
CB Radio Antenna Setup Guide for Trucks: Spring Mount, Tuning and SWR Optimization
, by iFJF Direct, 13 min reading time
, by iFJF Direct, 13 min reading time

Diesel guys learn this one the hard way. You drop $80 on a Firestik, spend an hour routing coax through the cab, get your SWR dialed in at 1.2:1... and the first low-hanging branch on a forest service road rips the antenna clean off the mount. Threads stripped. Stud bent. Day wasted.
The fix costs $30 and takes 30 seconds to install. It's called a spring mount, and if you're running a CB antenna taller than 2 feet on anything that leaves pavement, you need one.
This guide covers spring mount selection, stainless vs. chrome, complete SWR tuning procedure, coax routing through a diesel cab, and the 4 mistakes that'll cook your radio finals before you key the mic twice.
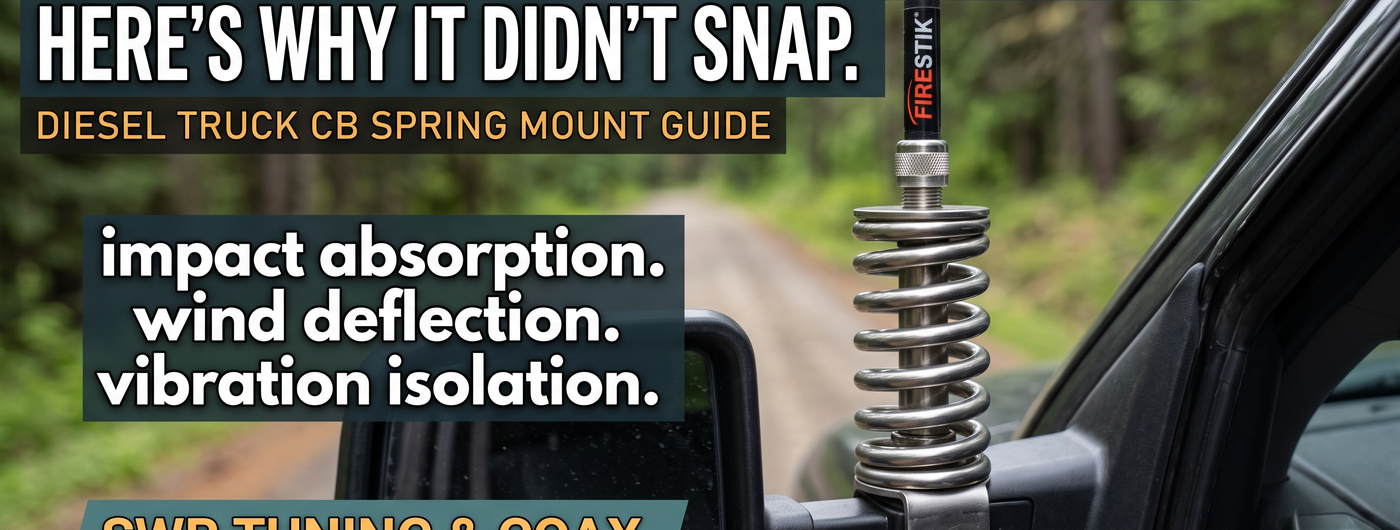
A CB antenna spring mount sits between your antenna stud and the antenna itself. It's a 3-inch stainless steel coil spring with 3/8"-24 threads on both ends. The spring does three things:
1. Impact absorption. Tree branch, garage door header, drive-through clearance bar — the spring flexes, the antenna bends, then snaps back. Without a spring, that impact energy goes straight into the mount threads. Best case: bent stud. Worst case: torn sheet metal on your roof or mirror arm.
2. Wind deflection at highway speed. A 4-foot Firestik at 75 mph catches serious wind load. The spring lets the antenna lean back under wind pressure instead of transmitting vibration to the mount bolts. Less vibration = less coax connector loosening = more consistent SWR.
3. Isolation from chassis vibration. Diesel engines shake. A lot. That vibration travels through the frame → mount bracket → antenna stud → antenna. Over time, the constant high-frequency buzz fatigues solder joints inside the antenna's coil housing. A spring dampens those micro-vibrations before they reach the antenna.
| Feature | iFJF SS-3H ($29.99) | Firestik SS-3H ($18-25) |
|---|---|---|
| Material | 304 stainless steel, electro-polished | Stainless steel (grade varies by batch) |
| Thread Inserts | Machined brass, chrome-plated | Brass (batch quality varies) |
| Thread Spec | 3/8"-24, both ends | 3/8"-24, both ends |
| Spring Rate | Heavy duty — stiff enough for 5' whips | Heavy — rated to 60" |
| Max Antenna Length | Up to 60 inches | Up to 60 inches |
| Height | ~3.0" | ~3.0" |
| Diameter | ~0.80" | ~0.80" |
| Made In | Precision-manufactured to Firestik-compatible spec | USA (Firestik Antenna Company) |
Here's what matters in real life: the iFJF SS-3H Heavy Duty Spring Mount ($29.99) uses 304-grade stainless throughout — the same alloy used in marine hardware. The brass thread inserts are chrome-plated, which prevents the galvanic corrosion you get when bare brass meets stainless in a wet environment. I've run one through two Wisconsin winters. Road salt, slush, minus-20 starts. Zero rust. Zero thread galling. The spring rate is matched to handle antennas up to 5 feet — anything longer and you're in ham radio territory anyway.
The Firestik-branded SS-3H runs $18-25 depending on where you buy it. It's a solid product — I'm not going to trash it. But the batch-to-batch quality on the thread inserts is inconsistent. I've seen two from the same order where one threaded on smooth and the other bound up after three turns. For a few extra bucks, the iFJF version gets you consistent machine work and better corrosion protection on the brass.
Spring rate warning: If you're running a lightweight 2-foot or 3-foot Firestik "FL" series antenna, a heavy-duty spring might be too stiff. At highway speed, the antenna won't flex enough and the mounting bracket takes the load instead. For antennas under 3 feet, consider a medium-duty spring (Firestik SS-3M style). For 3-5 foot whips, heavy is correct.
You can spend $500 on a radio and $200 on coax. If your SWR is above 2.0:1, your radio finals are cooking themselves every time you transmit. Here's the procedure I use on every install:
Tools you need: SWR meter (Astatic PDC1 or Workman SWR-2T — don't buy the $12 Amazon specials), 3-foot jumper coax (RG-58), and a small flathead screwdriver for the antenna tuning tip.
Step 1 — Initial setup. Thread the spring mount onto your stud. Thread the antenna onto the spring. Tighten both by hand — don't crank them with pliers. The brass inserts compress slightly when hand-tight and that's all the electrical contact you need. Over-tightening cracks the insert.
Step 2 — Hook up the meter. Radio → jumper coax → SWR meter "TX" port → main coax → antenna. Set the meter to "FWD" (forward power).
Step 3 — Calibrate on Channel 1. Key the mic. While holding the key, rotate the "CAL" or "SET" knob until the needle hits the "SET" mark on the meter face. Release the key. Now flip the switch to "REF" (reflected). Key the mic again. Read the SWR. Write it down.
Step 4 — Repeat on Channel 20 and Channel 40. You now have three SWR readings: CH1, CH20, CH40.
Step 5 — Interpret the numbers. If CH1 is higher than CH40: your antenna is too long. Screw the tuning tip IN (shorten it) by 1/8" and re-test. If CH40 is higher than CH1: your antenna is too short. Screw the tuning tip OUT (lengthen it) by 1/8" and re-test. Repeat until CH1 and CH40 are roughly equal (within 0.2 of each other), then fine-tune for lowest reading on CH20.
Target numbers: Below 1.5:1 across all 40 channels is excellent. 1.5-2.0:1 is acceptable — you won't damage anything but you're leaving power on the table. Above 2.0:1: stop transmitting and fix it. Above 3.0:1: your radio's final output transistor is actively dying.
Adding the spring changes SWR. Every time you add or remove a spring mount, your SWR shifts because the spring adds about 3 inches of electrical length to the antenna system. You must re-tune after installing a spring. I learned this the hard way — installed a spring, didn't re-check SWR, and cooked the finals in a Uniden PC78LTX within a week.
Modern diesel trucks are rolling computers. The ECM, TCM, and BCM on a 2020+ Ram 2500 generate enough RF noise to trash your CB receive. Route RG-8X coax (don't use RG-58 — the shielding is too thin for a diesel engine bay) away from these components:
Run coax along the frame rail, not through the engine bay. Drill a grommeted hole in the cab floor if you have to. Every inch of coax you run next to a high-current wire picks up noise.
For the antenna ground: the mount MUST have a clean metal-to-metal connection to the vehicle chassis. Paint, powder coat, and bedliner are insulators. Scrape the mounting surface down to bare metal, install a star washer between the bracket and chassis, and hit it with dielectric grease after tightening to prevent rust.
Mistake 1: No spring on an off-road antenna. I don't care if you "mostly stay on pavement." One gravel road, one low branch, one parking garage — and your antenna mount is a pretzel. The spring costs less than the replacement stud and coax connector you'll need after the first impact.
Mistake 2: Transmitting without an antenna connected. Never, ever key the mic without an antenna on the other end of the coax. The radio's transmitter sees infinite SWR (infinite reflected power) and the finals burn out in seconds. I've seen guys key up "just to test the radio" with no antenna attached. That's a $150 repair every time.
Mistake 3: Using the wrong coax. RG-58 is fine for a Jeep with the antenna on the tailgate. For a crew cab diesel truck running 18 feet of coax through the frame rail and into the cab, use RG-8X. The thicker braided shield rejects more noise. The difference between RG-58 and RG-8X on a diesel is often 0.5 SWR points and a much quieter noise floor.
Mistake 4: Checking SWR with doors open, hood up, in the driveway. SWR changes when the vehicle's metal body panels are in their normal position. Close the hood. Close the doors. Park in an open area — not next to a metal building or under power lines. The garage wall 3 feet from your antenna reflects RF and gives you a false reading. Test in the middle of a parking lot.
Dual antenna setups (co-phased arrays) are common on big rigs but rarely done right on pickups. For co-phased antennas to work, they need to be at least 1/4 wavelength apart — that's about 102 inches at CB frequencies. Even a dually pickup isn't wide enough. On anything smaller than a semi, co-phased antennas actually reduce performance by creating destructive interference patterns. Stick with a single antenna on the driver side roof or mirror arm. You'll get better range and more consistent SWR.
Check out our vehicle electronics selection for springs, mounts, and related truck accessories. If you're wiring up other electronics, our 130dB Snail Horn ($18.99) is a popular upgrade for diesel trucks — it's louder than stock and mounts in the factory horn location. For battery management and security, read our Bluetooth Battery Kill Switch Install Guide and the Bluetooth vs RF Kill Switch comparison.
A: Yes. A spring adds about 3 inches of electrical length to your antenna system. You must re-tune your antenna after installing a spring. Most Firestik and Wilson antennas have an adjustable tuning tip — screw it in about 1/8" to compensate for the added length of the spring, then fine-tune with an SWR meter.
A: For antennas under 3 feet (Firestik FL series, 2-foot models), a heavy-duty spring may be too stiff to flex properly at highway speeds. Use a medium-duty spring instead. For antennas 3-5 feet, heavy-duty is correct. The rating is about spring rate, not durability — a heavy spring on a light antenna is like running F-350 leaf springs on a Civic.
A: Wilson magnetic-mount antennas don't use springs because the magnet base is designed to break away on impact. For Wilson center-load or trucker-series antennas with a 3/8"-24 stud mount, a spring works fine. Check your antenna's thread spec — most Wilson trucker antennas use an SO-239 mount, not 3/8"-24, and require a different adapter.
A: Chrome-plated springs rust from the inside out. Once the chrome layer develops micro-cracks (which happens within months from vibration), moisture reaches the steel core and rust starts. You won't see it until the spring snaps. Stainless steel, specifically 304 grade with electro-polish finish, has no plating to crack — it's corrosion-resistant through the entire thickness of the material.
A: The spring itself doesn't need a separate ground — it becomes part of the antenna's electrical circuit through the threaded connection to the stud. However, your antenna MOUNT must have a solid ground to the vehicle chassis. The mount is half of the antenna's ground plane. A poor ground at the mount = high SWR = burned finals. Sand the mount surface to bare metal.