
Club Car DS Front Shock Absorber Replacement — 1014235 DIY Install Guide (1981–2013 Models)
, by iFJF Direct, 16 min reading time
, by iFJF Direct, 16 min reading time

The Club Car DS is arguably the most durable golf cart platform ever built, with production spanning from 1981 all the way to 2013. But even the most bulletproof chassis can't escape the laws of physics—and the front shock absorbers (OEM part #1014235, also cross-referenced as 1027064-01) are one of the first wear items owners encounter. Unlike automotive shocks that typically last 50,000–80,000 miles, golf cart shocks operate in a uniquely punishing environment: short, jarring impacts at low speed, constant exposure to dust and sand, and loads that frequently push the cart's weight rating—especially on lifted carts with rear seat kits and oversized tires.
The most common sign of worn front shocks on a Club Car DS is what owners describe as a "bouncy" or "floaty" front end. When you hit a bump, the cart oscillates 3–4 times instead of settling after one controlled rebound. You'll also notice excessive nose-dive under braking—on a properly damped DS, the front end should dip no more than 1–1.5 inches during a moderate stop. Other telltale symptoms include visible oil residue on the shock body (indicating a blown seal), uneven tire wear with cupping or scalloping on the outer tread blocks, and a distinct metallic clunking over bumps that gets progressively louder. If you're experiencing any combination of these, your front shocks are due for replacement—and the good news is that this is a straightforward driveway project requiring basic hand tools and about an hour of your time.
The Club Car 1014235 front shock is a twin-tube hydraulic shock absorber with a compressed length of approximately 10-1/4" and an extended length of approximately 14-3/4". The factory OEM part (Club Car #1014235, superseded by #1027064-01) is manufactured to Club Car's specification and typically retails for $58–$75 per shock through authorized Club Car dealers. At that price, replacing both fronts costs $116–$150 for parts alone. Here's how the aftermarket options stack up:
| Option | Price (Pair) | Warranty | Key Difference |
|---|---|---|---|
| Club Car OEM #1014235 | $116–$150 | 1 year (dealer) | Exact factory spec, paint-matched, dealer markup |
| Club Car OEM #1027064-01 (superseded) | $120–$140 | 1 year (dealer) | Same as 1014235, updated part number |
| Aftermarket (eBay/Amazon generic) | $35–$55 | None stated | Varying quality; some use thinner shaft diameter (8mm vs 10mm OEM) |
| Heavy-Duty Aftermarket (Nivel, Red Hawk) | $78–$95 | 90 days–1 year | Stiffer valving for lifted carts, thicker shaft, poly bushings |
| Gabriel / Monroe automotive shocks (adapted) | $45–$65 | Lifetime (brand) | Requires bushing modification; valving not optimized for golf cart weight |
Critical buying tip: The single biggest quality differentiator in aftermarket Club Car shocks is the piston rod diameter. OEM Club Car shocks use a 10mm hardened chrome rod. Many ultra-budget aftermarket units ($12–$18 per shock) use an 8mm rod—and on a lifted cart with 22" or 23" tires and a rear seat kit, those thinner rods will bend within 6–12 months of regular use. Always confirm the rod diameter before purchasing, and if the listing doesn't specify it, assume it's the budget 8mm version. For lifted carts or carts carrying 4 passengers regularly, the heavy-duty Nivel or Red Hawk options with stiffer valving and polyurethane bushings are worth the extra $40 up front.
A customer at a Georgia campground brought in a 2003 Club Car DS IQ (48V) with a 6" All Sports lift kit, 23x10.5-12 all-terrain tires, and a GTW rear flip seat. The cart was being used year-round for both golf course duty and campground transportation, typically carrying 2–4 passengers over hilly terrain. At roughly 4 years and an estimated 1,200 miles on the current shocks, the owner reported that the cart felt "twitchy" at speeds above 15 MPH and would bottom out the front suspension on moderate dips. Upon inspection, both front shocks were found to have completely blown seals—zero damping resistance in either direction of travel—and the lower rubber bushings had disintegrated to the point where the shock eye was making metal-to-metal contact with the mounting stud.
An additional issue surfaced during the replacement: the passenger-side upper shock mount had ovaled from the shock hammering against it for an unknown period. The ovaled hole was approximately 2mm oversized, which would cause even a brand-new shock to clunk. The fix involved welding a Grade 8 washer over the mount to restore the correct 3/8" diameter, adding approximately 30 minutes of labor. The moral: inspect your mounts carefully before installing new shocks, because worn shocks often take their mounting points with them.
Vehicle compatibility: 1981–2013 Club Car DS (gas and electric, all sub-models). The procedure is identical for DS, DS IQ, and DS Lynx models. The rear shocks (part #1014236) follow a similar process but are mounted vertically and require removing the rear access panel on electric models.
Estimated time: 45–60 minutes for both front shocks.
Skill level: Beginner — no special tools required.
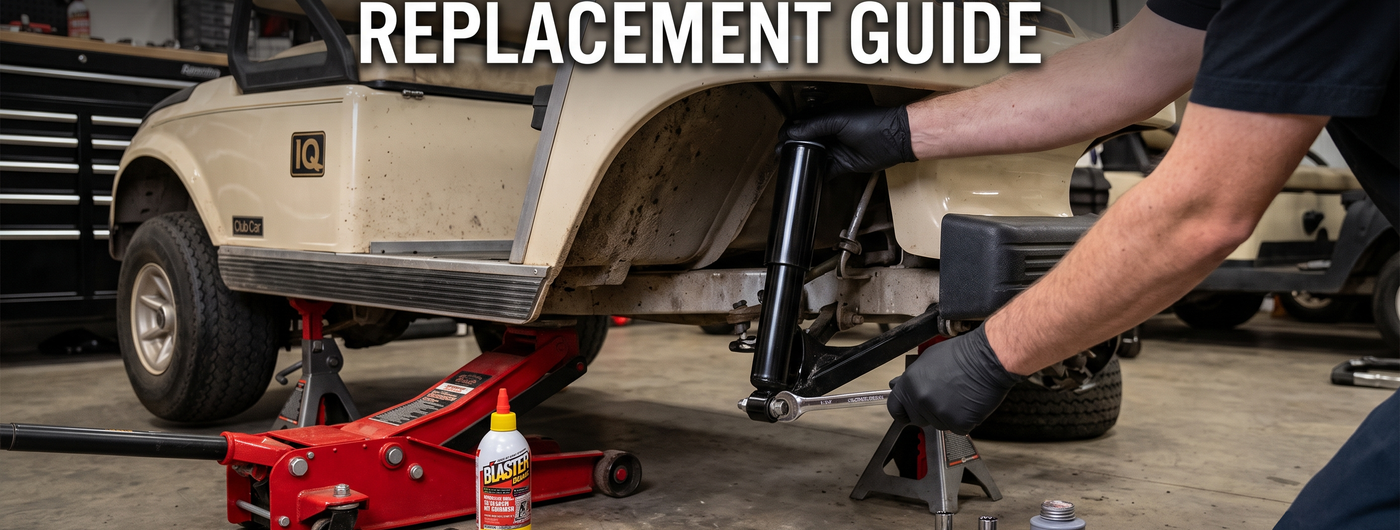
Park the cart on level ground, set the parking brake, and turn the key to OFF. If your DS is electric, place the Run/Tow switch in TOW position to disable the motor controller. Position your jack under the center of the front frame crossmember (not the suspension arms) and lift until the front tires are approximately 2–3 inches off the ground. Place jack stands under both frame rails just behind the front suspension pickup points. Lower the jack until the weight is resting on the stands, but leave the jack in place as a backup. Remove both front wheels using a 3/4" lug socket (stock Club Car DS lug nuts are 1/2"-20 thread).
Club Car DS shock mounting hardware is notorious for rust-seizing, especially on carts that see regular exposure to golf course irrigation or campground dirt. Apply penetrating oil liberally to all four mounting points: the upper stud nut (accessible from inside the front wheel well, near the top of the shock tower), and the lower bolt (accessible from underneath, passing through the lower A-arm and shock eye). Let the penetrating oil sit for 5–10 minutes. On exceptionally rusty carts, you may need to apply it and let it soak overnight—plan accordingly.
Start with the lower bolt first—it's easier to access and relieves tension on the upper mount. Using your 9/16" socket on the bolt head and a 9/16" wrench on the nut, break the lower bolt free. If the bolt spins without loosening, the nut has likely rust-welded to the threads. In this case, use a 6-point socket on the bolt head and an impact gun if available. If the bolt is seized beyond removal, cut it off with a reciprocating saw or angle grinder using a metal-cutting blade—replacement bolts are standard Grade 8 hardware available at any hardware store. Once the lower bolt is out, move to the upper nut. The upper mount is a stud pressed into the shock tower, and the shock bushing slides over it with a 1/2" nut on top. Remove the nut and washer, then slide the shock eye off the stud. You may need to pry gently with a flathead screwdriver between the rubber bushing and the mount.
Before installing new shocks, inspect the upper mounting studs for thread damage, bending, or ovaling of the surrounding frame metal. The stud should be perpendicular to the shock tower and show no signs of wear. Clean the stud threads with a wire brush. Inspect the lower A-arm mounting hole for elongation—the hole should be a tight slip fit for the 3/8" bolt. Apply a thin coat of anti-seize to both upper stud threads and lower bolt threads. This is the single most important step for ensuring you can remove these shocks again in 3–4 years without reaching for the angle grinder.
Install the upper mount first. Slide the new shock's upper bushing and eye over the mounting stud, place the washer on top, and thread the 1/2" nut by hand. Do not fully tighten yet—you need the shock to be able to pivot slightly while you align the lower mount. Next, align the lower shock eye with the A-arm mounting hole. The shock should slide into place without force—if it's binding, the upper nut is too tight. Insert the lower bolt from the front side of the A-arm (bolt head facing forward, nut on the back side) and thread the nut by hand. Once both mounts are started, tighten in sequence:
Repeat Steps 3–5 for the opposite side.
Reinstall the front wheels and hand-tighten the lug nuts in a star pattern. Lower the jack stands, remove them, and lower the cart fully to the ground. Torque the lug nuts to 55 ft-lbs in a star pattern. Do not use an impact gun for final tightening—aluminum Club Car DS wheels will warp if lug nuts are unevenly torqued.
Take the cart for a 10–15 minute test drive over varied terrain that includes bumps, speed bumps, and at least one moderate corner at 12–15 MPH. Listen for any clunking or rattling from the front end—a properly installed shock should be silent. After the test drive, re-check the torque on both upper and lower mounting hardware. New rubber bushings will "settle" after the first drive and may require a slight re-torque to eliminate any play.
The front shocks don't exist in isolation. While you have the cart in the air and the wheels off, take 10 extra minutes to inspect the following related components—catching a worn part now saves you from repeating the entire teardown sequence later.
Rear shocks (1014236): The Club Car DS uses a different shock part number for the rear (OEM #1014236 or 1027065-01). Rear shocks typically outlast fronts by 30–40% because they carry less dynamic weight during braking, but they still wear out. Check for the same signs: oil leakage, bushing deterioration, and a bouncing rear end when you push down on the rear bumper. If replacing all four shocks, budget approximately $85–$130 for a complete set of four aftermarket units versus $200–$280 for OEM.
Front leaf spring and bushings: The Club Car DS uses a single transverse leaf spring for the front suspension. Over time, the rubber bushings at the spring eyes compress and crack, introducing slop into the steering geometry. If your cart wanders or requires constant steering correction even with fresh shocks, inspect these bushings. A complete front spring bushing kit costs $12–$18.
King pin bushings and spindle bolts: Worn king pin bushings produce a similar clunking sound to blown shocks, and they're often misdiagnosed. To test: with the cart lifted, grab the top and bottom of the tire and rock it vertically. Any play indicates worn king pin bushings or a loose spindle bolt. Club Car DS king pin bushing kits run $25–$40 and require a bushing press or carefully used hammer and socket (plus about 2 hours of labor).
Steering rack boots and tie rod ends: The DS steering rack is exposed to everything the front tires kick up, and torn rack boots allow dirt and sand into the rack housing—which will eventually destroy the rack and pinion assembly ($180–$250 for a replacement rack). Inspect both boots for tears and replace them immediately if damaged ($8–$12 per boot). Check tie rod ends by grabbing the rod near the end and twisting—any perceptible play means the end is worn.
Tire pressure: It sounds obvious, but incorrect tire pressure is the most common cause of poor ride quality on a DS. Overinflated tires (above 22 PSI on standard 18x8.5-8 turf tires) transmit every pebble directly to the chassis. Underinflated tires (below 12 PSI) cause excessive sidewall flex and vague steering. For street and hard-packed trail use, 18–20 PSI provides the best balance of ride comfort and steering response. For soft sand or deep grass, 10–12 PSI maximizes flotation.
Golf cart shock absorbers live a harder life than most people realize. Here's how to get the maximum service life out of your new 1014235 shocks:
1. Wash the undercarriage regularly. Sand, fertilizer, and road salt are the enemies of shock seals. A monthly rinse. If you're also maintaining a vehicle fleet alongside your golf cart, check our suspension parts collection for control arms, ball joints, and complete suspension kits for passenger vehicles. of the undercarriage with a garden hose (not a pressure washer—high pressure can force water past the seals) removes abrasive particles before they can work their way into the shock's internal components. Pay special attention to the area around the shock shaft where it enters the shock body.
2. Lubricate the bushings annually. The rubber or polyurethane bushings at each shock eye are under constant shear stress. Applying a silicone-based lubricant (not petroleum-based—it degrades rubber) to the bushing surfaces once per year prevents the bushings from drying out, cracking, and allowing metal-to-metal contact. WD-40 Specialist Silicone or 3M Silicone Paste are both good choices at $6–$8 per can.
3. Don't overload the cart. A stock Club Car DS has a rated payload capacity of approximately 800 lbs (including passengers and cargo). A rear seat kit adds about 90 lbs of static weight, and four adult passengers can easily tip the scales at 650–750 lbs. Add a cooler, golf bags, and other cargo, and you're frequently at or above the design limit. Overloading dramatically shortens shock life—each extra 100 lbs above the rated capacity roughly halves the life expectancy of your shocks due to increased heat buildup and seal stress during compression.
4. Slow down for speed bumps and curbs. Golf cart shocks are valved for low-speed compliance, not high-speed impact absorption. Hitting a speed bump at 15 MPH can bottom out the shock internally, causing the piston to strike the base valve and damage the internal valving. The damage won't be immediately obvious, but you'll start noticing degraded damping performance within weeks. Slow to 5 MPH or less for any obstacle taller than 2 inches.
5. Replace shocks in pairs. This is universal suspension wisdom for a reason: a worn shock and a new shock on opposite sides of the same axle create an asymmetric damping response that makes the cart handle unpredictably, especially during emergency braking or evasive steering. If one front shock is dead, replace both fronts. The same principle applies to the rear.
The 1014235 front shock absorber is compatible across the entire Club Car DS production run (1981–2013), but there are a few model-year distinctions worth knowing before you order parts or dive into a repair:
1981–2003 (DS Series): These carts use a series-wound motor (electric) or the Kawasaki FE290/FE350 engine (gas). The suspension geometry is identical across all years, and the 1014235 shock bolts up without modification. Frame corrosion is the biggest concern on carts from the 1980s and early '90s—if your shock mounts are starting to flake, address the rust before installing new shocks.
2004–2013 (DS IQ / Precedent-era DS): The IQ (introduced in 2002) and later DS models added a separate-excitation (SEPEX) motor and IQ controller, but the chassis and suspension remained unchanged. Club Car continued producing the DS alongside the Precedent through 2013. The 1014235 fits all years without issue. The only suspension change of note is that factory-lifted DS models (preceded by "6" in the serial number prefix) use a front spindle lift rather than an A-arm lift—the shock mounts are identical.
Important: Not compatible with Club Car Precedent (2004+). Despite sharing the "Club Car" name, the Precedent uses an entirely different front suspension design with coil-over shocks (OEM #1011585 or 102588501 for the front). The 1014235 will not fit a Precedent. If you're unsure which model you have, the Club Car DS has an aluminum I-beam frame with exposed rivets on the main chassis rails, while the Precedent uses a welded aluminum box-frame with a molded plastic front cowl that wraps all the way around.
For owners maintaining aging DS fleets—whether you're running a golf course maintenance cart, a campground shuttle, or a lifted neighborhood cruiser—the 1014235 front shock replacement remains one of the highest-value suspension upgrades you can perform. It's a one-hour job that dramatically improves ride quality, steering precision, and passenger comfort, all for well under $100 in parts if you shop smart.