
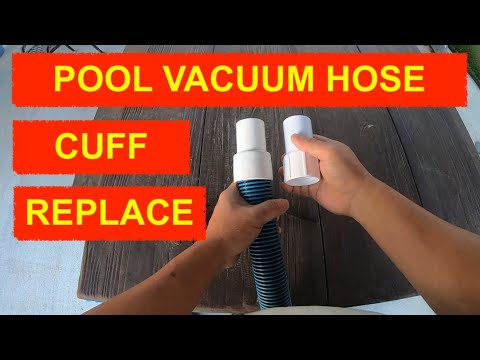
HOW TO REPLACE BROKEN SWIMMING POOL VACUUM HOSE CUFF
, by iFJF Direct, 9 min reading time
, by iFJF Direct, 9 min reading time

A cracked or broken swimming pool vacuum hose cuff — the fitting that connects your vacuum hose to the skimmer or pump — is one of the most common frustrations for pool owners. Left unrepaired, it cau...

A cracked or broken swimming pool vacuum hose cuff — the fitting that connects your vacuum hose to the skimmer or pump — is one of the most common frustrations for pool owners. Left unrepaired, it causes air leaks, reduces suction power, and turns routine cleaning into a losing battle. The good news: replacing it is a 15-minute, no-special-tools DIY job that costs less than $10. This guide walks you through every step, explains the why behind each decision, and includes pro tips to make the repair last.
Your pool vacuum hose cuff (also called a hose adapter, cuff fitting, or nozzle end) is the threaded or push-fit connector at each end of your vacuum hose. Most above-ground pool systems use a 1.5-inch standard cuff, though some older or specialty setups use 1.25-inch fittings. The cuff threads onto the pump inlet, skimmer vacuum plate, or the vacuum head itself — wherever you need a secure, airtight seal.
Over time, the soft PVC or rubber material degrades from:
When the cuff cracks or splits — typically at the threaded section or along the spiral reinforcement — you'll notice weak suction, air bubbling at the pump inlet, or the hose falling off mid-use.
Before you start, gather everything. You don't want to be halfway through with a cut hose in hand.
Note: You do not need pipe wrenches, power tools, or plumbing expertise. A utility knife and patience are enough.
First, inspect the broken cuff carefully. Look for:
Measure your hose diameter. Most above-ground pool vacuum hoses are 1.5 inches (38mm) inner diameter, which is the industry standard. A small number use 1.25-inch (32mm). Check both ends of your hose — sometimes one end is a different size than the other. If you still have the original cuff, measure it directly. If not, a 1.5-inch cuff fits most Intex, Bestway, and generic above-ground pool systems.
This is where many people get stuck. Factory-installed cuffs are fused to the hose during manufacturing and cannot be unscrewed. Trying to twist them off will damage or destroy the hose end. The correct approach is to cut it off.
Where to cut matters: Cut through the soft black outer portion of the cuff — not the hard white or blue inner ring. The hose cuff contains a spiral reinforcement (similar to a vacuum hose). If you cut only through the soft outer layer, you'll hit the hard spiral and the blade will bind. Instead, cut through the second spiral ridge — the one just inside the first. This lets your blade pass through the soft material, then cleanly through the spiral, without stopping.
Work slowly and rotate the hose as you cut. A utility knife works for thin-walled cuffs; a fine-tooth hacksaw or oscillating tool is easier for thick or heavily reinforced cuffs. Wear gloves — the cut edges can be sharp.
Before applying any adhesive, dry-fit the new cuff onto the hose end. The cuff should slide on with moderate resistance. If it bottoms out and the threads are still visible, you've found the correct seating depth. Keep turning until the threads are fully engaged — they will self-align and lock in place.
If the fit is too loose, the hose may be slightly oversized. A light coating of dish soap or silicone lubricant on the hose end can help during dry-fitting without affecting the glue bond (wipe it off before gluing). If the fit is impossibly tight, double-check that you're using the correct size.
For a repair that lasts multiple seasons, always glue the cuff in place. Even a snug friction fit will eventually work loose under pump pressure.
Standard PVC cement (sometimes labeled PVC glue or PVC pipe adhesive) is ideal. Apply a thin coat to the inner surface of the new cuff — focus on the area that will be in contact with the hose when fully seated, plus a ring around the hose end itself. You don't need to flood it; a thin, even layer is more effective than excess. Two to three small drops spread around the circumference is sufficient.
Immediately after gluing, push the cuff onto the hose to the test-fitted depth and rotate it slightly as you push. PVC cement sets fast — you typically have 10–30 seconds of working time before the bond begins to cure. Work quickly but without rushing.
Pro tip: Some users apply a thin ring of silicone sealant around the outside of the cuff at the hose joint for an extra weatherproof seal. This is optional but adds durability for outdoor pools that sit in direct sun year-round.
PVC cement reaches initial set in about 30 seconds, but full cure takes 24 hours. Do not run your pool vacuum pump until the cement has fully cured. A premature pressure test can blow the cuff off entirely, undoing your work and creating a mess. If you're in the middle of pool season and need a quick fix, let the cement set for at least 2 hours before running the pump on low pressure — but 24 hours is the safe recommendation.
Replacement cuffs are available at:
When buying, check product reviews for fit issues. Some universal cuffs require light filing or trimming to fit certain hose brands. Budget 10 minutes for adjustment if the fit isn't perfect out of the box.
Once you've replaced your cuff, a few habits will prevent premature failure again:
In some cases, replacing just the cuff isn't worth it. Consider replacing the full hose if:
A new 30-foot vacuum hose with factory-installed cuffs costs $30–50 and will outlast multiple seasons of cuff replacements on an aging hose.
Replacing a broken pool vacuum hose cuff is one of the easiest and most rewarding DIY pool maintenance tasks. With a utility knife, PVC cement, and about 15 minutes, you can restore full suction to your pool vacuum and get back to a clean pool without a plumber's bill. The key takeaways:
Regular inspection at the start of each season will catch degradation early, so you're never caught with a broken cuff mid-cleaning cycle. A proactive $6 cuff replacement beats an emergency pool call every time.
Have questions about pool maintenance or vacuum troubleshooting? Drop a comment below or check our full pool care guide library for more DIY tutorials.