
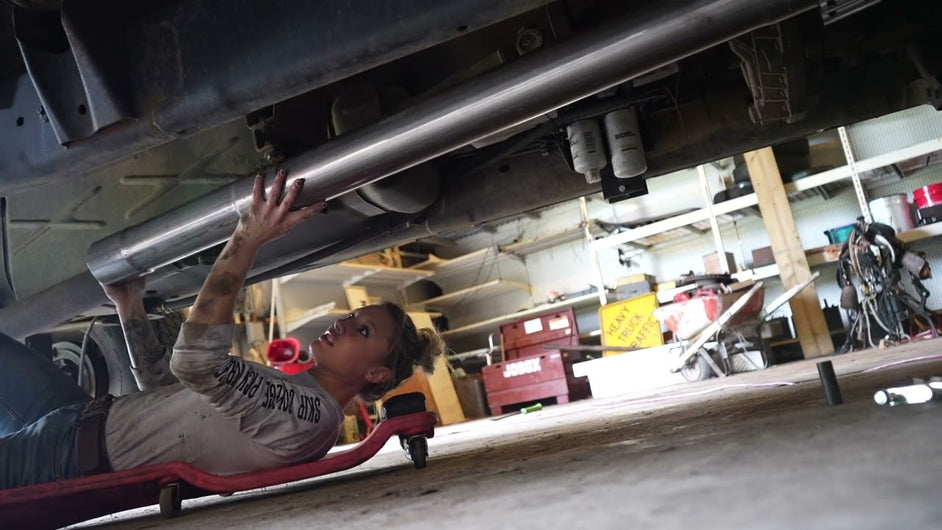
SPELAB 4" Straight Pipe Kit Install 05 Dodge 3500 Cummins
, by iFJF Direct, 15 min reading time
, by iFJF Direct, 15 min reading time

How to Install a 4-Inch Straight Pipe Kit on Your 2005 Dodge 3500 Cummins – Full DIY Guide If you own a 2005 Dodge 3500 Cummins and have been thinking about upgrading to a straight pipe exhaust, you'r...
If you own a 2005 Dodge 3500 Cummins and have been thinking about upgrading to a straight pipe exhaust, you're in the right place. In this detailed guide, we walk you through the complete installation process—from removing the old exhaust to firing up your truck with its new 4-inch straight pipe system. Whether you're chasing more power, a bolder diesel sound, or simply a more efficient exhaust flow, this install is one of the most satisfying mods you can do yourself in a weekend.
The 5.9L Cummins in the 2005 Dodge 3500 is one of the most beloved diesel engines ever made. It's rugged, reliable, and responds incredibly well to exhaust upgrades. A 4-inch straight pipe kit removes the restrictive catalytic converter and muffler from your factory exhaust system, allowing exhaust gases to exit the engine with far less backpressure.
The benefits most owners report include:
The 2005 model year sits right in the sweet spot for these builds — late enough to have the robust NV4500 or 48RE transmissions mated to the proven 5.9L, and old enough that the stock exhaust components are likely showing their age. Many trucks of this era have rusted, cracked, or sagging exhaust systems. A quality 4-inch straight pipe kit gives you a fresh start.
Before you roll under the truck, make sure you have everything on hand. Here's what you'll need for this install:
| Category | Item | Notes |
|---|---|---|
| Main Part | SPELAB 4" Straight Pipe Kit (or equivalent) | Full kit with downpipe, mid-pipe, over-axle pipe, tailpipe, clamps, and hangers |
| Tools | 7/16" socket (deep-well recommended) | Dedicated exhaust clamp socket saves knuckles |
| Tools | Ratchet & extension set | Extra-long extension useful for rear clamps |
| Tools | Angle grinder with cutting disc | For freeing rusted connections if needed |
| Tools | Heat gun or propane torch | Helps loosen corroded clamps |
| Consumables | Dish soap / soapy water | Lubricates rubber mounts and hangers during install |
| Consumables | New exhaust hangers (optional but recommended) | Factory rubber hangers degrade over 20 years |
| Safety | Mechanic's gloves | Exhaust pipes get hot; protect your hands |
The first job is always the demolition. On your 2005 Dodge 3500 Cummins, the stock exhaust runs from the downpipe (flange connection to the turbo) all the way back to the tailpipe, with rubber hangers along the frame and a series of clamps holding the sections together.
Start at the front. You'll find the turbo downpipe connects to your exhaust system via a clamp — typically a V-band or band clamp style — near the turbo outlet. Use your 7/16" socket on an extra-long extension. An extended socket designed specifically for exhaust clamps gives you the reach you need to keep your hand clear of hot surfaces.
Your truck has rubber exhaust hangers at several points along the frame rails. These isolate exhaust vibrations from the cab. Over 20+ years, these rubber bushings harden, crack, and break. For the install, you need to release the pipes from these mounts.
A squirt of dish soap into the rubber hanger makes the old pipe slide out much more easily. If some of your hangers are already broken — which is common on high-mileage trucks — the pipe may simply fall away once the front clamp is released. If the exhaust is still partially welded or seized at any point, don't force it.
If you encounter a rusted joint that won't separate, use your angle grinder to carefully cut around the seam, then flare the cut edge slightly outward with the grinder. This gives the pipe a path to release from its frozen position. In many cases, once the first section is free, the rest of the old exhaust can be lowered and removed as an assembly.
With the old exhaust out of the way, inspect your factory turbo downpipe. On the SPELAB kit and most aftermarket straight pipe kits for the 2005 Cummins, you'll be keeping the factory downpipe section that bolts to the turbo — it often has the O2 sensor bung and the proper flange to mate with your turbo. The kit will slide over or clamp onto this existing downpipe.
Clean any old gasket material, rust scale, or debris from the mating surface. This ensures a clean seal when you install your new components. If your factory downpipe has excessive rust or a cracked flange, now is the time to source a replacement before proceeding.
Here's the core of the installation. The key principle: install everything loose first, then tighten nothing until the entire system is in place. This gives you the freedom to adjust alignment, center pipes over axles, and ensure nothing is making contact with the frame or drivetrain.
Slide the kit's downpipe section over or onto your factory turbo downpipe. Install the supplied clamp at this junction, but leave it loose — just snug enough that the new pipe won't fall off, but loose enough that you can still rotate the pipe. This is critical because you'll need to adjust its angle to ensure clearance from the transmission bell housing and frame rail.
Now work your way rearward. The next section is the long straight pipe that replaces your old catalytic converter and mid-pipe assembly. You'll notice right away that a straight pipe kit has fewer hanger points than a stock exhaust — this is completely normal. You're no longer supporting the weight of a heavy catalytic converter or muffler, so fewer hangers are needed.
Slide each new section together and install the clamps loosely. Work from the front toward the back, connecting each piece. Don't worry if the alignment looks slightly off at this stage — the clamps allow for some adjustment, and you'll dial everything in during the final tightening pass.
Many 4-inch straight pipe kits include a short section with flared ends at both sides, designed to occupy the space where your factory muffler used to be. This piece typically goes in right before the over-axle pipe section. Install the clamps loosely and let it hang free.
The over-axle pipe is the section that runs from the rear of the cab area, over the differential, and back toward the rear crossmember. This is where new exhaust hangers go.
Most kits come with new steel exhaust hangers that slip over the pipe and hang from the existing rubber hanger mounts on the truck's frame. If your original rubber mounts are still intact and pliable, the new steel hangers will clip right in. If any are cracked or missing, replace them — rubber hanger bushing kits are inexpensive and widely available for 2005 Dodge Cummins trucks.
The over-axle pipe slides into the preceding pipe section (typically the short flared section), and then you hang it from the rubber mounts. Two hangers is usually sufficient for this section. Some kits will include more hangers than you need — this is intentional so you can choose the mounting points that work best for your specific configuration.
The final piece is the tailpipe, which extends past the rear crossmember and exits at the stock location or slightly aft. Install the last clamp, and then hang this section from the remaining rear hanger point. Leave everything loose.
Now that every piece is in place and loosely assembled, it's time for the critical alignment pass. Before you tighten anything, walk the entire length of the exhaust system and check for:
Once you're satisfied with the alignment, begin tightening from the front and work your way back — always in that direction. Starting at the turbo downpipe clamp, work rearward clamp by clamp. This sequential approach ensures proper preload and alignment are maintained as you go.
The clamp that attaches near the transmission bell housing — where the downpipe inserts into the rubber bushing mount — can be one of the trickiest to install. The fit is intentionally tight. A helpful technique: loosen the clamp completely, then use a hammer to gently tap the clamp band into the rubber bushing first, get the pipe aligned into the bushing, and then position the clamp over the pipe. Sometimes a little persuasion with a dead blow hammer is exactly what the situation calls for.
Having installed dozens of these kits, here are the most valuable lessons learned:
With everything tightened and double-checked, it's time for the moment of truth. Start the truck and let it idle. Listen carefully from inside the cab and then from outside.
With a 4-inch straight pipe on a 5.9L Cummins, you can expect:
Pay attention for any unusual rattling, ticking, or vibration noises. These usually indicate a pipe contacting something or a loose clamp. If you hear a rhythmic clicking that corresponds to engine RPM, shut the truck down and re-inspect that area of the exhaust. A pipe that's rubbing the frame will eat through the pipe or damage the frame over time.
"These exhausts don't need to be pretty — they need to be tight. A few extra minutes of tightening now will save you from a broken downpipe on the side of the road later."
Take the truck for a short test drive, varying your speed and RPM. Get out and check that nothing is overheating, rubbing, or leaking. A small test drive at varied loads gives you confidence the system is secure before you put serious miles on it.
Will a 4-inch straight pipe void my factory warranty?
Modifications to the emissions system (including removing the catalytic converter) can affect emissions-related warranty claims. However, powertrain components unrelated to the exhaust are typically unaffected. Check your specific warranty terms, or consult a Dodge dealer service department before proceeding.
Will I get a check engine light with a straight pipe?
Possibly. Removing the catalytic converter eliminates the downstream O2 sensor's reading, which can trigger a P0420 or P0421 code. Some owners run a defouler adapter or use a tuner to disable the rear O2 sensor monitoring. On the 2005 model without OBD-II compliance for all emissions monitors, this is less of an issue than on newer trucks.
Is 4 inches too big for a stock 5.9L Cummins?
For a stock or mildly tuned 5.9L, 4 inches is an excellent choice — not excessive. The 4-inch diameter provides minimal restriction and leaves room for future upgrades like a larger turbo or injectors. It strikes a good balance between flow and drivability.
How much does a straight pipe kit cost for a 2005 Dodge 3500 Cummins?
Quality 4-inch straight pipe kits from reputable diesel aftermarket brands typically range from $300 to $600 USD, depending on whether they include hangers, clamps, and a tailpipe tip. Budget another $20–$50 for new rubber hangers if yours are aging.
Can I install this without a lift?
Yes. While a lift makes the job easier, most owners with jack stands and basic hand tools can complete this install in a driveway or garage. The overhead clearance under a stock-height 2005 Dodge 3500 is manageable with 6-ton jack stands. Plan for 3–5 hours if working alone.
Final Thoughts: Installing a 4-inch straight pipe kit on your 2005 Dodge 3500 Cummins is one of the most rewarding diesel modifications you can do. It sounds incredible, flows better, and removes weight from your truck. With the right parts, basic tools, and this guide, you can tackle the entire install in an afternoon. Work methodically, tighten everything properly, and you'll be rewarded with that deep Cummins rumble every time you fire up the engine.
Have questions about your specific truck setup or need help sourcing parts? Drop a comment below or reach out — we're happy to help you get your build sorted.


