
FS1098 Fuel Water Separator Install Guide for Cummins B6.7 & ISL8.9 — Torque Specs, Cross-Reference & DIY Steps
, by iFJF Direct, 12 min reading time
, by iFJF Direct, 12 min reading time

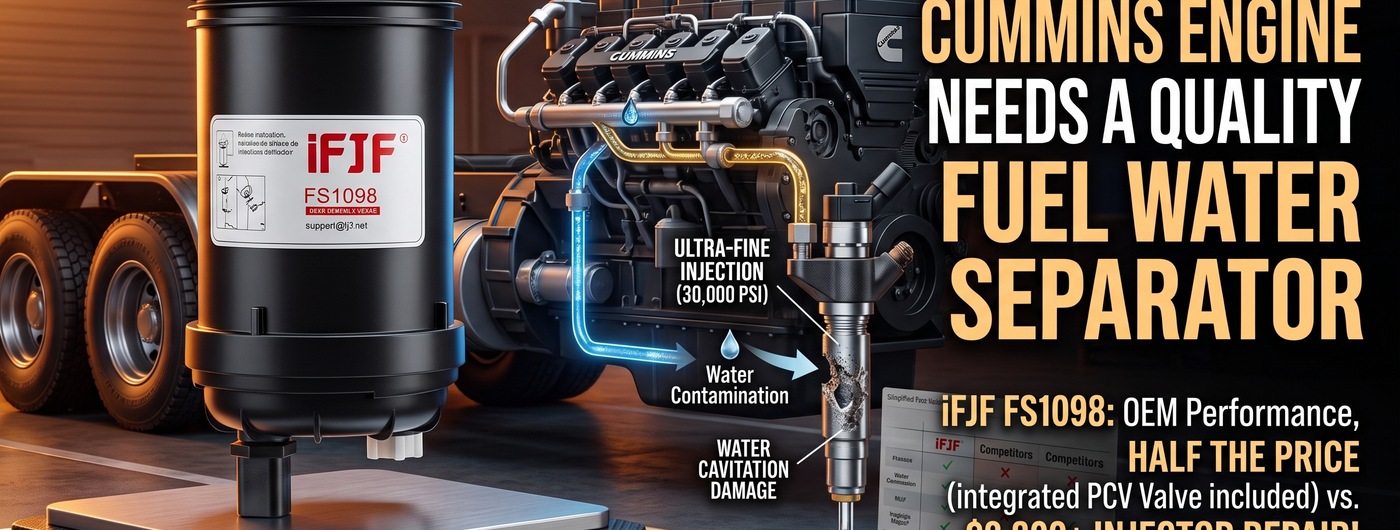
If you own a medium-duty or heavy-duty truck powered by a Cummins B6.7, ISB6.7, L9, or ISL8.9 diesel engine, the fuel water separator isn't just another filter—it's your engine's first and most critical line of defense. Modern common-rail diesel injection systems operate at pressures exceeding 30,000 PSI, and even microscopic water droplets can wreak havoc on injector tips, causing cavitation erosion that leads to spray pattern distortion, incomplete combustion, and eventually injector failure. Replacing a set of six Cummins injectors costs $2,800–$4,200 at a dealership. A quality fuel water separator that you replace on schedule costs $30–$50 per change. The math speaks for itself. For B6.7 owners running Stage V emissions hardware, our FF63041NN fuel filter install guide covers the newer spin-on design used on 2022+ engines.
Water contamination in diesel fuel comes from multiple sources: For Ram 2500/3500 owners who prefer the complete housing assembly, our 68268285AC fuel water separator assembly replaces the entire factory unit on 2013–2018 models. condensation in storage tanks (especially problematic in humid regions like the Southeast and Pacific Northwest), poor fuel station turnover, and even the ULSD refining process itself, which strips lubricity-enhancing compounds and makes the fuel more hygroscopic. Cummins specifies that fuel delivered to the high-pressure pump must contain no more than 200 PPM dissolved water—and zero free water. The FS1098 fuel water separator, with its 10-micron filtration media and integrated PCV (Positive Crankcase Ventilation) valve interface, is engineered specifically to meet these OEM requirements for the B6.7 and ISL8.9 engine families.
Before you buy, it pays to understand what's actually on the market. The FS1098 form factor is used across multiple engine platforms, and several manufacturers produce cross-compatible filters—but they are not all equal. Below is a head-to-head comparison based on published specification sheets and real-world fleet feedback.
| Specification | iFJF Direct FS1098 | Fleetguard FS1098 (FF63009) | Baldwin BF7699 | Donaldson P550851 |
|---|---|---|---|---|
| Filtration Rating | 10 Micron (absolute) | 10 Micron (nominal) | 12 Micron (nominal) | 10 Micron (nominal) |
| Water Separation Efficiency | ≥95% (SAE J1488) | ≥93% | ≥90% | ≥93% |
| Media Type | Cellulose/Synthetic Blend with hydrophobic treatment | Cellulose with StrataPore™ | Standard cellulose | Synteq™ XP media |
| OEM Cross-Reference | Cummins 5303743, 5319680 | Cummins 5303743, 5319680 | Cummins 5303743 | P550851 |
| Typical Price (Single Unit) | $28.99 | $42–$55 (dealer) | $38–$48 | $45–$60 |
| Bulk Price (6-Pack) | $24.99/ea | N/A consumer bulk | $34/ea | N/A consumer bulk |
| Integrated PCV Valve | ✅ Yes | No (separate purchase) | No | No |
| Drain Port Design | Brass petcock, 1/4-turn | Plastic drain plug | Plastic drain plug | Standard plug |
Key takeaway: The Fleetguard FF63009 is the factory-service part and commands a premium price, but it ships without an integrated PCV valve—meaning you'll pay an additional $18–$25 for that component separately through a Cummins dealer. The Baldwin and Donaldson offerings are solid, but their nominal micron ratings mean larger particles can pass through intermittently. For a do-it-yourselfer running a 2013–2024 Ram 2500/3500 with the 6.7L Cummins, or a fleet operator managing Freightliner M2 or International MV chassis with the B6.7 or L9, the iFJF FS1098 delivers OEM-spec performance at roughly half the Fleetguard price when you factor in the included PCV valve.
Consider this case study from a Midwest regional fleet running six 2018 Freightliner M2 106 box trucks with the Cummins B6.7. At approximately 85,000 miles, unit #4 began exhibiting a 2–3 second extended crank time on cold starts (ambient temps 35–45°F), accompanied by a rough idle that smoothed out after 30–45 seconds of run time. No check engine light was present, and the Cummins INSITE diagnostic tool showed no active fault codes—only a borderline-low fuel rail pressure reading during cranking (4,800 PSI vs. the specified minimum of 5,000 PSI).
The fleet mechanic pulled the fuel water separator and found approximately 4–5 ounces of emulsified water in the filter housing, along with a filter element that was visibly swollen and partially collapsed. The filter had been in service for 18,000 miles—within the recommended 15,000–20,000 mile interval, but the truck had been fueling at a high-turnover station that was later found to have water in its underground storage tank following heavy seasonal rain. After installing a new FS1098 separator, purging the fuel system with the primer pump, and adding a diesel fuel biocide treatment, the hard-start condition resolved immediately. Fuel rail pressure during cranking returned to 5,800 PSI. Total repair time: 45 minutes. Total cost (including biocide): $52. Compare that to what would have happened if water had reached the CP4.2 high-pressure pump—a repair bill averaging $6,800–$9,500 for pump, injectors, fuel rail, and complete fuel system flush.
This procedure applies to the frame-mounted fuel water separator housing on Cummins B6.7, ISB6.7, L9, ISL8.9, and ISL9 engines found in Ram 2500/3500/4500/5500 (2013+), Freightliner M2 106, International MV, and various off-highway equipment applications. Estimated time: 25–35 minutes. Skill level: Beginner to intermediate.
Park the vehicle on level ground, engage the parking brake, and chock the wheels. If the engine is hot, allow 30–45 minutes for the exhaust and turbocharger to cool—the fuel filter housing on most B6.7 applications is frame-mounted near the exhaust downpipe. Disconnect both battery negative terminals to eliminate any risk of accidental engine cranking during the procedure. Have your catch pan positioned directly beneath the separator housing before loosening anything.
Locate the drain petcock at the bottom of the fuel water separator housing. On the iFJF FS1098 assembly, this is a brass, 1/4-turn valve. Position your catch pan and open the petcock by turning it counterclockwise 90 degrees. Allow 30–60 seconds for all fuel and accumulated water to drain completely. You should see a clear separation between diesel (amber/greenish tint) and water (clear, settling at the bottom). If you see more than 2–3 ounces of water, add a fuel biocide treatment to your maintenance routine—you likely have tank contamination.
Using your socket and ratchet, loosen the housing cap by turning counterclockwise. On Ram truck applications, this is typically a 1-1/16" hex on top of the housing. On Freightliner chassis, some housings use a 27mm or integral molded cap. Once loose, unscrew the cap by hand and lift it off with the old filter element attached. Important: The old filter will be heavy with fuel—keep it upright and transfer it directly to your catch pan to minimize diesel spills. Remove the old O-ring from the cap groove using a small flathead screwdriver (be careful not to scratch the sealing surface).
With a clean rag, wipe down the interior of the housing. Look for any debris, algae growth (black slime indicates microbial contamination), or metal particles (which could signal pump wear). If the housing is severely contaminated, you may need to remove it for a thorough cleaning—this is rare but worth checking. Apply a thin film of clean diesel fuel to the new O-ring that comes with your FS1098 filter. This lubricates the seal and prevents it from binding or pinching during installation. Snap the new filter element onto the cap—it should click firmly into place. Insert the assembly into the housing, ensuring the filter seats squarely on the center standpipe, then thread the cap clockwise by hand until snug.
This step is commonly skipped and commonly regretted. Torque the housing cap to 25 Nm (18 ft-lbs) using a calibrated torque wrench. Over-tightening will crack the plastic housing ($85–$140 replacement cost), and under-tightening will cause air intrusion that manifests as hard starts and fuel pressure faults. Close the drain petcock by turning it fully clockwise—do not overtighten the brass valve or you risk stripping the threads in the aluminum housing base.
On most Ram 2500/3500 applications (2013+), cycle the key to the "RUN" position (do not start) and listen for the in-tank lift pump to run for approximately 25–30 seconds. Cycle the key OFF, then repeat this sequence 4–5 times. On Freightliner and commercial chassis without an automatic priming cycle, use the manual primer pump located on top of the fuel filter housing—pump until firm resistance is felt (typically 15–25 pumps). For marine or industrial applications with a remote-mounted separator, a hand-operated vacuum pump connected to the bleeder port may be necessary.
Reconnect the battery terminals. Start the engine—it should fire within 2–3 seconds of cranking. If extended cranking persists beyond 5 seconds, stop and re-prime the system (air is still present). Once the engine is running, let it idle for 2–3 minutes while you visually inspect the filter housing, drain petcock, and all fuel line connections for any sign of diesel seepage. A small mirror and flashlight help inspect the back side of the housing. Take the vehicle for a 5-minute test drive, then re-inspect for leaks before considering the job complete.
Mistake #1: Not draining water before removing the old filter. When you unscrew the cap without draining first, 12–16 ounces of diesel and water dump onto your frame rail, steering components, and driveway. Beyond the mess, diesel on rubber suspension bushings accelerates degradation. Always drain first.
Mistake #2: Double-gasketing. The old O-ring sometimes sticks in the housing groove when you remove the cap. If you install the new filter with the new O-ring on top of the old one, you create a leak path. Always run your finger around the housing groove to confirm it's clean before inserting the new filter.
Mistake #3: Ignoring the WIF (Water-In-Fuel) sensor. If your housing has an electronic WIF sensor at the bottom, disconnect its harness before unscrewing the housing. Forcing it will tear the sensor wires. The connector typically has a red locking tab—slide it back, then press the release and pull. After reassembly, if your dash displays a "Water In Fuel" warning despite a fresh filter, the sensor float may be stuck—tap the housing lightly with a rubber mallet to free it.
Post-install symptoms: If you experience hard starting after a correct installation, suspect air intrusion at the cap O-ring. Loosen, re-lubricate, and re-torque. If you see fuel dripping from the drain petcock, the internal seal may have dried out—replace the petcock assembly (most are standard 1/4" NPT brass fittings available at any hydraulic supply shop for $8–$12).
Recommended change interval: Every 15,000 miles or 12 months, whichever comes first. For vehicles operating in high-humidity environments (Florida, Gulf Coast, Pacific Northwest) or consuming biodiesel blends above B5, similar to what we covered in our Cummins FF266 cross-reference guide,, reduce the interval to 10,000 miles. Fleet operators running bulk storage tanks should test fuel from the tank bottom quarterly using a water-finding paste (Kolor Kut or similar, $8 per tube) and drain any accumulated water from storage tanks monthly during summer months when condensation is highest.
Pro tip #1 — Drain between changes: Make it a habit to crack the drain petcock every 5,000 miles (or once a month for daily drivers) and drain 2–3 ounces of fuel into a clear container. Let it settle for 60 seconds and check for water separation at the bottom. This 2-minute check can prevent a multi-thousand-dollar repair.
Pro tip #2 — Stock a spare: If you operate in remote areas or take extended trips, carry a spare FS1098 filter, a 1-1/16" socket, and a pair of nitrile gloves in your truck. A batch of bad fuel at a rural station 200 miles from the nearest dealer can leave you stranded. The filter, socket, and gloves all fit in a one-gallon Ziploc bag that tucks behind the rear seat.
Pro tip #3 — Fuel additive strategy: Using a quality diesel fuel additive that includes a demulsifier (not an emulsifier) helps the separator do its job more effectively. Emulsifiers bond water to fuel and carry it through the system—exactly what you don't want. For owners running older ISX/ISL platforms, our FS19624 fuel filter covers Coronado and 4800-series chassis. Demulsifiers encourage water to separate out so the filter can capture it. Look for products containing polyether amine (PEA) detergent chemistry with a demulsifier package, such as Power Service Diesel Kleen +Cetane Boost (silver bottle, not white) or Hot Shot's Secret Diesel Extreme. Expect to add 1 oz per 25 gallons of fuel, costing approximately $0.04–$0.06 per gallon treated.
| Manufacturer | Part Number | Notes |
|---|---|---|
| Cummins / Fleetguard | 5303743, 5319680, FF63009 | OEM equivalent |
| Baldwin | BF7699 | 12-micron nominal, no PCV |
| Donaldson | P550851 | 10-micron nominal, Synteq XP |
| Wix / NAPA | 33683 / 3683 | Standard cellulose |
| Luber-Finer | LFF5824 | 10-micron with drain |
| iFJF Direct | FS1098 | 10-micron absolute, PCV included, brass petcock |
Bottom line: The FS1098 fuel water separator is not a place to cut corners. At under $30 per change with a 15-minute DIY job, it's the cheapest insurance policy you'll ever buy for a $10,000+ fuel system. Whether you're running a hotshot truck, a fleet service vehicle, or a weekend RV towing rig with a Ram 3500, keep clean fuel flowing and your Cummins will reward you with half a million miles of service.