How to install Tie Rods on your GM Truck | Dmax XD Tie Rod Upgrade
, by iFJF Direct, 11 min reading time
, by iFJF Direct, 11 min reading time

Duramax Tie Rod Install: XD Heavy-Duty Upgrade Guide If your GM 2500/3500 wanders on the highway, your steering feels vague, or you've bent a stock tie rod hauling a load or running bigger tires, a he...
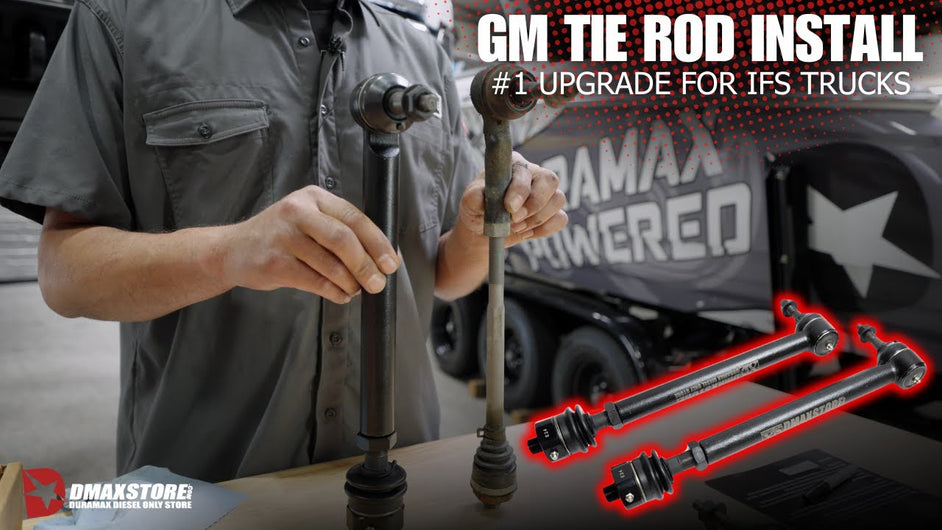
If your GM 2500/3500 wanders on the highway, your steering feels vague, or you've bent a stock tie rod hauling a load or running bigger tires, a heavy-duty tie rod upgrade is one of the best bang-for-the-buck fixes you can do in the driveway. This guide walks through a real shop install of the XD heavy-duty tie rods on a 2001–2010 GM/Duramax HD truck — the same process Eric runs at D-Max Store.
By the end you'll know exactly which wrenches to grab, how to pull the factory taper without a pickle fork, the trick for measuring tie rod length so you don't destroy your alignment, and the two torque specs that actually matter. This is a straightforward job — both sides take about an hour — and you do not need to be a professional tech to get it right.
| Item | Notes |
|---|---|
| 40 mm wrench | Breaks the stock tie rod loose from the inner joint |
| 21 mm socket | Removes the nut on the tie rod-to-knuckle joint |
| 2-inch wrench | Turns the hex on the new tie rod end / jam nut |
| 10 mm wrench | Holds the top hex so the shaft doesn't spin while torquing |
| Tape measure | Measures old vs. new tie rod length to preserve toe |
| Impact wrench | Speeds up the knuckle nut and wheel removal |
| Dead-blow hammer (the "persuader") | Pops the tapered joint out of the knuckle — a few firm taps |
| Blue Loctite (threadlocker) | Factory-style; applied to the threaded tie rod end |
| Torque wrench | For the 48 ft-lb knuckle nut |
| Hoist or jack + jack stands | Never work under a truck supported only by a jack |
| XD heavy-duty tie rods (pair) | One per side; the upgrade part for this job |
Get the front end in the air. A hoist is easiest, but a floor jack and quality jack stands on a flat surface work fine for a driveway job. Remove the wheel on the side you're starting with (passenger side in the walkthrough). With the wheel off you can see the tie rod clearly: it has two connection points, and both are tapered.
⚠️ Safety: Never crawl under a truck resting only on a hydraulic jack. Set it on stands and give it a shake before you reach in.
The tie rod tapers into the knuckle from the bottom. Hit the 21 mm nut on the knuckle joint with your impact and break it loose. Now grab your persuader — a dead-blow hammer — and give the knuckle a couple of firm smacks right where the taper sits. Most of the time it doesn't take much; the taper pops right out. Then go down to the inner joint with the 40 mm wrench and break the stock tie rod loose.
Set the old tie rod aside. The new XD rod is a massive improvement in front-end strength and steering responsiveness — that's the whole point of the upgrade.
Before the new rod goes in, you want the new one set to the exact same length so your alignment (toe) stays close. Get the tie rod joints as straight as you can. Here's the shop trick:
Write that number down. It's your target.
Take the new rod and spin the joint out until you're close to your number. Measure from the zerk center to the inner flange the same way. You'll likely need a touch more — spin it out, re-measure, and when you're at 16⅛ inches give it just a quarter turn to land "money." Snug the jam nut by hand for now; you'll lock it down at the end.
Put a dab of blue Loctite on the threaded end — the same style the factory uses on these tie rods. Thread it into the knuckle; wiggle it a little and it'll start cleanly. Keep the jam nut fairly tight as you go so the joint doesn't walk on you.
Now grab the 2-inch wrench on the hex. You can still get the wrench around the zerk fittings because there's plenty of material on the outside of the hex — but do not use the zerk fittings as a leverage point. They'll twist and break. If you're worried about it, pop the zerks out before you torque. Take your time and you'll be fine.
Install the new rod in the same direction the factory one came out, with the taper going into the knuckle from the bottom. The taper seat — not the nut — carries the load, so it has to be seated tight. If you don't have a second wrench up top, tap the joint with the dead-blow to seat the taper, or press up gently with a socket to help it seat, then tighten the nut.
Now tighten using the 10 mm hex on top with a ratcheting wrench to keep the shaft from spinning — "a good workout for the day," as the tech puts it. Then grab your torque wrench:
Go back and snug the jam nut securely so it can't back off on the way to your alignment shop. That's the passenger side done. Guess what — the driver side is the exact same process. Straightforward and easy once you've done one.
Even with the length matched, book a professional alignment. You've preserved toe, but you still need the full spec set. Roll it gently to your favorite alignment facility — and make sure that jam nut is tight before you go.
| Tip | Why it matters |
|---|---|
| Use the zerk fitting as your measuring center point | It's dead-center on the joint, so your old-vs-new length comparison is consistent and your toe stays close |
| Never pry against the zerk fittings | They twist off easily; a broken zerk means a new joint or a grease leak at the worst time |
| Seat the taper with a dead-blow, don't just crank the nut | The taper seat carries the load — a loose taper wallows out the knuckle and kills steering feel |
| Blue Loctite on the threaded end + tight jam nut | Stops the joint from walking under load so you're not re-tightening every few hundred miles |
Not every HD tie rod is built the same. Here are the common upgraded options for the 2001–2010 GM 2500/3500 HD platform so you can compare before you buy. Always confirm fitment for your exact year and trim.
| Brand | Product | Fitment | Notes |
|---|---|---|---|
| D-Max Store | XD Series Heavy-Duty Tie Rods | GM 2500/3500 HD, 2001–2010 | The part shown in this install; big strength and steering gains |
| PPE (Pacific Performance Engineering) | HD Tie Rod Kit | GM 2500/3500 HD, 2001–2010 | Forged upgrade favored for towing and plowing duty |
| Kryptonite | Death Grip Tie Rods | GM HD trucks (incl. Duramax) | Well-known name in the Duramax community for bent-stock fixes |
| MOOG | Problem Solver Tie Rod Ends | Direct OE-replacement ends | Good if you only need to replace worn ends, not a full HD upgrade |
Doing other front-end work on your Duramax? Browse the full GM Duramax parts collection for related components.
Plan about an hour for both sides if you have the right wrenches lined up. The first side takes longer while you learn the zerk-centerpoint measuring trick; the second side is the same steps and goes fast. Add shop time for a follow-up alignment.
You'll need a 40 mm wrench for the stock tie rod, a 21 mm socket for the knuckle nut, a 2-inch wrench for the new tie rod hex/jam nut, and a 10 mm wrench to hold the top hex while torquing. A tape measure, impact, dead-blow hammer, blue Loctite, and a torque wrench round out the list.
Yes. Even when you match the new rod length to the old one using the zerk-centerpoint method, you should still get a professional alignment to set toe, caster, and camber to spec. A tight jam nut keeps things stable on the drive to the shop.
Torque the knuckle nut to 48 ft-lb. The jam nut gets snugged firmly with Loctite — the installer used roughly 100 ft-lb of "elbow torque" on the hex, but always confirm the exact figure against your vehicle's service manual before you call it done.
Measure the old rod first: from the zerk fitting (your center point) to the flange of the inner joint — about 16⅛ inches on the truck in this guide. Set the new rod to that same dimension before install. Matching length preserves toe so the truck drives straight to the alignment rack.

While you've got the front end up and you're already working in the steering system, it's a smart time to protect your power steering with a 3/8" magnetic inline transmission & power steering filter. The inline magnet catches ferrous debris before it circulates through the rack and pump — cheap insurance for any truck that sees hard steering duty.
If you're already turning wrenches on the front end, adding this filter takes minutes and can save you a pump or rack down the road.
Shop Now →Upgrading to XD heavy-duty tie rods is one of those jobs that punches above its difficulty — an hour of wrenching buys noticeably tighter steering and the peace of mind that a loaded truck or bigger tires won't bend a stock rod. Measure twice with the zerk-centerpoint trick, seat the taper properly, torque the knuckle nut to 48 ft-lb, and lock that jam nut. Then let a pro finish with an alignment.
This guide is for informational purposes only and is based on a real-world install. Always refer to your vehicle's official service manual for OEM torque specifications and safety procedures. iFJF is not responsible for damage caused by improper repair.