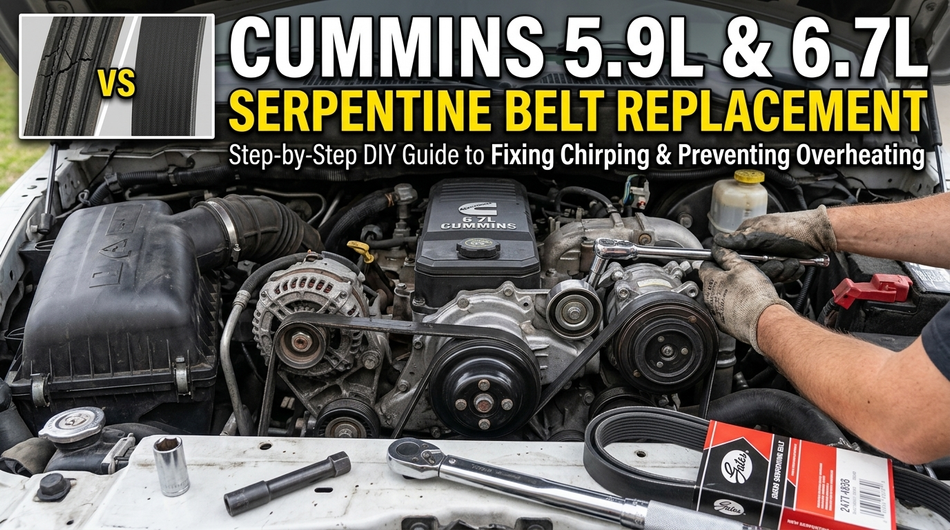
5.9 & 6.7L Cummins Serpentine Belt Diagram & Replacement Guide (2003-2024)
, by iFJF Direct, 17 min reading time
, by iFJF Direct, 17 min reading time

Replace your Cummins serpentine belt in 15 minutes. Belt routing diagram for 5.9L (2003-2007) & 6.7L (2007-2024). Tools needed, tensioner location & Gates/K080660 Dayco part numbers. Prevent roadside breakdowns.
Few sounds make a diesel owner's heart sink faster than a chirping or squealing serpentine belt under the hood of a Cummins-powered truck. The 5.9L inline-six and the 6.7L inline-six — the two most popular Cummins generations found in Dodge RAM 2500 and 3500 pickups from 1998 onwards — both use a single serpentine (or "drive") belt to run every accessory on the engine: the alternator, water pump, AC compressor, power steering pump, and air compressor.
When that belt goes, everything goes with it. No alternator means a dead battery. No water pump means overheating. The good news? Replacing a serpentine belt on a Cummins is a job you can knock out in an afternoon with basic hand tools — no special diagnostic equipment, no lift (a jack works fine), and no dealer visit required.
In this guide, we're walking through the complete replacement procedure — from the initial disassembly all the way through torquing down the belt tensioner and heading out for a test drive. Whether you're running a 24-valve 5.9L or a newer 6.7L, the fundamentals are the same. Let's get to it.
Before you tear anything apart, make sure the belt is actually the problem. Here are the tell-tale symptoms:
If you're seeing any of these symptoms, don't wait. A snapped belt on the road can leave you stranded miles from help — and in a diesel, it also means no coolant circulation, which can lead to overheating damage fast.
| Tool / Part | Purpose | Notes |
|---|---|---|
| 13mm ratchet/wrench | Fan shroud bolts & tensioner bolt | Crow's foot wrench helps in tight spots |
| Fan belt tool / belt tensioner tool | Rotate the tensioner to release belt tension | Many mechanics fab their own from a 3/8" drive extension |
| Deep-well socket (13mm) | Hold the fan shroud bracket while loosening | Used as a wedge between bracket and shroud |
| Torque wrench | Torque tensioner bolt to spec | 6.7L Cummins spec: 32 ft-lbs |
| 3/8" ratchet and extensions | General disassembly | Several lengths — tight clearance under the fan |
| New serpentine belt | Replacement part | Check your specific model year for part number |
| Flashlight / inspection light | See into tight areas | Crucial for the crank-fan pulley gap area |
| Floor jack + jack stands | Access from underneath if needed | Not always needed, but helpful |
Here's the uncomfortable truth about the Cummins engine bay: it's tight. Really tight. The 5.9L and 6.7L engines sit in the truck bay with very little clearance around the front — and the serpentine belt runs in the one area you have almost zero visibility into. Before you can do anything useful, you need to get the air intake assembly and airbox completely out of the way.
The airbox sits on top of the engine and blocks your direct line of sight down to the tensioner and the top run of the belt. Every mechanic who's done this job the hard way will tell you: take the airbox out first. No exceptions.
The exact procedure varies depending on your truck's model year — some have a simple wing-nut clamp, others use multiple hoses and sensors. The universal steps are:
Take a photo of the hose connections before you disconnect anything — trust us on this. It'll save you a "which hose goes where?" moment on reassembly.
With the airbox out, you can actually see the serpentine belt — but the fan shroud is still in the way. The fan shroud bolts to a bracket that sits over the belt path, and you'll need to swing it back out of the way to get your hands down into the pulley area.
What you're doing is creating maximum clearance without fully removing the shroud assembly. Once both sides are wedged back, you'll have a much clearer path to reach the tensioner and route the belt.
Now for the money move: releasing the belt tensioner. The tensioner on the Cummins (both 5.9L and 6.7L) is a spring-loaded arm that maintains constant pressure on the belt. To remove the belt, you need to rotate the tensioner in a specific direction to take the load off.
It takes a firm push — the spring is under real load. Don't be gentle here; the tool needs to move. A breaker bar or long ratchet handle gives you the mechanical advantage you need.
With the tensioner released, the belt should now be loose enough to work off the pulleys. Here's the order of operations:
From underneath the truck (or by laying on your back and reaching up), push the belt through the crankshaft-fan pulley gap from below. It takes patience. The gap is barely wider than the belt itself, and you'll be doing this by feel more than by sight.
Once the belt is free from that gap, pull it out from the top of the engine and discard it. Take a moment now to inspect the pulleys — spin each one by hand and check for:
Installing the new belt is essentially the reverse of removal — but with a couple of key strategic steps that make the impossible-feeling gap much more manageable.
The belt routing diagram is usually printed on the underside of the hood on a sticker — or in your owner's manual. Before you start, take a screenshot or a photo so you have a visual reference. Wrong belt routing can damage accessories quickly.
Now that the belt is seated on all pulleys, it's time to put the tensioner back in and apply the correct torque.
Once the tensioner is torqued, verify the belt is seated correctly on all pulleys — every rib should be in the groove, not riding up on the edge of any pulley.
Then reassemble in reverse order:
Before you put everything back together and close the hood, do a quick visual inspection with the engine running:
If the belt tracks true and stays quiet after a short drive, you're done. Close the hood and go change your own oil — you just saved yourself a shop bill.
Most manufacturers recommend inspection at 60,000 miles and replacement at 90,000–100,000 miles. However, heat is the enemy of rubber — if you do a lot of towing or drive in extreme heat, inspect it more frequently. A cracked or glazed belt should be replaced immediately, regardless of mileage.
If the tensioner is mechanically sound (no play, spins freely, doesn't wobble), replace just the belt. If the tensioner has any play or shows signs of failure, replace both at the same time. It's a false economy to put a new belt on a failing tensioner — the belt will wear unevenly and fail quickly.
It varies by model year and engine configuration. For the 5.9L 24-valve (2001–2007), the belt is typically a 6-rib belt, about 1/2" wide. For the 6.7L (2007.5+), check the Gates, Continental, or Dayco catalog with your specific VIN. Don't rely on cross-references — get the part number from the dealer catalog or a trusted parts retailer.
Chirping on a new belt usually means one of three things: (1) the belt is the wrong part number or type — double-check it, (2) a pulley has a glazed surface that needs cleaning or replacement, or (3) the tensioner isn't providing enough pressure — either because it's failing or wasn't torqued correctly. Rev the engine a few times first; that often seats a new belt. If it persists, investigate further.
No. The serpentine belt path does go around the water pump pulley, but you never need to open the cooling system to change the belt. You might get some coolant residue on your hands from the water pump pulley area ( weep hole), but that's just normal operation — not a leak.
Replacing the serpentine belt on your 5.9L or 6.7L Cummins is one of those jobs that looks intimidating from the outside but collapses into a straightforward sequence of steps once you're in there. The key challenges — the cramped engine bay, the tight crank-fan pulley gap, and getting the belt routed correctly — are all manageable with the right approach and a bit of patience.
Spend an afternoon doing this job yourself and you'll have saved $150–$300 in labor charges. More importantly, you'll know your truck a little better — and you'll have the confidence to handle it the next time the belt goes. Keep a spare belt in the truck, inspect your pulleys while you're in there, and you'll get 100,000 miles out of the next belt just as easily.
If this guide helped you get the job done, share it with a fellow Cummins owner who could use it. And if you ran into something we didn't cover, drop a comment below — we read every one.
Product and technical information on this page is based on publicly available manufacturer resources and field technician experience. Always verify fitment for your specific vehicle before purchasing parts. This is a general guide — your truck's service manual is the authoritative reference.