
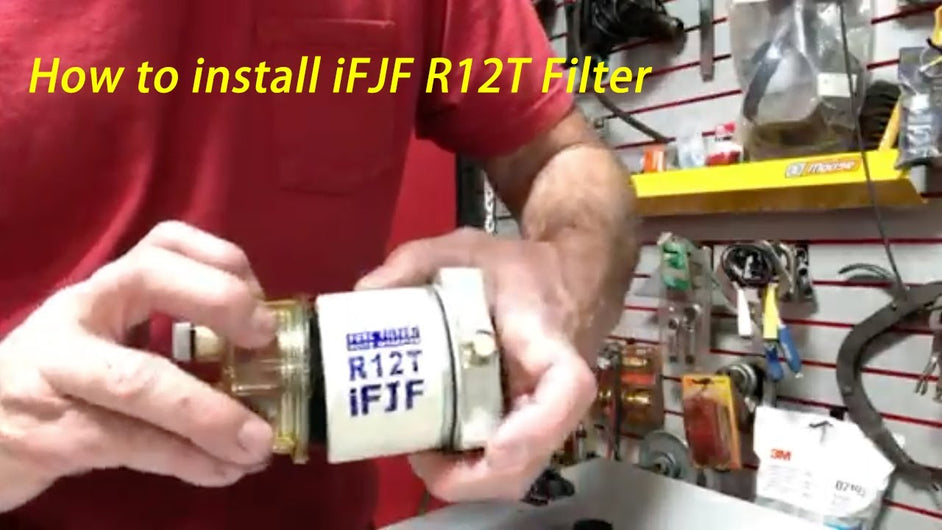
iFJF R12T Fuel Filter/Water Separator Install Guide (10 Mins)
, by iFJF Tech Team, 10 min reading time
, by iFJF Tech Team, 10 min reading time

The iFJF R12T Fuel Filter/Water Separator (120AT NPT ZG1/4-19) installs in about 10 minutes with basic hand tools and common shop supplies. This guide follows the official iFJF unboxing and installation video, showing you exactly how to prep, mount, and prime the unit on a diesel or gasoline vehicle.
The R12T is a direct replacement for the S3240 / 120AT style filter/separator, with a machined aluminum housing, a fine pleated filter element, a clear water drain bowl, and ZG1/4-19 (1/4-inch NPT) ports on both ends for flexible fuel line routing. Because it comes with two pipe plugs and two 3/8-inch barbed fittings, you can configure the inlet and outlet positions to match your vehicle before tightening anything. The install video shows the whole job done on an older carbureted Jeep, proving this separator works far beyond its diesel-targeted design.
Below you get the complete step-by-step installation process, a tools and parts table, pro tips from the video, a parts cross-reference table, and answers to common questions. If you need the filter kit itself, grab it from the iFJF fuel filter collection.
You only need a handful of items to install the R12T, most of which you probably already have in your garage. Here is the full list based on the official install video and the factory box contents.
| Tool / Part | What It's Used For |
|---|---|
| iFJF R12T fuel filter/water separator | The aluminum housing, pleated filter element, and water drain cap included in the box. |
| O-ring lubricant or clean motor oil | Lubricates the two O-rings before assembly so the housing seals without over-tightening. |
| Teflon thread seal tape | Seals the 1/4-inch NPT pipe plugs and 3/8-inch barbed fittings before final install. |
| Adjustable wrench or 1/4-inch NPT tap | Threads the barbed fittings and plugs into the housing ports (and for future service). |
| Fuel hose, 3/8-inch ID (supply and return) | Connects the tank outlet to the filter inlet and the filter outlet to the fuel pump. |
| Hose clamps | Secures fuel lines on the barbed fittings to prevent leaks and air suction. |
| Drill, rivets, or bolts | Mounts the housing to a bracket, frame rail, or firewall. The video uses rivets; bolts work just as well. |
| Small drain hose (optional) | Attaches to the bottom water drain port so water can be purged without dripping on your frame. |
| Fuel container and funnel | Fills the housing with clean fuel before installation as shown in the video. |
Follow these nine steps in order for a clean, leak-free install. The total job takes about 10 minutes when you pre-fill the housing before mounting, exactly like the video demonstrates.
Remove the R12T from the foam packaging and inspect the aluminum housing, filter element, and water drain cap. Apply a thin coat of O-ring lubricant or clean motor oil to both O-rings before threading the housing together. The video specifically warns against assembling the unit dry — it makes it almost impossible to get the housing apart by hand later. Thread the cap back on lightly, never force it.
Hold the filter assembly in the mounting location you picked on the frame, firewall, or inner fender. Rotate the housing so you can clearly visualize where the fuel tank line and fuel pump line will enter and exit. The video stresses doing this mock-up before adding any thread sealant so you choose the correct set of NPT ports.
The R12T has two 1/4-inch NPT ports on the top and two on the bottom (or sides, depending on orientation). Pick one port as the inlet from the fuel tank and the opposite or adjacent port as the outlet to the fuel pump. The remaining ports get plugged. In the video, the installer plugs two ports and fits barbed fittings on the other two — that way you have a dedicated supply line and a dedicated return/outlet line.
Wrap Teflon tape clockwise around the threads of the two pipe plugs and two barbed fittings. This is a mock-up critical detail; the video shows the installer hand-fitting the parts first, then adding Teflon tape and tightening everything for the real install. Use three to five wraps on each fitting to guarantee a leak-free seal on the NPT taper threads.
Pour clean fuel into the filter housing and then thread the bowl/cap assembly on. This is the single biggest time-saver in the video — priming the filter before installation means you don't have to fight a heavy, fuel-soaked filter underneath the truck while trying to connect lines. Filling the housing also prevents the fuel pump from running dry during the first crank, which protects the pump and reduces the number of priming cycles.
Position the pre-filled assembly at the marked spot and secure it with rivets or bolts. The installer in the video uses rivets because they only need a drill and a rivet gun — no reaching around for nuts. If you prefer removable service, use stainless bolts with locking nuts or thread inserts. Either way, keep the housing level so the water collection bowl sits at the lowest point.
Connect the tank outlet hose to the barbed fitting you designated as the inlet. Connect the other barbed fitting (the outlet) to the line running toward the fuel pump or carburetor. In the video, the install route is: fuel tank → R12T inlet → R12T outlet → fuel pump → carburetor. Secure every hose with a clamp and double-check that the flow direction matches your engine's fuel demand.
Use the small port at the top of the housing as the air purge, and the bottom drain — the water basket — as the water drain. The video shows tapping a clear hose onto the bottom drain valve so water runs safely away from the frame instead of dripping onto electrical components. Open that valve weekly, or whenever you see water sitting in the clear bowl, and close it after the fuel runs clean.
Once everything is connected, turn the ignition to run (without cranking) a few times to let the pump push fuel through the pre-filled housing. Inspect all NPT ports, hose clamps, and the O-ring seal for drips. The R12T is designed for diesel engines but works perfectly on gasoline and carbureted systems, as shown on the 1978 Jeep in the video.
These tips come straight from the ifjf R12T install footage and separate a clean 10-minute job from a frustrating afternoon. Memorize them before you start.
| Pro Tip | Why It Matters |
|---|---|
| Lube O-rings with O-ring grease, not oil | Oil works in a pinch, but grease stays put and gives a better seal, allowing you to thread the housing together smoothly and light. |
| Never over-tighten the housing | Over-tightening makes the cap impossible to remove by hand at the next filter change. Finger tight plus a quarter turn is enough. |
| Pre-fill the filter before mounting | Reduces priming time, prevents dry-start fuel pump damage, and avoids spilling fuel all over the frame while installing. |
| Use Teflon tape on every NPT thread | NPT threads seal by deformation; Teflon tape fills the spiral gaps and stops air from being sucked into the fuel line. |
| Plan the port direction before sealing | Once Teflon tape is applied and tightened, rotating the fitting changes the seal. Mock it up first. |
| Rivet instead of bolt if access is tight | Riveting requires only a drill and rivet gun, perfect for frame rails with no rear access. Bolting is fine if you can reach the backside. |
| Add a clear drain hose at the bottom | Makes water purging a one-hand operation and prevents water from running across your engine or frame. |
The R12T is a direct aftermarket replacement for the common S3240 and 120AT fuel filter/water separator units. Use this table to confirm compatibility before buying.
| iFJF Part Number | Replaces | Thread Spec | Filtration | Typical Fitment |
|---|---|---|---|---|
| R12T | S3240 / 120AT | ZG1/4-19 (1/4" NPT) | Pleated paper element, water separating | Diesel trucks, tractors, generators, marine engines; also gasoline/carbureted vehicles |
| R12T | S3240 | 1/4" NPT ports | 10-micron | Duramax, Power Stroke, Cummins fuel pre-filters |
| R12T | 120AT | ZG1/4-19 | 10-micron | Agricultural and industrial diesel equipment |
Always verify your existing fuel line size before ordering. The R12T ships with 3/8-inch barbed fittings, but the 1/4-inch NPT ports accept any standard fuel filter adapter if your lines are larger or smaller.
Will the R12T work on a gasoline engine? Yes. The video explicitly demonstrates the R12T installed on a 1978 Jeep with a carbureted gasoline engine. The pleated filter element and water-separating bowl work with any liquid fuel, though the unit was originally designed for diesel applications.
Do I really need to fill the filter with fuel before installing it? Yes. Filling the housing before mounting saves you from dealing with a heavy, fuel-soaked filter while lying under the vehicle. It also primes the fuel pump faster and prevents dry-running damage on the first crank.
What do I do with the extra NPT ports I don't use? Plug them. The box includes two 1/4-inch pipe plugs for exactly that purpose. Apply Teflon tape and tighten them into any port you don't need so air can't be sucked into the fuel system.
How often should I drain water from the separator? Check the clear bowl every week or at every oil change. If you see a visible water layer at the bottom, open the drain valve until clean fuel flows out, then close it. In humid climates or with older fuel tanks, check more frequently.
Can I bolt the housing instead of riveting it? Yes. The installer in the video used rivets because access was tight, but bolt-and-nut mounting is equally common and easier to remove for future service. Just keep the unit level so the water bowl drains fully.
Browse these iFJF guides to get the most out of your fuel filtration setup. They cover selection, maintenance, and troubleshooting for all fuel types.
The iFJF R12T is a bolt-on fuel filter/water separator with a machined aluminum body, a 10-micron pleated filter, a clear water drain bowl, and 1/4-inch NPT ports for flexible installation. It replaces S3240 / 120AT units and works on diesel, gasoline, and carbureted systems.
Everything you need is in the box: the aluminum housing, the filter element, the water drain cap, two 1/4-inch pipe plugs, and two 3/8-inch barbed fittings. The harbor freight-grade price and 10-minute install time make it one of the easiest preventive maintenance upgrades you can do this weekend.
Buy the iFJF R12T Fuel Filter/Water Separator here — free shipping on orders over $50 and full tech support from the iFJF team.
 Fuel Filter Assembly for 1992-2002 Chevy GMC 6.5L Diesel — Suburban Tahoe Silverado Sierra Yukon Hummer H1 — Replaces 10226035
$177.99
Fuel Filter Assembly for 1992-2002 Chevy GMC 6.5L Diesel — Suburban Tahoe Silverado Sierra Yukon Hummer H1 — Replaces 10226035
$177.99
 FS1098 Fuel Water Separator w/ PCV for Cummins B6.7 ISL8.9 — 10 Micron
$79.99
FS1098 Fuel Water Separator w/ PCV for Cummins B6.7 ISL8.9 — 10 Micron
$79.99
 68394482AA Water Separator for 2014-2018 Ram 1500 3.0L EcoDiesel
$489.73
68394482AA Water Separator for 2014-2018 Ram 1500 3.0L EcoDiesel
$489.73
 FS20081 Fuel Water Separator for EPA 2017 Cummins ISX15 X15
$47.99
FS20081 Fuel Water Separator for EPA 2017 Cummins ISX15 X15
$47.99