
Mercruiser 4.3L V6 Marine Carburetor Replacement Guide: 3310-807764A1 Electric Choke Install & Tuning
, by iFJF Direct, 16 min reading time
, by iFJF Direct, 16 min reading time

If you run a Mercruiser 4.3L V6 in a Bayliner, Sea Ray, Chaparral, or Glastron from the 1990s through mid-2000s, you know the two-barrel Rochester-style carburetor is both a workhorse and a headache. The 262 cubic-inch GM-derived V6 is one of the most common sterndrive engines on North American waterways, and when its carburetor starts to go, the symptoms are unmistakable.
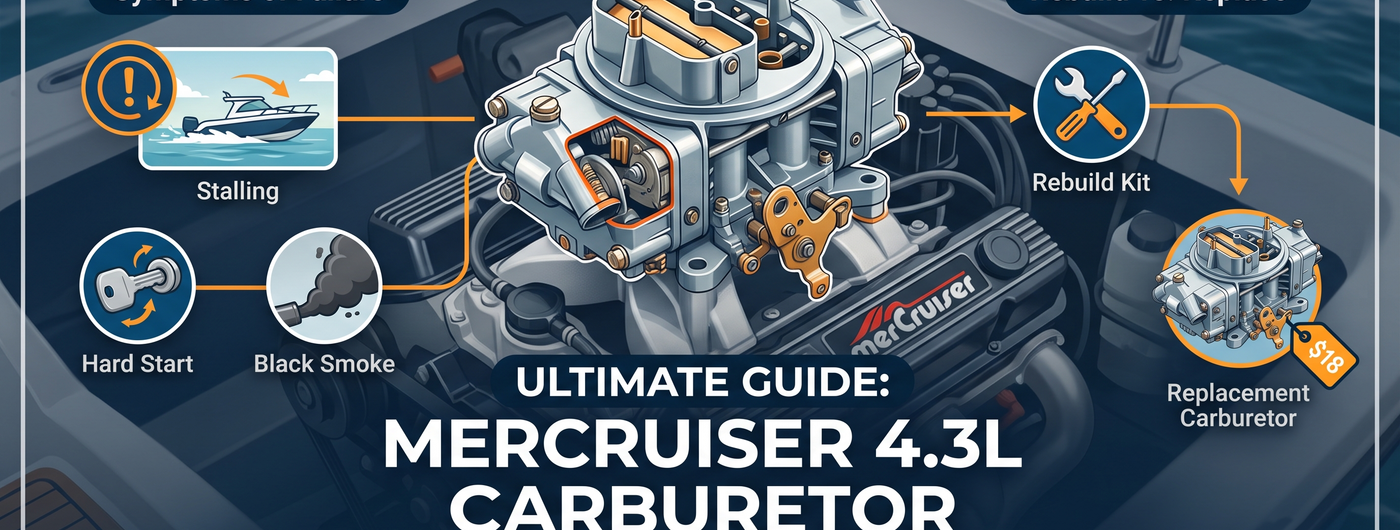
The most frequent complaint we hear from boat owners is a hard cold start followed by stalling at the dock. You pump the throttle three times, crank for 10 seconds, and it finally catches — only to die the moment you shift into neutral to untie the lines. This is the classic sign of a failing electric choke mechanism or a clogged idle circuit. On the Mercruiser 4.3L, the electric choke relies on a 12V heating element that gradually opens the choke plate as the engine warms. When that element burns out — and they all do eventually — the choke stays closed too long, flooding the engine at idle.
Other red flags include a RPM surge at cruising speed (typically 2,800–3,200 RPM) that feels like the boat is "hunting" for the right mixture, black soot accumulating on the transom above the exhaust outlet, and fuel consumption jumping from the normal 6–8 GPH at cruise to 10+ GPH. In one documented case, a 1998 Sea Ray 180 Bowrider with the 4.3L was burning 12 gallons per hour at 3,000 RPM — nearly double the expected rate — before the owner discovered the float needle was stuck partially open, dumping raw fuel into the intake manifold.
A marine environment accelerates carburetor wear in ways that automotive applications never see. Salt-laden humidity corrodes the aluminum body, ethanol-blended fuel (E10 is now standard at most marinas) attacks gaskets and accelerator pump diaphragms, and long winter layups allow varnish to crystallize in the idle passages. If your 4.3L sat for more than 90 days without a fuel stabilizer like Sta-Bil Marine 360, assume the carburetor needs at minimum a thorough cleaning, and more likely a full rebuild or replacement.
This is the question every 4.3L owner wrestles with. Let's break down the real numbers.
A Mercruiser OEM carburetor (part 807764A1 or superseding number) costs between $580 and $720 at authorized dealerships like West Marine or local Mercruiser service centers. That's before the 2.5–3.5 hours of shop labor at $125–$165/hour, bringing the dealer-installed total to $900–$1,300. For a boat worth $8,000–$15,000 on the used market, that's a 10% repair-to-value ratio — painful but sometimes necessary if you lack the time or tools.
A quality aftermarket replacement like the 3310-807764A1 Marine Carburetor with integrated electric choke runs $130–$200 from direct-manufacturer sellers. These units are built on the same Rochester 2GC casting specifications but use updated ethanol-resistant gaskets and nitrophyl floats instead of the original brass floats that can sink if they develop a pinhole leak. The price gap — $600+ vs. $180 — might raise eyebrows, but the explanation is straightforward: OEM pricing includes a marine dealer markup chain (manufacturer → distributor → dealer → you), certification testing costs spread across lower volume, and a "marine tax" that reflects the limited competition in the sterndrive parts market.
Compare this to the automotive equivalent: a Rochester 2GC for a 1985 Chevy 4.3L V6 truck engine costs about $120 at AutoZone. The marine version is functionally identical aside from Coast Guard-compliant fuel bowl overflow routing (J1171 certification) and a slightly different choke stove design. The aftermarket marine carburetor essentially bridges this gap — marine-certified but sold factory-direct without the triple-layer markup.
If you choose rebuilding, a quality kit like the Mercury Marine Carburetor Repair Kit runs $25–$45 and includes new gaskets, accelerator pump, needle and seat, float bowl gasket, and idle mixture screw O-rings. The catch: rebuilding requires a gallon of Chem-Dip carb cleaner ($35), compressed air, and realistically 3–4 hours for a first-timer. If the throttle shaft bores are worn (common on engines with 500+ hours), no rebuild kit will fix the resulting vacuum leak — you'll need a replacement casting.
This job takes 2–3 hours with basic hand tools. No special marine certifications required — but you must follow Coast Guard safety protocols because you're working in an enclosed engine compartment with fuel vapors.
This is where most DIY installs go wrong. A misadjusted electric choke causes either flooding (too rich, choke stays closed too long) or stalling (too lean, choke opens too quickly on a cold engine). Here is the proper setup sequence for the 3310-807764A1-style electric choke on a Mercruiser 4.3L:
Critical note on the 12V source: The electric choke must receive switched 12V — NOT constant battery voltage. The factory wiring taps into the alternator exciter circuit, which provides voltage only when the engine is charging. If you wire the choke directly to the ignition coil (+) terminal, you will draw excessive current through the ignition circuit and potentially damage the coil. Use the original choke wire or tap into the key-on 12V circuit at the instrument panel harness.
A survey of marine forums (iboats, The Hull Truth, Offshoreonly) and Amazon/eBay reviews reveals the aftermarket landscape for Mercruiser 4.3L carburetors. Here is how the major options stack up:
| Option | Price Range | Pros | Cons |
|---|---|---|---|
| Mercruiser OEM (807764A1) | $580–$720 | Exact fit, dealer support, resale value | 3x price of aftermarket, same Rochester design |
| 3310-807764A1 Aftermarket | $130–$200 | Ethanol-resistant internals, plug-and-play, 60-day warranty typical | Brand-dependent quality, may need idle tweaking |
| eBay Generic (China-sourced) | $90–$120 | Lowest entry price | Inconsistent float settings, unknown gasket material, no USCG cert visible |
| Sierra Marine 18-7689 | $380–$450 | Reputable marine brand, good warranty | Often out of stock, limited to newer 4.3L variants |
| Remanufactured (Flying Fish, Marine Carb Center) | $250–$350 | Original casting, flow-tested | Core charge adds complexity, 2-week turnaround |
The 3310-807764A1 aftermarket option dominates the "budget-conscious DIY" segment for a reason: the cost of a dealer replacement equals roughly 30% of a complete used 4.3L long block. At a $130–$200 price point, even if the aftermarket carburetor lasts 5 seasons instead of 10, two replacements still cost less than one OEM unit. For weekend boaters putting 50–80 hours per season on a 20-year-old boat, this math is compelling.
Consider a typical case: a 2000 Bayliner Ciera 2455 with the 4.3L V6 and Alpha One Gen II drive, based in freshwater (Lake Lanier, GA). The owner reported three seasons of declining performance: first, occasional stalling when coming off plane to idle speed in the no-wake zone, then hard hot restarts requiring 3–4 throttle pumps, and finally a persistent fuel smell in the engine compartment that prompted a U.S. Coast Guard Auxiliary safety inspection failure.
Diagnosis revealed the accelerator pump diaphragm had hardened and cracked — a direct result of ethanol exposure. The pump shot, normally a sharp stream of fuel into the venturi when the throttle is opened, was reduced to a weak dribble, causing the engine to stumble badly when the captain advanced the throttle to get on plane. Fuel leaking from the accelerator pump cover had pooled on the intake manifold, explaining the fuel odor. The electric choke element tested open-circuit (infinite resistance) on a multimeter, meaning the choke never opened fully, contributing to the rich-running condition and blackened spark plugs.
The fix: a new 3310-807764A1 carburetor with integrated electric choke ($175), a fresh fuel-water separating filter, and new spark plugs (NGK BPR6EFS, gapped at 0.035"). Total parts cost: $215. The dealer quote for the same work was $1,150. The owner completed the swap in a single Saturday afternoon using the steps above and reported the engine "starts like a brand new motor" with immediate hot restarts and smooth throttle response throughout the RPM range.
Marine carburetors die from three things: ethanol, inactivity, and dirt. Here is a maintenance schedule that adds years to any carburetor — OEM or aftermarket:
Q: Will a 3310-807764A1 fit my 1996 Mercruiser 4.3LX with the four-barrel intake?
A: No. The 3310-807764A1 is a two-barrel carburetor designed for the two-barrel cast iron intake used on the standard 4.3L (175–190 HP variants). The 4.3LX (205 HP) and 4.3L EFI models use either a four-barrel Rochester Quadrajet or multi-port fuel injection, respectively. Check your intake manifold bolt pattern: two-barrel intakes have four studs in a rectangular pattern; Quadrajet intakes have a spread-bore pattern.
Q: Can I convert my 4.3L from a two-barrel to a four-barrel?
A: Yes, but it requires the four-barrel intake manifold (Mercruiser 807988A3 or equivalent), the Quadrajet carburetor, and a different throttle bracket. Total cost typically exceeds $800 and the performance gain is marginal — about 10–15 HP at wide-open throttle. For most owners, a fresh two-barrel carburetor is the smarter investment.
Q: My new carburetor runs rich at idle even after adjusting the mixture screws. What's wrong?
A: Three common causes: (1) the float level is set too high from the factory — it should be 3/8" measured from the top of the float to the bowl gasket surface with the bowl inverted; (2) the needle and seat are not sealing, causing the fuel level to creep up; (3) the fuel pump pressure exceeds 6 PSI, overpowering the needle valve. Test pressure with an inline gauge — the Mercruiser mechanical pump should deliver 4–6 PSI. If it's higher, install an inline regulator.
Related Reading from iFJF Direct: If you're diving into marine maintenance, also check out our Duramax CAT Oil Filter Adapter Guide for another engine-saving DIY — the same principles of filtration and preventive maintenance apply whether you're on water or asphalt. For RV owners who maintain both a boat and a camper, our WFCO WF-8955 RV Converter Board Replacement Guide covers another common power-system failure that's just as satisfying to fix yourself.
Whether you're keeping an aging family cruiser on the water for another decade or flipping a project boat, the 4.3L Mercruiser V6 rewards basic maintenance with years of reliable service. A well-tuned carburetor isn't just about starting reliably — it's about enjoying every minute on the water without that nagging worry in the back of your mind. Browse our marine filter and parts collection for everything from fuel-water separators to oil filters that keep your sterndrive running season after season. And if you're tackling a broader carburetor project, our full carburetor selection covers marine, automotive, and powersports applications — all manufacturer-direct, all ethanol-ready.