



iFJF iFJF Leather Airpods Case Earphone Protective Skin Cover For Apple AirPod Pro 1 2
Product Overview Wrap your AirPods Pro in luxury with the iFJF Genuine Leather Protective Case. This precision-fit leather skin provides daily protection against drops, scratches, and scuffs while adding a touch of sophistication. Designed for both AirPods Pro 1st Generation and AirPods Pro 2nd Generation, the case features a secure snap-button closure, full port access, and a bonus carabiner clip for convenient carrying. Key Features Authentic Leather Craftsmanship: Each case is cut from premium top-grain leather and hand-stitched for durability. The natural leather grain means every case is one of a kind. Shock-Absorbing Design: Soft microfiber interior cushions your AirPods Pro case against everyday bumps and drops. Seamless Wireless Charging: Charge wirelessly through the case — no interference with MagSafe or Qi chargers. Complete Port Access: Precision openings for the charging port (Lightning/USB-C), rear setup button, and front LED indicator. Carry with Confidence: Metal carabiner clip included — attach to bags, belts, or keychains for always-accessible AirPods. Compatibility Table Device Compatibility AirPods Pro 1st Generation ✅ Fully Compatible AirPods Pro 2nd Generation (Lightning) ✅ Fully Compatible AirPods Pro 2nd Generation (USB-C) ✅ Fully Compatible AirPods 1st/2nd/3rd Generation ❌ Not Compatible Specifications Specification Value Material Genuine Top-Grain Leather + Microfiber Lining Closure Type Metal Snap Button Charging Method Wired + Wireless (MagSafe/Qi) Included Leather Case, Carabiner Clip Why This Case? The Apple AirPods Pro charging case is a $99 replacement if damaged — and its glossy white finish scratches if you so much as look at it wrong. The iFJF leather case provides essential protection without adding bulk, while the premium leather finish elevates the look from "tech gadget" to "personal accessory." It's the case Apple should have made. Frequently Asked Questions Q: Does the case cover the speaker holes on AirPods Pro 2?A: No. The case does not obstruct the bottom speaker or the side lanyard loop found on AirPods Pro 2nd Gen. Q: Can I use Find My through this case?A: Yes. The leather case does not interfere with the U1 chip or Bluetooth signal. Find My precision finding works normally. Q: Is the leather waterproof?A: The leather has a light water-resistant treatment but is not fully waterproof. Avoid heavy rain exposure. Wipe dry if wet — do not use heat to dry. Q: Will the snap button scratch the AirPods case?A: The interior of the snap button is covered with the same microfiber lining — no metal contacts the AirPods case directly. Q: Does this fit with a skin/wrap already applied to the AirPods case?A: The case fit is precise. Adding an additional skin or wrap underneath may make the fit too tight. Recommend using this case alone.
$39.99
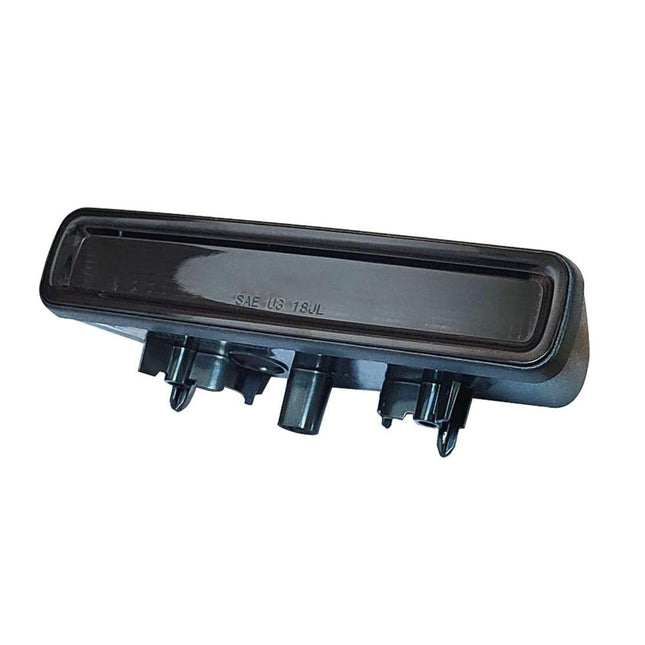
iFJF iFJF LED 3rd Brake Light Board for 2018-2023 Wrangler JL High Mount Stop Brake Lights Driver Rear Lamp Board Plug and Play (Black Housing Smoke Lens)
Overview Enhance both safety and style on your Jeep Wrangler JL or Gladiator JT with the iFJF LED 3rd Brake Light Board. Equipped with 5 high-output LEDs behind a light-amplifying smoke lens this direct replacement delivers significantly brighter illumination than the factory incandescent unit — making you more visible to following traffic in all weather conditions. The black housing with smoke lens adds a custom aggressive look while plug-and-play design means installation takes just minutes with no wiring modifications required. Compatibility Year Make Model Configuration 2018-2023 Jeep Wrangler JL 2-Door and 4-Door (JLU) 2020-2023 Jeep Gladiator JT All Trims Key Features 5 High-Output LEDs: Superior brightness with instant-on response — illuminates faster than factory incandescent bulbs for improved reaction time from following drivers Light-Amplifying Smoke Lens: Specialized diffuse lens maximizes LED output while providing sleek smoked appearance True Plug-and-Play: Uses factory wiring connector — no cutting splicing or resistors required. Simply unplug old and plug in new Waterproof ABS Housing: Sealed construction prevents moisture intrusion eliminating common factory issue of water-fogged lenses Scratch-Resistant Surface: Special surface treatment resists scratches from keys fingernails and routine contact Black Housing Design: Aggressive blacked-out look replaces factory red housing for custom modern aesthetic Technical Specifications Specification Value Dimensions 6.3 x 2.4 x 1.8 Inches (160 x 61 x 46mm) LED Count 5 High-Output LEDs Lens Color Smoke (Dark Tinted) Housing Color Black ABS Material ABS Engineering Plastic (Waterproof) Installation Plug-and-Play Factory Connector Voltage 12V DC Standard Vehicle Electrical Installation Open the rear tailgate / swing gate on your Jeep Wrangler or Gladiator Locate the factory 3rd brake light assembly above the spare tire mount Remove factory mounting screws using Torx or Phillips screwdriver Disconnect factory wiring harness connector from back of brake light Connect iFJF LED brake light to factory wiring harness — it clicks into place Position new unit and secure with factory mounting screws Test brake light function by pressing brake pedal Installation time: 5-10 minutes. No special tools beyond basic screwdriver. Why Choose iFJF? Brighter Equals Safer: LED technology delivers significantly more light output than factory bulb giving drivers behind you more reaction time Jeep-Specific Design: Engineered exclusively for JL and JT platform — perfect fit factory connector no modifications needed Weatherproof Construction: Unlike factory units that can fog up the iFJF light is fully sealed against elements Instant Installation: The easiest upgrade you will ever do on your Jeep — plug-and-play in under 10 minutes FAQ Q: Will this fit my 2022 Jeep Wrangler JL Unlimited?A: Yes designed for all 2018-2023 Jeep Wrangler JL and JLU 2-door and 4-door models plus 2020-2023 Gladiator JT. Q: Is the smoke lens legal in all states?A: LED output is brighter than factory and meets DOT brightness standards but some states restrict tinted/smoked lenses for brake lights. Check local regulations. Q: Do I need to add resistors or modify wiring?A: No. True plug-and-play unit connects directly to factory wiring harness. No resistors relays or wiring modifications needed. Q: Will water get inside like factory unit?A: iFJF unit features fully sealed waterproof ABS housing preventing moisture intrusion — common upgrade over factory units known to fog up. Q: Does this work with factory spare tire carrier and backup camera?A: Yes designed as direct replacement and does not interfere with factory spare tire carrier or backup camera system. Q: Is light output significantly brighter than factory?A: Yes 5 high-output LEDs produce noticeably brighter more vivid illumination with faster on/off response time than factory incandescent bulb.
$29.99

iFJF iFJF LED Light Pod Metal Hood Mount Bracket Kit/Ditch for Toyota Tacoma 2016-2017
Product Overview The iFJF LED Light Pod Hood Mount Bracket Kit is purpose-built for 2016-2017 Toyota Tacoma owners who need auxiliary lighting for off-road, overlanding, or work applications. These brackets mount at the hood hinge — commonly called "ditch light" brackets — providing an elevated mounting point for LED light pods that illuminates the sides of trails, ditches, and work sites. Heavy-gauge steel construction with a durable black powder coat finish ensures years of service in harsh conditions. Key Features Bolt-On Installation — No Drilling: Utilizes existing hood hinge mounting bolts. Installs in 30-45 minutes with basic hand tools. No modification to your Tacoma required. Heavy-Duty Steel Construction: Fabricated from 3/16-inch (4.7mm) thick steel plate — won't vibrate, flex, or crack like thinner brackets. Textured Black Powder Coat: UV and corrosion-resistant finish matches factory trim and resists chipping from rocks and road debris. Universal Light Pod Compatibility: Slotted mounting holes accept most LED cube lights (3-inch) and round pods (4-inch) with standard M8 or 5/16-inch hardware. Optimized Light Position: Places pods just above the hood line for maximum peripheral illumination without creating hood glare that reflects into the windshield. Compatibility Table Year Make Model Notes 2016-2017 Toyota Tacoma All trims (SR, SR5, TRD Sport, TRD Off-Road, Limited, TRD Pro) Specifications Specification Value Material 3/16-inch Heavy-Gauge Steel Finish Textured Black Powder Coat Mounting Position Hood Hinge (Ditch Light) Light Compatibility 3-inch Cube / 4-inch Round Pods Installation Bolt-On, No Drilling Required Kit Includes 2 Brackets (Left + Right), Mounting Hardware Why Ditch Lights for Your Tacoma The factory headlights on the 2016-2017 Tacoma — even the LED-equipped TRD trims — project a narrow forward beam. When you're navigating unlit trails, forest service roads, or job sites at night, you need to see what's in the ditches and around tight corners. Hood-mounted ditch lights fill this critical blind spot without the complexity of a full bumper or roof-mounted light bar setup. Installation Overview Open the hood and locate the hood hinge bolts on each side. Remove the factory bolts (keep them — they'll be reused). Position the bracket between the hood hinge and the fender, aligning the bolt holes. Reinstall bolts through the bracket and hinge into the factory mounting points. Torque to specification. Mount your LED pods to the bracket using the supplied hardware. Route wiring along the fender edge and through the firewall grommet. Adjust pod angle and tighten. Aim lights slightly outward (15-20° from centerline) for optimal ditch and shoulder coverage. Frequently Asked Questions Q: Will these brackets fit a 2018+ Tacoma?A: The 2016-2017 hood hinge geometry differs slightly from 2018+. These brackets are designed specifically for 2016-2017 models. Check our store for 2018+ brackets. Q: Do these interfere with the hood closing?A: No. The brackets mount below the hood line when the hood is closed. Verify pod height: pods under 3.5 inches tall clear the hood without interference. Q: Can I use these with a hood visor or bug deflector?A: Most low-profile hood visors are compatible. Full-height bug deflectors that wrap around the hood edge may interfere — check clearance before installing. Q: Do I need a relay harness for the lights?A: Yes. These brackets are mounting hardware only. You'll need a separate wiring harness with relay and switch for the LED pods. We recommend a weatherproof harness rated for at least 15A. Q: Will the powder coat rust over time?A: The textured black powder coat is highly rust-resistant. In areas with heavy road salt, a yearly wipe-down with corrosion inhibitor spray on the bracket edges adds extra longevity.
$70.99

iFJF iFJF Light Bracket Cage Mounts for Polaris Ranger and Defender Half Doors Pro-fit Cages Fits LED 3" Cube/4" Round Lights
Product Overview The iFJF Light Bracket Cage Mounts provide a secure, drill-free mounting solution for LED light pods on Polaris Ranger and Defender UTVs with half doors. These brackets clamp directly onto the roll cage tubing, giving you flexible forward, side, or rear lighting positions without permanent modifications to your machine. Compatible with popular 3-inch cube lights and 4-inch round LED pods. Key Features Clamp-On Design — No Drilling: Wraps around standard UTV roll cage tubing (1.5-2 inch diameter) with a secure bolt clamp. Installs in minutes with an Allen key and wrench. Dual Pod Compatibility: Slotted mounting pattern accepts both 3-inch LED cube lights and 4-inch round pods from major brands — Auxbeam, Nilight, Rigid, KC HiLiTES, and others. 360° Rotatable Mount: Adjust the light angle independently from the clamp position — point pods forward for trail riding, sideways for work area lighting, or rearward for backup illumination. Rugged Steel Construction: Heavy-gauge steel with corrosion-resistant black powder coat finish stands up to mud, pressure washing, and UV exposure. Half Door Compatible: Specifically designed to clear Polaris Pro-Fit cage systems with half doors — mounts above or between door lines without interference. Compatibility Table Make Model Cage Type Polaris Ranger (All models with half doors) Pro-Fit Cage Polaris Defender (All models with half doors) Pro-Fit Cage Specifications Specification Value Material Heavy-Gauge Steel Finish Black Powder Coat Tube Compatibility 1.5-2.0 inch diameter Light Fitment 3-inch Cube / 4-inch Round Pods Installation Clamp-On, No Drilling Kit Quantity Set of 2 Brackets + Hardware Mounting Positions & Lighting Ideas A-Pillar (Front Cage): Forward-facing trail lights — illuminate the path ahead at night. B-Pillar (Mid-Cage): Side-facing work lights — perfect for plowing, fencing, or loading in the dark. C-Pillar (Rear Cage): Rear-facing backup lights — see what's behind you when reversing on unlit trails. Roof Cage: 360° scene lighting for setting up camp or working around the machine after sunset. Installation Notes Choose your cage tube location and clamp diameter (rubber shims included for smaller diameter tubes). Wrap the clamp around the tube, insert the bolt, and tighten securely — do not overtighten as this can dimple the cage tubing. Mount your light pod to the bracket, route the wiring along the cage with zip ties, and connect to your switch panel or relay harness. Frequently Asked Questions Q: Will these fit a Polaris Ranger XP 1000?A: Yes — as long as your XP 1000 is equipped with the Pro-Fit cage system and half doors. Check your cage tube diameter; rubber shim inserts accommodate minor size variations. Q: Do these work with full doors?A: These brackets are optimized for half door configurations. With full doors, bracket clearance around the upper door frame should be verified — minor adjustment to mounting position may be needed. Q: Can I mount these on the front bumper tube instead?A: These are cage-mount brackets (1.5-2 inch tube). If your front bumper has the same diameter tubing, they may work — but verify clamp fitment before ordering. Q: How many brackets come in a set?A: This listing includes 2 brackets with mounting hardware. For 4-corner lighting setups, order 2 sets. Q: Will the clamps scratch my cage's powder coat?A: The clamps have a smooth inner surface and rubber shims, but any metal-to-metal clamp can cause minor wear over time. Applying a strip of electrical tape to the cage tube before clamping prevents any marking.
$67.99
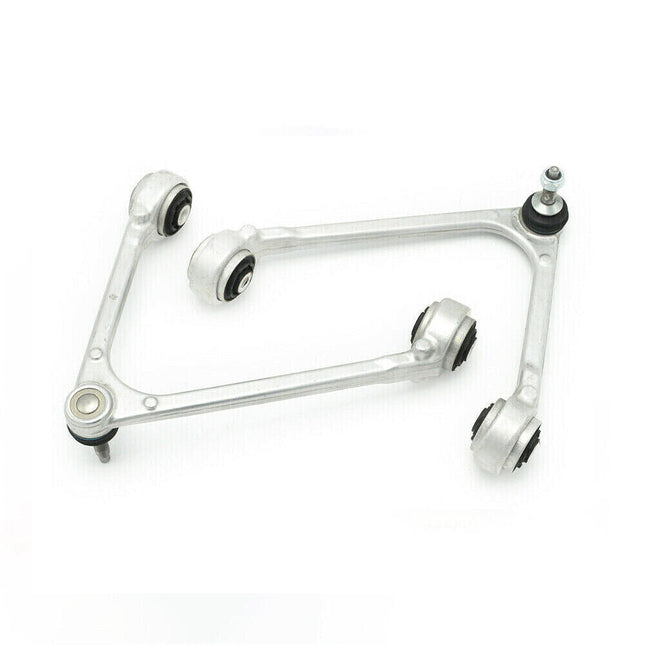
iFJF iFJF Lincoln LS Ford Thunderbird V8 Front Upper Control Arm w/ Ball Joint 2 Pcs
Product Overview The iFJF Front Upper Control Arm with Ball Joint pair set is specifically engineered for the 2000-2006 Lincoln LS and 2002-2005 Ford Thunderbird — both built on Ford's DEW98 rear-wheel-drive platform. These vehicles share an independent front suspension design where upper control arm ball joint failure is a known issue, often presenting as front-end clunking, uneven tire wear, and vague steering response. This replacement pair restores factory suspension geometry and front-end precision. Key Features Complete Assembly — Ball Joint Pre-Installed: No need to press or rivet in a separate ball joint. Each arm arrives fully assembled with a pre-greased, sealed ball joint — ready to bolt in. DEW98 Platform Specific: Designed to match the exact suspension kinematics of the Lincoln LS (2000-2006) and Ford Thunderbird (2002-2005). Generic or Mustang arms will NOT fit. OEM-Equivalent Bushings: Rubber bushings with correct durometer provide factory ride quality while offering improved durability over aged, cracked originals. Pair Set — Left & Right: Suspension work is always done in pairs. This set includes both driver-side and passenger-side arms. Corrosion-Resistant Coating: E-coat finish protects against road salt and moisture — critical for vehicles driven in northern states. Compatibility Table Year Make Model Engine 2000-2006 Lincoln LS 3.0L V6 / 3.9L V8 2002-2005 Ford Thunderbird 3.9L V8 Specifications Specification Value Position Front Upper (Left & Right Pair) Platform Ford DEW98 Ball Joint Sealed, Pre-Greased, Pre-Installed Bushing Material High-Durometer Rubber Finish E-Coat Corrosion Protection Signs of Failing Upper Control Arms Front-end clunking over bumps and during low-speed steering maneuvers Uneven inner or outer tire wear — classic sign of control arm bushing slop Steering wander or pull that alignment shops can't fully correct Visible ball joint boot tears — grease leakage leads to rapid joint wear Vibration through the steering wheel at highway speeds (65+ mph) Installation Guide Remove the front wheel, support the lower control arm with a jack, disconnect the upper ball joint from the spindle, remove the two frame mounting bolts, and swap the arm. Torque frame bolts to 55-65 ft-lbs and ball joint nut to 35-45 ft-lbs (verify with your year-specific service manual). Always get a professional alignment after replacing control arms — camber and caster will shift. Frequently Asked Questions Q: Will these fit the Lincoln LS V6?A: Yes. Both the 3.0L V6 and 3.9L V8 Lincoln LS (2000-2006) use the same front upper control arms. The Thunderbird shares this same DEW98 suspension design. Q: Do these fit a Ford Mustang (same platform)?A: No. Despite sharing some DEW98 platform elements, the Mustang (2005-2014 S197) uses different suspension geometry and completely different upper control arms. Q: Do I need an alignment after replacing these?A: Absolutely. Control arm replacement changes camber and caster settings. A professional 4-wheel alignment is mandatory after installation. Q: How do these compare to OEM Motorcraft arms?A: These are manufactured to equivalent specifications with the same bushing durometer and ball joint design. They offer a direct, cost-effective alternative to Motorcraft parts that are increasingly expensive and hard to find for these aging platforms. Q: What tools do I need?A: Basic metric socket set (15mm, 18mm, 21mm typically), torque wrench, ball joint separator or pickle fork, floor jack, and jack stands. An impact wrench makes removal much faster on these older vehicles with potentially corroded bolts.
$84.53

iFJF iFJF Load Stops Replacement T-Slot Truck Cross Bar (4 Pack) for Ladder Firewood Skis Snowboard Kayak
Product Overview The iFJF Load Stops are a 4-pack of T-slot mounted cargo anchors designed to keep your gear from sliding on truck bed cross bars. Whether you're hauling ladders to the job site, firewood for the campsite, skis to the mountain, or a kayak to the lake — these adjustable stops create a secure barrier that prevents lateral shifting during transport. Compatible with virtually all T-slot cross bar systems found on ladder racks, contractor racks, and overland bed racks. Key Features 4-Pack Coverage: Two stops per cross bar provides front and rear cargo containment. Enough for a two-bar rack setup out of the box. Universal T-Slot Fit: Slides into standard T-slot channels on most truck racks (Thule, Yakima, Rhino-Rack, Hauler, and generic contractor racks) — no brand-specific mounting required. Tool-Free Adjustment: Hand-tighten the T-bolt knob to lock stops in position. Loosen to reposition in seconds — no tools needed on the road. Heavy-Duty Construction: Molded from impact-resistant reinforced nylon composite with stainless steel T-bolts. Won't rust, crack, or deform under heavy cargo loads. Protective Contact Pads: Wide, flat face spreads load pressure and prevents damage to delicate cargo (kayak hulls, painted ladders, finished lumber). Compatibility Table Rack Type T-Slot Compatibility Contractor / Ladder Racks ✅ Standard T-Slot Channels Overland Bed Racks ✅ Standard T-Slot Channels Thule Aeroblade / WingBar ✅ T-Track Compatible Yakima JetStream / CoreBar ✅ T-Slot Compatible Rhino-Rack Vortex ✅ Requires T-Slot Adapter Round or Square Bars ❌ Not Compatible (T-Slot Only) Specifications Specification Value Material Reinforced Nylon Composite + Stainless Steel Hardware Mounting Type T-Slot Channel with Hand-Tighten Knobs Pack Quantity 4 Load Stops T-Bolt Size M6 / 1/4-inch (Common T-Slot Standard) Common Uses Ladder Securing: Prevent extension ladders from sliding forward during sudden stops. Lumber / Pipe Hauling: Keep long material bundles centered on the rack. Kayak / Canoe Transport: Pair with cam straps for rock-solid kayak mounting. Ski & Snowboard Racks: Create side barriers to keep skis from sliding off the ends. Firewood / Camp Gear: Build a cargo corral on your rack for loose camp items. Installation Slide the T-bolt into the T-slot channel from either end. Position the load stop where needed — typically 2-4 inches from the edge of your cargo. Hand-tighten the knob firmly. Test by pushing against the stop with moderate force. For heavy loads, pair with ratchet straps or cam straps for redundant security. Frequently Asked Questions Q: Will these fit my truck's factory cross bars?A: Only if your factory bars have a T-slot channel. Many factory bars are aerodynamic shapes without T-slots. Aftermarket ladder racks and overland racks almost always have T-slots. Q: What's the max load these can hold back?A: Load stops are positioning aids — they prevent shifting, not full tie-down. Never exceed your rack's weight rating. Use proper straps as primary tie-downs; use these as secondary cargo keepers. Q: Do they work on vertical T-slots (bed rack sides)?A: Yes — the T-bolts work in vertical or horizontal T-slot channels. Useful for creating side-to-side barriers on truck bed racks with side rails. Q: Can they be used on roof racks?A: Only if the roof rack cross bars have accessible T-slot channels. Most aerodynamic roof bars (Thule WingBar Evo, Yakima JetStream) have top-facing T-tracks compatible with these stops. Q: Will the nylon crack in cold weather?A: The reinforced nylon composite is rated for -20°F to +180°F. It remains impact-resistant even in extreme cold.
$83.99
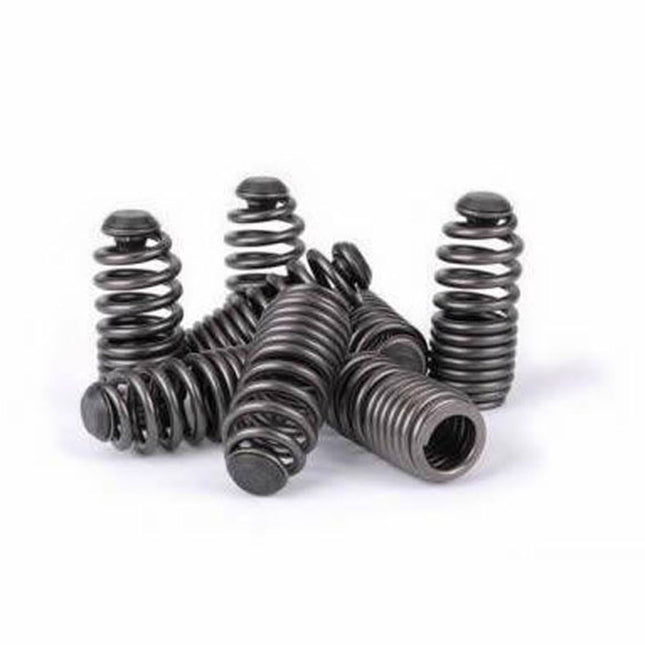
iFJF iFJF Lost Motion Assembly LMA For Acura/Honda B-Series VTEC B18/B16 312-05-0200
Product Overview The iFJF Lost Motion Assembly (LMA) is a direct replacement for the VTEC rocker arm mechanism in Honda B-series engines — including the legendary B16A, B16B, B18C, B18C1, and B18C5. The LMA is a spring-loaded plunger that maintains tension on the VTEC rocker arms during low-RPM (non-VTEC) operation. When LMAs wear out or seize, you get the dreaded "VTEC tick" — a rhythmic ticking noise from the cylinder head, poor VTEC engagement, and potential rocker arm damage. This kit of 8 LMAs replaces all units in a single cylinder head. Key Features Complete Set of 8: One head requires 8 LMAs — this set provides everything needed for a full replacement. No need to piece together individual units. OEM-Grade Spring Tension: Precision-calibrated internal springs match factory spring rates for correct VTEC rocker preload and smooth engagement/disengagement. Eliminates VTEC Tick: Collapsed or seized LMAs are the #1 cause of rhythmic cylinder head ticking at idle and low RPM. New LMAs restore quiet operation. B-Series Specific: Engineered for B16 and B18 VTEC cylinder heads. Inspect the tip condition and overall length to verify compatibility before installation. Restores Lost Power: Worn LMAs cause incomplete VTEC lobe engagement — you lose the high-RPM power bump that makes VTEC engines special. Compatibility Table Make Engine VTEC Applications Acura B18C1 / B18C5 DOHC VTEC Integra GSR / Type R Honda B16A / B16B DOHC VTEC Civic Si / Civic Type R / Del Sol VTEC Honda B18C DOHC VTEC Integra (JDM), Civic (swapped) Specifications Specification Value Part Number 312-05-0200 (OEM equivalent) Application B-Series DOHC VTEC Cylinder Heads Quantity 8 LMAs (Complete Head Set) Material Hardened Steel Body, Spring-Loaded Plunger Symptoms of Bad LMAs Rhythmic ticking from the valve cover area at idle — sounds like a sewing machine running at half engine speed VTEC engagement hesitation or "surging" during crossover (typically 4400-5800 RPM depending on engine) Loss of top-end power — dyno charts show a flat or declining power curve after VTEC should engage Metal debris in oil from severely worn LMA plunger faces Installation Notes LMA replacement requires removing the valve cover, camshafts, and VTEC rocker arm assembly. This is an advanced engine-internal job. The camshafts must be removed in the correct sequence to avoid warping. Use assembly lube on the LMA bores and soak new LMAs in engine oil before installation. Always replace the valve cover gasket and cam seals while you're in there. After installation, bleed the LMAs by letting the engine idle for 10-15 minutes before taking it above 3000 RPM. Frequently Asked Questions Q: Are these compatible with B20 (non-VTEC) engines?A: No. The B20B/B20Z does not have VTEC and does not use LMAs. These are strictly for DOHC VTEC B-series heads. Q: Can I just replace the noisy ones?A: You can, but it's false economy. The labor to access LMAs (cam removal) is the same whether you replace 1 or 8. If a few have failed, the rest are not far behind. Replace all 8 as a set. Q: How do these compare to OEM Honda LMAs?A: These meet the same dimensional and spring-rate specifications as OEM Honda part 312-05-0200. They are a cost-effective alternative for engines where OEM parts have become discontinued or prohibitively expensive. Q: What's the difference between intake and exhaust LMAs?A: On B-series DOHC VTEC heads, the intake and exhaust LMAs are the same part — they are interchangeable. All 8 units in this kit are identical. Q: Do I need to bleed or prime these before installation?A: Soak the LMAs in clean engine oil for 10-15 minutes before installation to pre-fill the internal oil passages. After assembly, idle the engine for 10+ minutes to allow full oil pressure priming before driving.
$27.99

iFJF iFJF Low Pressure Electric Fuel Pump For Volvo Penta 4.3L 5.0L 5.7L 92-06 21608511
Product Overview The iFJF Low Pressure Electric Fuel Pump is a direct replacement for the factory fuel pump on Volvo Penta 4.3L V6, 5.0L V8, and 5.7L V8 marine engines from 1992 through 2006. This pump delivers a consistent 4-7 PSI of fuel pressure to the carburetor — the exact specification these engines require. Whether you're replacing a failed pump, keeping a spare onboard, or doing a complete fuel system refresh, this pump provides reliable marine-grade performance at a fraction of dealer pricing. Key Features Marine-Specific Application: Designed for the unique demands of marine environments — corrosion-resistant housing, sealed electrical connections, and consistent flow characteristics in rough water conditions. Correct Pressure Range: Delivers 4-7 PSI — the target pressure for carbureted Volvo Penta V6 and V8 engines. Too much pressure floods the carb; too little starves the engine at WOT. 12V Universal Fit: Standard two-wire positive/negative connection. Includes mounting bracket and pre-attached fuel line fittings for common 5/16-inch and 3/8-inch marine fuel hose. Replaces OEM 21608511: Direct interchange with Volvo Penta part number 21608511 and equivalent aftermarket pumps. Quiet Operation: Rubber-isolated mounting bracket minimizes vibration transfer to the hull — a common complaint with generic electric pumps. Compatibility Table Year Make Engine Fuel System 1992-2006 Volvo Penta 4.3L V6 (GL, GS, GSi) Carbureted 1992-2006 Volvo Penta 5.0L V8 (GL, Gi) Carbureted 1992-2006 Volvo Penta 5.7L V8 (GS, GSi) Carbureted Specifications Specification Value Part Number (OEM) 21608511 Voltage 12V DC Pressure Range 4-7 PSI Flow Rate 30+ GPH (Free Flow) Inlet/Outlet 5/16-inch or 3/8-inch Hose Barb Polarity Negative Ground Signs Your Fuel Pump Needs Replacement Hard starting — engine cranks but takes excessive time to fire, especially after sitting Stalling under load — engine dies when you throttle up from idle No-start after winter storage — old fuel varnish seizes the pump internals Intermittent fuel delivery — engine surges or cuts out randomly on the water Audible pump failure — no clicking sound from the pump when the ignition is turned on Installation Guide Disconnect the battery before starting. Remove the old pump from its mounting bracket (typically on the port side of the engine near the fuel filter/separator). Transfer the bracket or use the included one. Connect the fuel lines — pay attention to flow direction (arrow on the pump body). Wire the red lead to ignition-switched 12V and the black lead to a clean ground. Prime the system by cycling the ignition 3-4 times before starting. Check all connections for leaks before heading out on the water. Need the Complete Assembly? This low pressure electric fuel pump is the pump unit inside the Volvo Penta electric fuel pump assembly (21608511 / 21545142) — the complete plug-and-play kit with mounting bracket, inlet/outlet fittings, and gasket. If you are replacing the whole fuel delivery unit, the complete assembly saves installation time and ships in one box. Frequently Asked Questions Q: Will this work on a Mercruiser 4.3L?A: While Mercruiser and Volvo Penta use similar GM-based blocks, fuel pump specifications may differ. Verify your Mercruiser's required fuel pressure before purchasing. This pump is specifically spec'd for Volvo Penta applications. Q: Can I use this for fuel injection (EFI/MPI) engines?A: No! EFI systems require 35-60 PSI. This is a low-pressure pump (4-7 PSI) for carbureted engines only. Using it on an EFI engine will result in a no-start condition. Q: Is this Coast Guard compliant for marine use?A: This pump is designed for marine engine compartments and uses sealed, ignition-protected construction. Always verify compliance with your local marine safety regulations. Q: Should I replace the fuel filter at the same time?A: Yes — absolutely. A new pump paired with an old, clogged fuel filter will fail prematurely. Replace the water-separating fuel filter and any inline filters simultaneously. Q: How long do these pumps typically last?A: In marine applications with regular use and clean fuel, expect 5-8 years of reliable service. Ethanol-blended fuels and long storage periods shorten pump life — consider adding a fuel stabilizer for winter layup.
$93.99

iFJF iFJF Lower Cap Fuel Filter Housing Heater For Ford 6.9L 7.3L IDI Diesel F2TZ9B249A
Product Overview The iFJF Lower Cap Fuel Filter Housing Heater replaces the factory fuel heater assembly on 1983-1994 Ford F-Series and E-Series trucks equipped with the 6.9L or 7.3L IDI (Indirect Injection) diesel engine. The factory Stanadyne fuel filter header uses an electric heating element in the lower cap to warm diesel fuel during cold starts — preventing wax crystal formation ("gelling") that can clog the filter and leave you stranded on a freezing morning. When the heater fails or the cap threads strip, this complete replacement cap restores cold-weather reliability. Key Features Complete Assembly: Includes the lower filter cap, integrated heating element, wiring connector, and sealing gasket — everything needed to replace a failed factory unit. Prevents Fuel Gelling: The 200W heating element warms diesel fuel passing through the filter, keeping paraffin wax in solution and maintaining fuel flow down to well below freezing. Direct OEM Replacement: Replaces Ford part number F2TZ9B249A and other equivalent lower cap assemblies used on the Stanadyne 80-series filter header. IDI-Specific Fit: Designed for the 6.9L (1983-1987) and 7.3L (1988-1994) IDI engines — does NOT fit the 7.3L Power Stroke (1994.5-2003) which uses a completely different fuel filtration system. Durable Construction: Threaded aluminum cap body with corrosion-resistant coating and weather-sealed electrical connector. Compatibility Table Year Make Engine Fuel System 1983-1987 Ford 6.9L IDI Diesel Stanadyne DB2 Injection Pump 1988-1994 Ford 7.3L IDI Diesel Stanadyne DB2 Injection Pump 1988-1994 Ford 7.3L IDI Turbo Stanadyne DB2 Injection Pump Specifications Specification Value OEM Part Number F2TZ9B249A Heater Wattage 200W Voltage 12V DC Filter Header Type Stanadyne 80-Series Why the Fuel Heater Matters IDI diesels use mechanical fuel injection (Stanadyne DB2 pump) with higher fuel viscosity sensitivity than modern common-rail engines. When diesel fuel drops below its cloud point (typically 10-15°F for #2 diesel), paraffin wax crystals form and rapidly clog the filter media — even with a brand new filter element. The factory fuel heater in the lower cap prevents this by warming fuel before it enters the filter media. Without a working heater, cold starts below freezing risk immediate filter plugging and engine stall. Installation Notes Unscrew the old lower cap (it may be tight after decades of heat cycling — a strap wrench helps). Clean the filter header threads thoroughly. Apply a thin film of clean diesel to the new O-ring seal. Thread the new cap on by hand to avoid cross-threading, then tighten firmly. Connect the wiring harness — the connector is keyed and only fits one way. Test by turning the ignition to "ON" — the heater should draw approximately 15-17 amps briefly before the internal thermostat cycles it off. Frequently Asked Questions Q: Will this fit my 1995 Power Stroke?A: No. The 1994.5-2003 7.3L Power Stroke uses a completely different fuel bowl and filter system. This cap is for the earlier IDI engines (1983-1994) with the Stanadyne filter header. Q: How do I test if my current heater is working?A: With the engine cold and the key ON (engine off), the lower cap should feel warm to the touch within 30-60 seconds. You can also check current draw — a working heater pulls 15-17 amps on a cold start. Q: Can I run without the heater in warm climates?A: In consistently warm areas (never below 30°F), you can technically run without the heater — but the lower cap is needed to seal the filter housing. A non-heated cap doesn't exist from the factory, so this replacement is your best option regardless of climate. Q: Do I need to replace the filter at the same time?A: It's recommended. If you're opening the filter housing, replace the filter element (Motorcraft FD-3374 or equivalent) while you're there. Old filters restrict flow even if they look clean. Q: Will this fix hard cold starts?A: If your IDI starts hard specifically on cold mornings (below 40°F) but runs fine once warm, a failed fuel heater could be part of the problem — along with glow plugs, glow plug relay, and injector condition. The fuel heater prevents filter gelling; it doesn't aid combustion directly.
$47.99

iFJF iFJF Lower Door Insert Panels Compatible with 2014-2020 Polaris RZR XP 1000 4-Door 2016-2020 Turbo 4-Door 2015-2019 RZR 900 4-Door
Product Overview The iFJF Lower Door Insert Panels are designed to close the gap on Polaris RZR half doors — keeping mud, rocks, sticks, and trail debris out of the cabin. If you've ever taken your RZR through a mud hole only to have the floorboards fill with crud, you know exactly why these exist. These panels fill the lower opening on factory half doors, dramatically improving cabin cleanliness and passenger comfort without the cost or complexity of full door kits. Compatible with 2014-2020 Polaris RZR XP 1000 4-door and Turbo 4-door models. Key Features Keeps the Cabin Clean: Blocks mud, gravel, sticks, and water spray from entering through the lower door opening — your passengers stay clean and your interior stays dry. Clip-On Installation: No drilling, no cutting, no permanent modification. Panels attach to the factory half door frame using the included spring clips and mounting hardware. Installation takes 15-20 minutes per side. Heavy-Duty UV-Stabilized Poly: Made from thick, impact-resistant polymer that won't crack in sub-zero temperatures or warp in desert heat. Textured black finish matches factory interior plastics. 4-Door Set: This kit includes all four lower door inserts — front left, front right, rear left, rear right — for complete coverage on 4-door RZR models. OEM-Look Integration: Designed to blend with the factory door shape and interior styling — looks like it came from the Polaris factory, not a backyard garage mod. Compatibility Table Year Make Model Doors 2014-2020 Polaris RZR XP 1000 4-Door (Crew) 2016-2020 Polaris RZR XP Turbo 4-Door (Crew) 2015-2019 Polaris RZR 900 4-Door (Crew) Specifications Specification Value Material Impact-Resistant UV-Stabilized Polymer Finish Textured Black Fitment Factory Half Doors Only Kit Includes 4 Panels (Front L+R, Rear L+R), Clips, Hardware Installation Clip-On — No Drilling Required Why You Need Lower Door Inserts Polaris RZR half doors provide rollover protection and a secure armrest — but their open lower section is a major design compromise. Every trail ride becomes a cleanup session: mud on the seats, gravel in the cupholders, and water soaking the floor mats. Lower door inserts solve this problem at a fraction of the cost of full doors while maintaining the open-air feel that makes a RZR fun to drive. Unlike fabric door lowers that flap, sag, and tear, these rigid polymer panels stay put and last for years. Installation Guide Clean the inner door frame surface where the panel will attach. Position the lower insert against the door frame opening — align the mounting points. Attach spring clips to the panel edge tabs. Press the panel firmly onto the door frame — clips snap into place with an audible click. Secure any additional screw points through the provided pre-drilled holes. Repeat for the remaining three doors. Check that all panels are flush and secure before riding. Frequently Asked Questions Q: Will these fit a 2-door RZR?A: No. This kit is specifically for the 4-door (crew) RZR models. The 2-door lower door opening dimensions are different. Q: Are these compatible with aftermarket doors?A: These are designed for factory Polaris half doors. Aftermarket doors from companies like Pro Armor, Assault Industries, or DragonFire have different frame geometries — verify fitment before ordering. Q: Can I still use my factory door nets with these installed?A: Yes. The inserts mount to the lower door frame and do not interfere with the upper door net or latch mechanism. Q: Will these warp in high heat?A: The UV-stabilized polymer is rated for continuous exposure up to 180°F. Arizona summers and desert riding won't cause warping or deformation. Q: Can these be painted or wrapped?A: The textured surface accepts adhesion promoter and plastic-rated paint. For wraps, a light scuff with 400-grit sandpaper improves vinyl adhesion. Test a small area first.
$299.99

iFJF iFJF LS Billet Oil Bypass Check Valve Plug For Engines LS1 LS2 LS3 LS6 LS7 LS9 LQ4 LQ9 4.8L 5.3L 6.0L
Protect Your LS Engine from Unfiltered Oil Contamination The iFJF LS Billet Oil Bypass Check Valve Plug is a critical upgrade for LS-series engine builders. The factory oil bypass check valve can allow unfiltered oil to reach bearings, lifters, and camshafts — causing premature wear. Our billet aluminum plug permanently seals this pathway, ensuring 100% filtered oil to your engine internals. Key Features Billet 6061-T6 Aluminum — CNC-machined from aircraft-grade aluminum for maximum durability and corrosion resistance Complete Bypass Elimination — Permanently seals the bypass port, preventing unfiltered oil from circumventing the filter under high-pressure conditions Threaded Removal Port — Built-in extraction hole for easy removal during engine teardowns Universal LS Compatibility — Fits all Gen III (1997-2007) and Gen IV (2005-2017) LS-based engines No Modification Required — Drop-in installation with basic hand tools Compatibility Engine Displacement Vehicle Examples LS1 5.7L 1997-2004 Corvette, 1998-2002 Camaro/Firebird LS2 6.0L 2005-2007 Corvette, GTO, CTS-V LS3/LS6 6.2L/5.7L 2008-2013 Corvette, 2001-2004 Z06 LS7 7.0L 2006-2013 Corvette Z06, Camaro Z/28 LS9/LSA 6.2L SC 2009-2013 ZR1, 2009-2015 CTS-V LQ4/LQ9 6.0L 1999-2007 Silverado/Sierra HD LM7/LR4 4.8L/5.3L 1999-2007 Silverado/Tahoe/Suburban Installation Steps Drain engine oil and remove oil filter Locate bypass valve near oil filter housing Remove factory bypass valve Clean mating surface thoroughly Install iFJF billet plug — torque to 18-22 ft-lbs Reinstall filter, refill oil, check for leaks Frequently Asked Questions Q: Will this increase oil pressure?A: No. The plug seals the bypass pathway, forcing all oil through the filter. Oil pressure remains unchanged. Q: Is this safe for daily driving?A: Yes, as long as you maintain regular oil changes (3,000-5,000 miles). This is standard practice in performance engine building. Q: Does this fit all LS engines?A: Yes — all Gen III and Gen IV LS-based engines: LS1, LS2, LS3, LS6, LS7, LS9, LQ4, LQ9, LM7, LR4, LM4, L33, L76, L92, L99. Q: Can I remove it later?A: Yes, the threaded removal port allows easy extraction during engine disassembly. Q: Does this work for forced induction builds?A: Yes. Billet 6061-T6 aluminum handles all power levels including 1000+ HP turbo/supercharged setups. Q: What tools do I need?A: Basic hand tools and a torque wrench. No special tools required.
$25.99

iFJF iFJF LT890 Truck Brake Spring Tool Adjustable Anchor Pin Spings Installer Heavy Duty Spring Removal Tool LTI890 890 (Yellow)
Heavy-Duty Truck Brake Spring Tool — Professional Grade The iFJF LT890 Truck Brake Spring Tool is engineered for professional mechanics and fleet maintenance crews. Designed to make adding and removing brake springs faster, safer, and more efficient — eliminating the need for pry bars, vise grips, or dangerous improvised methods. Key Features Heavy-Duty Steel Construction — Forged from high-quality corrosion-resistant steel for years of reliable service Adjustable Anchor Pin Design — Accommodates various brake spring sizes and configurations across truck makes One-Person Operation — Complete brake spring installation and removal without a helper Ergonomic Handle — Comfortable grip reduces fatigue during repetitive brake service work Secure Spring Retention — Keeps the spring in position, eliminating dangerous spring pop-off Bright Yellow Finish — Easy to locate in a crowded toolbox Applications Vehicle Type Examples Class 6-8 Semi Trucks Freightliner, Kenworth, Peterbilt, Volvo, International Heavy-Duty Trailers Flatbeds, tankers, dry vans, reefers Dump Trucks / Vocational Mack, Western Star, Autocar Buses / RVs Coach buses, school buses, large motorhomes Why Use a Dedicated Brake Spring Tool? Brake springs on heavy trucks are under extreme tension. Using screwdrivers, vise grips, or pry bars is dangerous — springs can suddenly release, causing serious injury. The LT890 gives you controlled leverage for precise, safe spring manipulation every time. Specifications Spec Detail Material Forged Steel, Anti-Corrosion Coated Weight ~2.5 lbs Compatible With S-Cam Drum Brake Systems Replaces LTI890, LT890, Brake Spring Tool 890 Frequently Asked Questions Q: What brake systems does the LT890 work with?A: The LT890 is compatible with S-cam drum brake systems found on Class 6-8 trucks, including Freightliner, Kenworth, Peterbilt, Volvo, International, and Mack. Q: Is this a one-person tool?A: Yes! The adjustable anchor pin design allows single-person brake spring installation and removal. Q: What material is it made from?A: Heavy-duty forged steel with anti-corrosion treatment for long service life. Q: Does it come with instructions?A: The tool is intuitive to use. Basic brake spring experience is recommended. Q: Can this replace the LTI890?A: Yes, this is a direct replacement for the LTI890 (also known as LT890 or 890 brake spring tool). Q: Will it work on trailer brakes?A: Yes, compatible with heavy-duty trailer brake systems including semi-trailers.
$49.99

iFJF iFJF Magnetic Keyhole Covers for Jeep Wrangler JL JT (2018-2024)
Magnetic Keyhole Covers for Jeep Wrangler JL JT (2018-2024) Protect your Jeep's door locks with these precision-engineered magnetic keyhole covers. Designed specifically for 2018-2024 Jeep Wrangler JL and Gladiator JT models, these covers shield your keyholes from dirt, road salt, moisture, and ice — preventing corrosion and frozen locks. The magnetic design ensures a secure snap-on fit that stays in place on and off the trail, while allowing easy removal when you need key access. Key Features Magnetic Snap-On Design: Strong neodymium magnets ensure a secure hold at highway speeds and on rough trails. No adhesive, no drilling, no permanent modification. All-Weather Protection: Shields keyholes from rain, snow, ice, road salt, mud, and dust. Prevents frozen locks in winter and corroded cylinders year-round. Precision Fit: Custom-designed for 2018-2024 Wrangler JL and JT models. Contoured to match the door handle profile for a flush, factory look. Durable Construction: Made from high-impact ABS plastic with UV-resistant coating to prevent fading and cracking in direct sunlight. Quick Removal: Pops off in seconds when you need key access. Reattaches just as easily — no tools required. Vehicle Compatibility Year Make Model Engine 2018-2024 Jeep Wrangler JL / JLU All Engines 2018-2024 Jeep Gladiator JT All Engines Technical Specifications Specification Detail Material High-Impact ABS Plastic + Neodymium Magnets Fitment 2018-2024 Jeep Wrangler JL / Gladiator JT Installation Magnetic Snap-On — No Tools Required Color Matte Black with Flag Design Why Choose iFJF? At iFJF, we specialize in premium aftermarket parts for diesel trucks, performance cars, and off-road vehicles. Every product is manufactured to strict quality standards with precision engineering, backed by responsive US-based customer support, and shipped fast from our warehouse. We stand behind our products so you can buy with confidence. Frequently Asked Questions Q: Will these fit my Wrangler JL?A: Yes. These magnetic keyhole covers are designed specifically for the 2018-2024 Jeep Wrangler JL and Gladiator JT door handles. They will NOT fit JK or earlier Wrangler models. Q: Do the magnets affect my key fob or electronics?A: No. The neodymium magnets are small and positioned away from electronic components. They will not interfere with your key fob, door locks, or any vehicle electronics. Q: Will these stay on at highway speeds?A: Yes. The magnetic hold is strong enough to stay secure at highway speeds and on rough off-road trails. They have been tested extensively in real-world conditions. Q: How do I remove them when I need to use the key?A: Simply pull the cover off — it detaches easily with a firm grip. The magnets hold securely but don't require excessive force to remove. No tools needed. Q: Will these scratch my paint?A: No. The covers have a smooth, non-abrasive backing that won't scratch your door paint. The magnet makes contact with the metal keyhole cylinder, not the paint surface. Order today and experience the iFJF difference — quality parts, fast shipping, and US-based support.
$29.99
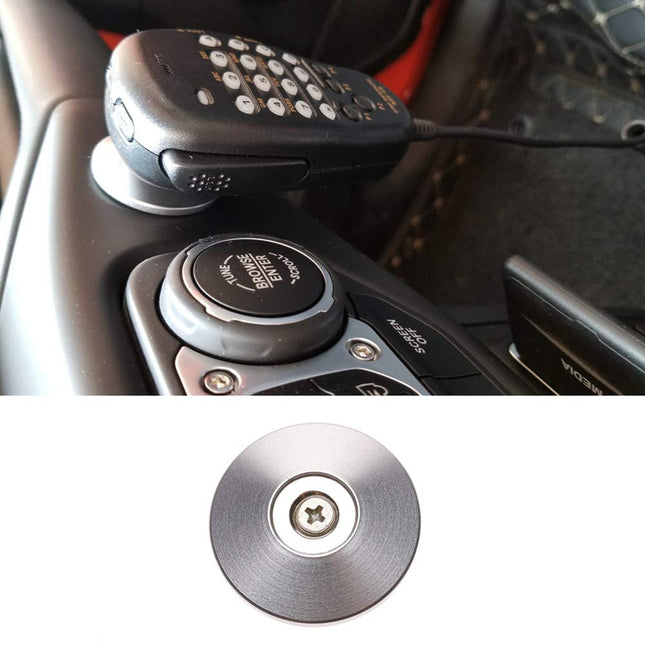
iFJF iFJF Magnetic Microphone Hand-Mic Mount Base for FTM-300DR FTM-300 FTM-7250DR FTM-7250 FTM-400DR FT-450D for Wrangler Chevy FD Off-Road SUV (Silver)
Overview Take your trail communications to the next level with the iFJF Magnetic Hand-Mic Mount Base in Silver. This innovative mount uses a powerful magnetic quick-release mechanism that lets you grab your Yaesu microphone instantly when you need to communicate and snap it back just as fast when done. The elegant silver finish adds a premium touch to your Jeep Wrangler Chevy off-road SUV or any adventure vehicle. Compatibility Category Compatible Models Radio Models Yaesu FTM-300DR FTM-300 FTM-7250DR FTM-7250 FTM-400DR FT-450D Vehicle Fitment Jeep Wrangler JK/JKU/JL/JLU/YJ/TJ Chevy Off-Road SUVs FD Off-Road SUVs Mounting Location Roll Bar Dashboard Center Console Key Features Magnetic Quick-Release: Powerful neodymium magnets provide instant grab-and-go functionality — no clips or latches to fumble with Wide Yaesu Compatibility: Engineered for FTM-300DR FTM-7250DR FTM-400DR and FT-450D handheld microphones Premium Silver Finish: Electroplated silver coating delivers sophisticated look with superior corrosion resistance Secure Off-Road Hold: High-strength magnetic connection keeps the microphone firmly in place during aggressive trail driving Versatile Installation: Mounts on roll bars and dashboards for optimal communication positioning Rugged Construction: Built to withstand dust mud moisture and the harsh realities of off-road adventures Technical Specifications Specification Value Color Silver (Electroplated) Compatible Radios Yaesu FTM-300DR/FTM-300/FTM-7250DR/FTM-7250/FTM-400DR/FT-450D Mounting Style Magnetic Quick-Release / Roll Bar Clamp Magnet Type Neodymium (High-Strength Rare Earth) Material High-Strength Alloy Steel with Silver Electroplate Package Includes 1x Magnetic Hand-Mic Mount Base 1x Magnetic Mic Plate Installation Select Location: Choose a mounting point on your roll bar or dashboard easily accessible to the driver Attach Magnetic Plate: Affix the included magnetic plate to the back of your Yaesu handheld microphone Secure Mount Base: Fasten the mount base to your chosen location using appropriate hardware (varies by vehicle) Test Magnetic Hold: Place the microphone on the mount — the magnets should engage firmly and hold securely Trail Test: Drive over bumpy terrain to verify the magnetic connection maintains solid grip under vibration Why Choose iFJF? Magnetic Innovation: Unlike traditional clip mounts that wear out the magnetic system maintains consistent holding force Instant Communication: Magnetic quick-release lets you grab your microphone in a split second — critical off-road Off-Road Tested: iFJF products developed and tested by actual off-road enthusiasts Complete Package: Includes both the mount base and magnetic microphone plate — everything needed for installation FAQ Q: Does the magnet interfere with radio signal?A: No neodymium magnets are positioned away from the antenna and do not affect transmission or reception quality. Q: Will the magnet hold on very rough trails?A: High-strength neodymium magnets are rated to hold securely through aggressive off-road conditions including rock crawling and desert running. Q: Do I need to modify my microphone?A: The kit includes an adhesive-backed magnetic plate that attaches to the back of your microphone. No permanent modification required. Q: Can I use with non-Yaesu radio microphones?A: The magnetic plate is designed for Yaesu FTM-series microphone form factor. Other brands may require modification for the plate to fit. Q: Does the magnet lose strength over time?A: Neodymium magnets maintain their strength essentially permanently under normal use conditions and vehicle temperature ranges.
$23.99
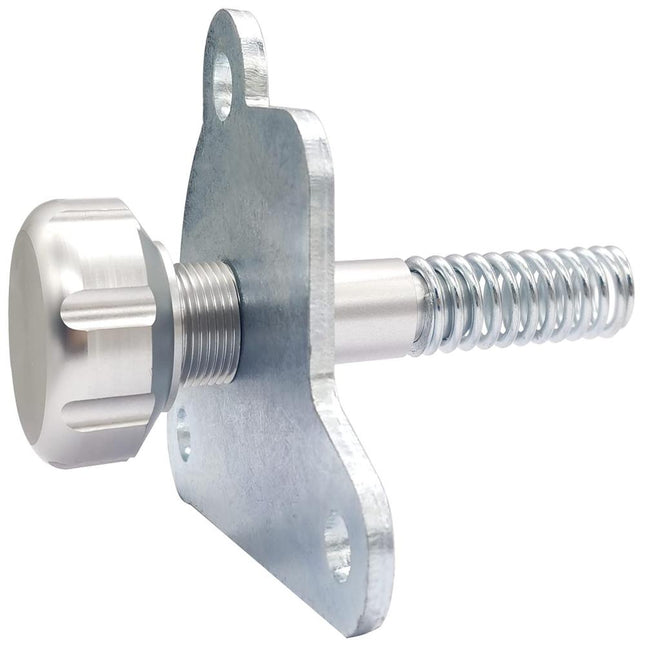
iFJF iFJF Manual Swaybar Disconnect 1087 Aluminum for 07-17 JK JKU Rubicon Replace Electric Swaybar Silver Easy Installation
Ditch the Failing Electric Swaybar — Go Manual The factory electric swaybar disconnect on Jeep JK Rubicon models is convenient — until it shorts out, fails, or refuses to re-engage. The iFJF Manual Swaybar Disconnect (1087) replaces the problematic electric unit with a simple, bulletproof manual alternative that works every time, in any gear, on any terrain. Key Features CNC-Machined 6061 Aluminum — Lightweight, strong, and corrosion-resistant. Won't rust like steel alternatives Simple Dial Operation — Turn to disconnect, turn back to reconnect. No bouncing, no pins, no links to remove Works at Any Articulation — Disconnect or reconnect on uneven ground without wrestling with alignment No Electronics — Eliminates water damage, short circuits, and CANbus errors Direct Replacement for OE 1087 — Bolts in where your electric swaybar motor currently sits Compatibility Vehicle Years Notes Jeep Wrangler JK Rubicon 2007-2017 2-door and 4-door (JKU) Why Upgrade? The Rubicon's electric swaybar disconnect is notorious for failure: motor burnout from water immersion, CANbus errors causing warning lights, and failure to reconnect on uneven terrain. The manual 1087 unit eliminates all these problems. Installation Disconnect battery and remove electric swaybar motor (skid plate may need removal) Remove factory swaybar disconnect motor assembly Install iFJF 1087 manual unit in its place using factory bolts Connect the manual dial — test operation before reassembly Reinstall skid plate and reconnect battery Frequently Asked Questions Q: Will this fit my 2015 JKU Rubicon?A: Yes, fits all 2007-2017 Jeep Wrangler JK and JKU Rubicon models with factory electric disconnect. Q: How do I reconnect the swaybar?A: Simply turn the dial in the opposite direction. The swaybar reconnects automatically when aligned. Q: Does this affect on-road handling?A: When reconnected, the swaybar functions exactly like factory. On-road handling is unchanged. Q: Is installation difficult?A: Moderate difficulty. Basic mechanical skills and hand tools needed. About 30-45 minutes. Q: Will this trigger warning lights?A: The CANbus may detect the disconnected motor. Some users use a programmer to disable the warning. Q: Is this lighter than the electric unit?A: Yes. Aluminum construction is significantly lighter than the factory electric motor assembly.
$69.99
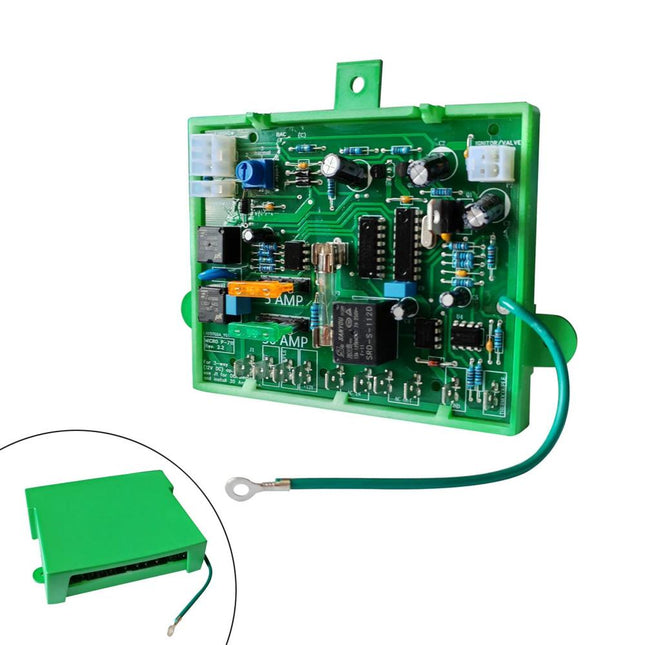
iFJF iFJF Micro P-711 Refrigerator Control Circuit Board fit 2-Way and 3-Way Models Replace RV Black Box Part Electronics Main Power Control Board
Universal RV Refrigerator Control Board — Micro P-711 The Micro P-711 is the industry-standard replacement control board for Dometic and Norcold RV refrigerators. If your fridge has stopped cooling, the control board is the most common failure point — and this board is the most reliable replacement available, compatible with over 30 refrigerator models. Key Features Built-in Temperature Adjustment — Precise thermistor-based control for safe food storage Automatic System Detection — Self-configures for 2-way (LP gas/120V) or 3-way (LP/120V/12V) operation Surge Protection — Improved circuit protection against campground power fluctuations Food Saver Feature — Automatic restart attempt after power loss to protect food Enhanced Thermocouple Circuit — More reliable flame sensing for LP gas operation Moisture-Resistant Coating — Conformal coating protects against humidity and condensation Replaces Part Numbers Direct replacement for boards starting with "293" — including: 2931842.01-04, 2931843.01-04, 2932691.017, 2932177.01, 2932695.01, 2932770.01, 2932881.01/.010, and more. Compatible Models (Partial) S1521, S1531, S1621, S1631, S1821, S1831, NDR1062, NDR1272, NDR1282, NDR1292, NDR1492, RM2551-4, RM2607, RM2611-2, RM2652, RM2807, RM2811-2, RM2852, RM3607, RM3662-3, RM3807, RM3862-3, RM4872-3, RM7030, RM7130, RM7732, RM7832 — and many more. Installation Disconnect ALL power sources — 120V AC, 12V DC, and LP gas Remove refrigerator access panel Photograph existing wiring connections for reference Disconnect old board and remove mounting screws Mount new Micro P-711 board and reconnect wiring per labeled terminals Restore power and test on all modes (AC, DC, LP) Frequently Asked Questions Q: How do I know if my control board is bad?A: Symptoms: fridge not cooling on any mode, no display lights, clicking but no ignition, intermittent operation, or error codes. Q: Is this plug-and-play?A: Yes. Connectors are clearly labeled. Works with original or updated wiring. Manual included. Q: Does this work with my older Dometic fridge?A: If your board part number starts with '293', the P-711 is a direct replacement. Q: Will this fix gas operation issues?A: If the control board is the cause, yes. The P-711 has an improved thermocouple circuit. Q: Do I need a technician?A: Most DIYers can install in under 30 minutes. Disconnect all power sources first!
$77.99

iFJF iFJF Mounting Clamps Truck Caps Camper Shell for Chevy 1500 2500 3500 F150 F250 F350 Dodge Ram Toyota Titan Silver Universal
Universal Truck Cap Clamps — One Set Fits Almost Everything The iFJF Universal Truck Cap Clamps provide a secure, rattle-free mounting solution for your pickup truck cap, camper shell, or topper — regardless of brand. With a universal clamp profile that fits the bed rails of virtually every full-size and mid-size pickup on the road, you get flexibility and reliability in one set. This 6-piece set gives you enough clamps for standard installation (4 required) plus 2 spares, or 6-point mounting for long-bed trucks and heavy-duty caps. Key Features Universal Bed Rail Fit — Compatible with most full-size and mid-size pickup truck bed rails Set of 6 Clamps — 4 for standard mounting + 2 spare, or 6-point mounting for long beds Heavy-Duty Powder-Coated Steel — Rust and corrosion resistant for all-weather durability Tool-Free Hand-Tighten Knobs — Quick installation and removal without tools Non-Marring Rubber Contact Pads — Protect your truck's paint from scratches and dents Wide Clamping Surface — Distributes pressure evenly for a secure, rattle-free hold Vibration-Resistant Design — Locking mechanism prevents loosening on rough terrain Compatible Truck Models Brand Models Years Chevrolet / GMC Silverado/Sierra 1500, 2500, 3500 1999+ Ford F-150, F-250, F-350 Super Duty 1997+ Dodge / Ram Ram 1500, 2500, 3500 1994+ Toyota Tundra, Tacoma 1995+ Nissan Titan, Frontier 1998+ How Many Clamps Do You Need? Standard short bed (5.5–6.5 ft): 4 clamps minimum Standard long bed (8 ft): 4–6 clamps recommended Heavy fiberglass cap: 6 clamps recommended regardless of bed length Off-road / rough terrain: 6 clamps for maximum security Commercial / work truck: 6 clamps for heavy-duty reliability Installation Guide Position your truck cap or camper shell on the bed rails Center the cap side-to-side, ensuring even overhang on both sides Slide each clamp under the bed rail lip, aligning with the cap's mounting flange Hand-tighten the knobs until snug — the rubber pad should make firm contact Distribute clamps evenly (minimum 2 per side, 3 per side for 6-point mounting) Re-check tightness after 50 miles and periodically thereafter Never use power tools! Hand-tightening provides the correct clamping force without risking damage Frequently Asked Questions Q: How many clamps do I actually need?A: Most standard caps use 4 clamps. This 6-piece set gives you the option of 2 extra security points or 2 spares. Long beds, heavy caps, and off-road use benefit from all 6. Q: Will these scratch my truck's paint?A: No — each clamp features a thick rubber pad at the contact point that prevents metal-on-metal contact and protects your paint. Q: Do I need to drill any holes?A: Zero drilling required. These clamps grip the underside of your bed rail — no permanent modifications to your truck. Q: Will these work with a plastic bed liner?A: Yes. You may need to trim the bed liner slightly at clamp contact points for optimal grip. Spray-in bedliners typically require no trimming. Related Products Complete your build with these complementary iFJF products: iFJF Truck Cap Clamps 4-Pack — Chevy/GMC iFJF 4 Diesel Dual Stack Kit iFJF Door Cable Repair Kit 32 Ends Frequently Asked Questions Q: Will these clamps fit my truck?A: Designed for full-size pickup trucks with standard bed rails. Check compatibility details for your year, make, and model. If you have aftermarket bed rails or bed liner, verify clamp depth. Q: What is the weight capacity?A: Each clamp is rated to secure camper shells under normal driving conditions. When properly torqued, the set provides secure retention at highway speeds and on rough terrain. Check tightness after first 100 miles. Q: Do I need to drill holes?A: No. These are clamp-on mounting brackets that attach without drilling or permanent modification. Compression force against the bed rail lip preserves resale value and prevents rust. Q: What material are these made from?A: Heavy-gauge steel with corrosion-resistant coating (powder coat or zinc plating) to withstand outdoor exposure. Q: Can I install these by myself?A: A second person to help position the camper shell makes installation easier. Basic hand tools required — typically a 1/2-inch or 13mm socket and ratchet. Q: What is the warranty?A: iFJF truck accessories come with a 1-year warranty against manufacturing defects. 🔧 Related Products Browse All Chevy Ram/Titan Parts — Compatible gaskets, hardware & upgrades Exhaust Gaskets & Hardware — Fresh gaskets recommended for every install 📖 Helpful Resources iFJF Installation Guides — Step-by-step tutorials for your vehicle Contact Our Support Team — Expert advice for your setup
$79.99

iFJF iFJF Mounting Clamps Truck Caps Camper Shell for Chevy Silverado Sierra 1500 2500 3500 (Set of 4)
Secure Your Truck Cap — Chevy/GMC Optimized Fit These iFJF truck cap mounting clamps are specifically designed for Chevrolet Silverado and GMC Sierra pickups. The clamp profile is precision-engineered to match the bed rail geometry of GM full-size trucks, delivering maximum grip and security that universal clamps simply can't match. Whether you're hauling gear to the job site, heading out for a weekend camping trip, or just want to keep your truck cap firmly in place on the highway, these clamps provide rattle-free, paint-safe mounting with zero drilling required. Key Features Chevy/GMC Optimized Clamp Profile — Precision-matched to Silverado and Sierra bed rail dimensions for superior grip Heavy-Duty Powder-Coated Steel — Rust-resistant black finish built for all-weather durability Set of 4 Clamps — Ideal for standard-length truck caps and camper shells Non-Marring Rubber Contact Pads — Protect your truck's paint from scratches and pressure marks Tool-Free Hand-Tightening Knobs — Wide, ergonomic knobs provide excellent leverage without tools Vibration-Resistant Locking Mechanism — Clamps stay tight on rough roads, highways, and off-road terrain No Drilling Required — Installs in minutes with zero permanent modifications to your truck Vehicle Compatibility Make Model Cab/Bed Configs Years Chevrolet Silverado 1500 All bed lengths 1999–2025 Chevrolet Silverado 2500HD/3500HD All bed lengths 2001–2025 GMC Sierra 1500 All bed lengths 1999–2025 GMC Sierra 2500HD/3500HD All bed lengths 2001–2025 Specifications Spec Detail Material Powder-Coated Heavy-Duty Steel Quantity 4 Clamps (complete set with hardware) Installation Hand-tighten, no drilling, no special tools Application Truck Cap, Camper Shell, Topper, Bed Cover Weather Resistance Rust-proof powder coat, UV-stable rubber pads Installation Guide Position your truck cap on the bed rails and center it side-to-side Slide each clamp under the bed rail lip, aligning it with the cap's mounting flange Hand-tighten the knob until snug — the rubber pad should make firm contact with the bed rail Install all 4 clamps, distributing them evenly along the bed rails (2 per side) Re-check tightness after 50 miles of driving and periodically thereafter Important: Hand-tighten only — do NOT use power tools. Over-tightening can damage the bed rail or cap flange Pro Tips With Bed Liners: You may need to trim the bed liner slightly at clamp contact points for the best grip Long-Bed Trucks: Consider our 6-piece clamp set (sold separately) for 8-ft beds or heavy caps Winter Use: Check clamp tightness after temperature swings — metal contracts in cold weather Off-Road Use: Add 1–2 extra clamps beyond the standard 4 for rough terrain security Frequently Asked Questions Q: Will these fit a 2024 Silverado 1500 with the Multi-Flex tailgate?A: Yes! The bed rail design on GM full-size trucks has remained consistent from 1999 through 2025, including models with the Multi-Flex/Multi-Pro tailgate. Q: Do I need to remove my factory spray-in bedliner?A: No. You may need to trim the bedliner slightly where the clamp contacts the bed rail for optimal grip. Q: Can I leave these on year-round?A: Yes — powder-coated steel and UV-stable rubber pads are designed for permanent outdoor installation in all climates. Q: Will these work with LEER, ARE, or SnugTop caps?A: Yes. These clamps are compatible with all major truck cap and camper shell brands on Chevy Silverado and GMC Sierra trucks. Related Products Complete your build with these complementary iFJF products: iFJF Universal Truck Cap Clamps 6-Pack iFJF 4 Diesel Dual Stack Kit iFJF Door Cable Repair Kit 32 Ends Frequently Asked Questions Q: Will these clamps fit my truck?A: Designed for full-size pickup trucks with standard bed rails. Check compatibility details for your year, make, and model. If you have aftermarket bed rails or bed liner, verify clamp depth. Q: What is the weight capacity?A: Each clamp is rated to secure camper shells under normal driving conditions. When properly torqued, the set provides secure retention at highway speeds and on rough terrain. Check tightness after first 100 miles. Q: Do I need to drill holes?A: No. These are clamp-on mounting brackets that attach without drilling or permanent modification. Compression force against the bed rail lip preserves resale value and prevents rust. Q: What material are these made from?A: Heavy-gauge steel with corrosion-resistant coating (powder coat or zinc plating) to withstand outdoor exposure. Q: Can I install these by myself?A: A second person to help position the camper shell makes installation easier. Basic hand tools required — typically a 1/2-inch or 13mm socket and ratchet. Q: What is the warranty?A: iFJF truck accessories come with a 1-year warranty against manufacturing defects. 🔧 Related Products Browse All Chevy Sierra/Silverado Parts — Compatible gaskets, hardware & upgrades Exhaust Gaskets & Hardware — Fresh gaskets recommended for every install 📖 Helpful Resources iFJF Installation Guides — Step-by-step tutorials for your vehicle Contact Our Support Team — Expert advice for your setup
$59.99

iFJF iFJF Mower Deck Spindle Reinforcement Ring for John Deere 42" Mower D100 D110 D130 D140 D160 LA100 LA105 LA110 LA115 LA120 LA125 LA130 (Set of 1)
John Deere Mower Deck Spindle Reinforcement Ring — Stop Deck Cracking Before It Starts The iFJF Spindle Reinforcement Ring is the most cost-effective upgrade you can make to your John Deere 42-inch mower deck. Factory decks are notorious for cracking around the spindle mounting area — this heavy-duty steel ring reinforces the weakest point and extends your mower deck's service life by years. Why You Need This John Deere 42" stamped decks (found on D100, D110, D120, D130, D140, LA100-Series, and X100-Series models) use thin-gauge steel that fatigues over time. The constant vibration and blade impact stress eventually cause hairline cracks radiating from the spindle bolt holes. Once cracks appear, the deck becomes unsafe and replacement costs $300-800. A simple reinforcement ring installed preventatively saves you hundreds. Key Features Precision Laser-Cut Steel — CNC laser-cut from 10-gauge American steel for exact fitment to John Deere 42" spindle bolt patterns. Prevents Costly Deck Replacement — Reinforces the #1 failure point on stamped mower decks, potentially saving $300-800 in replacement costs. Easy Bolt-On Installation — Installs between the spindle housing and deck surface using existing bolts. No drilling or welding required. Corrosion-Resistant Coating — Durable black finish stands up to grass moisture, fertilizer exposure, and outdoor storage. Universal 42" Deck Fitment — Compatible with nearly all John Deere 42-inch stamped deck models from 2003-present. Compatibility Series Models D100 Series D100, D110, D120, D130, D140, D150, D160, D170 LA100 Series LA100, LA105, LA110, LA115, LA120, LA125, LA130, LA135, LA140, LA145, LA150, LA155, LA165 X100 Series X110, X120, X140 L100 Series L100, L105, L107, L108, L110, L111, L118, L120, L130 Specifications Material 10-Gauge American Steel Finish Black Corrosion-Resistant Coating Compatible Deck Size 42 Inches Quantity 1 Ring (Single Spindle) Installation Bolt-On — Uses Existing Hardware Thickness Approximately 0.134 inch (10 GA) Installation Tips Remove mower deck from tractor and clean the spindle area thoroughly. Unbolt the spindle assembly — keep bolts and washers organized. Place the reinforcement ring between the spindle housing and the deck surface. Reinstall spindle bolts through the ring, deck, and into the spindle housing. Torque bolts to John Deere factory specifications (typically 35-45 ft-lbs). Reinstall deck and test for smooth operation before mowing. Frequently Asked Questions Will this fit my John Deere model? This ring is designed for John Deere 42-inch stamped decks found on D100, LA100, X100, and L100 series models. If your deck measures 42 inches and uses a stamped (non-fabricated) design, it should fit. Can I install this if my deck is already cracked? Minor hairline cracks can be stabilized with the reinforcement ring, but we recommend welding or replacing the deck if cracks are longer than 1 inch or have propagated to the deck edge. The ring works best as a preventative measure. Do I need both spindles reinforced? For a single-blade 42" deck, one ring is sufficient. For dual-blade decks, we recommend installing rings on both spindles (sold separately as a 2-pack — see related products). How thick is the steel? The ring is made from 10-gauge steel (~0.134 inch / 3.4mm), which is approximately 2-3x thicker than the factory deck material in the spindle area. Will this affect my deck warranty? If your mower is still under warranty, check with your dealer before installing. For out-of-warranty mowers (most D/LA/L series are 5+ years old), this is a smart preventative upgrade.
$39.99

iFJF iFJF Mower Deck Spindle Reinforcement Ring for John Deere 42" Mower D100 D110 D130 LA125 LA130 LA140 LA145 LA155 LA165 X110 X120 X140 L100 (Set of 2)
John Deere 42" Mower Deck Spindle Reinforcement Rings — 2-Pack Complete Kit Protect both spindles on your John Deere 42-inch mower deck with the iFJF 2-Piece Reinforcement Ring Kit. If you're running a dual-blade deck, reinforcing just one spindle leaves the other vulnerable — this complete kit provides balanced structural support across the entire deck. Key Features Complete 2-Spindle Coverage — Protects both spindle mounting points on dual-blade 42-inch decks. Ideal for LA-Series and X-Series models with twin blades. Laser-Cut 10-Gauge Steel — Each ring is precision-cut for exact bolt-hole alignment with John Deere factory spindle patterns. Preventative Deck Protection — Install before cracks appear to permanently eliminate the most common failure point on stamped mower decks. Bolt-On Simplicity — Uses existing spindle bolts; no drilling, welding, or deck modifications needed. Black Protective Coating — Rust-resistant finish engineered for the damp, acidic environment of grass clippings and fertilizer residue. Compatibility Series Models LA100 Series LA100, LA105, LA110, LA115, LA120, LA125, LA130, LA135, LA140, LA145, LA150, LA155, LA165 X100 Series X110, X120, X140 L100 Series L100, L105, L107, L108, L110, L111, L118, L120, L130 Sabre Select 42-inch deck models (verify bolt pattern before ordering) Scotts Select models manufactured by John Deere with 42-inch decks Specifications Material 10-Gauge Steel (0.134 inch) Quantity 2 Rings Finish Black Anti-Corrosion Coating Deck Compatibility 42-inch Stamped Decks Installation Type Bolt-On — No Modification Why the 2-Pack? Balanced Protection — Reinforcing one spindle while leaving the other unreinforced creates uneven stress distribution. The unreinforced side becomes the new weak point. Better Value — Two rings in one kit cost less than buying two singles. If you're already pulling the deck, do both spindles at once. Future-Proof Your Deck — Even if only one side shows wear today, the other side is on the same timeline. Install both and forget about deck cracks for the life of the mower. Installation Guide Disconnect spark plug and remove mower deck. Clean the spindle mounting area — remove all grass buildup and rust. Unbolt each spindle assembly (typically 4 bolts per spindle). Position one ring under each spindle housing, aligning bolt holes. Reinstall bolts through spindle → ring → deck in that order. Torque to 35-45 ft-lbs (refer to your model's service manual). Reinstall deck and test at idle before engaging blades. Frequently Asked Questions Do I really need both spindles reinforced? For a single-blade 42-inch deck, one ring (sold separately) is sufficient. For dual-blade decks (most LA and X series models), reinforcing both spindles is strongly recommended for balanced structural integrity. Will these work with a 48-inch deck? No — these rings are designed specifically for the 42-inch deck spindle bolt pattern. 48-inch decks use a different spindle assembly with different bolt spacing. Can I use these on a riding mower from another brand? These rings are precision-engineered for John Deere 42-inch stamped deck bolt patterns. They may fit some MTD or AYP-manufactured decks with identical bolt patterns, but we recommend verifying your bolt spacing before ordering. What if my deck is already cracked? Minor cracks (under 1 inch, not reaching deck edge) can be stabilized by these rings. For significant cracking, we strongly recommend welding repair + ring reinforcement or full deck replacement. Do not operate a mower with a structurally compromised deck. How long does installation take? Plan for 45-90 minutes including deck removal and reinstallation. The ring installation itself takes about 10 minutes per spindle once the deck is accessible.
$59.99

iFJF iFJF New Control Arm Front Driver or Passenger Side Lower With bushing(s) RH LH
Front Lower Control Arm with Bushings — Precision-Engineered Suspension Replacement Restore your vehicle's handling and tire wear patterns with the iFJF Front Lower Control Arm Assembly. Pre-assembled with OE-spec rubber bushings and ball joint, this direct-fit replacement eliminates the clunks, wandering, and uneven tire wear caused by worn control arms. Key Features Complete Assembly — No Press Work Required — Arrives fully assembled with pre-installed bushings and ball joint. Simply unbolt the old arm and bolt in the new one. OE-Spec Rubber Bushings — Provides the same ride quality and noise isolation as the factory part without the harshness of polyurethane. Forged Steel Construction — Matches or exceeds OE strength specifications. Built to handle potholes, speed bumps, and years of daily driving. Corrosion-Resistant Coating — Black electrophoretic coating (E-coat) provides superior rust protection compared to painted aftermarket arms. Direct Fit — No Modifications — Geometry and mounting points match OE specifications exactly. Alignment recommended after installation. Compatibility Table Application Position Side Driver or Passenger Side Front Lower Left (LH) or Right (RH) Fits multiple vehicle applications. Verify fitment by comparing your existing control arm to the product images before ordering. Specifications Position Front Lower Side Driver (LH) or Passenger (RH) Material Forged Steel with E-Coat Finish Bushing Type OE-Spec Rubber Ball Joint Pre-Installed & Greased Installation Direct Bolt-On Replacement Symptoms of a Worn Control Arm Clunking or knocking over bumps, especially at low speeds Steering wander — vehicle drifts or pulls without steering input Uneven tire wear — inner or outer edge wearing faster than the rest of the tread Vibration through the steering wheel at highway speeds Visible bushing cracks — rubber bushings showing dry rot, cracking, or separation from the metal sleeve Frequently Asked Questions Do I need an alignment after replacing a control arm? Yes — a professional wheel alignment is strongly recommended after any control arm replacement. The new arm may position the wheel slightly differently than the worn one, and incorrect alignment will cause rapid tire wear. Can I replace just one control arm? While you can replace just one, suspension components wear as pairs. If one side's bushings are worn, the other side is likely close behind. For best results and even handling, replace both sides simultaneously. How difficult is this to install at home? Moderate difficulty. You'll need a floor jack, jack stands, basic socket set, and a torque wrench. The main challenge is typically the ball joint separation, which may require a pickle fork or ball joint separator tool. Budget 1-2 hours per side for a DIY install. What torque specs should I use? Refer to your vehicle's factory service manual for exact specifications. Typical values range from 80-120 ft-lbs for control arm mounting bolts and 50-80 ft-lbs for ball joint nuts. How long do aftermarket control arms last? With proper installation and alignment, iFJF control arms typically last 50,000-80,000 miles under normal driving conditions — comparable to OE parts at a fraction of the cost.
$101.99
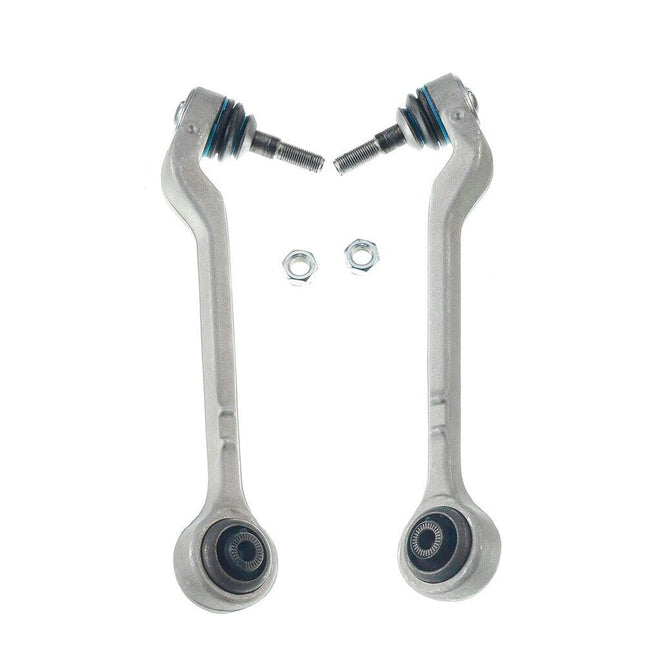
iFJF iFJF New Front Suspension Lower Rearward Control Arm Ball Joint LH RH Pair 2pc Set
Front Lower Rearward Control Arm Pair with Ball Joints — Complete 2-Piece Set Replace both lower rearward control arms in one job with the iFJF 2-Piece Control Arm Set. Each arm comes fully assembled with pre-installed ball joint and rubber bushings, eliminating the need for a hydraulic press. Designed as a direct OE replacement for front lower rearward positions on a wide range of passenger vehicles. Key Features Complete Pair — LH + RH Included — Both driver and passenger side arms in one kit. Balanced replacement ensures even handling and tire wear. Pre-Installed Ball Joints — Each arm arrives with a pre-greased, sealed ball joint. No press, no mess, no special tools needed. OE-Spec Rubber Bushings — Quiet, compliant ride quality that matches factory specifications. Absorbs road vibration without transmitting harshness to the cabin. Forged Steel with E-Coating — Heavy-duty forged steel construction with black electrophoretic coating for long-term corrosion resistance in all climates. Save vs. Dealer Pricing — Complete pair set at a fraction of what a dealership charges for a single arm with labor. Compatibility Position Side Quantity Front Lower Rearward Left (LH) + Right (RH) 2 Arms Designed for broad passenger vehicle compatibility. Verify your specific application by comparing the arm geometry and bushing style before ordering. Specifications Position Front Lower Rearward Quantity 2 Arms (LH & RH Pair) Material Forged Steel Bushing Material OE Rubber Compound Ball Joint Pre-Installed, Sealed, Pre-Greased Finish Black E-Coat (Electrophoretic) Professional Installation Notes Always support the vehicle with jack stands — never rely on a floor jack alone. Mark the camber bolt position (if equipped) before removal to preserve approximate alignment. Use a ball joint separator tool — avoid damaging the boot with a pickle fork if reusing nearby components. Tighten all bushing bolts with the suspension at ride height (vehicle weight on the ground) to prevent premature bushing failure. Schedule a professional alignment immediately after installation. Frequently Asked Questions What's the difference between forward and rearward control arms? On vehicles with a multi-link or double-wishbone front suspension, the lower control arm is often split into two separate arms — forward (front) and rearward (rear). Each handles different load directions. This kit replaces the rearward pair. Why should I replace both sides together? Control arms wear symmetrically. Replacing only one side creates a handling imbalance — the old side will have more compliance (slop) than the new stiff side, leading to pulling and uneven tire wear. Do these come with mounting hardware? Control arms include pre-installed bushings and ball joints. Mounting bolts and nuts are typically reused from your vehicle unless they show signs of corrosion or stretching. We recommend using new hardware if your existing bolts show any rust or thread damage. Can I do this job without a lift? Yes — floor jack and jack stands are sufficient. The biggest challenge is accessing the mounting bolts, which may require a breaker bar and penetrating oil on older, rust-belt vehicles. Expect 2-4 hours for a DIY install of both sides.
$83.71
iFJF iFJF NOx Nitrogen Oxide Sensor 5WK96668B Compatible with Hino Truck 89463-E0451
NOx Nitrogen Oxide Sensor 5WK96668B — OEM-Grade Emissions Control Replacement The iFJF NOx Sensor 5WK96668B is a direct plug-and-play replacement for your vehicle's factory nitrogen oxide sensor. Engineered to meet or exceed OEM specifications, this sensor restores proper DEF/SCR system function, eliminates check engine lights triggered by NOx sensor fault codes, and helps your diesel engine pass emissions testing. What a NOx Sensor Does Nitrogen Oxide (NOx) sensors monitor the concentration of harmful nitrogen oxides in your diesel exhaust stream — both before and after the Selective Catalytic Reduction (SCR) catalyst. The engine control module (ECM) uses this data to precisely meter Diesel Exhaust Fluid (DEF) injection. When a NOx sensor fails, the ECM can't regulate DEF dosing properly, leading to increased emissions, reduced fuel economy, and potential limp-mode activation. Key Features OE-Equivalent Performance — Calibrated to match the voltage curve and response time of the factory sensor for seamless ECM integration. Plug-and-Play Installation — Pre-terminated connector matches factory wiring harness. No splicing, no programming — remove the old sensor and install the new one. Durable Construction — High-temperature ceramic sensing element with stainless steel probe body withstands exhaust temperatures up to 930°C (1,700°F). Clears NOx-Related Fault Codes — Resolves common DTCs related to NOx sensor performance, circuit range, and rationality errors. 12-Month Warranty — Backed by iFJF's quality guarantee against manufacturing defects. Compatibility Make Models OEM Ref Hino Multiple truck models 89463-E0451 Cross-Reference / OEM Part Numbers Manufacturer Part Number(s) Hino 89463-E0451 Continental/VDO 5WK96668B Specifications Sensor Type Nitrogen Oxide (NOx) Sensor Model 5WK96668B Connector Type Pre-Terminated Factory Match Probe Material Stainless Steel with Ceramic Element Operating Temperature Up to 930°C (1,700°F) Installation Plug-and-Play (No Programming) Warranty 12 Months Symptoms of a Failing NOx Sensor Check Engine Light (CEL/MIL) — Common fault codes: P2200-P2214 (NOx sensor circuit), P229E/P20EE (SCR NOx efficiency) Failed Emissions Test — Vehicle produces excessive NOx emissions during inspection Increased DEF Consumption — ECM overcuts DEF trying to compensate for bad sensor readings Reduced Fuel Economy — Engine may run in a less efficient mode when NOx sensor data is unreliable Limp Mode / Reduced Power — In severe cases, the ECM may limit engine power to protect the emissions system Frequently Asked Questions Do I need to reprogram the ECM after installing this sensor? No — this is a plug-and-play sensor. The ECM will automatically recognize the new sensor on the next key cycle. However, you may need to clear existing fault codes with an OBD-II scanner. Some vehicles require a short drive cycle (10-20 miles) for the sensor to fully calibrate and for readiness monitors to set. How do I know if my NOx sensor needs replacement? The most common indicators are: (1) check engine light with NOx-related DTCs, (2) failed emissions test with high NOx readings, and (3) visible physical damage to the sensor or wiring harness. A professional diesel shop can confirm the diagnosis with a scan tool by comparing upstream and downstream NOx readings. What's the difference between upstream and downstream NOx sensors? Upstream (pre-SCR) sensors measure NOx entering the catalyst. Downstream (post-SCR) sensors measure NOx exiting the catalyst. They may look identical physically but are typically calibrated differently. Verify your vehicle's exact position before ordering. Can a bad NOx sensor cause DEF system problems? Yes — the ECM relies on NOx sensor data to calculate DEF injection rates. A faulty sensor sending incorrect data can cause over-injection (wasting DEF fluid) or under-injection (failing emissions standards). Either scenario can trigger additional fault codes. How long should a NOx sensor last? Factory NOx sensors typically last 80,000-150,000 miles depending on driving conditions. Contaminated DEF fluid, excessive idling, and high-sulfur fuel can significantly reduce sensor life. If one sensor has failed, the others on the vehicle may not be far behind.
$177.99
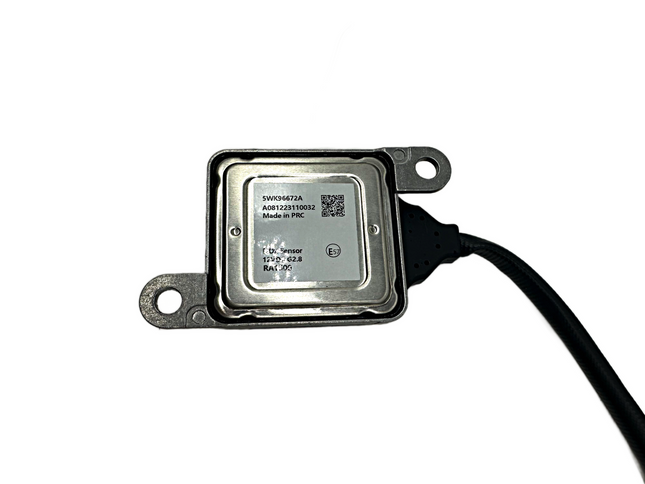
iFJF iFJF NOx Nitrogen Oxide Sensor 5WK96672A Compatible with Lafrance Condor Blue Bird Capacity 2871974 2894943RX
NOx Nitrogen Oxide Sensor 5WK96672A — OEM-Grade Emissions Control Replacement The iFJF NOx Sensor 5WK96672A is a direct plug-and-play replacement for your vehicle's factory nitrogen oxide sensor. Engineered to meet or exceed OEM specifications, this sensor restores proper DEF/SCR system function, eliminates check engine lights triggered by NOx sensor fault codes, and helps your diesel engine pass emissions testing. What a NOx Sensor Does Nitrogen Oxide (NOx) sensors monitor the concentration of harmful nitrogen oxides in your diesel exhaust stream — both before and after the Selective Catalytic Reduction (SCR) catalyst. The engine control module (ECM) uses this data to precisely meter Diesel Exhaust Fluid (DEF) injection. When a NOx sensor fails, the ECM can't regulate DEF dosing properly, leading to increased emissions, reduced fuel economy, and potential limp-mode activation. Key Features OE-Equivalent Performance — Calibrated to match the voltage curve and response time of the factory sensor for seamless ECM integration. Plug-and-Play Installation — Pre-terminated connector matches factory wiring harness. No splicing, no programming — remove the old sensor and install the new one. Durable Construction — High-temperature ceramic sensing element with stainless steel probe body withstands exhaust temperatures up to 930°C (1,700°F). Clears NOx-Related Fault Codes — Resolves common DTCs related to NOx sensor performance, circuit range, and rationality errors. 12-Month Warranty — Backed by iFJF's quality guarantee against manufacturing defects. Compatibility Make Models OEM Ref Lafrance Condor 2871974 Blue Bird School Bus 2894943RX Capacity Terminal Tractor 2871974 Cross-Reference / OEM Part Numbers Manufacturer Part Number(s) Lafrance/Blue Bird/Capacity 2871974, 2894943RX Continental/VDO 5WK96672A Specifications Sensor Type Nitrogen Oxide (NOx) Sensor Model 5WK96672A Connector Type Pre-Terminated Factory Match Probe Material Stainless Steel with Ceramic Element Operating Temperature Up to 930°C (1,700°F) Installation Plug-and-Play (No Programming) Warranty 12 Months Symptoms of a Failing NOx Sensor Check Engine Light (CEL/MIL) — Common fault codes: P2200-P2214 (NOx sensor circuit), P229E/P20EE (SCR NOx efficiency) Failed Emissions Test — Vehicle produces excessive NOx emissions during inspection Increased DEF Consumption — ECM overcuts DEF trying to compensate for bad sensor readings Reduced Fuel Economy — Engine may run in a less efficient mode when NOx sensor data is unreliable Limp Mode / Reduced Power — In severe cases, the ECM may limit engine power to protect the emissions system Frequently Asked Questions Do I need to reprogram the ECM after installing this sensor? No — this is a plug-and-play sensor. The ECM will automatically recognize the new sensor on the next key cycle. However, you may need to clear existing fault codes with an OBD-II scanner. Some vehicles require a short drive cycle (10-20 miles) for the sensor to fully calibrate and for readiness monitors to set. How do I know if my NOx sensor needs replacement? The most common indicators are: (1) check engine light with NOx-related DTCs, (2) failed emissions test with high NOx readings, and (3) visible physical damage to the sensor or wiring harness. A professional diesel shop can confirm the diagnosis with a scan tool by comparing upstream and downstream NOx readings. What's the difference between upstream and downstream NOx sensors? Upstream (pre-SCR) sensors measure NOx entering the catalyst. Downstream (post-SCR) sensors measure NOx exiting the catalyst. They may look identical physically but are typically calibrated differently. Verify your vehicle's exact position before ordering. Can a bad NOx sensor cause DEF system problems? Yes — the ECM relies on NOx sensor data to calculate DEF injection rates. A faulty sensor sending incorrect data can cause over-injection (wasting DEF fluid) or under-injection (failing emissions standards). Either scenario can trigger additional fault codes. How long should a NOx sensor last? Factory NOx sensors typically last 80,000-150,000 miles depending on driving conditions. Contaminated DEF fluid, excessive idling, and high-sulfur fuel can significantly reduce sensor life. If one sensor has failed, the others on the vehicle may not be far behind.
$177.99


