
Chevy GMC 6.5L Diesel Fuel Filter Replacement Guide — Suburban Silverado Sierra Tahoe DIY
, by iFJF Direct, 13 min reading time
, by iFJF Direct, 13 min reading time
If you own a 1992-2002 Chevy or GMC truck or SUV with the 6.5L diesel — whether it's a Silverado, Sierra, Suburban, Tahoe, Yukon, or even a Hummer H1 — the fuel filter is one of the most critical (and easiest) maintenance items you'll do. A clogged filter causes hard starts, power loss, and eventually a dead injection pump that costs $1,200-$2,500 to replace. This guide walks you through the entire replacement process, from tools needed to bleeding the system.
The GM 6.5L turbo diesel (engine codes L49/L56/L57/L65) was produced from 1992 to 2002 and powered millions of trucks, SUVs, and vans. It's a durable engine — many have 300,000-600,000 miles on the original bottom end — but the fuel system is its Achilles' heel. The Stanadyne DS4 electronic injection pump and injectors have extremely tight tolerances, and any contamination passing through the filter can score internal surfaces.
A few key facts about the 6.5L fuel filter system:
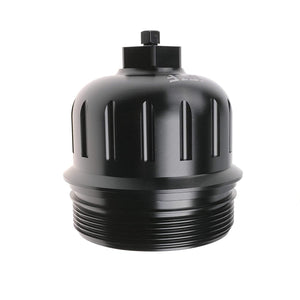
🔧 Option 1: Just the Filter Element (Routine Maintenance)
If your housing is in good shape, you only need the replaceable filter cartridge:
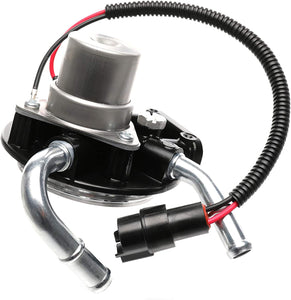
🔧 Option 2: Complete Assembly (Housing Cracked or Leaking)
If your housing is cracked, the heater is dead, or the WIF sensor port is stripped — swap the whole unit:
The plastic engine cover (beauty shroud) sits on top of the intake manifold, covering the fuel filter housing. Remove the 10mm bolts holding it down — typically 2-4 bolts depending on the year. Lift the cover off and set it aside. You'll now have clear access to the filter housing on the passenger side of the intake.
Place your drain pan under the filter housing. The housing holds residual diesel fuel. When you unscrew the cap, expect a few ounces to drain out. If your truck has been sitting, crack the cap slowly to release any built-up pressure first.
Before installing the new filter, take 30 seconds to:
After installing the new filter, you need to prime the system and purge air. The 6.5L diesel has an electric lift pump that makes this easy:
Alternative method (older trucks without automatic prime): Open the bleeder screw on top of the filter housing (if equipped), cycle the key ON, and close the screw when fuel bubbles stop and solid fuel emerges.
If the engine won't start: There's still air in the system. Cycle the key ON/OFF 3-4 more times. If it still won't start, crack open an injector line at the injector (19mm wrench) to bleed air from the high-pressure side — but be extremely careful: diesel injection pressure can pierce skin.
Confused by part numbers? Here's the quick reference:
| Part Number | What It Is | When You Need It |
|---|---|---|
| TP1256 | Filter element (cartridge + cap + O-ring) | Routine filter change — housing is intact |
| 10226035 | Complete assembly (housing + heater + sensor + filter) | Housing is cracked, leaking, or heater failed |
| 10154635 | Older GM OEM number — same as TP1256 | Alternative lookup number |
| ACDelco 33976 / 33376 | ACDelco-branded TP1256 equivalent | Dealer parts counter number |
| WIX 33379 / NAPA 3960 | Aftermarket equivalents | Parts store cross-reference |
| Stanadyne 31712 | OEM filter manufacturer number | Stanadyne made the original filter for GM |
This filter system (TP1256 element in 10226035 housing) fits every GM 6.5L diesel vehicle from 1992-2002:
| Make | Models | Years |
|---|---|---|
| Chevrolet | Silverado / C/K 1500, 2500, 3500 | 1992–2002 |
| Suburban 1500 / 2500 | 1992–1999 | |
| Tahoe | 1995–1999 | |
| Blazer (Full-Size K5) | 1992–1999 | |
| Express / G20 / G30 Vans | 1992–2002 | |
| GMC | Sierra / C/K 1500, 2500, 3500 | 1992–2002 |
| Suburban 1500 / 2500 | 1992–1999 | |
| Yukon | 1992–1999 | |
| Savana / G2500 / G3500 Vans | 1992–2002 | |
| AM General | Hummer H1 | 1994–2001 |
Note: This guide covers truck/SUV applications. GM Express/Savana vans with the 6.5L diesel use a DIFFERENT canister-style filter located on the driver's side frame rail. If you have a van, check your filter location before ordering.
Most likely cause: Air intrusion. The 6.5L fuel system must be completely sealed to maintain prime. Even a tiny air leak through a dried-out O-ring or cracked housing will let fuel drain back to the tank overnight. Fix: Replace the filter element with a new O-ring, or replace the entire housing assembly if cracks are visible.
Most likely cause: Cracked housing (plastic OEM units) or improperly seated O-ring. Fix: If the leak is from the cap area, reseat the O-ring. If it's from the housing body or heater connector, replace the entire assembly.
Most likely cause: Water accumulation in the bottom of the filter housing. The WIF sensor detects water (which is heavier than diesel and sinks to the bottom). Fix: Drain the water separator (small knob at the bottom of the housing) monthly. If the light stays on after draining, the sensor may be faulty — replacement sensors are available.
Most likely cause: Failed fuel heater. The 6.5L filter housing has an integrated 12V heating element that warms fuel in cold conditions. Fix: If your truck is hard to start below 20°F, check the heater connector for corrosion. If the heater is dead, the complete assembly replacement includes a new heater.
| Interval | Action |
|---|---|
| Monthly | Drain water separator (turn knob at bottom of filter housing) |
| Every 10,000-15,000 miles | Replace TP1256 filter element (normal driving) |
| Every 7,500 miles | Replace filter (heavy towing, biodiesel blends, dusty conditions) |
| Every 30,000 miles | Inspect housing for cracks, check heater connector, verify WIF sensor operation |
| At 150,000+ miles | Consider replacing the entire housing assembly preventatively — plastic OEM housings fatigue over time |
 |
Complete Fuel Filter Assembly Metal housing + heater + sensor + filter | $110.00 |
 |
Single TP1256 Filter Element Includes cap & gasket | $22.99 |
 |
3-Pack Value Bundle 3 filters, save 27% | $49.99 |
 |
6-Pack Best Value 6 filters, save 36%, $14.67 each | $87.99 |
Q: How do I know if I need just the filter or the whole assembly?
A: Inspect the filter housing. If it's dry (no fuel leaks anywhere), crack-free, and the heater connector isn't corroded — you only need the TP1256 filter element. If you see fuel dripping from the housing body or the heater connector is broken, get the complete 10226035 assembly.
Q: Do I really need to bleed the system after changing the filter?
A: Yes — absolutely. If you don't bleed the air out, the engine won't start or will run rough. The lift pump priming procedure (key ON 10 sec → OFF → repeat 3-4×) is simple and takes 2 minutes. Don't skip it.
Q: Will this filter fit my 1994 Chevy C3500 with the 6.5L diesel?
A: Yes. This exact filter system fits all 1992-2002 GM 6.5L diesel trucks including your 1994 C3500. The procedure is the same across all years — C/K 1500, 2500, and 3500 series.
Q: My filter cap is stuck — how do I get it off?
A: This is extremely common, especially if the previous owner or mechanic overtightened it. Use a strap wrench (not channel-lock pliers — those will crack the plastic cap). Wrap the strap around the cap, apply steady pressure counterclockwise. If it's really stuck, a rubber mallet tap on the wrench handle can break it free.
Q: Can I use this guide for a Hummer H1?
A: Yes. The Hummer H1 (1994-2001) uses the same GM 6.5L diesel engine and the identical 10226035 filter housing. The filter is in the same location on the passenger side of the intake. The procedure is identical.
Q: What happens if I don't change the fuel filter regularly?
A: A clogged filter restricts fuel flow, causing power loss, hard starting, and reduced fuel economy. Worse, when a filter becomes completely saturated, the bypass valve opens and unfiltered fuel goes straight to your injection pump. Contaminants score the pump internals, and within a few thousand miles you're looking at a $1,200+ repair bill. For a $22.99 filter, it's the cheapest insurance you'll ever buy for your 6.5L diesel.
Q: How do I dispose of the old diesel fuel and filter?
A: Take the old filter and drained diesel to your local auto parts store — most chains (AutoZone, O'Reilly, Advance Auto) accept used oil and filters for free recycling. Never pour diesel fuel down a drain or into the ground.
 Fuel Filter Assembly for 1992-2002 Chevy GMC 6.5L Diesel — Suburban Tahoe Silverado Sierra Yukon Hummer H1 — Replaces 10226035
$127.00
Fuel Filter Assembly for 1992-2002 Chevy GMC 6.5L Diesel — Suburban Tahoe Silverado Sierra Yukon Hummer H1 — Replaces 10226035
$127.00
 Fuel Filter Head 2005-2013 Duramax LLY/LBZ/LMM — Billet Bleeder Screw
$57.99
Fuel Filter Head 2005-2013 Duramax LLY/LBZ/LMM — Billet Bleeder Screw
$57.99
 L5P Billet Fuel Filter Cap 2017-2020 Silverado/Sierra 2500HD 3500HD
$55.99
L5P Billet Fuel Filter Cap 2017-2020 Silverado/Sierra 2500HD 3500HD
$55.99
 TP1256 Fuel Filter for 1992-2002 Chevy GMC 6.5L Diesel (3-Pack)
$57.99
TP1256 Fuel Filter for 1992-2002 Chevy GMC 6.5L Diesel (3-Pack)
$57.99