
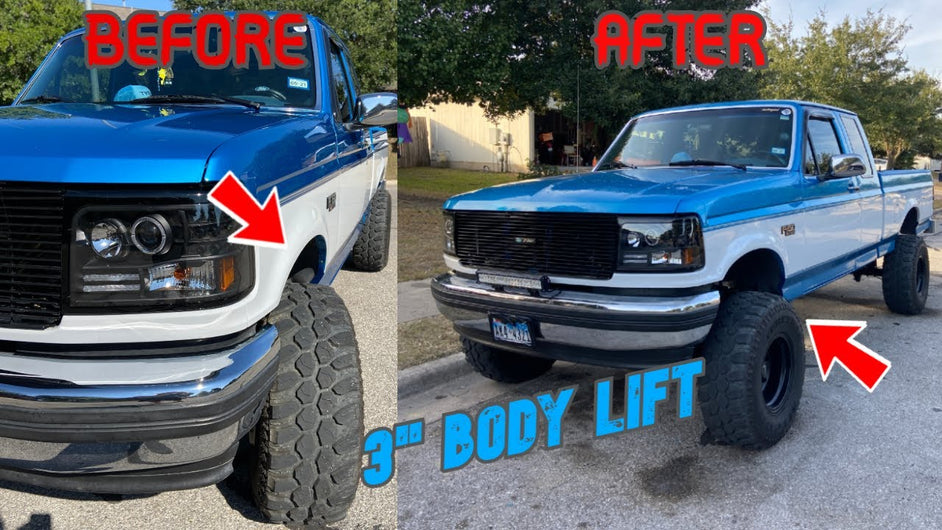
How to Install a 3" Body Lift on a 1995 Ford F-150 (OBS 2WD) — Complete Guide
, by iFJF Direct, 16 min reading time
, by iFJF Direct, 16 min reading time

Complete step-by-step guide to installing a 3-inch body lift on a 1995 Ford F-150 (OBS 2WD). Based on real hands-on install covering cab bolts, steering linkage, fan shroud, and bumper relocation.
If you own a 1987–1997 Ford F-150, F-250, or Bronco with the "OBS" (Old Body Style) design, you've probably run into the same problem many truck enthusiasts face: tire rubbing. After adding a 2-inch wheel spacer, the tires start kissing the fenders the moment you reverse into a bump. A 3" body lift is one of the cleanest ways to solve that — and no, you don't need to cut the frame or hire a professional. This guide walks you through the entire process, step by step, based on a real hands-on install on a 1995 Ford F-150 2WD.
A body lift raises the truck's cab and bed 3 inches above the frame while keeping the suspension geometry completely stock. Unlike a suspension lift — which modifies your springs, shocks, and articulation — a body lift only separates the body from the frame at the mounting points and inserts blocks in between. The result: more tire clearance, a slightly taller stance, and zero impact on your factory suspension setup.
The 1995 Ford F-150 in this guide had a persistent tire-rubbing issue after installing 2-inch wheel spacers. Even mild reversing maneuvers caused the tires to gnaw at the fender wells. After the 3" body lift, the truck has been driven hard — reversing, turning, hitting bumps — without a single rub. Problem solved.
This guide covers the cab and front section of the install. For the bed portion (the first half of the lift), refer to the companion video guide linked in the description. Both halves follow the same core principle: locate bolts, loosen them, lift the body, insert blocks, and torque everything back down.
| Item | Notes / Why You Need It |
|---|---|
| 3" Body Lift Kit (Performance Accessories or equivalent) | Compatible with 1987–1997 Ford F-150, F-250, Bronco 2WD/4WD |
| Impact wrench (air or cordless) | Essential for breaking loose rusted bolts — especially the front cab mounts |
| Ratchet with extensions (20+ total length recommended) | Some front bolts sit 20+ inches deep in the engine bay — you'll stack extensions |
| Drill with metal bit | May be needed to drill out rusted-through bolts or add new mounting holes |
| Thread-locking compound (Loctite) | Apply to any newly drilled bolts to prevent backing out |
| Welder (optional) | Useful for repositioning bumper brackets instead of drilling new bolt holes |
| Socket set (deep and shallow) | Metric and SAE — front cab bolts are typically 14mm–18mm |
| Pry bars / body lift tool (long pry bar) | Helps separate the body from the frame at stubborn mounting points |
| Torque wrench | Re-torque all body mount bolts to factory spec (typically 35–45 ft-lbs) after lift |
| Zip tie or bungee cord | Used as a trick hood latch tool (loop through latch, pull to release) |
| Jack and jack stands (or hydraulic lift) | Required for raising the body — never work under a vehicle supported only by a jack |
Before jacking anything, find all six cab mount bolts — three per side. Here's how to locate them in your 1995 F-150:
⚠️ Safety tip: If your truck has significant mileage, some of these bolts may be seized or rusted solid. An impact wrench driven from above (through the cab floor) combined with a breaker bar from below is often the fastest combo to crack them free.
Clear the cab interior to access all six bolt locations:
Here's the critical part of the process:
Why three inches? On an OBS F-150, a 3" lift gives you roughly 1.5" of additional tire clearance per side — enough to clear most 33" tires with wheel spacers, without the cost and complexity of a full suspension lift.
The front two cab bolts are the trickiest part of the install. On the 1995 F-150, these bolts run vertically through the frame rail and into the engine bay — you'll be working from inside the cab and from the top of the engine bay simultaneously.
After the cab is lifted 3", the steering linkage — the black connecting bar between the steering box and the front differential — will be slack relative to the new body height. The body lift kit includes a steering linkage extension bracket specifically for this.
Installing it is straightforward:
The installer's report: the steering felt better after the body lift than before. With the linkage properly indexed through the extension bracket, there was no slop or play — in some cases, this setup actually tightens up the steering feel.
Once the cab is raised, the radiator fan shroud no longer aligns with the fan blade — the 3" gap is too much for the factory shroud to bridge. Here's how to handle it:
Pro tip: This is also a great time to consider an electric fan conversion. The OBS trucks came with mechanical clutch fans that sap engine horsepower. An electric fan kit (e.g., a SPAL or Hayden universal unit) bolts directly to the radiator and eliminates the shroud concern entirely — plus it frees up a few horsepower at the crank.
With a 3" body lift, the bumpers will sit 3 inches below their original alignment relative to the cab. Here's how to correct them without cutting the frame:
Before driving, go through every body mount bolt with a torque wrench:
Take the truck for a test drive that includes:
In this install, the truck felt measurably stiffer after the body lift. The previous "loose boat" feeling in the bed was gone — the body lift blocks locked everything solid. Tire rubbing on hard reverses? Gone completely.
| Tip | Why It Matters |
|---|---|
| Apply Loctite to any newly drilled bolts | Newly drilled body mount holes don't have the same thread locking as factory hardware. Loctite prevents bolts from backing out over thousands of miles of vibration. |
| Drill new holes straight through — use a guide | A crooked hole in the bed or cab floor compromises clamping force and can crack the fiberglass bed liner or floor pan over time. |
| Two people minimum for the cab lift | Keeping the body level while inserting blocks is nearly impossible solo. A second set of hands prevents the body from twisting and keeps the blocks seated properly. |
| Photograph bolt locations before disassembly | OBS trucks have slight manufacturing variations. Pre-disassembly photos help you put everything back exactly as it was — especially the wiring harness clips and exhaust hanger positions. |
| Consider an electric fan conversion while the shroud is off | The mechanical fan clutch is a known failure point on 1990s Ford trucks. With the shroud removed, it's the ideal window to install an electric fan kit. |
One question that comes up constantly: does a body lift hurt the truck? The honest answer is nuanced:
| Brand | Kit Part Number | Fits | Includes |
|---|---|---|---|
| Performance Accessories (most popular) | PA3933 | 1988–1997 Ford F-150 2WD/4WD | Body lift blocks, zinc-plated bolts, steering linkage extension, shroud drop brackets, rear bumper brackets |
| Body Lift Blocks by Dorman | 26101 | Ford F-150/F-250 OBS (verify fitment) | Blocks only — steering linkage hardware sold separately |
| Tuff Country | 12921 | Ford 1988–1997 F-150/F-250 2WD | Full kit: blocks, bolts, steering linkage, hardware |

Looking for Ford diesel or gas truck parts to pair with your body lift upgrade? iFJF Direct carries a full lineup of Ford Powerstroke parts, fuel system components, and emissions equipment for 1987–2024 Ford trucks. From fuel filters to EGR delete kits and everything in between, we ship from the US with fast delivery.
If you're upgrading your OBS F-150 or installing performance parts, browse our Ford collection for filters, sensors, and hard parts that fit right the first time.
Shop Ford Powerstroke Parts →Will a 3" body lift on my 1995 F-150 cause any check engine lights or code issues?
No. A body lift is purely a mechanical modification that raises the body 3 inches above the frame. It does not affect the engine computer, sensors, transmission, or any electronic systems. Your OBD-II port, wiring harnesses, and sensor connections remain untouched.
Do I need to extend the brake lines or fuel lines for a body lift?
For a 3" lift on the OBS F-150, factory brake lines and fuel lines are typically long enough to accommodate the movement without extension. However, inspect them carefully after the install — on high-mileage trucks, the rubber lines may be aged and less tolerant of any tension. Replace any questionable lines before driving.
Can I install a body lift on a 2WD truck, or do I need 4WD?
Yes — a body lift works on both 2WD and 4WD OBS Ford trucks. The installation process is nearly identical. The only difference is that 4WD trucks have CV axles and front differential mounts to account for, while 2WD trucks (like the F-150 2WD in this guide) have a solid rear axle with leaf springs on both ends — a slightly simpler setup.
How long does a 3" body lift installation take?
With two people and the right tools, plan for 6–10 hours. Rusted bolts can add 2–4 hours to the job. If you're doing the bed and cab together (rather than splitting them across two sessions like in the video), budget for a full weekend. The single most time-consuming step is freeing up rusted front cab bolts.
Will a body lift void my truck's transmission warranty or affect the transmission?
A body lift does not modify the transmission or drivetrain. However, any aftermarket modification can potentially be cited by a warranty administrator in a disputed claim. Keep your body lift blocks, bolts, and instructions on file as documentation that the lift uses factory-style mounting points and doesn't alter drivetrain geometry.
The 3" body lift on the 1995 Ford F-150 2WD delivered exactly what it promised: zero tire rubbing, a taller stance, and a noticeably stiffer ride — without the $3,000+ cost of a full suspension lift. The job is well within the reach of a competent DIY mechanic with basic tools. The key is patience with the rusted bolts, doing the job with two people, and making sure every body mount bolt is torqued properly before you drive it.
If tire rubbing after wheel spacer installation is your problem, a body lift is almost certainly your answer. Drop a comment below if you have questions about your specific truck setup — we'll help you figure out if this is the right move for your build.


