Duramax LB7 Injector Replacement: Step-by-Step DIY Guide (2001-2004)
, by iFJF Direct, 20 min reading time
, by iFJF Direct, 20 min reading time

Replace LB7 Duramax injectors yourself and save $2,000+ in labor. Complete DIY guide with torque specs, tools needed, and tips to avoid common mistakes. Fits 2001-2004 Chevy Silverado & GMC Sierra 6.6L.
Before you crack anything open, confirm that injectors are actually the culprit. The LB7 (2001–2004) is known for injector failures, and common symptoms include:
Gather everything before you start. Nothing kills momentum like digging through your toolbox mid-job. Here's what you'll need:
Parts to replace (LB7 specific):
Always, always start here. With any electrical work near the fuel system, you cannot have the truck's electrical system active. Pop the negative terminal off both batteries and set them aside. Tuck the cable ends so they can't accidentally arc against the terminals.
The airbox sits on top of the engine and restricts access to the valve cover area. Remove the MAF sensor first — it has a simple push-clip connector. Push in the clip and pull the sensor out. Then remove the entire airbox by loosening the clamps on both intake tubes. Be very careful with the clamps: these are often over-tightened from the factory and the silicone boots are old and brittle. You may need new worm-drive clamps (5–10 bucks each) after reassembly if you crack the boots or can't get a seal.
Use a half-inch breaker bar or a ratchet with a cheater pipe on the belt tensioner to release tension. Slip the belt off the pulleys and set it aside. This gives you the clearance you need to pull the AC compressor forward.
Disconnect the wiring harness clips from the compressor. Then remove the four 15mm bolts that secure the compressor to the bracket. There's a small clip holding the compressor wiring in place — unclip it, then carefully lift the compressor out. You can flip it upside down and lay it on the frame rail; there's enough line slack to do this without discharging the system. The AC lines will have a slight kink, and that's fine.
Remove the overflow jug cap (the small plastic cap on the degas bottle) and let the system drain through the petcock on the lower radiator hose. Use a large drain pan — a 5-gallon bucket works perfectly. Work clean. The mess you make now is the time you'll spend cleaning later. Drain until coolant flow stops.
With the AC condenser wiring, overflow jug harness, and MAF sensor already disconnected, continue peeling the main engine harness away from the valley. Work methodically and keep track of where each connector goes — you'll need to reconnect everything in reverse order. Take photos before you disconnect anything complex.
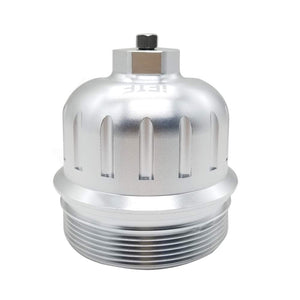
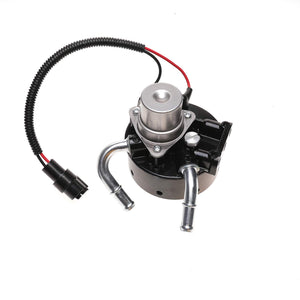
The fuel filter housing sits on the driver's side of the valley. Disconnect the water-in-fuel sensor connector and the fuel lines using your disconnect tool. Remove the two 12mm bolts holding the housing bracket, then pull the fuel lines off the housing. Keep the housing and bracket in a clean area — you'll be reusing the bracket. Next, disconnect the Fuel Injection Control Module (FICM) wiring harnesses by pulling up on the tabs and wiggling the connectors free. Be gentle — these connectors are known to be fragile.
Remove the 17mm bolt securing the fuel return line to the cylinder head, then remove the three 14mm bolts holding the return line bracket. There's also a 13mm nut below. Once loose, the entire return line can be pulled down and set aside. You'll also need to remove the fenderwell bolt hidden under the main wire harness connector — disconnect that connector first before trying to access it.
The glow plug module is bolted to the passenger side of the valley and will block access to the rear valve cover bolts. Remove its mounting bolts and set it aside. You won't need to disconnect the wiring harness unless it's in the way.
There are 11 valve cover bolts on the upper cover, all 5mm Allen heads. These are notorious for stripping — the bolts are soft and the Allen socket wears them out quickly. Buy a couple of extra 5mm Allen keys before you start. If you strip one, stop and use a 12-point 17mm socket as a pry point against the bolt head to break the cover loose instead.
Once all bolts are out, use the small pry tabs cast into the valve cover to crack the seal. Work your way around the cover — the RTV sealant is stubborn. A rubber mallet tapped gently around the edges also helps break the seal without damaging the aluminum cover.
With the upper cover off, you now have access to the lower valve cover, which seals the fuel return rail. Remove its 11 bolts (note the bolt length difference — 5 longer bolts vs. 6 shorter ones). The lower cover just pops off — it doesn't have a rubber gasket, just RTV. Set it aside and install the new lower valve cover gasket in its place.
Remove the 12mm bolt at the top of the return line near cylinder #1. The return line can then be pulled out of the injector cups and set aside.
Each injector is held down by two 8mm Allen head bolts. These are torqued tight — use an 8mm Allen socket and break them loose. Remove all hold-down bolts for the injectors on cylinders 1, 3, 5, and 7 (the driver's side bank — the LB7 uses four injectors on each bank, but the fuel system side is the driver side, cylinders 1, 3, 5, 7).
If the injectors don't lift out easily after the hold-down bolts are removed, use a small pry bar against the hold-down bracket to lift the injector just enough to wiggle it free. Work it back and forth — the O-ring at the top creates suction. If an injector is completely seized, use an air hammer with a chisel bit against the top of the injector body to break it free. A few solid hits usually does it. Once free, pull the injector straight up and out of the cup.
Blow out any debris from the cylinder head and injector cups using compressed air. Wipe the cup seats clean with a shop towel. Make sure there's no gasket material or carbon debris sitting on the sealing surface. The cleaner the cup, the better the seal.
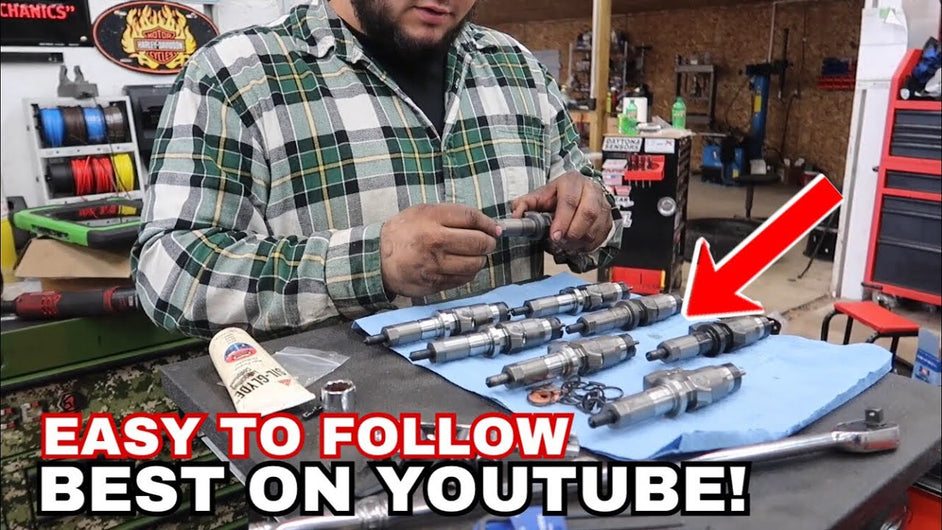
Apply a small amount of Scylla (dielectric grease) to the new injector O-rings — this helps the O-ring slide into the cup without rolling or bunching. Place the new crush washer on the injector body (the washer has a ridge on one side; orientation doesn't matter, but it must be seated fully). For the lower O-ring (fuel return side), apply a thin film of assembly lube around the seal.
For the upper O-ring (fuel supply side), use the twist method: don't roll it on — twist it. Rolling O-rings can kink them and cause leaks. Twist it over the injector body until it seats in the groove. Then apply a thin film of grease around the O-ring to help it slide down into the cup during installation.
Slide the injector into the cup — go slow, apply gentle downward pressure, and feel for the O-ring to seat. You'll feel it "pop" in when it drops past the cup's upper edge. Do not use the hold-down bolt to force the injector down. If it doesn't seat by hand, the O-ring is caught — pull it back out, check for debris or a rolled O-ring, and try again.
Place the hold-down bracket over each injector. Each bracket has a specific orientation — the bolt holes must face down toward the cylinder head, and the bracket can only go in one way. Install the 8mm Allen hold-down bolts hand-tight first, then come back and torque them to 37 ft-lbs. This is the OEM fastener spec for LB7 injector hold-downs.
Install the new crush seals (small on bottom, large on top) on each injector fuel line. Slide the lines into place — they should seat easily. Hand-tighten all the banjo bolts. Then torque all fuel line bolts to 133 inch-pounds (in-lbs) using an electronic torque wrench. There are 5 total banjo bolts: 4 on the injectors and 1 on the cylinder head.
Fill the new fuel filter housing with fresh diesel fuel. Use a 13mm socket to open the bleeder screw on the fuel filter housing. Pump the primer bulb until fuel seeps out around the bleeder screw, then tighten the screw. Continue pumping the primer until you feel resistance — the system is primed.
With everything reassembled and reconnected, cycle the ignition key a couple of times to let the glow plugs warm up (this is a diesel — glow plugs matter in cold weather). On the first startup, you may need to cycle the key a few more times to get the high-pressure fuel pump to build rail pressure. The engine should fire within 3–5 seconds once the system is primed.
Expect to spend 6–10 hours on your first time. An experienced tech can do it in 4–5 hours. Budget for a full day if this is your first fuel system job on a diesel.
If you're going through the labor of doing cylinders 1, 3, 5, and 7 (the fuel system side), it's strongly recommended to replace all four on that bank at the same time. If the other four (2, 4, 6, 8) are showing symptoms, budget for a second repair day — the passenger side requires less disassembly since the AC compressor doesn't block access on that side.
Yes — LB7 injectors can be rebuilt with O-ring kits. However, if the injector body itself is worn, scored, or has low injection volume (measured with a injector flow tester), replace the whole unit. O-rings fix leaks; worn internals require new injectors.
AC Delco and Bosch are the most widely available OE-equivalent options. For performance applications, look at Bosch Performance or Askoll. Stick with reputable names — cheap Amazon "compatible" injectors are a gamble on a high-pressure common-rail system.
Yes. After reinstalling, pull codes and run a fuel system status check. On an LB7, the ECM needs to see the correct fuel rail pressure and injector operation to complete its self-calibration. Any persistent misfire codes after startup indicate an installation issue (likely a leak or a bad connection).
No. If you're seeing coolant seepage around the upper valve cover, your lower valve cover gasket may not be seated, or one of the coolant tube seals is compromised. Do not drive the truck with a coolant leak — air in the cooling system causes overheating and can damage the head gasket.
Doing your own Duramax LB7 injector replacement is a legitimate advanced DIY job that will save you $2,000–$4,000 in labor at a shop. The disassembly is the hard part — working around the AC compressor, managing the harness, and keeping everything organized. Once the injectors are out and you're on the reassembly side, it moves fast.
The keys to success are: work clean, torque to spec, use new gaskets and O-rings, and don't rush the bleeding process. If the engine runs rough after startup, double-check your banjo bolt torque and your injector O-ring seating before you call it done.
This guide is for informational purposes only. Always refer to your vehicle's official service manual for OEM torque specifications and safety procedures. iFJF is not responsible for damage caused by improper repair procedures.