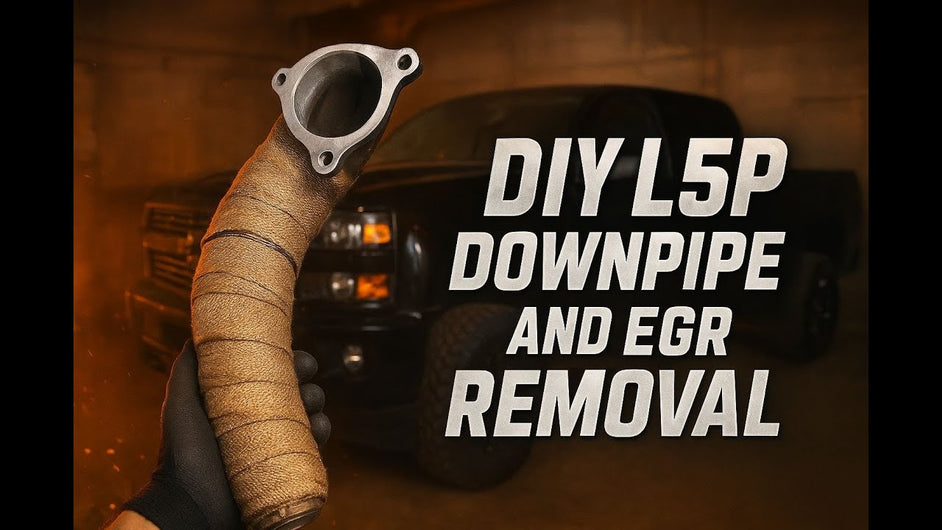
L5P Duramax: Downpipe Install + EGR Block-Off | Step By Step
, by iFJF Direct, 22 min reading time
, by iFJF Direct, 22 min reading time

L5P Duramax EGR Delete & Aftermarket Downpipe Install Guide (2017–2019) What This Guide Covers: Removing the EGR cooler, installing EGR block-off plates, and replacing the factory SCR catalytic conver...
The L5P Duramax (2017–2019) is widely regarded as the most refined diesel platform General Motors has ever produced. But even the best engineers at GM couldn't escape one of diesel's fundamental problems: exhaust gas recirculation (EGR) buildup. Over time, carbon deposits from recirculated exhaust gases accumulate in the intake manifold, on the EGR cooler, and throughout the intake tract. This leads to:
Beyond reliability, deleting the EGR on an L5P Duramax also opens the door to an aftermarket straight-through downpipe. The factory SCR (selective catalytic reduction) catalytic converter — while effective at reducing emissions — creates measurable backpressure. Swapping it for a straight pipe dramatically improves exhaust flow, reduces turbo spool time, and unlocks additional power potential once you get a proper tune.
Start with a 10mm socket and remove both negative battery terminals. There are two — one on each battery. This is non-negotiable for any major engine work and prevents accidental shorts when you're rummaging around with tools near electrical connectors.
Pull out the passenger fender liner. You'll need a T15 Torx for the 19 small screws holding it in place. Once the liner is out, reach in through the wheel well to find the radiator drain petcock. Crack it open and let the coolant drain into a appropriate container. Expect to recover 3+ gallons.
Start at the mass airflow (MAF) sensor housing. Push the red clip out, then squeeze the center tab on the electrical connector to release it. Next, use an 8mm socket to loosen the hose clamps on both ends of the intake tube. Then grab a 13mm socket and remove the nut on the mounting stud. The whole intake tube lifts right out.
💡 While you're in here: With the airbox removed, this is the perfect time to swap in a fresh L5P air filter ($29.99). The stock filter gets dirty fast on tuned trucks — you're already doing the labor to access it.
The airbox has two rubber grommet studs pointing downward. Give it a firm upward jolt to break it free. If it resists, work a flathead screwdriver underneath to pry — it pops out easily once the grommets release. Roll the airbox out toward you and set it aside.
Use a 10mm socket to remove the heat shield bolts. Then attack the EGR pipe — 13mm socket at both ends. The top rear bolt may need a box-end wrench since it's tight. The bottom rear bolt is reachable from the wheel well with a long extension and swivel. Once all six bolts are out, disconnect the wiring connector (push the tab back, then down) and pull the EGR pipe out.
GM placed the AC line directly over the turbo horn bolt — a notorious headache on the L5P. To work around it: loosen all three belt tensioner bolts (15mm socket) with an impact, then use a wrench on the last one. Swing the AC compressor out of the way to expose the turbo horn bolt, which you can now remove with a quarter-inch ratchet and swivel.
Remove the turbo horn from the intake (13mm with swivel and extension). Then remove the aluminum hard line from the wire harness area — four hose clamps (two at the top, two at the bottom) plus a 10mm bolt and a 13mm bolt. Leave the hoses attached; only remove the hard line itself.
For the plastic intercooler pipe: remove the 13mm support bolt, then twist the quick-connect collar clockwise while pulling down and wiggling. A flathead screwdriver against the collar helps break it loose. Slide the pipe toward the passenger fender and set it aside.
Pop out every wiring connector on top of the Y-bridge. Don't forget the small Christmas tree clips (wire retainers) — take your time and remove all of them before touching the bolts. Forgetting these clips and pulling the Y-bridge out anyway is a great way to break wiring harness connectors.
Eight bolts total — four on each side of the Y-bridge, all 10mm. Use a quarter-inch long extension with a 10mm swivel socket. Once all bolts are out, lift the Y-bridge straight up and out.
Remove the 10mm heat shield bolts, then the 13mm pipe bolts (two on each end — two facing down, two facing sideways). Slide the pipe and heat shield out together through the top.
Disconnect all coolant lines feeding the upper and lower EGR valves. Looking straight down, you'll see four 13mm bolts holding the lower EGR valve in place. Remove them and pull the lower EGR valve out from below — it comes out easier from underneath. There is a heat shield on the valve cover side that may require a bit of careful prying on one bolt.
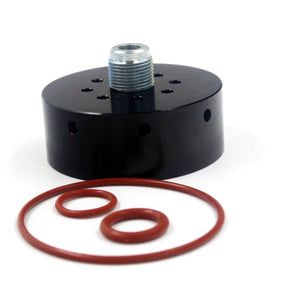
Grab your lower EGR block-off plate (with new gasket) from the kit. Need a kit? Shop the L5P EGR Valve Cooler Delete Kit ($141.99) — includes both block-off plates with gaskets.
Reinstall the studs and bolts exactly as they came out. Torque all fasteners to 25 ft-lb. This is the first permanent modification — say goodbye to that lower EGR valve forever.Remove the steel coolant pipe feeding the EGR cooler — 10mm socket for the two bolts at the top, 13mm at the bottom, plus a hose clamp further down. After removing all wiring first, pop the two coolant line fittings loose and pull the hard line out from under the alternator.
Now grab the billet coolant plug from your kit. Drop the O-ring on, apply a bit of grease to the O-ring, and reinstall the plug with the factory bolt. This seals off the coolant passage permanently.
Disconnect the remaining coolant lines going to the EGR cooler. Remove all 13mm bolts around the cooler — five total (medium extension with a 13mm swivel works perfectly). The whole assembly lifts right out of the engine bay. It is heavy and awkward — use two hands and guide it out carefully.
Install the replacement hose from your kit — the barb end goes into the lower hose (the one you just removed from the cooler), and the quick coupler end plugs into the upper line you disconnected a moment ago. Slide the spring clamp back into place. On the top, it snaps into the factory coolant line fitting. This reroutes the DEF injector coolant flow cleanly.
Pull the wiring bridge aside and grab the block-off plate, gasket, and two supplied bolts from the kit. Use a 12mm socket and torque to 25 ft-lb. Clean, simple, permanent.
The DEF injector line runs across the back of the transmission. Unplug the connector (squeeze the blue tab and pull straight off) and install the plug from your kit. Zip tie the unplugged line up and out of the way.
Start by loosening the V-band clamp at the turbo outlet — use a 3/8" ratchet with a 7/16" socket. Then remove the two support brackets at the top and two more on the side of the downpipe. The lower section of downpipe you already installed (the new aftermarket piece) stays put.
With the V-band clamp loose, the SCR (diesel oxidation catalytic converter) assembly needs to break free from the turbo's outlet flange. Four 1/2" bolts hold it — crack them all loose with a breaker bar, then zip them all out. Once the bolts are out, use a ratchet and hammer to bump the side of the SCR until it breaks loose and falls away from the turbo. It separates cleanly from the clamp.
Unplug the temp sensor and remove the oil feed line (10mm), coolant lines (10mm), and oil drain line from the turbo. All use 10mm sockets with an impact and medium extension — they come off easily. Remove the cold-side piping (11mm T-bolt clamp) and the heat shielding from the back of the SCR (10mm).
Pull the SCR straight down from the turbo outlet. As it comes down about halfway, it needs a slight counterclockwise rotation. If it jams, place a long pry bar against the forward side of the SCR and against the transmission bell housing — pry it forward to free the back end. It drops right out.
Clean all old gasket material off the turbo pedestal. Install the new gasket from your kit — it sits right on the pedestal dowels. Slide the V-band clamp (removed from the SCR) over the new downpipe so it's ready.
If you haven't picked up your downpipe yet: Shop the 2017-2023 L5P 3.5" Downpipe ($259.19) — direct bolt-on, 304 stainless, V-band compatible.
Guide the new straight-through downpipe into position. It takes some wiggling and twisting to align everything, but once it drops onto the two turbo dowels, it seats correctly. Don't fully tighten anything yet — you need adjustability for the support bracket alignment. Get all four turbo mount bolts started first, then torque to 43 ft-lb.
Reinstall the oil drain, coolant lines, and oil feed line onto the turbo. Torque all turbo mount hardware to 89 in-lb. For the two coolant lines on this side, use the new gaskets from your EGR delete kit. The top coolant line fitting can be flipped 180° so it points downward — this makes for cleaner routing. Install the rubber plug from the kit on any unused coolant port, using the factory spring clamp.
Snug the V-band clamp tight — but not so tight that the downpipe can't pivot. Install the support bracket, feeding the two studs through the bracket holes and into the block. While tightening the bracket bolts, hold the bracket flush against the downpipe (vice grips help here). Once the bracket is flat and flush, go back up top and fully torque the V-band clamp.
If your kit included a heater core line with a quick-connect fitting, test-fit it first — one bad unit was encountered during the original install with a fitting that pulled straight out. Solution: grind down the plastic ring on the factory hose barb, pull the factory fitting out, and reuse it with the new hose and a hose clamp instead. Route the line with the supplied adapter fitting at the bottom. For the last turbo coolant line, use the 3/8" line from the kit with factory spring clamps on both ends.
Each mounting bolt has a small plastic sleeve that holds it in place — pre-load all eight bolts into their sleeves so they're ready. Set the Y-bridge back in position, align all eight bolt holes, and thread everything in. Torque to 89 in-lb with a 10mm socket. Double-check your wiring harness routing — it should come around the side, over the top, and down the front. Make sure no wires are pinched.
Slide the intercooler pipe back in, give it a quarter turn to lock the collar, and reinstall the support bolt. Reconnect the turbo inlet tube (13mm socket) and torque to 20 ft-lb. Set the airbox back in its grommets — line it up and give it a firm downward push. It snaps right in. Reconnect the MAF sensor and all wiring.
Move the AC compressor back into position, reinstall all bolts, and put the serpentine belt back on the pulleys. Reinstall the bail connector bracket over the AC compressor and reconnect all electrical connectors.
Fill the radiator and coolant overflow tank with fresh antifreeze. The L5P coolant cap is reverse thread — remember this before you start cranking on it. Expect to use approximately three full jugs of antifreeze to fill the system after this job.
Before starting the truck, reconnect both negative battery cables. Remember: with the hood open, remote start will not work.
On first startup, expect the following:
Let the truck idle through at least three full heat cycles (coolant fans cycling on and off). After each cycle, check and top off the coolant. Once the level stabilizes and the fans have cycled three times, the job is done.
Since you're already elbow-deep in your L5P, these maintenance items take minutes to swap while everything's apart:

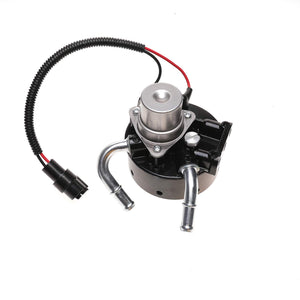
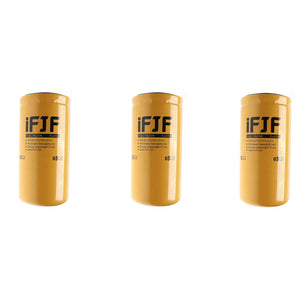
Fuel + Air Filter Combo
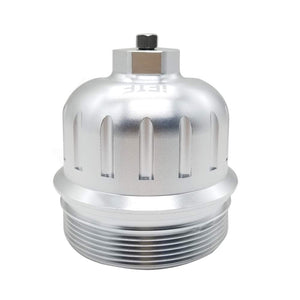
🛠️ Pro Tip: For the ultimate fuel system upgrade, pair your downpipe with our TP1015 Fuel Filter & Black Billet Aluminum Housing Cap (or the 134001 cap alone). The CNC-machined 6061-T6 cap replaces the failure-prone OEM plastic housing and includes a genuine 5-micron filter. See our L5P fuel filter cap upgrade guide for full details.
$37.99
Q: Does this guide apply to all L5P Duramax years?
A: This guide specifically covers 2017–2019 L5P Duramax trucks (the 6.6L V8). The L5P uses a different intake and EGR configuration than the earlier LML (2011–2016) and later L5D (2020+). Always verify your specific year before ordering parts.
Q: Do I need a tune for an EGR delete on the L5P?
A: Absolutely. The L5P's engine control module (ECM) expects the EGR system, DEF system, and SCR to all be present and functional. Without a tune that disables these systems, you will get multiple check engine lights, reduced power, and potential limp mode. A quality Duramax tuner (EFILive, H&S Mini Maxx, or similar) will address all emissions deletions in one tune.
Q: Can I reuse the factory coolant after an EGR delete?
A: The factory coolant can be reused if it's clean and has been recently changed. However, since you're already in the cooling system, many builders take this opportunity to flush and refill with fresh coolant. Use GM-approved DEX-COOL or equivalent for the L5P.
Q: What's the torque spec for the turbo pedestal mount bolts?
A: The four turbo pedestal mount bolts are torqued to 43 ft-lb. All other turbo-related hardware (coolant lines, oil lines, drain) is torqued to 89 in-lb. The EGR block-off plate bolts get 25 ft-lb. The turbo inlet tube clamp is torqued to 20 ft-lb.
Q: Will deleting the EGR void my warranty?
A: On a modified truck, the emissions-related warranty is effectively void on the deleted components regardless. Your General Motors powertrain warranty for non-emissions parts (engine, transmission, etc.) may still apply for unrelated failures. Consult your dealer and your tune provider for specifics.
Q: How much power will I gain from an EGR delete and downpipe?
A: The delete and downpipe alone provide modest gains from reduced backpressure and improved airflow. The bigger gains come with a proper tune that takes advantage of the increased airflow. Expect noticeable throttle response improvement (faster turbo spool) and exhaust sound improvement. Consult your tuner for dyno-proven numbers on your specific configuration.
Q: What happens to the DEF system after this delete?
A: The DEF injector is plugged off during this install. The ECM still thinks DEF is being injected, so your tune must disable DEF injection logic as well. Without the tune, the truck will derate and eventually not allow a restart. Make sure your tuner disables the entire emissions chain — EGR, DEF, and SCR — comprehensively.
Last updated: July 2026 | Compatible with 2017–2019 L5P Duramax (6.6L V8) | Torque specs: 25 ft-lb (EGR block-off), 43 ft-lb (turbo mounts), 89 in-lb (turbo lines), 20 ft-lb (turbo inlet)