


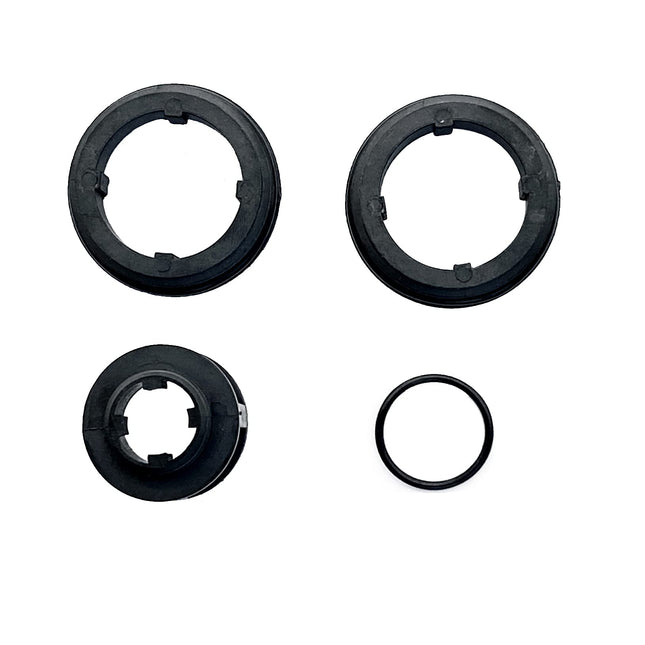
iFJF 3/4"-1" Repair Kit for Zurn 975XL & 975XL2 Backflow Preventer — Rubber Kit
3/4"-1" Repair Kit for Zurn 975XL & 975XL2 Backflow Preventer Restore your Zurn backflow preventer to proper working condition with the iFJF Repair Kit. Designed for 3/4" to 1" Zurn Wilkins 975XL and 975XL2 reduced pressure zone (RPZ) backflow preventers, this kit contains all rubber components needed to rebuild the check valves and relief valve for reliable backflow protection. Key Features Complete Rubber Kit: Includes check valve discs, relief valve diaphragm, O-rings, and seals High-Quality Rubber: Durable elastomer compounds resist chlorine, chloramine, and water treatment chemicals Exact Fit: Precision-molded to Zurn 975XL/975XL2 OEM specifications Restores Function: Eliminates weeping, dripping, and discharge from worn internal seals Cost-Effective: Rebuild instead of replacing the entire backflow preventer assembly Compatibility Model Size Zurn Wilkins 975XL 3/4" - 1" Zurn Wilkins 975XL2 3/4" - 1" Kit Contents Component Description Check Valve Discs First & Second Check — Rubber Relief Valve Diaphragm Rubber Diaphragm Assembly O-Ring Set Bonnet, Cover & Relief Valve O-Rings Seat Washers Check Valve Seat Seals Why Rebuild Your 975XL? Pass Annual Inspection: Most jurisdictions require annual backflow testing — a worn unit will fail Stop Water Waste: A leaking relief valve can waste hundreds of gallons per day Protect Water Supply: A properly functioning RPZ prevents contaminated water from backflowing into the potable supply Save vs. Replacement: A rebuild kit costs a fraction of a new backflow preventer assembly Frequently Asked Questions Q: Will this fit my 1" Zurn 975XL?A: Yes, this kit fits all 3/4" and 1" Zurn 975XL and 975XL2 models. Q: Is this a genuine Zurn kit?A: This is a high-quality aftermarket replacement kit manufactured to OEM specifications. Q: Do I need special tools to install this kit?A: Basic hand tools are sufficient — typically a screwdriver and adjustable wrench. The check modules unscrew from the valve body. Q: How often should I rebuild my backflow preventer?A: Typically every 5 years, or whenever it fails annual certification testing. More frequent in areas with hard water or high chlorine. Q: Does this include the check module assemblies?A: This kit includes rubber components (discs, diaphragm, O-rings) — not the plastic check modules themselves. If your modules are cracked, you'll need complete replacement modules. Related Products Explore more products from our Plumbing Parts collection: All Plumbing Parts — Browse our complete selection Fuel Filters & Water Separators — Protect your fuel system Oil Filters — Premium filtration for diesel engines
$27.99
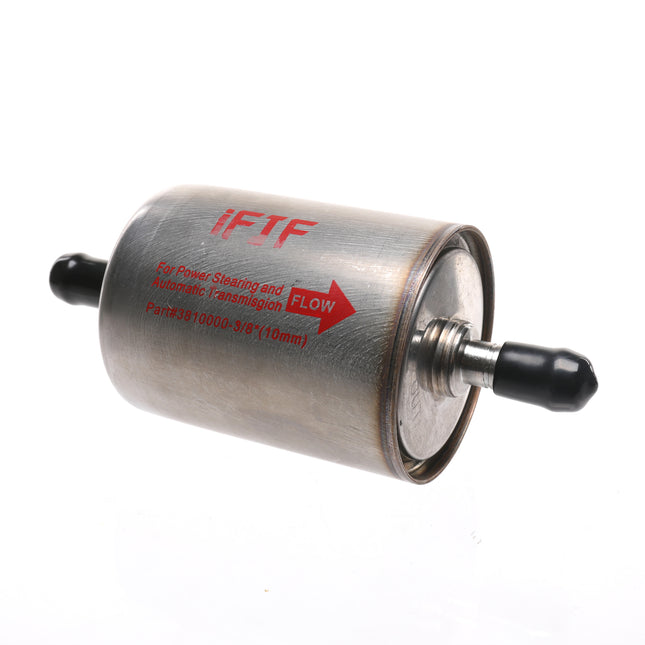
iFJF 3/8" Magnetic Inline Transmission & Power Steering Filter
3/8" Magnetic Inline Transmission & Power Steering Filter — Universal Fit Transmission failures don't happen overnight — they're the result of thousands of tiny metal particles circulating through your fluid, grinding away at bearings, valve bodies, and clutch packs. This 3/8" magnetic inline filter installs in minutes on the transmission cooler return line, capturing ferrous metal debris before it reaches sensitive components. The integrated neodymium magnet adds a second layer of filtration that standard inline filters can't match. ⚙️ Proactive Protection: Most transmissions fail from gradual wear, not sudden breakage. A $20 magnetic inline filter can catch the metal particles that warn of impending failure — often years before symptoms appear. It's the cheapest transmission insurance you'll ever buy. Why Magnetic Filtration Matters Standard transmission filters (internal pan filters and inline screen filters) only catch particles down to 40–70 microns. But the metal wear particles that cause the most damage — from bearing wear, gear micro-pitting, and clutch material shedding — are often below 20 microns and pass right through a standard filter. A neodymium magnet in the flow path captures these sub-visible ferrous particles that conventional filtration misses. The result: cleaner fluid, longer transmission life, and earlier warning of abnormal wear patterns (visible in the magnet surface during inspection). Key Features High-Strength Neodymium Magnet — Rare-earth magnet permanently bonded inside the filter housing. Captures ferrous wear particles as small as 2–3 microns — far below the threshold of any paper or screen filter. Cleanable and reusable — wipe the magnet during fluid changes. 3/8" Barbed Inlet/Outlet — Fits standard 3/8" ID transmission cooler hose. Universal application for most light trucks (½-ton, ¾-ton, 1-ton), SUVs, and passenger cars with 3/8" transmission cooler lines. Simple inline installation with two hose clamps. Dual-Purpose — Transmission & Power Steering — Works on both transmission cooler return lines and power steering return lines. Power steering systems generate metal debris from pump wear and rack/pinion friction — this filter protects both systems. Replaceable Filter Element — The internal 40-micron screen filter captures non-magnetic debris (clutch material, silicone, aluminum) while the magnet handles ferrous particles. Can be cleaned or replaced during scheduled fluid services. Compact Inline Design — Installs in tight engine bays without relocating lines or modifying routing. Aluminum housing is lightweight, corrosion-resistant, and dissipates heat effectively. Compatibility Application Fitting Size Vehicle Types Transmission Cooler Return 3/8" Barb ½-ton, ¾-ton, 1-ton light trucks, SUVs, passenger cars Power Steering Return 3/8" Barb Most light trucks and cars with 3/8" return hose Note: Verify your hose inner diameter before ordering. This filter fits 3/8" ID (inside diameter) hose. Some heavy-duty trucks (1-ton+) use ½" cooler lines — measure first. If you have ½" lines, look for our ½" version. Cross-Reference Brand Part Number Magnefine 3810000 WIX 58953 ATP TF101M Installation Guide For Transmission: Locate the transmission cooler return line — this is the line returning fluid FROM the cooler back TO the transmission (cooler fluid, not the hot line going TO the cooler). Cut the rubber hose section, install the filter with the flow arrow pointing toward the transmission, and secure with two hose clamps (not included — use quality stainless steel worm-gear clamps). For Power Steering: Install on the low-pressure return line from the steering rack/gearbox back to the reservoir. Do NOT install on the high-pressure supply line. Frequently Asked Questions Q: Will this fit my truck's transmission cooler lines?A: If your transmission cooler uses 3/8" ID (inside diameter) rubber hose, yes. This covers most ½-ton and ¾-ton trucks including Ford F-150/F-250, Chevy Silverado 1500/2500, Ram 1500/2500, Toyota Tundra, and Nissan Titan. Measure your hose ID with a caliper or ruler before ordering — some HD trucks use ½" hose. Q: How often should I clean or replace this filter?A: Inspect at every transmission fluid change (30,000–60,000 miles). Wipe the magnet clean with a rag. Replace the internal screen element if it shows significant debris accumulation. The aluminum housing itself is reusable indefinitely. Q: Does this filter restrict transmission fluid flow?A: No. The filter element is rated for full-flow applications with minimal pressure drop. It's designed to be installed on the return (low-pressure) side of the cooler circuit, where fluid velocity is already reduced. No impact on transmission cooling or line pressure. Q: Can I use this for my power steering system too?A: Yes — install it on the low-pressure return line from the steering rack back to the reservoir. Power steering systems are prone to metal-on-metal wear at the pump vanes and rack/pinion interface. This filter captures those particles before they circulate and cause further damage. Q: What's the difference between this and a standard inline filter?A: Standard inline filters only use a mesh or paper screen — they miss sub-20-micron metal particles that cause bearing and bushing wear. This filter adds a neodymium magnet that captures ferrous particles down to 2–3 microns. You get both mechanical filtration AND magnetic capture in one compact housing. Product Overview 3/8" Magnetic Inline Transmission & Power Steering Filter is a premium-quality replacement component engineered for exact fitment and reliable performance. Manufactured to meet or exceed OEM specifications using high-grade materials, this part delivers dependable service life for your equipment. Why Choose iFJF Direct iFJF Direct specializes in premium replacement parts for diesel trucks, RVs, marine, pool & spa, and automotive applications. Every product is backed by our commitment to quality, fast US-based shipping, and responsive customer support. We source directly from IATF 16949-certified manufacturers to bring you OEM-equivalent quality at competitive prices.
$29.99
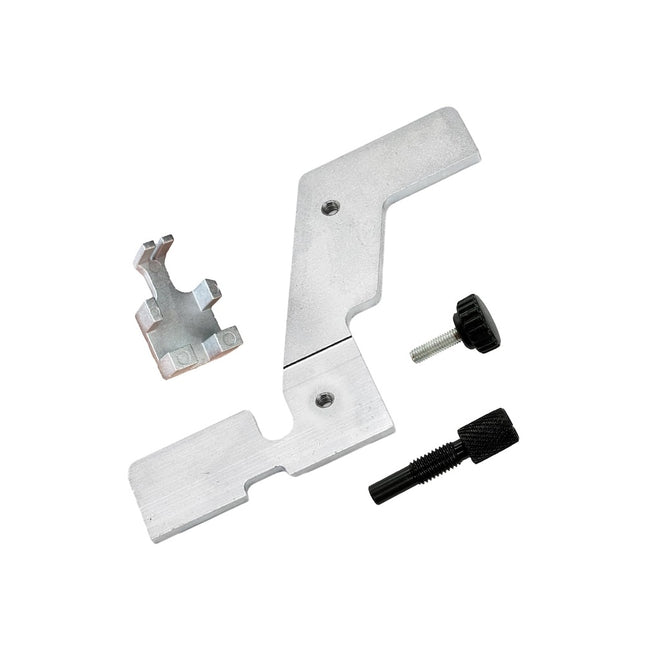
iFJF 303-507 Timing Tool Kit for Ford EcoBoost 2.0L & 2.3L — Crankshaft & Camshaft
303-507 Timing Tool Kit — Ford EcoBoost 2.0L & 2.3L Engine Alignment The iFJF 303-507 Timing Tool Kit is an essential service tool for Ford EcoBoost 2.0L and 2.3L engines. This kit includes the crankshaft timing pin and camshaft/crankshaft alignment tools needed for accurate timing belt or timing chain service, camshaft replacement, and engine timing verification. Key Features Complete Kit: Crankshaft timing pin + camshaft alignment tool + crankshaft alignment fixture Precision Machined: CNC-machined from hardened steel for accurate, repeatable alignment OEM-Equivalent: Functions identically to Ford factory tool 303-507 at a fraction of the cost Essential for Timing Service: Required for timing chain/belt replacement, head gasket jobs, and camshaft service Durable Storage Case: Includes blow-molded case for organized storage and transport Compatible Engines Engine Displacement Applications Ford EcoBoost 2.0L Turbo Focus ST, Fusion, Escape, Edge, Explorer Ford EcoBoost 2.3L Turbo Mustang EcoBoost, Focus RS, Explorer, Ranger Ford Duratec 2.0L Focus (2008-2011), Transit Connect Mazda MZR / L-Series 2.0L / 2.3L Mazda3, Mazda6, CX-7 (Duratec-derived) Kit Contents Tool Function Crankshaft Timing Pin Locks crankshaft at TDC position Camshaft Alignment Bar Holds camshafts in timed position during service Crankshaft Alignment Fixture Verifies correct crankshaft position Storage Case Blow-molded for organization When You Need This Tool Timing Chain Replacement: EcoBoost engines require precise timing — this tool set ensures correct alignment Head Gasket Service: Lock cams and crank in position before removing the cylinder head Camshaft Replacement: Hold camshafts in position while replacing or upgrading Timing Verification: Check timing after engine work to prevent catastrophic valve-piston contact Frequently Asked Questions Q: Will this work on my 2.0L EcoBoost Fusion?A: Yes, this kit is designed for all Ford 2.0L and 2.3L EcoBoost engines across Focus, Fusion, Escape, Edge, Explorer, Mustang, and Ranger applications. Q: Is this the same as the Ford 303-507 factory tool?A: Functionally equivalent — performs the same timing lock and alignment functions at a significantly lower cost. Q: Do I need this tool for a timing chain job?A: Yes, proper camshaft and crankshaft locking is critical for EcoBoost timing chain replacement. Attempting without proper tools risks engine damage. Q: Does it come with instructions?A: Basic usage guide included. We recommend referencing Ford factory service manual procedures for full timing service instructions. Q: Will this work on the 2.7L or 3.5L EcoBoost?A: No, this kit is specifically for the 2.0L and 2.3L EcoBoost and Duratec engines. The 2.7L and 3.5L V6 engines use different timing tool sets. Related Products Explore more products from our Automotive Tools collection: All Automotive Tools — Browse our complete selection Fuel Filters & Water Separators — Protect your fuel system Oil Filters — Premium filtration for diesel engines
$37.99

iFJF 3106996022 RV AC Control Relay Board for 579/590/595/600 Series
3106996022 Heat & Cool Analog Control Relay Board for RV Air Conditioners — 579, 590, 595 & 600 Series When your RV's air conditioner stops responding to the thermostat — no cooling, no heat, or the fan won't kick on — the analog control relay board is the #1 suspect. This 3106996022 replacement board is a direct plug-and-play fit for Dometic and compatible RV rooftop AC units in the 579, 590, 595, and 600 series. No programming, no special tools — just swap the board, reconnect the harnesses, and you're back to comfortable temperatures. 🔧 Diagnostic Check: Before replacing the board, verify: (1) 12V DC and 120V AC power at the unit, (2) thermostat is calling for cooling/heating, (3) no blown fuses on the existing board. If power is present and the thermostat is calling but nothing happens, the relay board is the likely culprit. Key Features Exact OEM Replacement — Direct replacement for Dometic 3106996022 and 3311924 analog control relay boards. Same connector pinouts, same relay configuration, same mounting pattern. No wiring modifications needed. Plug-and-Play Installation — Remove the old board (typically 4–6 screws), disconnect the wire harness connectors, connect them to the new board in the same positions, and secure. Most installations take 20–30 minutes with just a screwdriver. Full Function Control — Controls all standard RV AC functions: compressor (cooling), heat strip (if equipped), fan (high/low/auto), and reversing valve (heat pump models). Tested to match OEM relay timing and sequencing. Heavy-Duty Relays — Industrial-grade relays rated for the constant cycling of RV AC compressors and fan motors. Silver alloy contacts resist arcing and welding — a common failure mode on cheaper replacement boards. Conformal Coating — Circuit board coated with moisture-resistant conformal coating to withstand the humidity, condensation, and temperature swings of rooftop RV installations. Compatibility — RV Air Conditioner Series Series Models Covered Applications 579 Series All 579-series analog control units Travel trailers, pop-ups, small motorhomes 590 Series All 590-series analog control units Mid-size travel trailers, fifth wheels 595 Series All 595-series analog control units Large fifth wheels, Class A motorhomes 600 Series All 600-series analog control units Premium Class A motorhomes, high-BTU units Specifications Specification Value OEM Part Numbers 3106996022, 3311924 Control Type Analog relay board (non-digital) Functions Compressor, fan (high/low/auto), heat strip, reversing valve Input Voltage 12V DC control / 120V AC load Mounting Direct replacement — same screw pattern as OEM Symptoms of a Failed Control Board Thermostat clicks but compressor doesn't start Fan runs but compressor never engages in cool mode AC works intermittently — runs for a while then shuts off Heat mode doesn't respond (heat strip or heat pump models) Burned smell or visible scorch marks on the board Fan stuck on one speed regardless of thermostat setting Unit completely unresponsive to any thermostat command Why Replace Instead of Repair While individual relays can sometimes be replaced by someone with soldering skills, a burned relay often indicates broader heat damage to the board — traces, solder joints, and adjacent components may be compromised. A new board restores ALL functions with factory-fresh relays and traces. At roughly the cost of one service call from an RV tech ($100–$150 minimum), this board pays for itself on the first repair. Frequently Asked Questions Q: How do I know if my AC uses this control board?A: Check your RV AC unit's model/series label, typically located on the interior ceiling assembly or inside the rooftop unit's electrical compartment. If the model number begins with 579, 590, 595, or 600, this board is compatible. You can also visually match your current board to the product images — the connector layout and relay positions are distinctive. Q: Is this board compatible with digital thermostats?A: This is an analog relay board designed for basic analog thermostats and some early digital wall thermostats. It is NOT compatible with modern multi-zone digital control systems (CCC/CCC2 thermostats) — those require a different control board. Check your thermostat type before ordering. Q: Can I install this myself or do I need an RV technician?A: If you're comfortable with basic electrical work — disconnecting and reconnecting wire harnesses, using a screwdriver — you can install this board yourself in 20–30 minutes. Always disconnect shore power AND battery before working on any RV electrical component. Take a photo of the existing wire connections before disconnecting them. Q: Does this board support a heat strip or heat pump?A: Yes. The board includes relay circuits for heat strip and heat pump reversing valve control. If your RV AC unit has a heat strip installed, verify the electrical connections match the board's heat strip terminal — most installations use the same connector. Product Overview 3106996022 RV AC Control Relay Board for 579/590/595/600 Series is a premium-quality replacement component engineered for exact fitment and reliable performance. Manufactured to meet or exceed OEM specifications using high-grade materials, this part delivers dependable service life for your equipment. Why Choose iFJF Direct iFJF Direct specializes in premium replacement parts for diesel trucks, RVs, marine, pool & spa, and automotive applications. Every product is backed by our commitment to quality, fast US-based shipping, and responsive customer support. We source directly from IATF 16949-certified manufacturers to bring you OEM-equivalent quality at competitive prices.
$49.99
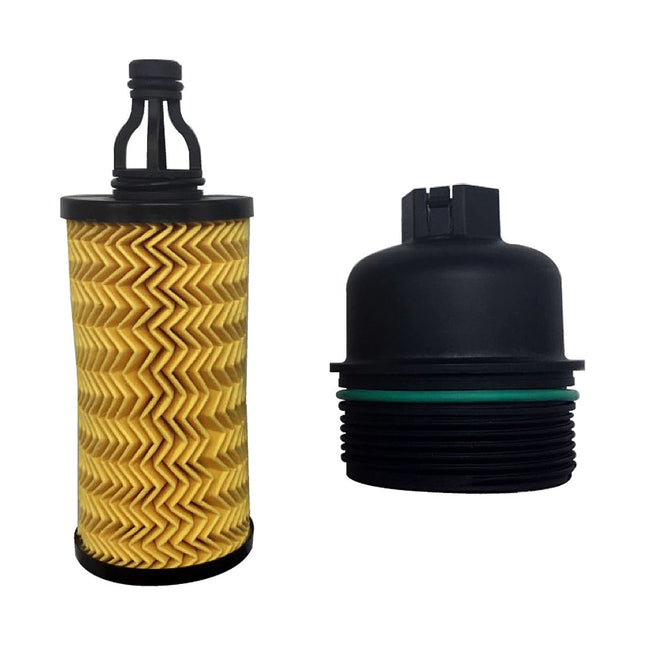
iFJF 311401 Oil Filter & Housing Cap for 2014-2020 Maserati Ghibli Quattroporte Levante 3.0L V6
311401 Oil Filter & Housing Cap Kit — 2014-2020 Maserati Ghibli, Quattroporte, Levante 3.0L V6 The 311401 Oil Filter and Housing Cap Kit is a complete oil change solution for 2014-2020 Maserati Ghibli, Quattroporte, and Levante vehicles equipped with the 3.0L twin-turbo V6 (F160) engine. This kit includes both the high-efficiency oil filter cartridge element AND the replacement oil filter housing cap — because on these Maserati engines, the plastic OEM cap is notorious for cracking at the torque spec tabs, leading to oil leaks and low oil pressure warnings. Replace both in one job. Key Features Complete Oil Change Kit: Filter cartridge + replacement housing cap in one package — everything you need for a proper oil service. Upgraded Housing Cap: Reinforced construction addresses the weak point of the factory plastic cap that commonly cracks at the 25Nm torque tabs. High-Efficiency Filter Media: Multi-layer synthetic/cellulose blend captures particles down to 20 microns — protecting the F160's twin turbochargers from oil contamination. OEM-Spec Bypass Valve: Internal bypass valve opens at the correct pressure differential — ensures oil flow continues even if the filter is restricted (cold start protection). Pre-Lubed O-Rings: Factory-applied silicone lubrication on all sealing surfaces for proper installation and leak-free operation. Compatibility Year Make Model Engine 2014-2019 Maserati Ghibli 3.0L Twin-Turbo V6 (F160) 2014-2019 Maserati Quattroporte 3.0L Twin-Turbo V6 (F160) 2017-2020 Maserati Levante 3.0L Twin-Turbo V6 (F160) Frequently Asked Questions Q: Why do I need to replace the housing cap too?A: The factory Maserati oil filter housing cap is made of plastic with molded torque tabs. Over time and repeated oil changes, these tabs crack — especially if over-torqued. A cracked cap causes oil leaks, low oil pressure, and potential engine damage. Our replacement cap is reinforced to prevent this common failure. Q: What oil should I use with this filter?A: Maserati recommends 5W-40 full synthetic meeting API SN or ACEA C3 specifications. Brands commonly used include Pennzoil Platinum Euro, Mobil 1 ESP, and Shell Helix Ultra. Capacity: approximately 8.5 quarts with filter change. Q: Can I do this oil change myself or do I need a dealer?A: The F160 V6 oil change is more involved than a typical car due to undertray removal and filter housing access, but it's absolutely DIY-friendly with the right tools. You'll need a 36mm socket for the housing cap, a torque wrench (25Nm), and ramps or a lift. Dealer oil changes on these cars often run $400-500 — DIY saves $250+ per change.Related Guides & Articles📖 Maserati Ghibli Oil Change: DIY Guide — Save $250+ Per Service
$33.99

iFJF 322-3154 Fuel Filter for Cat 312E 320D2 320E 324E 329E Excavators
Overview The 322-3154 Fuel Filter is engineered for Caterpillar's mid-size excavator lineup — the machines that power construction, mining, and earthmoving operations worldwide. This spin-on filter provides dual-stage protection: particulate filtration plus water separation, ensuring clean fuel delivery to your Cat engine's high-pressure common rail injection system. Compatible with C4.4, C6.6, and C7.1 ACERT engines across the 312E through 329E series. Key Features Genuine CAT-Spec Filtration: 4-micron absolute rating protects high-pressure injectors from wear Water Separation: Integrated hydrophobic media strips emulsified water from diesel fuel Heavy-Duty Construction: Reinforced steel canister withstands high-vibration excavator environments Broad Excavator Coverage: Fits 312E, 315E, 320D2, 320E, 324E, 329E, and more Extended Service Life: 500-hour service interval under normal operating conditions Compatibility Table Equipment Engine Series Cat 312E Excavator C4.4 ACERT E-Series Cat 315E Excavator C4.4 ACERT E-Series Cat 320D2 Excavator C6.6 ACERT D2-Series Cat 320E Excavator C6.6 / C7.1 ACERT E-Series Cat 324E Excavator C7.1 ACERT E-Series Cat 329E Excavator C7.1 ACERT E-Series Cat 2384C/2484C Loader C6.6 ACERT C-Series Specifications Spec Value Part Number 322-3154 Filter Type Spin-On Fuel/Water Separator Micron Rating 4 micron absolute Thread Size M16 × 1.5 Service Interval 500 hours (normal) / 250 hours (severe duty) Why iFJF for Heavy Equipment? Every filter batch-tested for burst pressure and filtration efficiency per ISO 4548 Anti-drainback valve prevents dry starts after filter changes Save 40-60% vs CAT dealer pricing — same protection, smarter fleet management Bulk pricing for fleet and rental companies — contact us FAQ Q: Will this fit my Cat 320DL?A: The 320DL typically uses a different fuel filter configuration. This 322-3154 is designed for the D2 and E-series excavators. Check your operator's manual or contact us with your machine serial number for verification. Q: How often should I drain the water separator?A: Check the water-in-fuel (WIF) sensor daily. Drain any accumulated water immediately. Even small amounts of water can damage common rail injectors — the #1 cause of Cat fuel system failure. Q: Can I use this on Cat generators?A: Only if your generator set uses the same C4.4/C6.6/C7.1 engine platform and filter head. Always verify by part number cross-reference before ordering.
$179.99
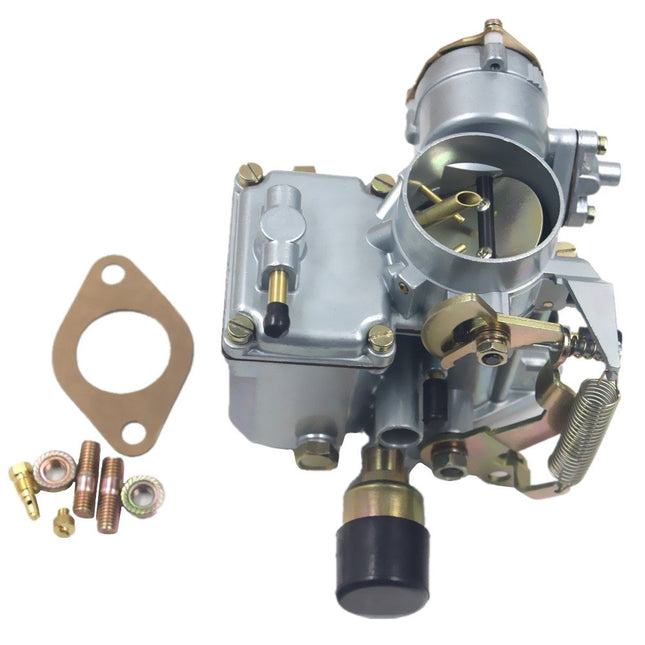
iFJF 34 PICT-3 Carburetor for 1971-1979 VW Beetle Super Beetle — 1600cc Dual Port Electric Choke
34 PICT-3 Carburetor for 1971-1979 VW Beetle & Super Beetle — 1600cc Dual Port Restore your classic Volkswagen's performance with this 34 PICT-3 reproduction carburetor from iFJF Direct. Precision-engineered for the 1600cc dual port air-cooled engine, this carburetor delivers the smooth idle, crisp throttle response, and reliable cold starts your vintage VW deserves. Key Features Exact 34 PICT-3 Reproduction: Manufactured to replicate the original Solex 34 PICT-3 specifications — bolt pattern, venturi sizing, and jetting match OEM specifications for the 1600cc dual port engine. 12V Electric Choke: Pre-installed automatic electric choke ensures reliable cold starts. Connect to a switched 12V ignition source for hands-free warm-up enrichment. Improved Throttle Response: Precision-machined throttle shaft and venturi provide crisp, immediate throttle response — a noticeable upgrade over worn 50-year-old original carbs. Complete Ready-to-Install: Arrives fully assembled with electric choke, mounting gasket, and baseline adjustments set for immediate startup and driving. Classic VW Compatibility: Fits 1971-1979 Beetle, Super Beetle, 1973-1974 Thing, and 1971-1974 Karmann Ghia with 1600cc dual port engines. Compatibility Make Model Years Engine Volkswagen Beetle 1971-1979 1600cc Dual Port Volkswagen Super Beetle 1971-1979 1600cc Dual Port Volkswagen Thing (Type 181) 1973-1974 1600cc Dual Port Volkswagen Karmann Ghia 1971-1974 1600cc Dual Port Specifications Specification Value Carburetor Type 34 PICT-3 (Solex reproduction) Choke Type 12V Electric (automatic) Engine 1600cc Dual Port Air-Cooled Replaces Part # 113129031K, 34PICT-3 Barrels Single barrel, progressive Why Choose iFJF Direct? Our 34 PICT-3 reproduction is built to tight tolerances using quality materials that stand up to modern ethanol-blended fuels. Every unit is inspected before shipping. Satisfaction guaranteed. Frequently Asked Questions Q: Will this fit my VW Beetle?A: This 34 PICT-3 carburetor fits 1971-1979 Volkswagen Beetle and Super Beetle with the 1600cc dual port engine. It also fits 1973-1974 VW Thing and 1971-1974 VW Karmann Ghia with the same engine configuration.Q: Is this a genuine Solex carburetor?A: This is a high-quality reproduction of the Solex 34 PICT-3 carburetor, manufactured to OEM specifications. It provides the same fit, function, and performance as the original at a more accessible price point.Q: Does it come with the electric choke?A: Yes — this carburetor includes the 12V electric choke assembly pre-installed. Simply connect the choke wire to a 12V switched ignition source for automatic cold-start enrichment.Q: Is it pre-adjusted out of the box?A: The carburetor comes with baseline settings that should allow the engine to start and run. Fine-tuning of idle speed, idle mixture, and choke adjustment will be needed for optimal performance on your specific engine.Q: What gaskets are included?A: The carburetor includes the base gasket for mounting to the intake manifold. We recommend also replacing your intake manifold gaskets and fuel line during installation for best results. Order today and get your classic VW running right. Free shipping on orders $50+.
$253.99
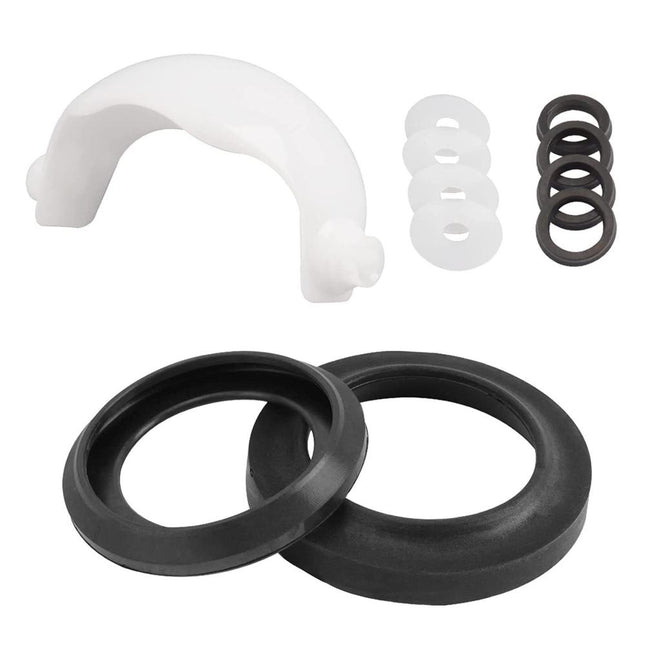
iFJF 34117 Waste Ball Valve Seal Kit for Aqua Magic Style II, Style Lite, Style Plus RV Toilets
Overview The iFJF 34117 Waste Ball Valve Seal Kit is a direct replacement for the critical sealing component in Aqua Magic Style II, Style Lite, and Style Plus RV toilets. The waste ball valve seal creates the watertight barrier between your toilet bowl and the black water holding tank — when it fails, you get persistent odors, water leakage, and an unpleasant living environment in your RV or camper. Over time, the factory rubber seal hardens, cracks, or loses elasticity due to exposure to chemicals, temperature extremes, and mechanical wear from the flush ball mechanism. This affordable seal kit restores a tight, odor-free seal without the expense of replacing the entire toilet assembly ($200-400 for a new RV toilet). Installation takes about 30 minutes with basic hand tools. Key Features Direct OEM Replacement — Compatible with Aqua Magic Style II, Style Lite, Style Plus, and related Thetford RV toilet models Stops Odors & Leaks — Restores the water seal that prevents black tank odors from entering your RV living space Durable Rubber Construction — Manufactured from chemical-resistant rubber compound that withstands RV toilet chemicals and holding tank treatments Complete Kit — Includes ball valve seal, O-rings, and necessary gaskets for a thorough rebuild DIY-Friendly — Replace in approximately 30 minutes with basic hand tools; no special plumbing skills required Save $200+ — A $10-15 seal kit vs. $200-400 for a new RV toilet assembly Technical Specifications Specification Details Part Number 34117 Compatible Toilets Thetford Aqua Magic Style II, Style Lite, Style Plus Material Chemical-Resistant Rubber Compound Includes Waste Ball Valve Seal, O-Rings, Gaskets Installation Time Approx. 30 Minutes Compatibility Toilet Model Compatibility Aqua Magic Style II ✅ Direct Fit Aqua Magic Style Lite ✅ Direct Fit Aqua Magic Style Plus ✅ Direct Fit Other Thetford Residential-Style RV Toilets ✅ May Fit — Verify Design Installation Guide Turn Off Water — Shut off water supply to the RV toilet Empty & Clean Bowl — Flush and thoroughly clean the toilet bowl and flush ball area Remove Old Seal — Access the waste ball valve area (typically by removing the toilet from the floor flange or accessing through the bowl), extract the old hardened seal Clean Seal Groove — Remove all debris, mineral deposits, and old seal residue from the seal groove Install New Seal — Press the new iFJF 34117 seal into the groove, ensuring even seating around the entire circumference Reassemble & Test — Reinstall toilet if removed, restore water, fill bowl, and check for leaks and proper seal operation FAQ Q: How do I know if my waste ball valve seal needs replacement?A: Signs of a failing seal include: water in the toilet bowl draining slowly or not holding at all, persistent sewer odors in the RV bathroom, visible cracking or hardening of the rubber seal (visible when looking at the flush ball area), or the toilet requiring more frequent water refills to maintain the bowl seal. Q: Can I replace the seal without removing the toilet from the floor?A: On most Aqua Magic models, the seal is accessible from above after removing the flush ball mechanism — the toilet does not need to be removed from the floor flange. However, access is tight and removing the toilet (just two floor bolts) can make the job significantly easier. Q: How long should an RV toilet ball valve seal last?A: With regular use, expect 2-5 years from a quality seal. Factors that shorten seal life include: frequent use of harsh chemical holding tank treatments, extreme temperature swings (winter storage freeze-thaw cycles), and failure to maintain water in the bowl (a dry seal cracks faster). Q: Will this stop my toilet from holding water?A: If the water loss is caused by a worn ball valve seal, yes. If the toilet bowl itself is cracked or the flush ball is damaged, those are separate issues requiring different repairs. The majority of "toilet won't hold water" complaints in RV toilets are seal-related. Q: Do I need any special lubricant for the new seal?A: We recommend applying a thin coat of silicone-based plumber's grease or Thetford-approved seal lubricant to the new seal before installation. This protects the rubber, ensures smooth flush ball operation, and extends seal life. Never use petroleum-based lubricants as they degrade rubber. Q: Is this the same as Thetford part 34117?A: Yes. This aftermarket seal is manufactured to the same specifications as Thetford OEM part 34117 and provides equivalent fit and durability at a more accessible price point. Q: Can I use chemical treatments with this seal?A: Yes. The seal material is formulated to resist standard RV holding tank chemicals. For maximum seal longevity, avoid pouring undiluted chemicals directly onto the seal. Add treatments to the holding tank through the toilet bowl with water running. Q: What if the new seal still doesn't hold water?A: If the problem persists after installing a new seal, check: (1) The flush ball surface for scratches or damage that prevents sealing, (2) Proper seal seating in the groove (fully pressed in, no twists), (3) The toilet bowl itself for hairline cracks. The flush ball may also need replacement if heavily scratched. 📚 Related Guides & Articles iFJF Guides & Resources — Expert Tips, Installation Tutorials & Buying Guides
$39.99
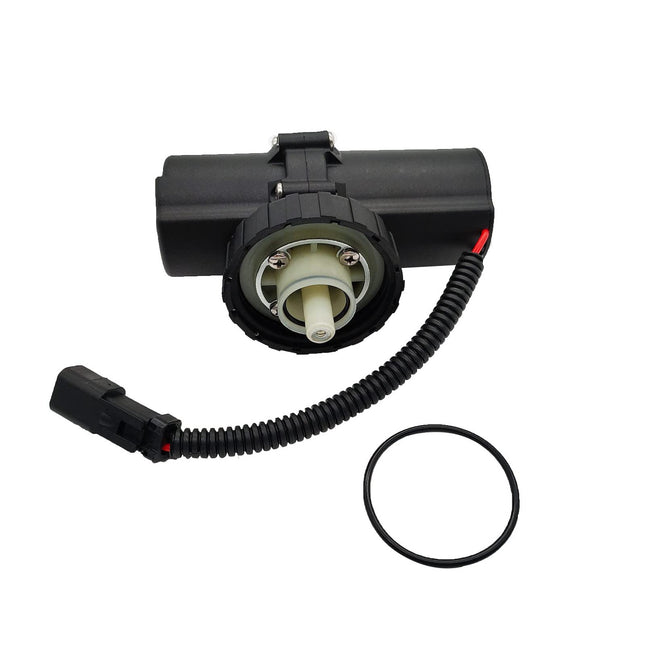
iFJF 349-5327 12V Fuel Extraction Pump for Perkins 804C-33 & CAT
349-5327 12V Electric Fuel Extraction Pump for Perkins & CAT Diesel Engines When the fuel transfer pump on your Perkins or Caterpillar engine fails, the machine doesn't run — period. This 12V electric fuel extraction pump is a direct replacement for the 349-5327 OEM unit found on Perkins 800 Series and CAT compact diesel engines. Designed for generators, compact construction equipment, marine auxiliary engines, and industrial power units — anywhere a Perkins 800-series or equivalent CAT engine provides the power. 🔌 12V Electric — Self-Priming: This is an electric fuel pump, not a mechanical lift pump. It requires 12V DC power (typically from the engine's electrical system or a dedicated circuit). Self-priming design eliminates the need for manual bleeding in most installations. Key Features Direct OEM Replacement — Engineered as a bolt-on replacement for Perkins 349-5327 and MP10325 fuel transfer pumps. Matches OEM mounting pattern, fuel line connections, and electrical connector specifications. 12V DC Electric Operation — Self-priming electric pump delivers consistent fuel flow regardless of engine RPM — unlike mechanical pumps that lose efficiency at low idle. Critical for generators that run at constant RPM but need reliable starting fuel delivery. Wide Cross-Reference Coverage — Replaces 349-5327, MP10325, 232-5877, 228-9130, 228-9129, and many more. Compatible with Perkins 804C-33, 804C-33T, 804D-33, 804D-33T, 422E, 432D, 3044C, 259B3, 279C, 279C2, 289C engine models. Corrosion-Resistant Construction — Aluminum pump body with stainless steel internal components. Designed to withstand the vibration, heat, and fuel chemistry of diesel engine compartments in generator enclosures, engine bays, and machinery frames. Pre-Set Output Pressure — Factory-calibrated output pressure matches Perkins/CAT fuel system specifications. No regulator adjustment needed for standard installations. Compatibility Engine Family Models Typical Applications Perkins 800 Series 804C-33, 804C-33T, 804D-33, 804D-33T Generators, compact wheel loaders, telehandlers, mobile compressors Perkins 400 Series 422E, 432D Compact excavators, skid steers, aerial work platforms Perkins 3000 Series 3044C Marine auxiliary engines, industrial power packs CAT Compact 259B3, 279C, 279C2, 289C Compact track loaders, multi-terrain loaders Cross-Reference Part Numbers Brand Part Numbers Perkins (OEM) 349-5327, MP10325 CAT 232-5877, 228-9130, 228-9129 Specifications Specification Value Voltage 12V DC Pump Type Electric diaphragm / gear pump Fuel Compatibility Diesel (standard and biodiesel up to B20) Mounting Direct bolt-on — matches OEM mounting pattern Self-Priming Yes Why This Pump Fails and When to Replace Electric fuel pumps in industrial and generator applications fail for predictable reasons: (1) Contaminated fuel — running without a properly maintained primary filter allows debris to score the pump's internal surfaces. (2) Water in fuel — causes internal corrosion on the electric motor windings and check valves. (3) Continuous operation — generator pumps that run for thousands of hours between services experience normal brush/motor wear. (4) Voltage issues — low battery voltage or poor ground connections cause the pump motor to overheat. If your engine cranks but won't start, or starts and then dies after a few seconds, test the fuel pump output before replacing injection components. Frequently Asked Questions Q: How do I confirm this pump fits my Perkins engine?A: Check your engine's data plate for the model number. If it's an 804C-33, 804C-33T, 804D-33, 804D-33T, 422E, 432D, or 3044C — or a CAT 259B3/279C/279C2/289C — this pump is compatible. Visually compare the mounting flange, fuel line positions, and electrical connector to the product images before ordering. Q: Is this a mechanical or electric pump?A: This is a 12V electric pump. It requires a 12V DC power supply. It is NOT a mechanical lift pump driven by the engine camshaft. Most Perkins 800-series engines use electric lift pumps — verify your engine's configuration before ordering. Q: Do I need to bleed the fuel system after installation?A: This pump is self-priming, so in most installations it will draw fuel and purge air on its own. For stubborn air locks (common after a complete system drain), loosen the injection pump inlet fitting until fuel appears, then tighten and attempt to start. Never use starting fluid on a diesel engine. Q: What causes these pumps to fail — and how do I prevent it?A: Water contamination and dirty fuel are the top two killers. Always maintain your primary fuel filter/water separator. Check for water in the fuel system monthly if the equipment is stored outdoors or runs seasonally. A fuel pressure gauge on the output side can warn you of declining pump performance before it fails completely. Product Overview 349-5327 12V Fuel Extraction Pump for Perkins 804C-33 & CAT is a premium-quality replacement component engineered for exact fitment and reliable performance. Manufactured to meet or exceed OEM specifications using high-grade materials, this part delivers dependable service life for your equipment. Why Choose iFJF Direct iFJF Direct specializes in premium replacement parts for diesel trucks, RVs, marine, pool & spa, and automotive applications. Every product is backed by our commitment to quality, fast US-based shipping, and responsive customer support. We source directly from IATF 16949-certified manufacturers to bring you OEM-equivalent quality at competitive prices.
$79.99
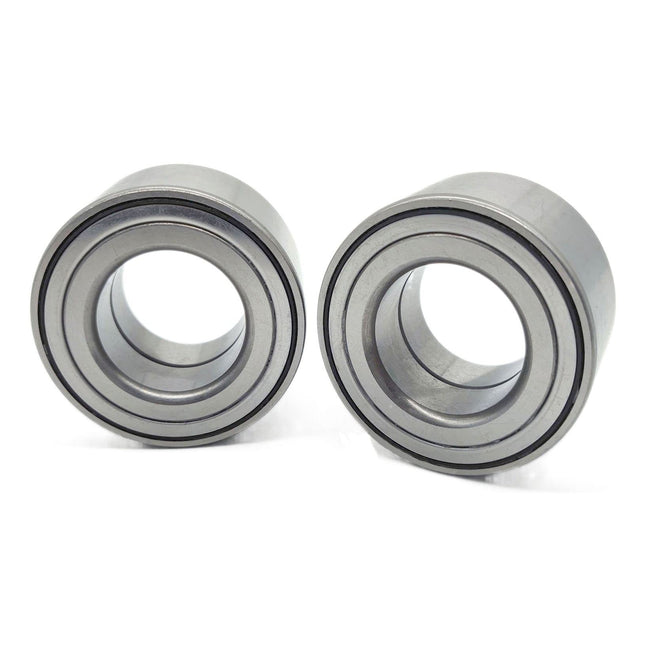
iFJF 3514635 3585502 Rear Wheel Bearing Kit for Polaris Ranger 400-900 4x4
3514635 3585502 Rear Wheel Bearing Kit — Polaris Ranger 400-900 4x4 The 3514635 3585502 Rear Wheel Bearing Kit is a complete rear wheel bearing replacement set engineered for Polaris ATV and UTV models. Restore smooth wheel rotation, eliminate grinding noise, and fix excessive wheel play with this direct-fit bearing kit. Whether you're servicing a workhorse Ranger or prepping for the trail, fresh bearings mean safer, more predictable handling — and no seized hubs in the backcountry. Key Features Complete Replacement Set: Includes all bearings, seals, and snap rings needed for a full rear wheel bearing service — both sides. Precision-Ground Races: Heat-treated chrome steel (GCr15) bearings with precision-ground races for smooth rotation and long service life under heavy loads. Double-Lip Seals: Upgraded double-lip rubber seals keep water, mud, and sand out significantly better than single-lip seals — critical for ATV/UTV use. Pre-Packed Grease: Bearings come pre-packed with high-temp, water-resistant lithium complex grease — ready to install out of the box. Direct OEM Replacement: Matches Polaris part numbers 3514635 and 3585502 exactly — no modifications needed. Compatibility Make Model Engine Years Polaris Ranger 400 400cc 2010-2014 Polaris Ranger 500 500cc 2005-2018 Polaris Ranger 700 700cc 2005-2010 Polaris Ranger 800 800cc 2010-2014 Polaris Ranger 900 900cc 2013-2019 Polaris Worker 500 4x4 500cc Various Frequently Asked Questions Q: How do I know if my wheel bearings need replacement?A: Common symptoms: grinding or humming noise from the wheel area that changes with speed, excessive wheel play when you rock the tire side-to-side, uneven tire wear, or the wheel feeling "loose" during turns. To test: jack up the ATV, grab the tire at 12 and 6 o'clock, and rock it — any play indicates worn bearings. Q: Can I replace just one side?A: We recommend replacing both sides at the same time. Bearings wear at similar rates, and if one side is gone, the other is usually not far behind. This kit includes components for both sides. Q: What tools do I need for this job?A: You'll need a bearing press or a bearing driver kit, snap ring pliers, socket set, torque wrench, and a dead blow hammer. A hydraulic press makes the job straightforward. Without one, you can use the freezer/heat method (freeze bearings, heat hub with a heat gun), but a press is strongly recommended.Related Guides & Articles📖 ATV Wheel Bearing Replacement: Step-by-Step DIY Guide
$53.99
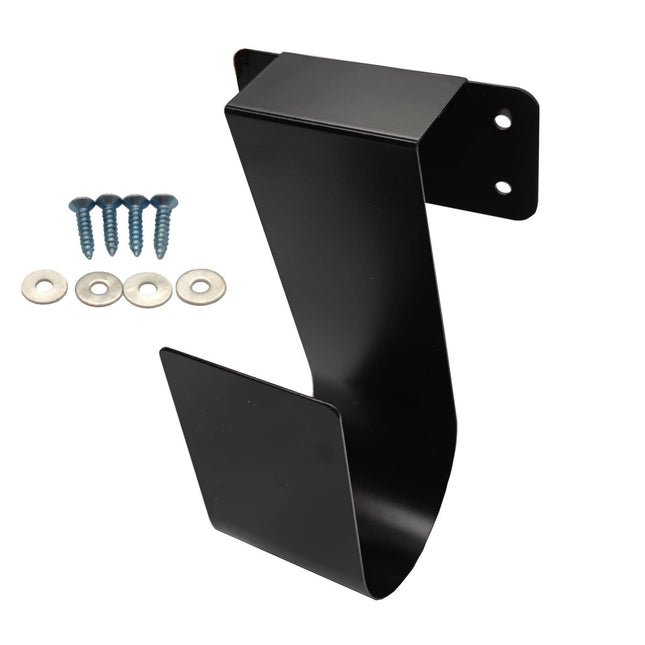
iFJF 35610 Metal Hook Hanger Replacement for Hose and Outdoor Decorative Suspension — Heavy Duty
Overview The iFJF 35610 Metal Hook Hanger is a heavy-duty utility hook designed for reliable outdoor and indoor suspension applications. Whether you need to organize garden hoses, hang outdoor decorations, suspend tools in the garage, or create an organized storage solution in your shed or workshop, this versatile metal hook delivers the strength and durability you need. Constructed from heavy-gauge steel with a corrosion-resistant finish, the 35610 hook withstands outdoor exposure, workshop abuse, and the weight of heavy items without bending or breaking. The universal mounting design fits most standard wall surfaces with appropriate hardware (mounting screws sold separately based on your wall material). Key Features Heavy-Duty Steel Construction — Built from thick-gauge steel for dependable load-bearing capacity without bending under weight Corrosion-Resistant Finish — Protective coating resists rust and oxidation for reliable outdoor and damp-environment use Versatile Applications — Ideal for garden hoses, outdoor decorations, garage tool storage, extension cords, ladders, and more Universal Mounting — Pre-drilled mounting holes accept standard screws or bolts for secure attachment to wood, drywall (with anchors), or concrete (with appropriate fasteners) Curved Hook Design — Wide opening and deep curve securely hold items without slipping off, even in windy outdoor conditions Multi-Pack Flexibility — Use individually for focused storage or combine multiple hooks for organized wall storage systems Technical Specifications Specification Details Part Number 35610 Material Heavy-Gauge Steel with Corrosion-Resistant Finish Application Indoor/Outdoor Suspension, Hose Storage, Utility Hanging Mounting Pre-Drilled Holes — Screws Sold Separately Finish Corrosion-Resistant Coating Recommended Uses Garden hose storage and organization Outdoor decorative item suspension (wind chimes, planters, bird feeders) Garage tool and extension cord hanging Workshop and shed organization RV and camper exterior accessory mounting Bicycle, ladder, and bulky item wall storage FAQ Q: What is the weight capacity of this hook?A: When properly mounted into a stud or solid backing, this heavy-gauge steel hook can support approximately 25-40 lbs (11-18 kg). For drywall installations, always use appropriate wall anchors rated for your intended load. The limiting factor is usually the mounting surface and hardware, not the hook itself. Q: Are mounting screws included?A: Mounting screws are not included, as the appropriate fastener depends on your mounting surface — wood screws for studs, toggle bolts or anchors for drywall, concrete anchors for masonry, etc. The pre-drilled holes accommodate standard #8 or #10 screws. Q: Can this be used outdoors in all weather conditions?A: Yes. The corrosion-resistant finish is designed for outdoor exposure to rain, humidity, and temperature fluctuations. For coastal or extreme environments, periodic inspection and touch-up of the finish is recommended to maintain appearance and rust resistance. Q: Will this hold a heavy, water-filled garden hose?A: Yes. A standard 50-foot garden hose (approximately 8-10 lbs dry, slightly more when water remains in the hose) is well within the hook's capacity. Ensure the hook is mounted into a stud or solid wood backing for the most secure installation. Q: How deep is the hook opening?A: The hook features a generous deep curve design that securely cradles items. The exact dimensions vary by production batch — refer to the product photos for scale reference. The opening accommodates standard garden hoses, extension cords, and most tool handles comfortably. Q: Can I use this indoors as a coat or bag hook?A: Absolutely. While designed for utility use, the clean metal finish works well for indoor coat hooks, bag hooks, mudroom organization, or decorative hanging applications. The heavy-duty construction easily handles coats, backpacks, and bags. Q: Is this sold individually or in a multi-pack?A: This listing is for one individual hook. For organizing multiple hoses, tools, or creating a wall storage system, order the quantity needed. Many customers purchase 3-6 hooks for a complete garage or shed organization project. Q: How does the finish hold up to UV exposure?A: The corrosion-resistant coating provides good UV protection for outdoor use. Over extended years of direct sunlight, some fading of the finish is normal but does not affect structural integrity. For longest finish life in sunny climates, occasional application of a clear protective spray coating can help. 📚 Related Guides & Articles iFJF Guides & Resources — Expert Tips, Installation Tutorials & Buying Guides
$49.99
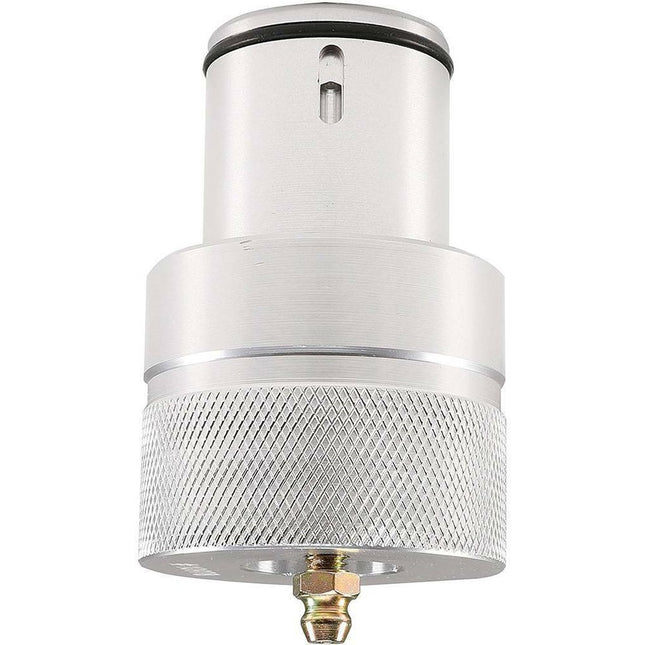
iFJF 35mm Rear Wheel Bearing Greaser Tool for Polaris RZR Ranger Sportsman General
Product Overview Service your Polaris 35mm rear wheel bearings the professional way — without removing the hub assembly. This purpose-built bearing greaser tool injects fresh grease directly into the bearing cavity through a standard zerk fitting, pushing old, contaminated grease out the opposite side in a complete flush. Designed for Polaris RZR, Ranger, Sportsman, and General models with 35mm rear bearings. A single bearing replacement costs $80-150 in parts plus 2-3 hours of labor. This tool pays for itself the first time you use it. Key Features 35mm Precision Fit — CNC-machined for an exact, leak-free seal on Polaris 35mm rear wheel bearing hubs. Won't slip or spray grease during the injection process. No Hub Removal Required — Jack up, remove the wheel and axle nut, slide the greaser over the bearing hub, and pump. No hub disassembly, no press work, no bearing removal. Complete service in 5-10 minutes per side. Complete Grease Flush — The tool forces fresh grease through the bearing from one side while pushing old, contaminated grease (with water, mud, and metal particles) out the other side. True flush, not just a top-off. CNC-Machined 6061-T6 Aluminum — Anodized for corrosion resistance and built to withstand repeated shop use. Includes O-ring seals and a standard grease gun zerk fitting. Broad Polaris Compatibility — Fits all Polaris models using 35mm rear wheel bearings: RZR 800/900/1000/XP/Turbo/Pro (2008+), Ranger 500-1000 (2013+), Sportsman 500-1000 (2009+), General 1000 (2016+). Compatibility / Fitment Brand Model Series Years Bearing Size Polaris RZR 800 / 900 / 1000 / XP / Turbo / Pro 2008-Present 35mm ID Polaris Ranger 500 / 570 / 700 / 800 / 900 / 1000 / XP 2013-Present 35mm ID Polaris Sportsman 500 / 570 / 700 / 850 / 1000 2009-Present 35mm ID Polaris General 1000 / XP 2016-Present 35mm ID Technical Specifications Specification Value Bearing Size Compatibility 35mm Inner Diameter Material 6061-T6 Aluminum (Anodized) Grease Fitting Standard Zerk (1/8" NPT) Kit Contents Greaser Body, O-Ring Seals, Zerk Fitting, Instructions Service Time Per Side 5-10 Minutes Why Choose This Polaris rear wheel bearings are exposed to water, mud, sand, and extreme loads — and they're not cheap to replace. A single OEM bearing assembly costs $80-150, and installation requires a hydraulic press and 2-3 hours of labor. Regular greasing with this tool flushes out contaminants before they cause pitting and failure, easily doubling bearing service life. At $40, it pays for itself on the first bearing you save. Trail riders especially benefit — a quick grease job before a multi-day ride prevents the dreaded "bearing howl" 50 miles from the truck. Related Products 40mm Rear Wheel Bearing Greaser for Polaris — For larger 40mm Polaris rear bearings Browse all Polaris Parts — Tools and accessories for Polaris ATV/UTV Shop All iFJF Parts — Complete product catalog Frequently Asked Questions Q: Will this work on my Polaris RZR 1000 XP?A: Yes. The RZR 1000 XP and all RZR 1000 variants (including Turbo and Pro XP) use 35mm rear wheel bearings. This greaser fits all RZR 1000 models from 2014 to present. Q: How often should I grease my rear wheel bearings?A: Every 500 miles under normal riding conditions. After any significant water crossing or mud riding. Before and after multi-day trail rides. More frequent greasing = longer bearing life — grease is cheap, bearings are not. Q: Does this work on front wheel bearings too?A: No — this is specifically designed for 35mm rear wheel bearings. Front hubs on Polaris models use different bearing sizes and configurations that require a different greaser tool. Q: Can I over-grease and damage the bearing seals?A: No — the tool design allows excess grease to exit the opposite side of the bearing, flushing old grease out rather than building pressure. The bearing seals are designed to allow this controlled grease exit path. Q: What type of grease should I use?A: Use a high-quality NLGI #2 lithium-complex or synthetic grease rated for wheel bearings. Marine-grade grease is recommended if you frequently ride through water or in wet conditions. Avoid mixing grease types — if unsure, flush completely and start fresh. Q: How do I know if my bearings are already too far gone?A: If you hear grinding, feel roughness when rotating the hub by hand, or see rust-colored grease leaking from the seal, the bearing is already damaged. Greasing can't reverse existing pitting or spalling — but it can prevent it in healthy bearings. Order with Confidence Fast shipping from our US warehouse. Dedicated customer support team ready to answer your questions. Click Add to Cart to get your order started today. Related Guides & Articles Check out these helpful resources from the iFJF blog: Golf Cart Bearing — Club Car Wheel Hub Bearing Replacement DIY Guide
$39.99
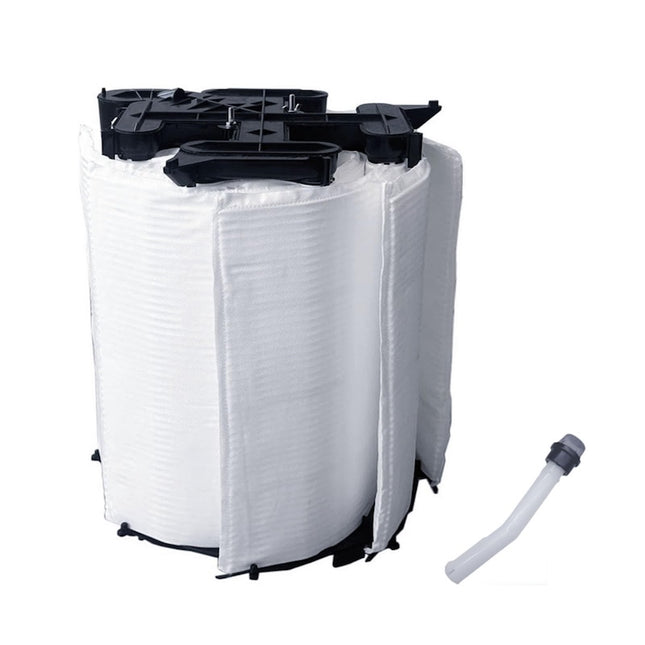
iFJF 36 Sq.ft Pool Filter Grille Assembly 59023500 | Replaces DEX3620DC DEX3600DA | iFJF
Product Overview 36 Sq.ft Pool Filter Grille Assembly 59023500 | Replaces DEX3620DC DEX3600DA | is a premium-quality replacement component engineered for exact fitment and reliable performance. Manufactured to meet or exceed OEM specifications using high-grade materials, this part delivers dependable service life for your equipment. Key Features Precision Fit: Engineered to exact OEM dimensions for leak-free, drop-in installation. Chemical Resistant: Made from high-grade materials that resist chlorine, bromine, and ozone degradation. Direct Replacement: No modifications required — simply remove the old part and install this one. Durable Construction: Premium materials prevent cracking, warping, and compression set over time. Cost-Effective: Get OEM-equivalent quality at a fraction of dealer pricing. Specifications Specification Detail Brand iFJF Product Type Pool Filter Condition New Replaces Part # 59023500 Warranty 12 Months Why Choose iFJF Direct iFJF Direct specializes in premium replacement parts for diesel trucks, RVs, marine, pool & spa, and automotive applications. Every product is backed by our commitment to quality, fast US-based shipping, and responsive customer support. We source directly from IATF 16949-certified manufacturers to bring you OEM-equivalent quality at competitive prices. Frequently Asked Questions Q: Will this fit my pool/spa model?A: Please verify your multiport valve model number against the specifications listed. This part is designed for HiFlow-compatible valves. Contact us with your valve model if you need help confirming fitment. Q: What material is this made from?A: This component is manufactured from high-grade, chemical-resistant materials engineered to withstand constant exposure to chlorine, bromine, and ozone in pool and spa environments. Q: How do I install this part?A: Installation is straightforward — remove the old component and replace with this direct-fit part. We recommend using silicone-based lubricant on gaskets and O-rings during installation for optimal sealing. Q: How long will this last?A: With proper maintenance and balanced water chemistry, these components typically provide 3-5 years of reliable service. Inspect annually for signs of wear. Q: Is this an OEM part?A: This is a premium aftermarket replacement manufactured to match OEM specifications. It provides equivalent performance at a more affordable price point.
$383.00
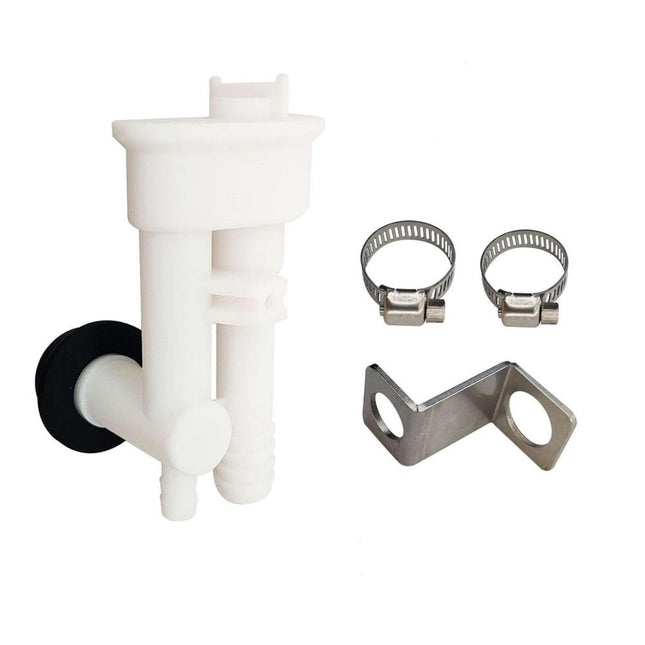
iFJF 385230325 Vacuum Breaker Kit for Sealand Traveler Toilets — Hand Sprayer
385230325 RV Toilet Vacuum Breaker Kit — Hand Sprayer — Stop Leaks & Prevent Backflow A leaking vacuum breaker on your RV toilet doesn't just waste water — it can siphon contaminated water back into your fresh water system, cause odors, and damage your bathroom floor. The iFJF 385230325 Vacuum Breaker Kit is the correct dual-port replacement for Dometic/Sealand Traveler and VacuFlush toilets equipped with a hand sprayer. Unlike single-port alternatives, this kit includes the dedicated sprayer connection port — no adapters, no leaks, no compromises. Complete kit includes vacuum breaker body, integrated dual-seal check valve, all O-rings and gaskets, and stainless steel mounting hardware. Measures 3.25" L × 1.73" W × 3.65" H for exact drop-in fit. Key Features Hand Sprayer Compatible: Dual-port design with dedicated sprayer connection — no T-fittings or adapters that create leak points. Specifically for toilets WITH a hand sprayer. Complete Kit: Vacuum breaker body (3.25"L × 1.73"W × 3.65"H), dual-seal check valve, all O-rings, gaskets, and stainless steel hardware — everything needed. Backflow Prevention: Dual-seal check valve prevents contaminated water from siphoning back into your fresh water plumbing. Meets ABYC and RVIA code requirements. Durable Materials: High-impact ABS body withstands years of vibration from road travel. Nitrile seals resist holding tank chemicals and marine sanitation products. DIY-Friendly: 20-30 minute installation with basic hand tools. 1/2" NPT connections match factory plumbing. Compatibility Brand Series Models / Notes Dometic / Sealand Traveler 110, 111, 210, 211, 510, 511 (with hand sprayer) Dometic / Sealand VacuFlush All models with hand sprayer attachment ⚠️ Not Sure Which Kit? If there's a coiled hose behind your toilet connected to the breaker → this is your kit. No hose → order 385316906 (no sprayer). Specifications Specification Detail Part Number 385230325 Dimensions 3.25"L × 1.73"W × 3.65"H Material ABS Body / Nitrile Seals / Stainless Steel Hardware Connection 1/2" NPT — Dual Port (Water Inlet + Sprayer) Check Valve Dual-Seal, Integrated Symptoms of a Failed Vacuum Breaker Water leaking or spraying from behind the toilet pedestal — especially when the hand sprayer is used Continuous slow drip from the breaker housing Bowl fails to hold water after flushing Sewage odor near the toilet (backflow through failed check valve) Reduced sprayer pressure or water hammer when flushing Installation Steps Shut off water supply to the toilet. Flush to relieve system pressure. Disconnect the hand sprayer hose and water supply line from the old breaker. Remove the old vacuum breaker (typically 2 screws or threaded collar). Clean mounting surface and inspect for cracks or damage. Install new breaker with supplied gaskets — 2-3 wraps of Teflon tape on threaded connections. Reconnect sprayer hose and water line, turn on supply, test all connections for leaks. Why Choose iFJF? iFJF vacuum breaker kits are manufactured to OEM Dometic/Sealand specifications with upgraded nitrile seals for extended service life — especially important in hot climates where rubber seals degrade faster. US-based support and fast shipping from our American warehouse. Related Products 385316906 Vacuum Breaker Kit — No Hand Sprayer 4036ER2004A Washer Tub Bearing & Seal Kit Pressure Gauge for Sand Filter Pump Frequently Asked Questions Q: Does this fit toilets without a hand sprayer?A: No. If your Sealand/Dometic toilet does NOT have a hand sprayer, you need the 385316906 (single-port) vacuum breaker kit. This 385230325 has a dedicated sprayer port. Q: How long does installation take?A: 20-30 minutes. Accessing the back of the toilet in tight RV bathrooms is typically the most time-consuming part. A compact mirror and headlamp make it easier. Q: Do I need thread sealant or Teflon tape?A: Yes. Apply 2-3 wraps of Teflon tape to male threaded connections. Do not use pipe dope or liquid sealants — they can degrade the nitrile seals. Q: Why does my breaker leak only when I use the hand sprayer?A: This is a classic sign of a failed check valve inside the vacuum breaker. The sprayer back-pressures the system, and a worn seal can't hold. Replacement is the fix. Q: Will this stop sewage odors?A: If the odor is from backflow through a failed vacuum breaker — yes. If caused by a failed floor flange seal or holding tank vent, those may need separate repair. 📚 Related Guides & Articles Complete Onan Quiet Diesel RV Generator Tune-Up Why You Need a Bluetooth Kill Switch for Your RV or Truck
$27.99
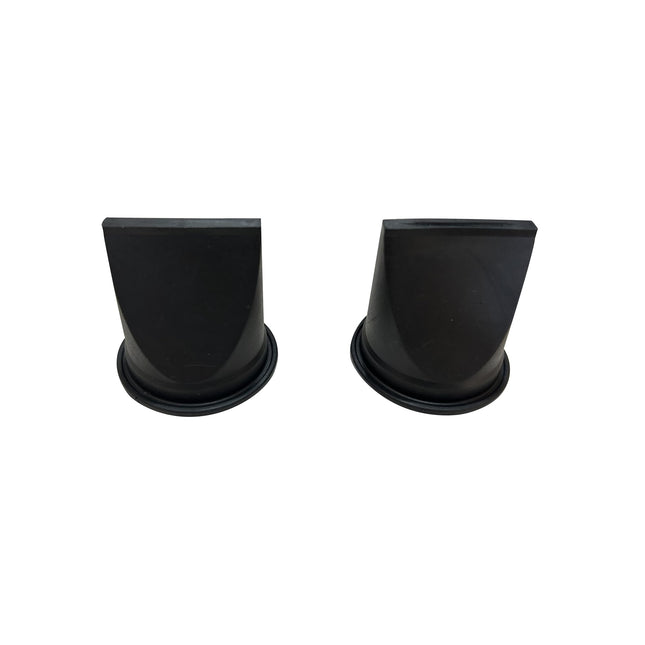
iFJF 385310076 Duckbill Valve for Sealand S&T Vacuum Pumps — Single Replacement
385310076 Duckbill Valve — Single Replacement for Sealand Vacuum Pumps When your Sealand VacuFlush toilet loses vacuum or cycles constantly, the culprit is almost always a worn duckbill valve. This iFJF 385310076 single replacement duckbill valve is manufactured from premium nitrile rubber and sized for all Sealand S-Series and T-Series vacuum generator pumps. Ideal for boat and RV owners who need to replace one failed valve or build a spare parts kit — without buying a full rebuild kit. Key Features Premium Nitrile Rubber: Withstands chemical exposure from holding tank treatments and mineral buildup — outlasts generic silicone valves. Single Valve Purchase: Buy exactly what you need. No waste, no unused parts. OEM-Spec Dimensions: Precise lip geometry ensures complete one-way seal. Drops into S12D, S24D, S32D, T12, T24, T32 without modification. Silicone Grease Included: Pre-lubricated for easy installation without tearing. Universal S-Series/T-Series Fit: Compatible with all Sealand vacuum generator pumps. Compatibility Series Models S-Series S12D, S24D, S32D, S115A, S12, 52A, S32 T-Series T12, T24, T32 VHT/VG VHT12, VHT24, VG4, VG5 Specifications Spec Value Part Number 385310076 Material Premium Nitrile Rubber Valve Type One-Way Duckbill Check Valve Quantity 1 (Single Pack) Includes Valve + Silicone Grease Packet When to Buy a Single Valve vs. 2-Pack Buy Single: Inlet valve failed but outlet still good. Building a spare parts kit for cruising or camping. Troubleshooting to isolate which valve is the problem. Buy 2-Pack: Both valves are original and over 2 years old. Complete pump rebuild recommended. Pump cycles every few minutes. Symptoms of Failed Duckbill Valves Pump runs continuously without building pressure Weak or incomplete flushes Pump cycles every few minutes without flushing Foul odor from vacuum tank area Hissing sound near pump during operation Installation Tips Turn off power at breaker. Open pump housing (4-6 screws). Note orientation: tapered beak must face toward holding tank. Remove old valve carefully. Clean mounting surfaces thoroughly. Apply included silicone grease to valve lip and press into place. Reassemble housing, restore power, test with 3-4 flushes. Check for vacuum hold — pump should not cycle within 2 minutes of idle. Frequently Asked Questions Q: How do I identify which valve is bad?A: Listen near each valve while pump runs. Hissing = leak at that valve. Vacuum bleeds immediately after pump stops = inlet valve failure. Pump slow to build vacuum but holds once achieved = outlet valve issue. Q: Should I buy one valve or the 2-pack?A: If both valves are original and over 2 years old, buy the 2-pack for a complete rebuild. If one failed prematurely (chemical damage, debris), a single replacement is sufficient. Q: How often should duckbill valves be replaced?A: Every 2-3 years under normal use. Liveaboards and full-time RVers should replace annually. Holding tank chemicals accelerate rubber degradation — inspect valves during annual maintenance. Q: Will non-OEM valves work as well as original?A: Our premium nitrile valves match OEM specifications and dimensions. Many marine mechanics report our nitrile compound outlasts OEM rubber in chemically-treated systems. Q: Can I install this myself?A: Absolutely. The job takes 15-20 minutes with basic hand tools (screwdriver). No specialized marine or RV knowledge required. Watch our installation video for step-by-step guidance. Q: What happens if I install it backward?A: The pump won't build vacuum because the valve will be forced open instead of sealed. The tapered beak MUST face toward the holding tank (away from the vacuum pump). If installed backward, simply flip it around. Related Products 385310076 Duckbill Valve 2-Pack — Complete Pump Rebuild 385310681 Flush Ball & Shaft Cartridge Kit 385314349 RV Water Valve Kit 📚 Related Guides & Articles Complete Onan Quiet Diesel RV Generator Tune-Up Marine Fuel Water Separator Guide: Why Your Outboard Needs One
$19.99
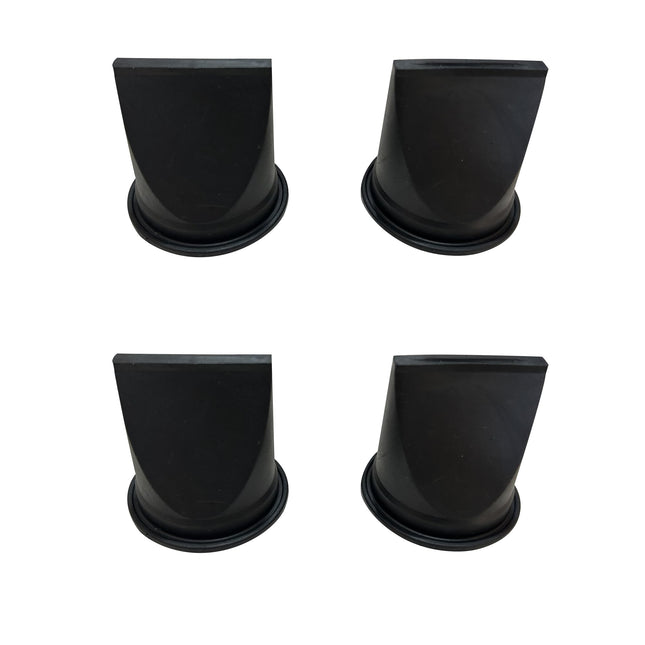
iFJF 385310076 Duckbill Valve Kit for Sealand S&T Vacuum Pumps — 2-Pack Complete Rebuild
385310076 Duckbill Valve Kit — Complete Sealand Vacuum Generator Rebuild (2-Pack) When your Sealand VacuFlush toilet loses vacuum or cycles constantly, worn duckbill valves are almost always the cause. These one-way rubber check valves degrade from waste chemicals and mineral buildup. The iFJF 385310076 Duckbill Valve Kit includes two premium nitrile valves sized for all Sealand S-Series and T-Series vacuum generators. Rebuild your pump in under 30 minutes and restore factory vacuum performance. Key Features Complete 2-Pack Value: Both inlet and outlet valves needed for a proper pump rebuild. Replace both while you have the housing open. Premium Nitrile Rubber: Resists chemical attack from holding tank treatments — outlasts generic silicone valves by 2-3x in chemical-rich environments. Universal S&T Fit: Compatible with S12D, S24D, S32D, T12, T24, T32, and VHT/VG series vacuum generators. OEM-Dimension Match: Precise lip geometry ensures complete one-way seal — no vacuum loss between flushes. Includes Silicone Grease: Pre-applied lubrication prevents tearing during installation and ensures a perfect seal. Compatibility Pump Series Models S-Series S12D, S12DAB, S24D, S32D, S115A, S12, 52A, S32 T-Series T12, T24, T32 VHT/VG VHT12, VHT24, VG4, VG5 Specifications Spec Value Part Number 385310076 Material Premium Nitrile Rubber Valve Type One-Way Duckbill Check Valve Quantity 2 (Inlet + Outlet) Includes 2x Valves + Silicone Grease Packet Symptoms of Failed Duckbill Valves Pump runs continuously without building pressure Weak or incomplete flushes — bowl doesn't clear completely Pump cycles every few minutes without anyone flushing Foul odor from vacuum tank area Hissing sound near pump housing during operation Vacuum gauge shows pressure bleed-down Installation Guide Turn off power at breaker. Locate vacuum generator pump. Remove pump housing cover (4-6 screws depending on model). Note orientation: tapered beak faces toward holding tank on both valves. Remove old valves carefully — they may be brittle. Clean mounting surfaces with a rag. Apply included silicone grease to the lip of each new valve. Press new valves firmly into their seats. Ensure full perimeter contact. Reassemble housing, tighten screws evenly. Restore power. Test with 3-4 flushes. Verify pump shuts off and vacuum holds for 2+ minutes. Frequently Asked Questions Q: How do I know which valve is bad — inlet or outlet?A: Listen near each valve while pump runs — hissing indicates a leak at that valve. Vacuum bleeding immediately after pump stops suggests inlet valve failure. Slow to build vacuum but holds once achieved points to outlet valve wear. When in doubt, replacing both is recommended. Q: How often should duckbill valves be replaced?A: Replace every 2-3 years under normal recreational use. Liveaboards and full-time RVers should replace annually. If you use formaldehyde-based holding tank chemicals, inspect every 6 months — chemicals accelerate rubber degradation significantly. Q: Why buy the 2-pack instead of single valves?A: Both valves wear at similar rates. If one has failed, the other is likely close behind. Replacing both saves you from opening the pump housing again in a few months — and costs less than two single purchases. Q: Will these fit my older Sealand pump?A: Yes. The 385310076 duckbill valve fits all S-Series and T-Series Sealand/Dometic vacuum generators dating back to the 1990s. The design has not changed. Q: Can I do this repair myself?A: Absolutely. This is a 20-30 minute DIY job requiring only a screwdriver. No plumbing or electrical expertise needed. We include step-by-step instructions in every kit. Q: What happens if I install a valve backward?A: The pump will run continuously but never build vacuum — the valve will be forced open instead of sealing. The tapered beak MUST face toward the holding tank. If you make this mistake, simply open the housing and flip the valve around. Related Products 385310076 Duckbill Valve — Single Replacement 385310681 Flush Ball & Shaft Cartridge Kit 385314349 RV Water Valve Kit 📚 Related Guides & Articles Complete Onan Quiet Diesel RV Generator Tune-Up Marine Fuel Water Separator Guide: Why Your Outboard Needs One 📖 Related Guide: VacuFlush Toilet Seal Replacement: Step-by-Step Install Guide →
$25.99
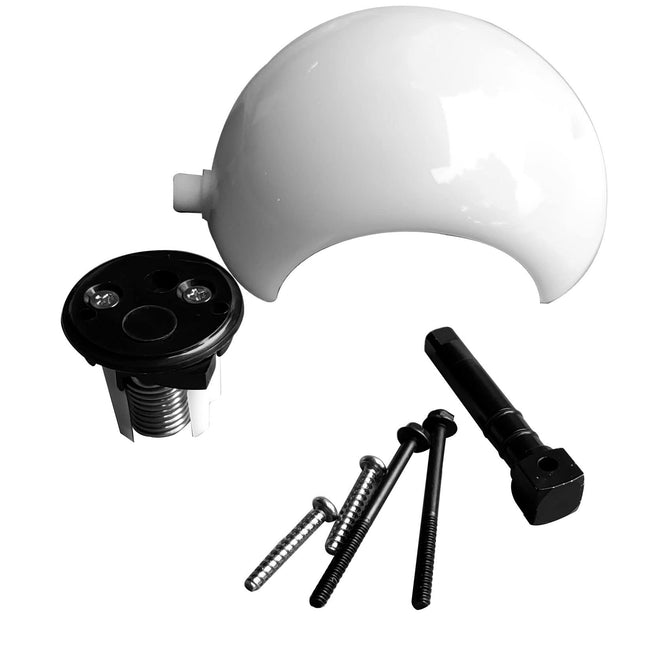
iFJF 385310681 Flush Ball & Shaft Cartridge Kit for Sealand Dometic VacuFlush Toilets
385310681 Flush Ball & Shaft Cartridge Kit — Complete Sealand Toilet Rebuild A sticky, hard-to-flush, or leaking toilet bowl can ruin any boating trip or RV vacation. The iFJF 385310681 kit replaces the entire flush mechanism in Dometic Sealand Traveler and VacuFlush foot-pedal toilets with plastic pedals. This complete cartridge assembly includes a Teflon-coated flush ball, stainless steel shaft, dual lip seals, O-rings, and mounting clip — everything needed for a smooth, odor-free flush restoration. Key Features Complete Cartridge Assembly: Includes flush ball, stainless steel shaft, dual lip seals, O-rings, and retaining clip — no need to piece together individual parts from multiple sources. Teflon-Coated Flush Ball: Ultra-smooth Teflon surface ensures effortless flush action with minimal foot pressure — no more sticky, hard-to-press pedals. Designed for Plastic-Pedal Toilets: Specifically engineered for Dometic/Sealand foot-pedal toilets with plastic pedal arms (not metal). Verify your pedal type before ordering. Odor-Tight Dual Lip Seals: New high-performance lip seals create a positive barrier that prevents holding tank odors from entering the bathroom. Stainless Steel Shaft: Corrosion-resistant shaft won't rust or seize — ensures years of smooth operation in the humid marine/RV bathroom environment. Compatibility Brand Series Pedal Type Models Dometic / Sealand Traveler Foot Pedal (Plastic) 110, 111, 210, 211, 510, 511 Dometic / Sealand VacuFlush Foot Pedal (Plastic) 147, 148 Specifications Spec Value Part Number 385310681 Ball Material Polymer Core with Teflon Coating Shaft Material Stainless Steel Seal Type Dual Lip — Odor-Tight Design Kit Contents Flush Ball, Shaft, Lip Seals, O-Rings, Retaining Clip Symptoms You Need This Kit Foot pedal is stiff or requires excessive force to flush Flush ball sticks in the open position (allowing odors to escape) Bowl loses water between uses — slow drain into holding tank Loose, wobbly, or rattling foot pedal Flush ball doesn't return to closed position after releasing pedal Water visible around the flush ball seal when bowl is filled Installation Guide Turn off water supply to toilet. Disconnect water line. Remove toilet from floor flange (typically 2 bolts through the base). Access the cartridge assembly from the bottom of the toilet bowl. Remove the retaining clip securing the old cartridge. Slide the old cartridge out of the bore. Thoroughly clean the cartridge bore — remove all old grease, mineral deposits, and debris. Apply a thin coat of silicone grease (included) to the new lip seals. Slide the new 385310681 cartridge into the bore. Ensure proper orientation and alignment. Secure with the new retaining clip. Reinstall toilet onto floor flange. Reconnect water, turn on supply, and test flush operation with 5-6 cycles. Frequently Asked Questions Q: Does this fit metal pedal or plastic pedal toilets?A: This kit is specifically designed for plastic-pedal Dometic/Sealand toilets. Verify your pedal material before ordering — metal-pedal toilets use a different cartridge assembly. Q: How long does this cartridge typically last?A: With normal use, expect 5-7 years of service life. Avoid abrasive bowl cleaners (Comet, Ajax) which can scratch the Teflon coating and accelerate seal wear. Use liquid toilet bowl cleaners instead. Q: Is this a DIY job or do I need a professional?A: This is a moderately involved DIY project — expect 45-90 minutes for your first time. The toilet must be removed from the floor flange to access the cartridge. Having a second person to help lift the toilet makes the job much easier. Q: What's the most common installation mistake?A: Not cleaning the cartridge bore thoroughly enough. Old grease and mineral deposits can prevent the new seals from seating properly, causing immediate leaks. Take the extra 5 minutes to clean the bore completely. Q: My flush ball sticks — do I need the whole kit or just lubrication?A: If lubrication temporarily fixes the sticking, you may only need to clean and re-grease the existing assembly. If the problem returns quickly or the Teflon coating is visibly worn/scratched, replace the entire cartridge. Q: Will this stop holding tank odors in my bathroom?A: Yes, if the odor is entering through the toilet bowl. The dual lip seals in this kit create an airtight barrier between the bowl and holding tank. Combine with a properly functioning vent system for complete odor elimination. Related Products 385310076 Duckbill Valve Kit 2-Pack 385314349 RV Water Valve Kit 385311658 Flush Ball Ring Seal Kit Related Products Water Valve Kit for Sealand 300/310/320 RV Toilets — 385311641 13168 RV Toilet Water Valve Kit for Aqua Magic IV Toilets 34117 Waste Ball Valve Seal Kit for Aqua Magic Style II RV Toilet Related Guides & Articles Complete Onan Quiet Diesel RV Generator Tune-Up Best Water Separator Fuel Filter for Diesel & Marine Engines Diesel Fuel Filter Replacement: The Complete Guide 📖 Related Guide: VacuFlush Toilet Seal Replacement: Step-by-Step Install Guide →
$34.99

iFJF 385311462 RV Toilet Bowl Seal Kit for Dometic & Vac-UFlush Toilets
Overview The iFJF 385311462 RV Toilet Rubber Bowl Leak Seal Kit is the permanent fix for that annoying toilet bowl leak that wastes water and creates unpleasant odors in your RV. If your toilet bowl won't hold water between flushes or you smell sewer gas seeping through, this seal kit replaces both the rubber bowl seal and flush ball seal — restoring a watertight barrier without expensive shop visits. Compatible with most popular Dometic/SeaLand pedal-flush and Vac-UFlush toilet models (see compatibility chart below). Built from high-quality sealing rubber that matches or exceeds OEM material specs. No special tools required — most RV owners complete the swap in under 15 minutes. Key Features Dual-Seal Design — Includes both rubber bowl seal (7" x 2" x 1/16") and flush ball seal (7" x 1-5/8" x 1/4") for a complete leak solution in one kit. Watertight Shutoff — Precision-molded rubber creates a tight seal against the water outlet pipe, stopping the slow drain-down that wastes fresh water between flushes. Odor Elimination — Blocks sewer gas from entering the RV interior through a leaking toilet seal. 15-Minute DIY Install — Simple plug-and-play replacement with no special tools or plumbing skills required. Saves $100+ in dealer labor fees. OEM-Spec Rubber — Manufactured from durable, flexible rubber compound that resists cracking, hardening, and chemical breakdown from RV holding tank treatments. Compatibility / Fitment Toilet Series Compatible Models Pedal Flush (Dometic/SeaLand) 506+, 511H, 547+, 548+, 706, 709, 748, 749, 806, 808, 847, 848, 1147, 1148, 2010, 2011, 5006, 5047, 5048, 5049 Vac-UFlush (Dometic/SeaLand) 168, 606, 647, 648, 1006, 1008, 1047, 1048, 1049, 1106, 5146, 5148, 5149 Replaces OEM Part # 385311462, 385310677 — direct replacement NOT compatible with Dometic 300, 310, 320 series toilets or Thetford cassette toilets. Specifications Specification Details Bowl Seal Dimensions 7" diameter x 2" wide x 1/16" thick Ball Seal Dimensions 7" diameter x 1-5/8" wide x 1/4" thick Material High-quality sealing rubber Package Includes 1x Rubber Bowl Seal, 1x Rubber Flush Ball Seal OEM Part Numbers 385311462, 385310677 Why Choose iFJF Every RV owner knows a leaking toilet means wasted fresh water on the road and an unpleasant living space. Dealership replacement charges can run $150-250 — this seal kit gives you OEM-quality parts at a fraction of the cost, with a straightforward install you can complete at the campsite. Frequently Asked Questions Q: How do I know if my toilet bowl seal is leaking?A: The #1 symptom is the toilet bowl losing water between flushes. If you fill the bowl, walk away, and come back to find it nearly empty, the bowl seal is failing. You may also notice a faint sewer odor around the toilet area. Q: Will this fit my Dometic 310 toilet?A: No. This seal kit is NOT compatible with Dometic 300, 310, or 320 series toilets. It is designed for the older pedal-flush model numbers listed in the compatibility chart. Check the model number sticker inside your toilet before ordering. Q: How long does installation take?A: Most RV owners complete the swap in 15 minutes with basic hand tools (screwdriver and wrench). No plumbing skills needed. Q: Does this kit include both seals I need?A: Yes. The package includes one rubber bowl seal and one rubber flush ball seal. Replacing both at once ensures a complete, long-lasting fix. Q: What's your warranty?A: All iFJF products come with a 12-month warranty against manufacturing defects. Contact us for a free replacement or full refund. Stop that toilet leak today — ships from iFJF warehouse within 1 business day. Product Overview 385311462 RV Toilet Bowl Seal Kit for Dometic & Vac-UFlush Toilets is a premium-quality replacement component engineered for exact fitment and reliable performance. Manufactured to meet or exceed OEM specifications using high-grade materials, this part delivers dependable service life for your equipment.
$23.99
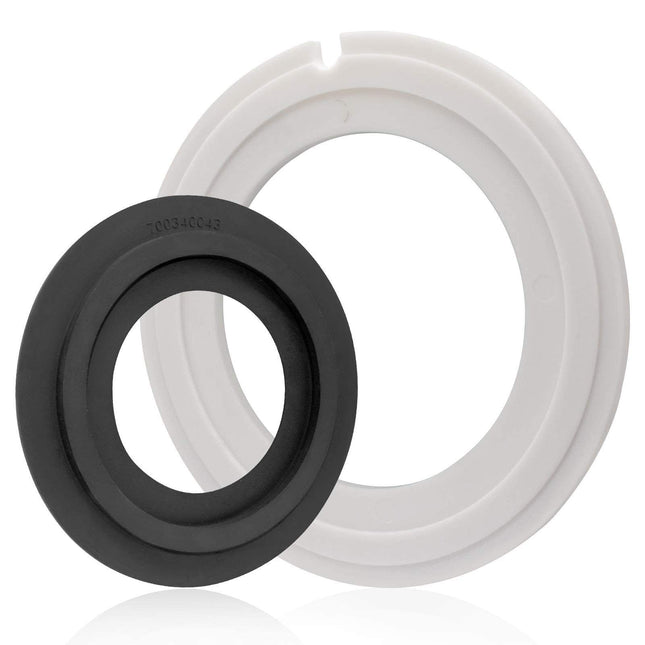
iFJF 385311462 VacuFlush Toilet Seal Kit for Dometic Sealand 110 111 210 510 — Teflon
Product Overview Stop bowl water loss and sewer odors with this upgraded Teflon-faced toilet seal kit for Dometic Sealand VacuFlush toilets. Designed for models 110, 111, 210, and 510 — common in higher-end RVs, boats, and marine applications — this kit replaces both the 385311462 and 385310677 seal assemblies. The Teflon-faced polymer disk with raised alignment groove outperforms standard rubber seals, maintaining its shape through thousands of flush cycles and creating an odor-tight seal that lasts significantly longer. Key Features Upgraded Teflon-Faced Disk — Unlike standard rubber seals that develop compression set (permanent flattening), the Teflon surface resists deformation through thousands of flush cycles, maintaining a consistent seal. Raised Alignment Groove — Precision-molded groove centers the seal on the VacuFlush ball valve for even wear distribution and consistent sealing pressure around the entire circumference. Complete Seal Kit — Includes Teflon-faced seal disk, mounting ring, O-rings, and silicone lubricant packet — no additional parts needed for a complete rebuild. Direct OEM Replacement — Exact replacement for Dometic/Sealand part numbers 385311462 and 385310677. Same dimensions, same fit, upgraded material. Marine & RV Compatible — Works in both recreational vehicle and marine (boat/yacht) installations with VacuFlush toilet systems. Compatibility / Fitment Brand Series Models Replaces Part # Dometic / Sealand VacuFlush 110, 111, 210, 510 385311462, 385310677 Technical Specifications Specification Value Part Numbers 385311462, 385310677 Seal Material Teflon-Faced Polymer Disk Kit Contents Seal Disk, Mounting Ring, O-Rings, Silicone Lube Compatible Flush Type VacuFlush (Vacuum Flush) Installation Time 30-45 Minutes Why Choose This VacuFlush toilets are premium systems — and their seals demand premium materials. Standard rubber seals on these toilets often fail within 1-2 years, letting bowl water drain into the holding tank (creating sewer gas path) and allowing odors to enter the living space. The Teflon-faced design in this kit addresses both failure modes: it maintains its shape (no compression set) and creates a superior gas-tight barrier. Marine boat owners especially benefit, as salt air accelerates rubber degradation significantly. Related Products 385311653 Dometic 300/310/320 RV Toilet Seal Kit — For gravity-flush Dometic toilets with hardware Browse all RV Plumbing Parts — Complete selection of seals and repair components Shop All iFJF Parts — Our full product catalog Frequently Asked Questions Q: Will this fit my VacuFlush 510 Plus series?A: Yes. The 510 series (including 510 Plus) uses this exact seal kit. The seal interface is common across all 110, 111, 210, and 510 VacuFlush toilet models from Dometic/Sealand. Q: How is Teflon better than the standard rubber seal?A: Teflon-faced seals resist compression set — the permanent flattening that causes rubber seals to lose their shape. This means a consistent seal over many more flush cycles. Teflon also has a lower coefficient of friction, reducing wear on the flush ball surface. Q: Why is my toilet bowl water dropping within hours?A: When the VacuFlush seal fails, water slowly drains from the bowl into the holding tank. This also creates an open path for sewer gases to enter the bathroom. Replace the seal to fix both issues simultaneously. Q: How often should I replace the VacuFlush seals?A: Under normal RV use, every 2-3 years. In marine (saltwater) environments or full-time liveaboard use, every 1-2 years. Replace sooner if you notice the bowl losing water or detect sewer odors. Q: Does this kit include the silicone lubricant?A: Yes. A packet of silicone lubricant is included. Apply lightly to the Teflon seal surface during installation — this helps the seal bed in and ensures smooth flush ball operation from day one. Q: Can I install this myself or do I need a tech?A: DIY-friendly with basic mechanical skills. Budget 30-45 minutes. Key steps: shut off water, flush to empty bowl, remove toilet from flange, replace seal components, reassemble, test with 4-5 flushes. Order with Confidence Fast shipping from our US warehouse. Dedicated customer support team ready to answer your questions. Click Add to Cart to get your order started today. Related Guides & Articles Check out these helpful resources from the iFJF blog: RV Maintenance — Complete Diesel Truck & RV Maintenance Schedule 2026 RV Generator Guide — Cummins Onan RV Generator Maintenance Guide 2026 Related Guide Read: RV VacuFlush Toilet Bowl Seal Replacement: Fix That Leak and Stop the Constant Pump Cycling 📖 Related Guide: VacuFlush Toilet Seal Replacement: Step-by-Step Install Guide →
$25.99
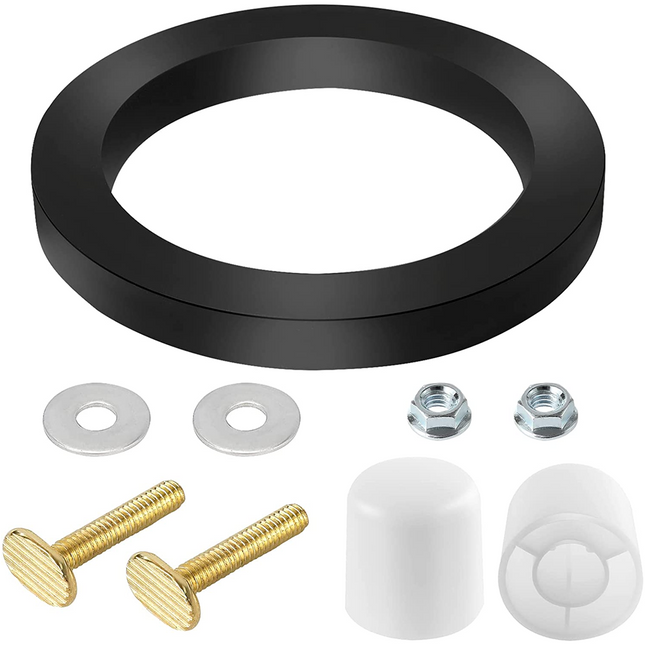
iFJF 385311653 RV Toilet Seal Kit for Dometic 300 310 320 — Includes 385311652 Hardware
Product Overview Fix your leaking, wobbling RV toilet in one repair with this complete seal kit for Dometic 300, 310, and 320 series gravity-flush toilets — the most popular RV toilet lineup in North America. This kit includes the 385311653 closed-cell foam floor seal to stop water and odor leaks at the base AND the 385311652 stainless steel mounting hardware kit (bolts, washers, nuts) to eliminate toilet wobble caused by corroded or stripped fasteners. One kit, one repair, problem solved. Key Features Complete Seal + Hardware Kit — Includes both the 385311653 closed-cell foam floor seal AND the 385311652 stainless steel bolt kit — everything you need for a complete toilet base repair. Closed-Cell Foam Construction — Unlike open-cell foam that acts like a sponge, closed-cell foam creates a true water barrier that won't wick moisture or absorb odors over time. Stainless Steel Hardware — The 385311652 bolts, washers, and nuts are stainless steel — they won't rust or corrode in the humid RV bathroom environment, unlike the factory carbon steel fasteners. Perfect Fit for Dometic 300/310/320 — Precision-cut to match the Dometic gravity-flush toilet base flange exactly. Same seal interface on the standard 300, low-profile 310, and elongated 320 models. DIY-Friendly Installation — 30-45 minute job with basic hand tools. No special plumbing skills required. Full instructions included. Compatibility / Fitment Brand Series Type Common Models Dometic 300 Standard Height, Gravity Flush Dometic 300 Dometic 310 Low Profile, Gravity Flush Dometic 310 Dometic 320 Elongated Bowl, Gravity Flush Dometic 320 Technical Specifications Specification Value Seal Part Number 385311653 Hardware Part Number 385311652 Seal Material Closed-Cell Foam Hardware Material Stainless Steel Flush Type Gravity Flush Installation Time 30-45 Minutes Why Choose This RV dealers charge $150-250 for this simple repair. This kit gives you everything needed to do it yourself in under an hour. The factory carbon steel bolts on Dometic toilets are notorious for rusting solid in the humid bathroom environment — our stainless steel hardware eliminates this problem permanently. The closed-cell foam seal won't degrade or absorb moisture like cheap open-cell alternatives. If your toilet is leaking at the base, rocking when you sit, or emitting sewer odors, this kit is the definitive fix. Related Products 385311462 VacuFlush Toilet Seal Kit — For Dometic Sealand VacuFlush 110/111/210/510 models Browse all RV Plumbing Parts — Seals, valves, and repair kits Shop All iFJF Parts — Complete inventory Frequently Asked Questions Q: Does this fit the Dometic 310 low-profile model?A: Yes. The 385311653 seal interface is identical across all three Dometic gravity-flush models — the standard-height 300, low-profile 310, and elongated 320. The bolt pattern and flange design are the same. Q: How do I remove rusted factory bolts?A: If the original carbon steel bolts are heavily rusted, spray them with penetrating oil (PB Blaster or WD-40) and let sit for 15 minutes. Use a 6-point socket (not 12-point) to avoid rounding. If the bolt head snaps, the toilet will lift off the broken stud — remove the remainder with vice grips from underneath. Q: How tight should I torque the new bolts?A: Hand-tighten until the toilet feels firmly seated, then turn an additional 1/4 turn with a wrench. DO NOT overtighten — excessive torque can crack the ceramic toilet base or deform the plastic flange. The foam seal does the sealing work, not bolt pressure. Q: What are the signs my toilet seal needs replacement?A: Watch for: water pooling around the toilet base after flushing, a persistent sewer odor near the toilet (even with the fan running), the toilet rocks or wobbles when you sit, visible water staining on the floor around the base, and corroded or stripped mounting bolts. Q: Can I reuse the old bolts if they look okay?A: We strongly recommend replacing the bolts with the new stainless steel hardware included in this kit. Factory bolts that look okay externally may be heavily corroded inside the flange — and carbon steel will eventually rust. Stainless hardware is a permanent upgrade. Q: Do I need to remove the toilet completely?A: Yes. The seal sits between the toilet base and the floor flange. You must lift the toilet off the floor to access and replace the old seal. Shut off the water supply, disconnect the water line, and remove the mounting bolts to lift the toilet. Order with Confidence Fast shipping from our US warehouse. Dedicated customer support team ready to answer your questions. Click Add to Cart to get your order started today. Related Guides & Articles Check out these helpful resources from the iFJF blog: RV Maintenance — Complete Diesel Truck & RV Maintenance Schedule 2026 RV Generator Guide — Cummins Onan RV Generator Maintenance Guide 2026
$25.99
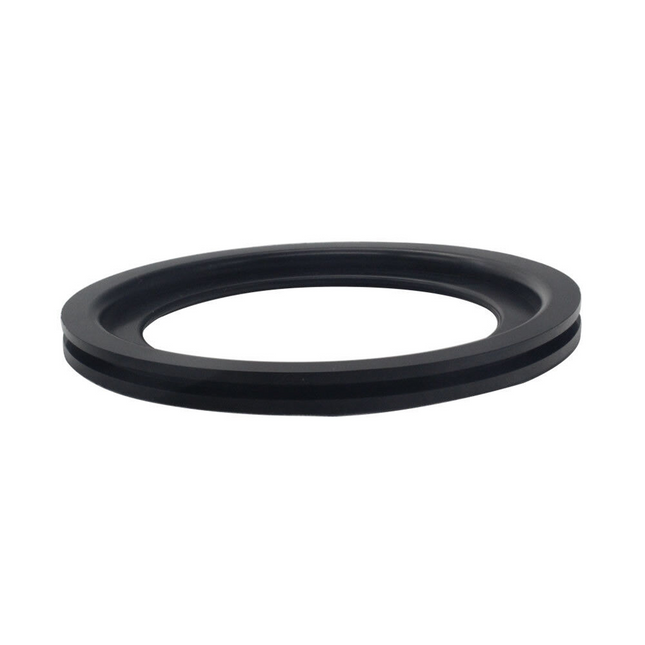
iFJF 385311658 Flush Ball Ring Seal for Dometic 300/310/320 RV Toilet — Bowl Seal Kit
385311658 Flush Ball Ring Seal — Complete Dometic Bowl Seal Kit Slow bowl water loss or faint sewage odor in your RV bathroom almost always points to a worn flush ball seal ring. The iFJF 385311658 is an exact-replacement seal for the critical junction between the flush ball and toilet bowl in Dometic 300, 310, and 320 series gravity-flush toilets. Made from durable, chemical-resistant polymer, this seal restores the water-tight and odor-proof barrier in under 30 minutes — no tools required, installed entirely from above the bowl. Key Features Exact OEM Fit: Precision-molded to Dometic specifications for 300, 310, and 320 series toilets — drops into the seal groove without modification or trimming. Dual-Seal Function: Creates a positive water barrier to keep bowl water from draining into the holding tank AND an odor seal to prevent sewage gases from entering the bathroom. Chemical-Resistant Polymer: Engineered to withstand formaldehyde-based and enzyme-based holding tank treatments — won't swell, soften, or degrade. Tool-Free Installation: The only Dometic toilet repair that requires zero tools — accessed and replaced entirely from above the bowl in 20-30 minutes. Budget-Friendly Maintenance: The most affordable Dometic toilet seal on the market — replace prophylactically every 2 years for peace of mind. Compatibility Brand Series Toilet Type Dometic 300, 310, 320 Gravity-Flush (All Models) Specifications Spec Value Part Number 385311658 Material Chemical-Resistant Polymer Seal Type Flush Ball Ring / Bowl Seal Installation Tool-Free — Above Bowl Access Includes Seal Ring + Installation Grease Symptoms of a Failed Bowl Seal Bowl water drains completely within 1-2 hours of flushing Holding tank odor noticeable near toilet (especially on hot days) Mineral buildup or black residue visible around flush ball opening Toilet requires multiple flushes to clear waste (insufficient bowl water) Gurgling sounds from toilet when not in use Installation Guide (Tool-Free!) Turn off water supply to toilet. Flush and hold pedal to drain bowl completely. Step on flush pedal and hold open to expose the seal ring in the bowl opening. Use fingers or a plastic pry tool to lift the old seal ring out through the bowl — it sits in a groove around the opening. Clean the seal groove thoroughly with a rag — remove all mineral deposits and old grease. Apply a thin coat of included silicone grease to the new seal ring. Press the new seal firmly into the groove. Ensure it's fully seated all the way around. Release pedal, turn water on, fill bowl, and check for water retention. Frequently Asked Questions Q: My bowl is dry every morning — is this the fix?A: Yes, this is the classic symptom of a failed flush ball seal. The seal can no longer hold water in the bowl, so it slowly drains into the holding tank overnight. Replace the seal ring to restore water retention. Q: Do I need to remove the toilet from the floor?A: No. Unlike many RV toilet repairs, the flush ball seal is installed entirely from above the bowl. Simply hold the pedal open and access the seal groove through the bowl opening. No dismounting required. Q: How often should the flush ball seal be replaced?A: Replace every 2-3 years under normal use, or at the first sign of bowl water loss. If you full-time RV or use harsh holding tank chemicals, inspect annually. The seal is inexpensive — proactive replacement prevents odor problems. Q: Will this stop the holding tank odor in my bathroom?A: Yes, if the odor is coming through the toilet bowl. A worn seal allows tank gases to bypass the flush ball. Combined with good tank vent maintenance, a new seal eliminates bathroom odors. Q: Why does my seal keep failing quickly?A: Frequent seal failures usually indicate mineral buildup from hard water or abrasive chemical treatments. Use a water softener if you have hard water, and consider enzyme-based tank treatments instead of formaldehyde-based products. Q: Is this genuine Dometic or aftermarket?A: This is a high-quality aftermarket replacement manufactured to Dometic OEM specifications. It matches the exact dimensions and material properties of the factory seal at a significantly lower cost. Related Products 385310076 Duckbill Valve Kit 2-Pack 385314349 RV Water Valve Kit 42049 Water Valve Style II Kit Related Products Water Valve Kit for Sealand 300/310/320 RV Toilets — 385311641 13168 RV Toilet Water Valve Kit for Aqua Magic IV Toilets 34117 Waste Ball Valve Seal Kit for Aqua Magic Style II RV Toilet Related Guides & Articles Complete Onan Quiet Diesel RV Generator Tune-Up Best Water Separator Fuel Filter for Diesel & Marine Engines Diesel Fuel Filter Replacement: The Complete Guide
$19.99
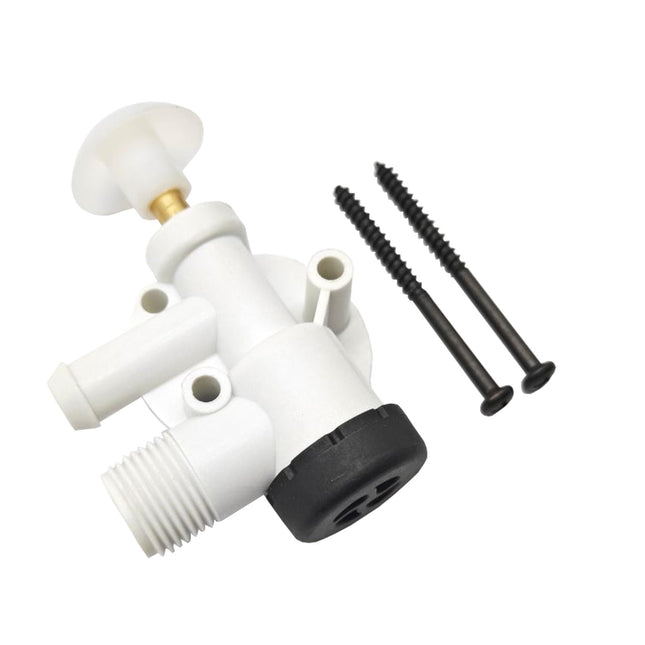
iFJF 385314349 RV Toilet Water Valve Kit for Sealand Traveler & VacuFlush Pedal Flush
385314349 RV Toilet Water Valve Assembly — Complete Replacement Kit A constantly running RV toilet wastes fresh water — the most precious resource when boondocking. The iFJF 385314349 replaces the complete water inlet valve on Dometic Sealand Traveler and VacuFlush foot-pedal toilets. This full valve body assembly includes an integrated check valve, inlet screen, and mounting flange — everything needed for a leak-free repair in under 30 minutes. Key Features Complete Assembly: Valve body, built-in anti-siphon check valve, inlet screen, and mounting flange — no need to piece together individual parts. Wide Fitment: Compatible with Sealand Traveler models 110, 111, 210, 211, 510, 511 and VacuFlush models 147, 148 with foot-pedal flush. Built-In Check Valve: Prevents back-siphoning of toilet water into the fresh water system — meets plumbing code requirements for RV applications. Quick-Connect Fittings: Tool-free push-to-connect water line connections — no wrenches needed for plumbing connections. Chemical-Resistant Construction: Seals and body materials withstand RV antifreeze, holding tank chemicals, and hard water mineral deposits. Compatibility Brand Series Models Sealand / Dometic Traveler 110, 111, 210, 211, 510, 511 Sealand / Dometic VacuFlush 147, 148 (foot-pedal models) Specifications Spec Value Part Number 385314349 Valve Type Diaphragm Water Inlet Valve Connection Type Quick-Connect Push Fittings Includes Valve Body, Check Valve, Inlet Screen, Mounting Flange, Hardware Symptoms of a Failing Water Valve Water runs continuously or trickles into toilet bowl when not in use Very weak flush — water barely enters bowl when pedal pressed No water at all when pedal is pressed Water leaking from valve body or connections Unusual hissing or vibrating sounds during flush cycle Toilet fills slowly — taking 30+ seconds for normal water level Installation Guide Shut off RV water supply (turn off pump and disconnect city water connection). Flush toilet to relieve any remaining line pressure. Disconnect water line from valve inlet — press quick-connect release tab and pull. Remove mounting screws securing old valve to toilet base. Install new 385314349 valve assembly. Align mounting holes and tighten screws. Push water line into quick-connect fitting until it clicks — no tools required. Turn water supply back on. Cycle flush pedal several times to purge air. Inspect all connections for leaks. Adjust if needed. Frequently Asked Questions Q: My toilet keeps running — will this fix it?A: Yes, if water is continuously flowing into the bowl even when the pedal isn't pressed, the internal valve diaphragm has failed. Replacing the complete valve assembly is the proper repair. Q: Does this fit the Traveler 511 toilet?A: Yes. The 385314349 fits all Sealand Traveler series models (110, 111, 210, 211, 510, 511) with push-to-connect water fittings. Q: Do I need special tools?A: No. The quick-connect fittings are tool-free. You'll only need a screwdriver for the mounting screws. Complete installation typically takes 20-30 minutes. Q: Will this work with my well water / hard water system?A: Yes. The valve is designed to handle mineral-heavy water. The built-in inlet screen catches sediment and can be cleaned periodically to maintain flow rate. Q: Is this valve anti-siphon?A: Yes. The integrated check valve prevents backflow into your fresh water system, meeting RVIA plumbing standards for toilet water supply connections. Q: What causes water valve failure in RV toilets?A: The most common causes are mineral scale buildup jamming the diaphragm, chemical degradation of internal seals from holding tank treatments, freeze damage in un-winterized systems, and simple wear from years of use. Related Products 385310076 Duckbill Valve Kit 2-Pack 385310681 Flush Ball & Shaft Cartridge Kit 385311658 Flush Ball Ring Seal Kit Related Products Water Valve Kit for Sealand 300/310/320 RV Toilets — 385311641 13168 RV Toilet Water Valve Kit for Aqua Magic IV Toilets 34117 Waste Ball Valve Seal Kit for Aqua Magic Style II RV Toilet Related Guides & Articles Complete Onan Quiet Diesel RV Generator Tune-Up Best Water Separator Fuel Filter for Diesel & Marine Engines Diesel Fuel Filter Replacement: The Complete Guide 📖 Related Guide: VacuFlush Toilet Seal Replacement: Step-by-Step Install Guide →
$25.99
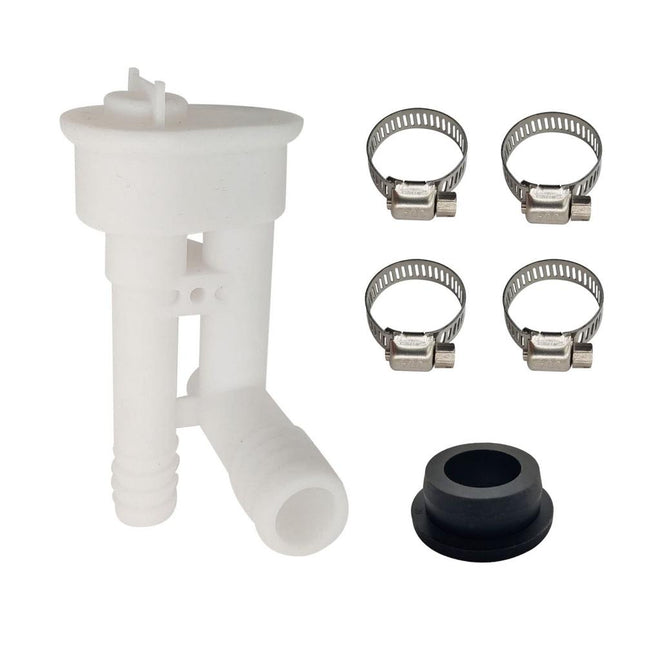
iFJF 385316906 Vacuum Breaker Kit for Sealand Traveler Toilets — No Sprayer
385316906 Vacuum Breaker Kit for Sealand Traveler Toilets — Leaking Stopped, No Sprayer Stop your Sealand Traveler RV toilet from leaking with this OEM-grade vacuum breaker repair kit (part number 385316906). Designed specifically for Traveler series toilets WITHOUT the hand sprayer hookup, this kit replaces the worn internal seals and components that cause water leaks, backflow issues, and inconsistent flushing. Whether you're dealing with a slow drip that won't stop or water backing up into the bowl, this kit provides a complete, lasting repair at a fraction of the cost of a new toilet. Key Features OEM-Spec 385316906 Replacement: Manufactured to exact Sealand/Dometic specifications for a guaranteed fit on Traveler series toilets without the hand sprayer option Complete Sealing Kit: Includes vacuum breaker, o-rings, gaskets, check valve components, and all internal seals needed for a full rebuild Stops Water Leaks: Addresses the two most common leak sources — the vacuum breaker seal failure (leaks at the back of the toilet) and check valve deterioration (water leaking into the bowl) Prevents Backflow: Restores proper one-way water flow, preventing contaminated bowl water from siphoning back into your RV's fresh water system DIY-Friendly Installation: Clear, illustrated instructions included — most RV owners complete this repair in 30-45 minutes with basic hand tools Compatibility Brand Model Series Part Number Configuration Sealand Traveler 385316906 Without hand sprayer hookup Dometic Traveler 385316906 Without hand sprayer hookup Important: This kit is for Traveler models WITHOUT the hand sprayer. If your toilet has a hand sprayer attachment, you need kit 385230325 instead (available in our store). Common Symptoms This Kit Fixes Water leaking from the back of the toilet onto the bathroom floor Water slowly filling the bowl when the toilet is not in use Weak or inconsistent flush performance Water hammer or chattering noise during flush cycle Water backing up or gurgling in the bowl after flushing Why Fix Instead of Replace? A new Sealand Traveler toilet costs $400-700. This vacuum breaker kit addresses the most common failure point for under $25. The Traveler series is known for durable ceramic bowls and robust pedal mechanisms — the vacuum breaker is typically the first and only component that fails. Replacing it restores full function and extends your toilet's life by years. This is the same repair a mobile RV tech would perform, and you can do it yourself in under an hour. Frequently Asked Questions Q: How do I know if my Traveler toilet needs this part vs the 385230325 kit?A: Check if your toilet has a hand sprayer attachment (a small hose coming from the back of the toilet with a spray nozzle). If NO sprayer → order this 385316906 kit. If YES sprayer → order our 385230325 kit. The vacuum breaker design is different for each configuration. Q: Can I install this myself, or do I need a mobile RV tech?A: Most RV owners can install this kit themselves. You'll need basic tools: Phillips screwdriver, adjustable wrench, and possibly needle-nose pliers for small o-rings. Turn off the water pump and relieve pressure before starting. Allow 30-45 minutes for first-time installation. Q: Will this stop my toilet from running intermittently?A: If your toilet's water valve cycles on and off while not in use, the vacuum breaker seal is likely the culprit. Replacing it with this kit typically resolves intermittent cycling. If the issue persists after installation, the water valve itself may need replacement. Q: Are these genuine Sealand parts?A: This is an OEM-grade aftermarket kit manufactured to Sealand/Dometic specifications. The materials, dimensions, and tolerances match the original parts. It's functionally identical to the OEM kit at a more accessible price point. Q: How often should the vacuum breaker be replaced?A: There's no fixed replacement interval — replace it when symptoms appear (leaking, backflow, weak flush). In full-time RV use, expect 3-5 years from a vacuum breaker. In occasional/seasonal use, they can last 5-8 years. 📚 Related Guides & Articles RV Toilet Maintenance: Fixing Leaks and Odors Sealand vs Dometic: RV Toilet Parts Compatibility Guide
$23.99
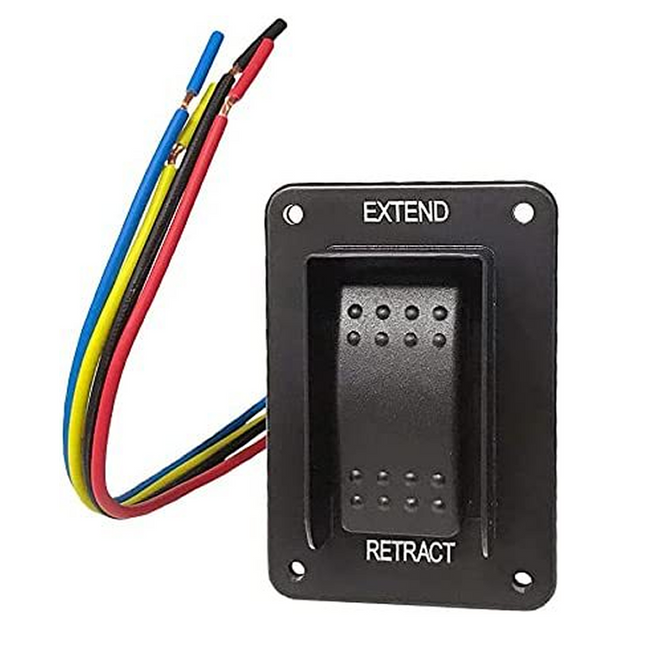
iFJF 387874 Power Stabilizer Switch Harness for Lippert RV — 5th Wheel
Product Overview The 387874 Power Stabilizer Switch Harness for Lippert RV — 5th Wheel Camper is a premium-quality aftermarket replacement part engineered for 3878 Lippert diesel engines vehicles. Designed to meet or exceed OEM specifications, this Switch delivers exceptional performance, durability, and reliability for compatible models owners who demand the best for their vehicles. Key Features Precision Engineering: Manufactured to exact OEM specifications using advanced CNC machining and rigorous quality control processes for perfect fitment every time. Premium Materials: Constructed from high-grade materials selected for maximum durability, corrosion resistance, and long service life under demanding conditions. Direct Fit Installation: Designed as a direct bolt-on replacement with no modifications required — simply remove the old part and install this one using basic hand tools. Quality Certified: Backed by IATF 16949 certified manufacturing standards, ensuring consistent quality and reliability across every unit produced. Comprehensive Warranty: Covered by iFJF's standard warranty against manufacturing defects, with dedicated customer support available to answer your questions. Compatibility Specification Details Vehicle Make Lippert Vehicle Models compatible models Year Range 3878 Engine diesel engines Part Number 387874 Power Stabilizer Switch Harness for Lippert RV — 5th Wheel Camper Replaces OEM OEM specifications Why Choose iFJF Direct? At iFJF Direct, we specialize in providing diesel enthusiasts and professional mechanics with premium aftermarket parts that deliver genuine value. Every product we sell is carefully selected for quality, tested for performance, and backed by our commitment to customer satisfaction. Whether you're maintaining a daily driver, building a competition truck, or servicing a fleet, iFJF has the parts you need with the quality you can trust. Frequently Asked Questions Q: Will this fit my 3878? A: This Switch is specifically designed for 3878 Lippert compatible models with the diesel engines. Always verify your vehicle's exact year, make, model, and engine specification match the compatibility information above before ordering. Q: Is professional installation required? A: Installation difficulty varies by vehicle and skill level. For most applications, this is a direct bolt-on replacement that can be completed with basic hand tools. We always recommend consulting a certified mechanic if you are unsure about any installation procedure. Q: What's included with my purchase? A: Your purchase includes the Switch as shown. Please review the product images and description carefully. If additional hardware or gaskets are required for installation, they are included where noted. Q: What is your shipping and delivery policy? A: iFJF Direct offers fast worldwide shipping. Orders are typically processed within 1-2 business days. Shipping times vary by destination. Free shipping is available on qualifying orders. Contact our support team for specific delivery estimates to your location. Q: What warranty coverage do you provide? A: All iFJF products are warranted against manufacturing defects. Our warranty covers replacement or refund of defective products. Contact our support team with your order number to initiate a warranty claim. We pride ourselves on standing behind every product we sell. Order With Confidence When you order from iFJF Direct, you're getting more than just a Switch — you're getting our commitment to quality, reliability, and customer satisfaction. Every product is backed by our warranty and supported by our knowledgeable customer service team. Order yours today and experience the iFJF difference! Related Guides & Articles Check out these helpful resources from the iFJF blog: RV Maintenance — Complete Diesel Truck & RV Maintenance Schedule 2026 RV Generator Guide — Cummins Onan RV Generator Maintenance Guide 2026
$57.99


OEM-Grade Duramax Replacement Parts & Maintenance Filters
iFJF Direct offers precision-engineered aftermarket replacement filters and components tailored for GM Chevy/GMC Duramax diesel engines. Designed to match or exceed OEM specifications, our products provide optimal filtration efficiency and engine longevity for Silverado and Sierra 2500HD/3500HD trucks. Every component is manufactured to strict quality standards with a 45-day return policy and fast shipping from Boulder, Colorado.
Duramax Engine Generation Compatibility Guide
- LB7 (2001–2004): Fuel water separators, oil filtration kits, and air bleeder screws for the original 6.6L Duramax.
- LLY / LBZ / LMM (2004.5–2010): Precision oil filters, CCV elements, fuel filter housings, and EGR maintenance components.
- LML (2011–2016): Advanced fuel filter kits designed for high-pressure common rail (HPCR) systems — spin-on and cartridge options.
- L5P (2017–2026): Next-gen oil filter housing caps, dual fuel filter service kits, TP1015/134001 replacements with CNC billet aluminum upgrades.
- LM2 / LZ0 (2020+ 3.0L inline-6): Specialized maintenance kits for light-duty Duramax diesel applications.
Duramax OEM Cross-Reference & Replacement Guide
Use this table to quickly find the iFJF replacement part that matches your original equipment. All parts listed are direct fit, no modifications required.
| OE / OEM Part No. | Engine Generation | Part Type | Replaces / Cross-Reference |
|---|---|---|---|
| TP1015 / 134001 | L5P (2017-2026) | Fuel Filter Kit + Housing Cap | ACDelco TP1015, GM 13539108, OE 134001 |
| TP3018 | LB7-LLY-LBZ-LMM-LML (2001-2016) | Fuel/Water Separator Filter | ACDelco TP3018, GM 12664429, Racor PFF50216 |
| FJ-TOOL09 | All 6.6L Duramax (2001-2026) | Billet Air Bleeder Screw | GM 12642623 Bleeder Screw Upgrade |
| 12642623 | L5P (2017-2026) | Fuel Filter Housing Assembly | GM 12642623, ACDelco TP1015 Housing |
| 122-0836 | Onan QG RV Generators | Oil Filter | Onan 122-0836, Cummins Onan HGJAA/HGJAB |
Duramax Maintenance FAQ
How often should I change the fuel filter on a 6.6L Duramax?
GM recommends replacing the Duramax fuel filter every 15,000 to 22,500 miles, or every 12 months. If operating under heavy towing conditions or using biodiesel blends, changing it every 10,000 miles is recommended to protect the high-pressure fuel pump (CP4/HPCR). The L5P models (2017+) use a dual-filter system — both filters should be changed simultaneously for optimal protection.
Are iFJF Duramax filters compatible with OEM housings?
Yes. All iFJF Duramax oil, fuel, and CCV filters are built to exact OEM dimensions. They feature high-grade synthetic filtration media (5-micron rating on fuel filters) to ensure 98%+ water separation efficiency and zero modifications required during installation. Compatible with ACDelco, Racor, and GM factory filter housings.
What causes the "Water in Fuel" warning on my Duramax?
The "Water in Fuel" warning light indicates water accumulation in the fuel filter housing separator. This is common on LML and L5P engines. Drain the water separator immediately using the bleed screw, and consider replacing the filter if the warning persists. Upgrading to an iFJF CNC billet aluminum bleeder screw (replacing the fragile OE plastic screw) prevents stripping and ensures reliable drainage.
Do I need to prime the fuel system after changing a Duramax fuel filter?
For L5P (2017+) models with the electric lift pump, the system self-primes after filter replacement — simply cycle the key to "ON" (without starting) for 30 seconds, repeat 2-3 times. For LB7-LML models, use the manual primer pump on the filter housing until firm resistance is felt. Running the engine without proper priming can cause air in the HPCR system and potential injector damage.
What is the difference between TP1015 and TP3018 Duramax fuel filters?
TP1015 is the spin-on fuel filter used on 2017+ L5P Duramax engines (driver-side frame rail mount). TP3018 is the fuel/water separator filter for 2001-2016 LB7 through LML engines. They are not interchangeable — verify your model year before ordering. iFJF offers both types, including complete kits with upgraded CNC aluminum housing caps.
How do I know if my Duramax fuel filter housing cap needs replacement?
Common signs include: fuel seepage around the cap, difficulty achieving a proper seal after filter changes, cracked or stripped threads on the OE plastic cap, and recurring "Water in Fuel" warnings despite draining. iFJF upgraded CNC 6061-T6 billet aluminum caps (available in multiple colors for the L5P 134001 housing) permanently solve these issues with a precision-machined fit and O-ring sealing surface that outlasts the factory plastic components.