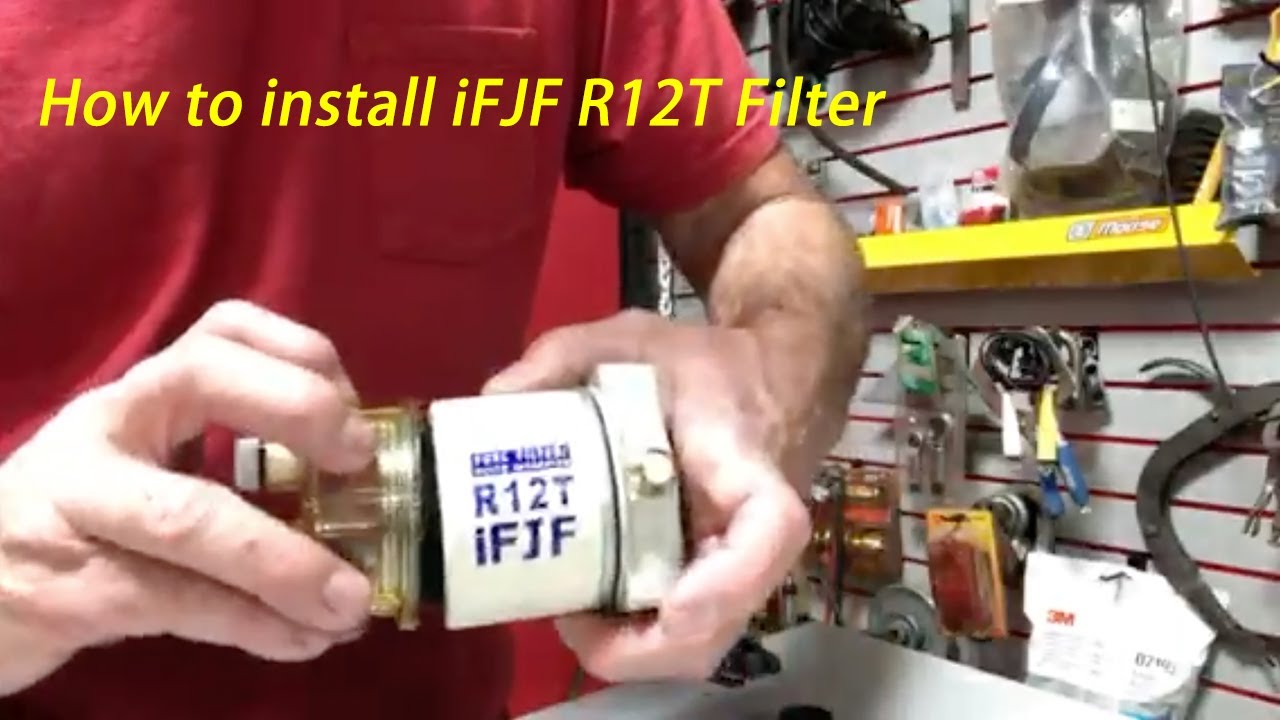
How to install iFJF R12T Fuel Filter/Water Separator 120AT NPT ZG1/4-1
,
by iFJF Direct,
11 min reading time
How to Install iFJF R12T Fuel Filter/Water Separator: Complete Step-by-Step Guide Protect your diesel engine from water contamination and extend its lifespan with the iFJF R12T fuel filter/water separ...
How to Install iFJF R12T Fuel Filter/Water Separator: Complete Step-by-Step Guide
Protect your diesel engine from water contamination and extend its lifespan with the iFJF R12T fuel filter/water separator. This comprehensive guide walks you through the complete installation process, from unboxing to final setup.
🛒 Not sure which filter to buy? Start with our complete R12T buying guide — we compare the Top 5 water separator fuel filters for 2026.
Watch the complete installation video for visual guidance alongside this written tutorial.
Why You Need a Fuel/Water Separator for Your Diesel Vehicle
Diesel fuel is hygroscopic, meaning it naturally absorbs water from the atmosphere. Over time, water accumulates in your fuel tank through condensation, contaminated fuel, or storage issues. When this water reaches your engine, it can cause:
Corrosion in fuel system components – Water corrodes metal parts in injectors, pumps, and lines
Poor combustion – Water doesn't burn, leading to misfires and reduced power
Injector damage – Modern high-pressure injectors are extremely sensitive to water contamination
Microbial growth – "Diesel bug" thrives in the water-fuel interface, creating slime that clogs filters
The iFJF R12T fuel filter/water separator provides a critical defense layer, removing both particulate contamination and water before fuel reaches your engine. While designed primarily for diesel engines, it works effectively with gasoline engines too.
What's in the Box: iFJF R12T Package Contents
When you receive your iFJF R12T fuel filter/water separator, here's what you'll find in the well-packaged box:
R12T Filter Unit – Features a durable aluminum housing with fine pleated filter media and integrated water collection bowl
Two O-rings – For sealing the filter bowl to the housing (critical for preventing leaks)
Two Quarter-Inch Pipe Plugs – Used to close unused ports
Two 3/8" Barbed Fittings – For fuel line connections
Business Cards – Contact information for iFJF support
The unit comes nicely packaged with foam wrap protection. The aluminum housing feels substantial and well-machined, while the pleated filter appears to be high-quality media designed for fine filtration.
Tools and Materials Needed
Before starting the installation, gather these tools and materials:
O-ring lubricant – Specialized lubricant is preferred (movie recommends against using motor oil, though both work)
Teflon tape or thread sealant – Essential for sealing pipe threads
Fuel line – Appropriate diameter to match your vehicle (typically 3/8" for most applications)
Hose clamps – Stainless steel preferred for corrosion resistance
Drill and rivets (or bolts/nuts) – For mounting the unit
Wrenches – To fit the barbed fittings and mounting hardware
Drain hose – Small diameter hose to route water drain away from vehicle
Clean rags – For catching spills during priming
Fuel – Clean diesel or gasoline to prime the filter before installation
Step-by-Step Installation Guide
Step 1: Plan Your Installation Location
Before touching any components, determine where the R12T will mount on your vehicle. Consider these factors:
Accessibility – You'll need to access the drain valve regularly
Fuel line routing – Minimize bends and distance between tank, filter, and engine
Protection from damage – Avoid locations exposed to rocks, debris, or excessive heat
Mounting surface – Ensure adequate structure to support the unit when full of fuel
In the video demonstration, the installer chose a location on a 1978 Jeep, positioning it where the inlet comes from the tank and the outlet goes to the fuel pump.
Step 2: Prepare the Unit (Before Installation)
The video demonstrator makes an excellent point: prime the filter BEFORE mounting it. This approach prevents struggling to fill the filter in an awkward under-vehicle position and minimizes fuel spills.
Here's the pre-installation preparation process:
Lubricate the O-rings – Apply a thin layer of O-ring lubricant (or motor oil in a pinch) to both O-rings. This ensures proper sealing and makes future disassembly easier. Don't over-tighten – you want to be able to remove the bowl by hand for maintenance.
Determine port configuration – The R12T has multiple ports. You need to identify:
Inlet port – From fuel tank
Outlet port – To fuel pump/engine
Unused ports – Must be plugged
Install plugs and fittings – Apply Teflon tape to pipe plug threads and hand-tighten. Install barbed fittings in inlet/outlet ports with Teflon tape on threads. Don't over-tighten – hand-tight plus a quarter turn is usually sufficient.
Prime the filter – Fill the filter bowl with clean fuel before mounting. This removes air from the system and makes priming the fuel system much easier after installation.
Step 3: Mount the R12T Unit
With the unit prepared, it's time to mount it in your chosen location:
Position the unit – Hold it in place and mark mounting holes. Ensure the drain valve at the bottom is accessible.
Choose mounting method – The video shows rivet mounting, which is cleaner than bolt-on in some situations. However, you can also use bolts with nuts on the back. Consider:
Rivets – Clean look, no protruding bolt ends, but require drilling if you ever need to remove it
Bolts – Easier to remove for maintenance or relocation
Secure the unit – Whether using rivets or bolts, ensure the unit is firmly attached. A loose fuel filter is a fire hazard and reliability risk.
The video demonstrator completed the entire installation in about 10 minutes, proving this is a straightforward DIY project.
Step 4: Connect Fuel Lines
With the unit mounted, connect your fuel system:
Install inlet line – Connect fuel line from the tank to the inlet port. Use hose clamps at both ends. Ensure the line is secured away from heat sources and moving components.
Install outlet line – Connect fuel line from the outlet port to the fuel pump or engine. Again, use proper hose clamps and route carefully.
Install drain hose – Attach a small diameter hose to the water drain valve. Route this to a location where draining water won't create a mess or environmental hazard. The video shows attaching a hose so water drains away from the vehicle.
ol>
Step 5: Prime the Fuel System
After connecting everything, you need to prime the fuel system to remove air:
Operate the manual prime pump – Most diesel vehicles have a manual primer on the fuel filter housing or fuel pump. Pump it until fuel flows steadily from the outlet.
Bleed air – Some systems have a bleed screw. Open it and pump until only fuel (no air bubbles) escapes.
Check for leaks – With the system primed, inspect all connections for fuel leaks. Tighten clamps or fittings as needed.
Step 6: Test and Verify
Before considering the job complete:
Start the engine – It may take a few extra cranks to pull fuel through the new filter.
Check for leaks again – With the system pressurized, inspect all connections.
Monitor performance – Ensure the engine runs smoothly and has normal power.
Check water bowl – After the first few hours of operation, check the clear bowl at the bottom. If you see water accumulation, drain it following the procedure below.
How to Drain Water from the R12T
Regular draining of collected water is essential for proper operation. Here's the procedure:
Monitor the bowl – The clear bowl allows visual inspection. When you see water separated from the fuel (it will appear as a layer at the bottom), it's time to drain.
Position drain container – Place a container under the drain hose end.
Open drain valve – Slowly open the valve until fuel/water mixture flows out.
Close when fuel appears – When pure fuel (no water bubbles) flows, close the valve.
Dispose of waste properly – Fuel/water mixture is hazardous waste. Dispose of it according to local regulations.
The video demonstrator attached a hose to the drain valve to route water away from the vehicle, preventing mess and making draining more convenient.
Maintenance Schedule
To keep your R12T functioning properly:
Daily (or before each trip) – Visually inspect the water bowl, drain if necessary
Every 500-1000 miles – Drain water bowl
Every 10,000-15,000 miles – Replace the filter element (bowl threads off for access)
Every oil change – Inspect O-rings and lubricate if needed
Troubleshooting Common Issues
Engine Won't Start After Installation
If the engine won't start:
Check for air locks – Prime the system more thoroughly
Verify fuel flow – Disconnect outlet line and operate primer – fuel should flow steadily
Check filter orientation – Ensure inlet and outlet aren't reversed
Leaking at Bowl Threads
If fuel leaks where the bowl threads to the housing:
Remove and re-lubricate O-rings – Dry or damaged O-rings cause leaks
Don't over-tighten – Overtightening can damage O-rings
Inspect O-rings for damage – Replace if cut or deformed
Water Not Separating
If water isn't collecting in the bowl:
Verify correct installation – Flow direction must be correct
Check for emulsion – Extremely fine water droplets may not separate immediately; allow more time
Confirm water in fuel – Test fuel sample with water-finding paste
Can the R12T Be Used with Gasoline Engines?
Yes! While the R12T is designed primarily for diesel applications, the video demonstrator confirms it works effectively with gasoline engines too. The filtration media and water separation principles work with any liquid fuel. If you have water contamination issues in a gasoline engine (as the demonstrator experienced with his Jeep carburetor), the R12T provides protection.
Upgrading to R12H (The R12T Upgrade)
iFJF offers the R12H as an upgrade to the R12T. Key differences:
Same mounting pattern – Direct bolt-on replacement
If you're running higher horsepower or want extended filter life, consider the R12H upgrade. iFJF also makes a combo kit that includes both R12H and R12T components.
Frequently Asked Questions
What thread size are the ports on the R12T?
The R12T features 1/4"-19 NPT threads on the ports, which is clearly marked in the product name (120AT NPT ZG1/4-19).
Can I mount the R12T vertically or horizontally?
Yes, the R12T can be mounted in any orientation. However, ensure the drain valve remains accessible regardless of mounting angle.
How do I know if I need to replace the filter element?
Signs include: reduced engine power, difficulty starting, or visible contamination in the filter bowl. As a preventive measure, replace every 10,000-15,000 miles.
Is the R12T marine-rated?
Yes, iFJF markets R12T kits specifically for marine applications. The corrosion-resistant aluminum housing and reliable water separation make it excellent for boats.
Conclusion: Protect Your Investment
Installing an iFJF R12T fuel filter/water separator is one of the best preventive maintenance steps you can take for your diesel (or gasoline) engine. Water contamination causes expensive damage, and the R12T provides reliable, low-cost protection.
The entire installation takes about 10 minutes if you have basic tools and follow the steps in this guide. The unit comes well-packaged with all necessary fittings, though you'll need to supply fuel line, clamps, and mounting hardware specific to your vehicle.
Remember to prime the filter before installation (as shown in the video) to make the process much cleaner and easier. And don't forget to regularly drain the water bowl – a few seconds of preventive maintenance prevents expensive repairs.
Related Articles:
Subscribe to our blog for more installation guides and maintenance tips!
Disclaimer: This installation guide is for informational purposes only. Always consult your vehicle's service manual and follow all safety precautions when working with fuel systems. If you're unsure about any step, consult a qualified mechanic.