
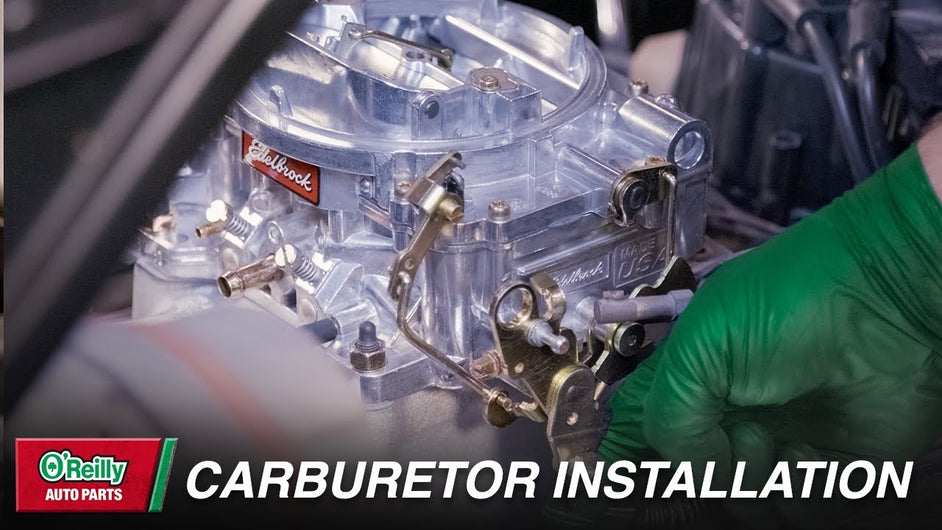
iFJF 1403 Performer 500 CFM 4-Barrel Carburetor Installation Guide
, by iFJF Direct, 23 min reading time
, by iFJF Direct, 23 min reading time

Tools, torque sequence, fuel-pressure and choke-wiring specs for the iFJF 1403 500 CFM square-bore — plus the vacuum-port map that stops a hanging idle and the CFM formula that tells you whether 500 or 600 CFM suits your V8.
The iFJF 1403 Performer 500 CFM 4-barrel carburetor bolts onto any square-bore intake in about an hour: 5.5 PSI fuel pressure at the inlet, mounting nuts torqued in a crisscross pattern, and switched 12V to the electric choke. This guide covers the full 1960s-1990s GM, Ford and Chrysler V8 install, plus marine swaps and street rods.
Swapping a tired Quadrajet or a limping factory EFI system for the iFJF 1403 square-bore carburetor turns a hard-starting small-block into a crisp, reliable runner. This guide walks through the exact bolt-on procedure demonstrated on a slightly modified Chevrolet 350: a clean intake surface, a square-bore gasket, crisscross torque, throttle and kickdown hookup, electric-choke wiring, and a leak-free first fire. As of 2026, the 1403 remains the go-to square-bore, electric-choke, no-EGR upgrade for 1960s-1990s GM, Ford, and Chrysler V8s, marine swaps, and street rods where a simple carburetor beats a finicky factory EFI or a worn Quadrajet.
The procedure below follows the factory Performer-series service sequence rather than a generic how-to. It keeps the details that matter - the CFM formula, the 5.5 PSI fuel-pressure target, vacuum-port routing, and the small gotchas (1977-and-later GM throttle studs, capped unused vacuum ports) that separate a clean install from a leaning, high-idle headache.
A square-bore Performer carburetor like the iFJF 1403 delivers predictable throttle response and easy tuning because every circuit is accessible and the throttle bores are equal-sized. For a stock or mild 305/350 cruiser, 500 CFM is enough airflow to make power without drowning the engine in fuel, while a spread-bore Quadrajet's secondary doors and a limp factory computer can leave you chasing stumbles and floods.
The 1403 also ships with an electric choke and no EGR, so it is a clean bolt-on for pre-emissions and off-road or competition builds where EGR plumbing is removed. Pair it with a proper square-bore intake - an Edelbrock RPM Air-Gap is a perfect match - plus good fuel filtration, and you get a setup a weekend mechanic can actually tune.
Gather these before the carburetor leaves the box so the install stays a one-hour job. Every part number below is a real Edelbrock Performer-family reference that the iFJF 1403 is built around.
| Item | Notes / Spec |
|---|---|
| iFJF 1403 Performer 500 CFM 4-Barrel Carburetor | Square bore, electric choke, no EGR, golden finish. Includes mounting gasket and hardware. |
| Edelbrock 8126 Fuel Inlet Pipe | 1/8 NPT port for a fuel-pressure gauge; simplifies line hookup. |
| Edelbrock 8748 Clear-View Inline Fuel Filter | Traps debris before it reaches the bowls and clogs jets. |
| Fuel pressure gauge (1/8 NPT) | Confirms 5.5-6.5 PSI at the inlet. |
| 1/2-inch socket and ratchet | For the carburetor mounting nuts (crisscross pattern). |
| Test light or multimeter | Verifies switched 12V at the electric-choke feed. |
| External throttle return spring | Closes the butterflies when the pedal is released. |
| Fuel-compatible thread sealer | For the rear power-brake / plug threads. |
Size the carburetor with the formula displacement (cu in, accounting for modifications) x maximum RPM / 3456, then pick the nearest Performer rating. A slightly modified 350 Chevrolet assumed to spin about 6,000 RPM lands near 600 CFM (the iFJF 1406 600 CFM square-bore); a stock 305 or mild 350 cruiser is better served by the 500 CFM iFJF 1403. Compare the whole iFJF square-bore lineup - 500 CFM (1403), 600 CFM (1406) and marine (1409) ratings.
Over-carbureting hurts low-end response and can load up the engine; under-carbureting leans the top end. Match the CFM to how the vehicle actually drives, not to the biggest number on the shelf. The 1403's 500 CFM is the sweet spot for street-driven small-blocks and most marine and RV V8 conversions.
Confirm 5.5 PSI at the inlet (never above 6.5 PSI) and that plugs, wires, air filter, and PCV are healthy before the carburetor goes on. Performer-series carbs handle up to 6.5 PSI, but 5.5 PSI is ideal to reduce flooding while still feeding plenty of fuel.
Test pressure at the 1/8 NPT port on the inlet pipe with a gauge, or permanently mount a gauge there for quick checks. If pressure runs high, add a regulator before continuing. Also knock out basic maintenance first - fresh spark plugs, ignition wires, a clean air filter, and a working PCV valve - because a new carburetor will only expose an underlying tune problem.
Learn the four connection groups - throttle arm, accelerator-pump link, vacuum ports, and electric choke - before the carburetor leaves the box. The throttle arm fits most 1976-and-earlier GM cable throttles with no adapter; Ford and Chrysler adapters are available, and 1977-and-later GM uses an 8009 throttle cable adapter stud instead of a ball stud.
The accelerator-pump link has three adjustments: the inner hole gives the largest pump shot, the middle a normal shot, and the outer the least. Leave it in the factory middle position - it is calibrated to the carburetor's CFM. At the front, the lower 3/16-inch full-time vacuum port feeds the transmission modulator (and a tuning gauge); the 3/16-inch timed port higher on the passenger side feeds the distributor vacuum advance; the large center tube is for the PCV system. Factory idle-mixture screws are set to an airflow target - do not touch them on a new carburetor (on a used one, seat them lightly, then back out 1.5 turns). The rear threaded hole takes a 3/8 hose barb for power brakes, or a pipe plug from the kit if unused; seal either with fuel-compatible thread sealer.
Clean the sealing surface, drop on the gasket, and snug the nuts in a crisscross pattern - do not overtighten. Start by removing all oil, old gasket material, and fuel from the intake flange so the new gasket seals with no leak paths.
The 1403 is a square-bore carburetor (equal-sized throttle bores), so the included gasket fits a square-bore intake like an Edelbrock RPM Air-Gap directly. To fit a spread-bore intake such as a Quadrajet, you need an adapter plate (Edelbrock 2696). Thread the mounting nuts over the studs by hand, then use a 1/2-inch socket to tighten them in a crisscross pattern over several steps until snug. Overtightening cracks the aluminum body.
Link the throttle arm to your cable or linkage, add an external return spring, and verify full open-and-close travel with the pedal. Connect the throttle and (if equipped) kickdown linkage to the throttle arm, then install an external return spring that closes the throttle butterflies when the pedal is released.
Have a helper press the accelerator: with the pedal fully depressed the butterflies should be fully open, and as it releases they should fully close with the idle-speed screw contacting the lever. Repeat the check with the air cleaner in place. If the pedal binds or the arm does not fully return, inspect the accelerator pedal, cable, and throttle arm for interference before moving on.
Run a clean fuel path through an inline filter and the specified inlet pipe so debris never reaches the bowls. Use the Edelbrock 8126 inlet pipe with an Edelbrock 8748 clear-view inline filter to catch the grit that clogs jets and strands you roadside.
A variety of fittings can be used for the fuel line, but the inlet-pipe-plus-filter combination keeps the install simple and protects the investment. A carburetor is far less tolerant of debris than EFI, so if you are refreshing the rest of the fuel system, the iFJF fuel filter collection covers replacement filter housings and elements for gas and diesel applications alike.
Ground the choke to the carburetor body and run the positive lead to a 12V source that is live only in the Run position. The ground wire connects to the carburetor body; the positive wire runs from inside the cabin to a switched circuit so power is present only with the key on.
Verify the feed with a test light or multimeter before buttoning up. Never tie the choke to constant 12V - it would stay open and the engine would run rich until it warms, defeating the choke's purpose. The choke is factory-set and should only be adjusted if the engine's warm-up behavior demands it.
Hook the distributor advance, PCV, and transmission modulator to their ports, and cap every unused one to stop vacuum leaks. A single open port creates a lean condition, a hanging idle, and a stumble that is maddening to diagnose.
Route the distributor vacuum advance to the timed (passenger-side) port, the PCV to the large center tube, and the trans modulator (if equipped) to the lower full-time port. Any port you are not using gets a proper cap. Confirm every line is seated before the first start.
Fill the bowls, check for leaks, then start with your foot off the pedal and let the engine warm up off fast-idle. With an electric fuel pump, turn the key to Run and let it fill the bowls; with a mechanical pump, disconnect the coil wire and crank for 10-15 seconds to prime.
Inspect carefully for any fuel leak and repair it before proceeding. If all is well, press the pedal to the floor once and release fully, then start the engine with your foot off the pedal. Check again for leaks and let it reach operating temperature; a quick blip of the accelerator brings it off fast-idle. At factory settings, most vehicles run and idle right out of the box; idle-mixture and accelerator-pump fine-tuning is a short, separate job you can do once the engine is fully warm.
| Tip | Why it matters |
|---|---|
| Set fuel pressure to 5.5 PSI and never above 6.5 PSI. | Performer carbs use a hollow float; excess pressure overwhelms it and floods the engine, especially at hot idle. |
| Cap every unused vacuum port. | One open port pulls unmetered air, causing a lean condition, high idle, and off-idle stumble that mimics a bad carburetor. |
| Leave the accelerator-pump link in the factory middle hole. | It is calibrated to the carburetor's CFM; moving it changes the pump shot and can cause bog or flood. |
| Do not touch the factory idle-mixture screws on a new carburetor. | They are pre-set to an airflow target; turning them makes the out-of-box tune worse, not better. |
| Use fuel-compatible thread sealer on the rear power-brake or plug threads. | Fuel can wick past dry threads and cause a slow leak or vapor that smells and stains. |
The iFJF 1403 is built to the Edelbrock Performer-series pattern, so the familiar 1406, 8126, 8748, 2696, and 8009 references all apply. Use this table to confirm fit and source the supporting parts - and when the carburetor eventually needs a kit, our Edelbrock 1406 and 1405 rebuild guide covers the same Performer-family internals.
| Part / Brand | Part Number | What it does |
|---|---|---|
| iFJF 1403 Performer 500 CFM 4-Barrel | 1403 | Main carburetor - square bore, electric choke, no EGR, golden. |
| Edelbrock Performer 600 CFM 4-Barrel | 1406 | Higher-CFM sibling for 350-400 cu in engines spinning higher RPM. |
| Edelbrock Fuel Inlet Pipe | 8126 | Clean line hookup with 1/8 NPT gauge port. |
| Edelbrock Clear-View Inline Fuel Filter | 8748 | Transparent bowl shows debris before it reaches the carb. |
| Edelbrock Spread-Bore Adapter Plate | 2696 | Lets the square-bore 1403 bolt to a Quadrajet intake. |
| Edelbrock Throttle Cable Adapter Stud (1977+ Chevy) | 8009 | 1977-and-later Chevrolet throttle cable adapter stud; replaces the ball stud. |

The iFJF 1403 is a bolt-on 500 CFM 4-barrel built to the Performer-series pattern: equal square bores, an electric choke for clean cold starts, and no EGR for pre-emissions, off-road, and competition builds. It ships with the mounting gasket and hardware, so there are no extra trips to the parts store.
If you are swapping off a tired Quadrajet or limp factory EFI on a GM, Ford, or Chrysler V8, this is the carburetor that gets you back on the road with tuning you can actually do yourself.
Shop Now →The 1403 is a square-bore carburetor, so it bolts directly to any square-bore intake (an Edelbrock RPM Air-Gap is a perfect match). To fit a spread-bore intake like a Quadrajet, use an Edelbrock 2696 adapter plate. The throttle arm fits most 1976-and-earlier GM cable throttles with no adapter; Ford and Chrysler adapters are available, and 1977-and-later GM uses an 8009 throttle cable adapter stud instead of a ball stud. Use the formula displacement x max RPM / 3456 to confirm 500 CFM suits your combo.
Performer-series carbs handle up to 6.5 PSI but run best at 5.5 PSI. Test at the 1/8 NPT port on the inlet pipe with a fuel-pressure gauge, and add a regulator if your pump pushes more than 6.5 PSI. Too much pressure floods the engine; too little starves it.
Both are Performer-series square-bore 4-barrels with electric choke and no EGR; the difference is CFM. The 1403 is 500 CFM for stock or mild small-blocks and cruisers, while the 1406 is 600 CFM for larger or higher-RPM combinations. Pick the CFM your engine actually needs rather than treating one as "better" than the other.
Yes. The 1403 is a square-bore carburetor and a Quadrajet intake is spread-bore, so use an Edelbrock 2696 adapter plate. Without it, the gasket will not seal and you will have vacuum and fuel leaks at the flange.
On a new carburetor, leave the idle-mixture screws alone - they are factory-set to an airflow target. On a used carburetor, seat them lightly until they bottom out, then back each out 1.5 turns as a base setting to get the engine running before fine-tuning.
Connect the choke ground to the carburetor body and run the positive lead to a 12V source that is live only in the Run position - never constant 12V. Verify the feed with a test light or multimeter before final assembly so the choke opens as the engine warms.
While the air cleaner is off and the fuel line is apart, these are the pieces worth having on the bench - they take minutes to fit and save a second job later:
 Carburetor Rebuild Kit for Edelbrock 1400-1409 & Carter 9000 Series 4-BBL — 809064
$39.99
Carburetor Rebuild Kit for Edelbrock 1400-1409 & Carter 9000 Series 4-BBL — 809064
$39.99
 Carburetor Calibration Tuning Kit for Edelbrock 1400-1411 & Carter AFB — Jets Rods Springs
$35.99
Carburetor Calibration Tuning Kit for Edelbrock 1400-1411 & Carter AFB — Jets Rods Springs
$35.99
 Edelbrock 1406 Performer 600 CFM 4-Barrel Carburetor — Electric Choke, for Chevy/GMC/Ford (Gold)
$419.99
Edelbrock 1406 Performer 600 CFM 4-Barrel Carburetor — Electric Choke, for Chevy/GMC/Ford (Gold)
$419.99
 1404 Performer 500 CFM 4-Barrel Carburetor Manual Choke NO EGR
$419.99
1404 Performer 500 CFM 4-Barrel Carburetor Manual Choke NO EGR
$419.99


