
Marine Fuel Water Separator Buying Guide: R12H Aluminum vs Racor S3240 — Complete Comparison & Install Tips
, by iFJF Direct, 14 min reading time
, by iFJF Direct, 14 min reading time

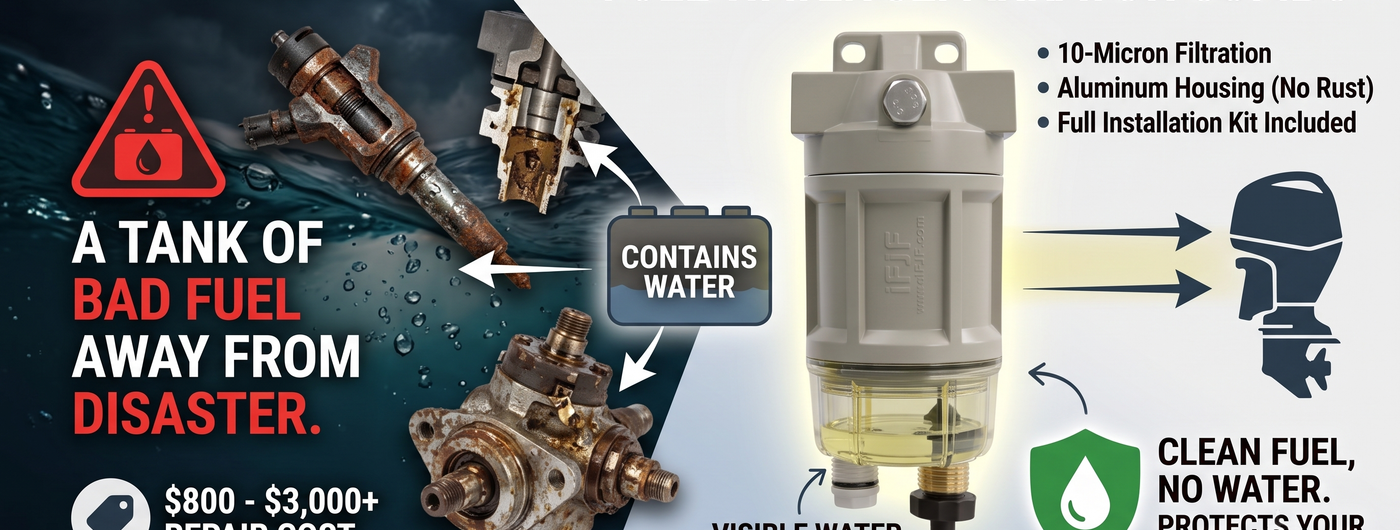
Marine engines face a threat that automotive engines almost never encounter: water-saturated fuel. Between condensation in partially filled tanks, ethanol's hygroscopic properties, and the simple reality that boats operate on water, marine fuel systems are under constant assault. A single tank of water-contaminated gasoline can leave you dead in the water — literally — with repair bills starting at $800 for a fuel system flush and climbing past $3,000 if injectors or the high-pressure pump are damaged.
This is where a quality fuel water separator earns its keep. The R12H Marine Fuel Water Separator Combo — an aluminum-bodied spin-on filter assembly — is designed to replace the popular Racor S3240 series at roughly half the cost while providing equivalent or better filtration performance. In this guide, we'll compare the R12H head-to-head with the Racor S3240, walk through a complete installation, and explain exactly how to maintain your separator for years of trouble-free operation.
A fuel water separator sits between your boat's fuel tank and the engine. Fuel enters the assembly, spins through a centrifuge-like chamber, and exits through a 10-micron filter element. The spinning action — a principle called cyclonic separation — forces water droplets (which are denser than gasoline) to the outer wall of the bowl, where they coalesce and settle at the bottom. Clean, water-free fuel flows through the center and onward to your engine.
The R12H uses a 10-micron filtration rating — the same standard as the Racor S3240 and most OEM marine filters from Mercury, Yamaha, and Suzuki. At 10 microns, the filter catches:
Going finer than 10 microns (some aftermarket filters advertise 2-micron ratings) sounds appealing but creates a critical problem: excessive restriction. Modern EFI outboards — particularly Mercury Verado and Yamaha F-series four-strokes — require specific fuel pressure at the vapor separator tank. A restrictive filter upstream can cause lean-running conditions at wide-open throttle. Ten microns is the sweet spot: fine enough to protect injectors, coarse enough to maintain flow rates exceeding 30 GPH on a single filter assembly.
E10 fuel (10% ethanol) is now nearly universal at U.S. marinas. Ethanol absorbs water from the atmosphere — up to 0.5% by volume before phase separation occurs. In a 50-gallon tank, that's a quart of water absorbed into your fuel, invisible until the ethanol reaches saturation and dumps it all at once. This is why a properly functioning fuel water separator isn't optional equipment — it's your last line of defense between phase-separated fuel and your engine's precision injectors.
The Racor S3240 (and its variants S3220TUL, S3213, S3214) has been the benchmark marine spin-on fuel water separator for decades. Parker Hannifin's Racor division essentially invented the category. But at $45-55 for the housing alone — plus $15-20 for each replacement element — the cost adds up quickly for boats with dual-engine or generator fuel circuits.
The R12H Combo at $49.99 includes the aluminum housing, a 10-micron filter element, two NPT/ZG fittings, and two port plugs — everything needed for a complete single-engine installation. Here's how the two compare across the metrics that matter:
| Specification | R12H Aluminum Combo | Racor S3240 / S3213 |
|---|---|---|
| Housing Material | Aluminum (corrosion-resistant) | Aluminum (painted/powder-coated) |
| Filtration Rating | 10 Micron | 10 Micron (S3213) / 30 Micron (S3240) |
| Port Thread Size | NPT ZG1/4-19 (1/4" NPT compatible) | 1/4" NPT or NPTF |
| Max Flow Rate | 30+ GPH | 30 GPH (S3240) / 15 GPH (S3213) |
| Includes Fittings & Plugs | ✅ Yes (2 fittings + 2 plugs) | ❌ Sold separately |
| Compatible Filter Elements | R12T, 120AT, S3240-style | S3240, S3213, S3220TUL (proprietary) |
| Price (Housing + Element) | $49.99 | $45-55 (housing) + $15-20 (element) |
| Drain Valve | Bowl drain for water inspection | Clear bowl (S3240) / No drain (S3213) |
Both the R12H and Racor S3240 use aluminum housings — a deliberate choice over cheaper steel or plastic alternatives. Aluminum provides three specific benefits in a marine environment:
If budget is no concern, the Racor S3240 with its clear sediment bowl offers one advantage: visual water inspection without draining. You can glance at the bowl and see accumulated water immediately. The R12H uses a metal bowl with a drain valve — you'll need to drain a small sample periodically to check for water, a minor inconvenience that takes about 10 seconds.
For boaters who want the clear-bowl convenience without the Racor price tag, the 495-4 Hyaline Fuel Filter Bowl can be adapted to some filter head configurations — check your thread compatibility before ordering.
Installing a fuel water separator is a straightforward mechanical job — no special tools beyond basic wrenches and thread sealant. The entire process should take 30-45 minutes for a single-engine installation.
Mount the separator on a solid bulkhead or stringer in a well-ventilated area of the bilge — never in an enclosed compartment where fuel vapors can accumulate. The filter should be accessible for spin-on cartridge changes: leave at least 3 inches of clearance below the bowl for draining water. Position it between the fuel tank and the engine's lift pump (suction side), not after a high-pressure pump.
Use the housing's mounting bracket as a template to mark your bolt holes. Drill and install with stainless steel hardware and nylock nuts. The bracket should be oriented so the filter element hangs vertically — this ensures proper cyclonic separation and water settling.
Apply a thin film of fuel-rated thread sealant to the male threads of the two included NPT ZG1/4-19 fittings. Thread them into the housing ports — one marked "IN" (from tank), one marked "OUT" (to engine). Hand-tighten, then add 1-1.5 turns with a wrench. Do not overtighten — aluminum threads will strip before steel, and the NPT taper provides the seal, not brute force.
Cut your fuel hose to length, allowing a slight service loop (2-3 inches of slack) for future maintenance. Push the hose fully onto the barbed fittings and secure with two stainless steel clamps per connection — one at the very end of the barb, one approximately 1/2" back. Double-clamping is standard marine practice and ABYC-recommended for below-deck fuel connections.
Fill the new R12T/120AT filter element with clean fuel before spinning it onto the housing. This prevents a large air pocket from entering the fuel system. Lubricate the gasket with a thin film of clean fuel or motor oil — never install a spin-on filter with a dry gasket. Spin on until the gasket contacts the housing face, then tighten an additional 3/4 turn by hand. Do not use a filter wrench for installation.
If your engine has a manual primer bulb, pump it until firm. If not, cycle the key to "run" (not "start") several times if equipped with an electric lift pump. Check every fitting and the filter gasket for fuel seepage. Any leak — even a damp spot — must be corrected before starting the engine. A fuel leak in an enclosed bilge is a fire and explosion hazard.
Start the engine and let it idle. Check for steady fuel flow and re-inspect all connections. Run the engine at idle for 2-3 minutes, then check the filter bowl by cracking the drain valve briefly — if the filter is working correctly, you should see clean fuel with no water droplets. For boats with the 496 Fuel Filter Assembly installed downstream as a secondary filter, verify flow through the entire circuit.
Look at the filter housing for corrosion, loose mounting bolts, or fuel staining. A quick glance saves you from discovering a leak 20 miles offshore.
Crack the bowl drain valve and collect about 2 ounces of fuel in a clear container. Let it settle for 30 seconds. If you see a water bubble or layer at the bottom, your separator is doing its job — drain until the sample runs clean, then consider adding a fuel stabilizer or drying additive to your tank.
Spin-on replacement is straightforward: unscrew the old element, fill the new one with clean fuel, lubricate the gasket, and spin on. The R12H uses standard R12T/120AT-style elements that are widely available. For boats operated in high-humidity environments (Pacific Northwest, Great Lakes, Southeast coastal), consider replacing at 75 hours — ethanol attracts water faster in these climates.
For diesel applications, the FS1098 Fuel Water Separator (2-Pack) provides a higher-capacity alternative for engines with greater fuel demand, including Cummins B6.7 and ISL8.9 marine diesels.
If you winterize your boat, treat the fuel system with a stabilizer (Sta-Bil Marine or equivalent), run the engine for 10 minutes to distribute treated fuel through the separator, then change the filter element. A filter saturated with untreated fuel over winter storage can develop internal corrosion and introduce sediment into the system when spring comes.
For a complete marine fuel system overhaul, check out our R25T Water Separator Replacement Guide for 245R Diesel engines — the same principles apply to most spin-on marine filter installations.
The R12H with NPT ZG1/4-19 ports is compatible with virtually any gasoline or diesel marine engine that uses a remote spin-on fuel filter head — which covers 95% of outboards, sterndrives, and inboards built after 1990. Specifically:
A charter captain running a 2019 Parker 23 SE with a Yamaha F150 outboard in the Chesapeake Bay reported persistent water-in-fuel issues after refueling at several older marinas. His OEM Yamaha filter (MAR-FUELF-IL-TR, $20.24 replacement cost) was catching water but requiring replacement every 40-50 hours — triple the normal interval. After switching to the R12H combo with an R12T 10-micron element, filter life normalized to approximately 100 hours, and the drain valve made monthly water checks a 30-second task instead of a full spin-off inspection. Total first-year savings: approximately $120 in filter elements plus avoided downtime that would have cost $400+ in lost charter revenue.
Fuel water separators must be installed on the suction side of the fuel pump — between the tank and the lift pump. Installing after the pump subjects the filter to positive pressure, which can force water through the element instead of allowing it to settle in the bowl. It also creates a leak point under pressure rather than vacuum.
Standard white PTFE (Teflon) tape can shred when threaded into aluminum housings, sending tape fragments downstream into carburetors or injectors. Use only fuel-rated paste sealant. If you must use tape, use yellow gas-rated PTFE tape — it's denser and less prone to shredding.
Spin-on filters need hand-tight plus 3/4 turn — period. Using a filter wrench for installation crushes the gasket, which can split and leak. A properly installed gasket swells slightly upon contact with fuel and creates a better seal over the first few heat cycles than one that's been mechanically crushed.
Installing a dry filter element creates a large air pocket that your lift pump may struggle to overcome — resulting in extended cranking, hard starting, or a no-start condition. Always pre-fill with clean fuel.
For carbureted engines, maintaining clean fuel delivery extends to the intake side as well. Our Mercruiser 4.3L V6 Carburetor Replacement Guide covers the complete fuel delivery chain from tank to intake manifold, including filter selection for pre-carb installations.
Browse our full selection of marine fuel filters and boat maintenance supplies for everything you need to keep your boat running reliably — from fuel water separators to carburetor rebuild kits and replacement elements.