
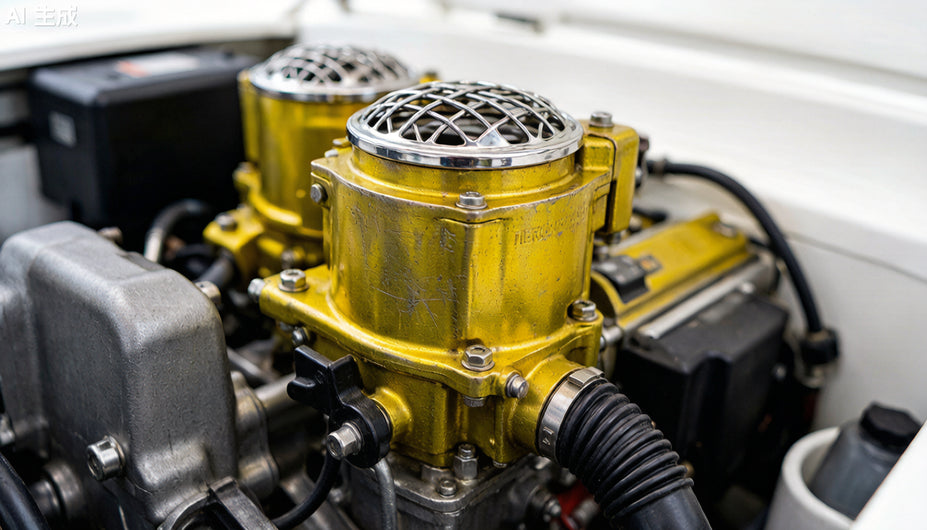
Mercruiser 4.3L V6 Marine Carburetor Replacement Guide: 3310-807764A1 Electric Choke Install & Tuning
, by iFJF Direct, 13 min reading time
, by iFJF Direct, 13 min reading time

If your Mercruiser 4.3L V6 is hard-starting, stumbling under throttle, or flooding at idle, the factory Mercarb 2-barrel carburetor has likely reached the end of its service life. The 3310-807764A1 aftermarket marine carburetor delivers OEM-spec fitment with an upgraded electric choke and yellow zinc corrosion protection — at a fraction of what Mercury Marine charges at the dealership counter. This guide walks you through symptom diagnosis, step-by-step installation, electric choke setup, and post-replacement tuning so you can get your boat back on the water with confidence.
The Mercruiser 4.3L V6 — the 262-cubic-inch workhorse found in countless Sea Ray, Bayliner, and Chaparral runabouts from the mid-1990s through the late 2000s — relies on a Rochester-derived Mercarb 2-barrel carburetor to mix air and fuel. When it wears out, the symptoms are unmistakable. Recognizing them early saves you from getting stranded at the boat ramp or, worse, taking on water while trying to restart a flooded engine in rough conditions.
A failed automatic choke mechanism — whether the thermal spring loses tension or the electric assist stops working — leaves the choke plate stuck open. The engine cranks and cranks without catching because the air-fuel mixture is too lean for cold combustion. You'll find yourself pumping the throttle repeatedly, which on a marine engine risks raw fuel pooling in the intake manifold.
When the accelerator pump diaphragm tears or hardens, the carburetor can't deliver the enrichment shot needed when you abruptly open the throttle. The engine bogs, stumbles, or backfires through the carb throat. This is especially dangerous when trying to power through a tight docking maneuver or navigate a busy channel.
A sinking float or needle-and-seat that won't seal causes the fuel bowl to overfill, dumping raw fuel into the venturi at idle. You'll notice a strong gasoline odor at the stern, black smoke from the exhaust, and plugs that foul within hours of running. On the water, this is both a performance problem and a serious safety hazard — gasoline vapors in the bilge are an explosion risk.
If the main metering jets are partially clogged with varnish from ethanol-blended fuel sitting in the bowl over winter, the engine surges as it transitions between the idle circuit and the main circuit. RPM will hunt by 200–300 at cruise speed, making for an uncomfortable ride and reduced fuel economy.
You can buy a Mercarb rebuild kit for $42.95, but consider this: after 15–20 years of saltwater air exposure, the zinc casting itself may be corroded. The throttle shaft bores wear oval, creating vacuum leaks that no gasket set can fix. The electric choke housing cracks from heat cycling. At that point, you're throwing good money after bad — rebuilding a worn-out casting buys you maybe one more season.
Boat owners face a stark choice when their Mercarb fails: pay the dealer tax for an OEM unit, gamble on a used eBay take-off, or buy a quality aftermarket replacement. Here's how the numbers stack up.
| Option | Source | Price | Notes |
|---|---|---|---|
| OEM Mercury Marine 3310-807764A1 | Hardin Marine | $1,222.99 | 7–10 day special order, no stock |
| Remanufactured Rochester Quadrajet | eBay | $385–$510 | No warranty, unknown history |
| Rebuild Kit (gaskets + needle) | eBay/Amazon | $42.95 | Doesn't fix worn casting or shafts |
| iFJF 3310-807764A1 Aftermarket | ifjf.net | $237.99 | New, electric choke, yellow zinc finish |
At $237.99 versus $1,222.99 for the identical OEM part number, the iFJF 3310-807764A1 saves you $985 — enough to cover a full set of marine spark plugs, a new fuel water separator, and a weekend's worth of marina fuel. That's not a marginal difference; it's the cost of an entire season's maintenance budget.
The 3310-807764A1 uses a yellow zinc chromate coating rather than the standard black oxide or bare aluminum finish found on budget replacements. Yellow zinc provides superior corrosion resistance in the marine environment, where salt spray, humidity, and temperature swings accelerate oxidation. If you've ever seen a black-finished carburetor develop white powdery corrosion around the fuel bowl screws after a single season in a saltwater slip, you understand why this matters. We covered this topic in detail in our Yellow Zinc vs Black Coating comparison guide.
The integrated electric choke on the 3310-807764A1 receives 12V from the ignition circuit and opens the choke plate progressively as the heating element warms up. This eliminates the cold-start dance — turn the key, the choke sets itself, and within 90–120 seconds the plate is fully open for normal running. Compare this to manual choke conversions that require drilling holes in your dash and routing cables through the engine compartment.
This 2-barrel carburetor is a direct bolt-on replacement for Mercruiser 4.3L V6 engines using the following superseded part numbers:
- 3310-806080A2
- 3310-806972A1
- 3304-9353A2
- 3304-9565A1 / 3304-9565A7
It fits standard-rotation engines with the 2-barrel intake manifold — covering the vast majority of 4.3L-powered sterndrive boats from 1987 through the early 2000s. Always verify your engine serial number against the Mercruiser 4.3L carburetor replacement guide before ordering.
Installing the 3310-807764A1 is a 2–3 hour job for a competent DIY mechanic with basic hand tools. You're working in an enclosed engine compartment, so safety comes first.
Turn the key to the "Run" position without cranking for 10 seconds — this primes the fuel bowl. Then crank the engine. It should fire within 3–5 seconds as the electric choke automatically sets the enrichment. Let it idle for 2 minutes before touching the throttle. Check for fuel leaks at the inlet fitting immediately. A small inspection mirror and flashlight help you see the back side of the fitting.
The electric choke on the 3310-807764A1 is adjustable, and getting it right is the difference between one-touch starts and endless cranking.
The 3310-807764A1 uses two idle mixture screws at the base of the carburetor, one for each barrel.
1. Warm the engine to operating temperature (160°F+ on the gauge, typically 10 minutes of idle on the hose).
2. Connect a tachometer or use the boat's dash tach.
3. Using a flathead screwdriver, gently seat both mixture screws (clockwise until they just stop — do not force them).
4. Back each screw out 1.5 turns as the baseline setting.
5. Adjust each screw 1/8 turn at a time, alternating between the two barrels, until you achieve the highest steady idle RPM.
6. Once peak RPM is found, turn each screw inward (lean) 1/8 turn to set a slightly lean-best idle. This prevents loading up during extended no-wake-zone operation.
7. Set the curb idle speed screw to achieve 650–700 RPM in gear (for most 4.3L applications). Note: idle must be set with the drive in the water or with a test propeller providing back-pressure; hose idle will read 100–150 RPM higher.
Unlike some aftermarket carburetors that arrive with float levels set at a generic factory spec, the 3310-807764A1 comes pre-calibrated for the 4.3L application. However, it's worth verifying: with the engine idling on a level surface, the fuel level should be visible at the center of the sight glass (if equipped) or you can briefly remove the sight plug — fuel should just barely trickle out, indicating the float is holding the correct bowl level.
A marine carburetor lives in one of the harshest environments imaginable — salt air, vibration, temperature swings from 40°F to 200°F, and fuel that often sits for weeks between uses. A few habits will dramatically extend the life of your new 3310-807764A1.
Ethanol-blended fuel is the enemy of every marine carburetor. E10 absorbs moisture from the air, and in a boat's vented fuel tank, that means water accumulation over time. Water in the fuel bowl corrodes zinc castings and promotes phase separation. Use ethanol-free recreational fuel (often labeled "REC-90") whenever possible. If you must run E10, treat every tank with a marine fuel stabilizer like Sta-Bil Marine 360.
For boats stored over winter:
1. Add fuel stabilizer to the tank and run the engine for 10 minutes to distribute treated fuel through the entire fuel system.
2. With the engine running on the hose, fog the carburetor throat with marine fogging oil until the engine stalls — this coats internal passages with protective oil.
3. Drain the fuel bowl: most Mercarb designs have a bowl drain plug. Catch the fuel in a container; do not let it drip into the bilge.
4. Spray the exterior of the carburetor and all linkages with a light corrosion inhibitor like CRC 6-56 Marine.
Under normal recreational use (50–100 hours per season), the 3310-807764A1 should deliver 5–7 years of reliable service before needing a rebuild. Signs that service is due: idle becomes difficult to hold steady despite mixture adjustments, fuel economy drops noticeably, or you find fuel staining around the throttle shaft indicating bore wear.
The Mercruiser 4.3L V6 is one of the most reliable marine engines ever produced — but the Mercarb 2-barrel on top of it is a known weak point after 15+ years of service. The iFJF 3310-807764A1 marine carburetor solves the three biggest pain points: it eliminates the $985 OEM markup, it brings the reliability of a modern electric choke to older engines, and its yellow zinc finish stands up to the marine environment better than budget alternatives.
Whether you're wrenching on a 1998 Sea Ray 180 Bowrider that's been in the family for two decades or refreshing the engine in a center console fishing boat that earns its keep every weekend, a new carburetor is one of the highest-ROI repairs you can make. It transforms a temperamental hard-starter into a reliable turn-key boat — and that means more time on the water and less time in the driveway with the engine cover open.
For a deeper dive into coating options and saltwater durability, see our Yellow Zinc vs Black Coating comparison. For step-by-step installation with torque specs, check out the Mercruiser 4.3L Carburetor Replacement Guide. Browse our complete Marine Fuel Filters & Parts collection for fuel system components that complement your carburetor upgrade.
 Carburetor Rebuild Kit for Edelbrock 1400-1409 & Carter 9000 Series 4-BBL — 809064
$39.99
Carburetor Rebuild Kit for Edelbrock 1400-1409 & Carter 9000 Series 4-BBL — 809064
$39.99
 Carburetor Calibration Tuning Kit for Edelbrock 1400-1411 & Carter AFB — Jets Rods Springs
$35.99
Carburetor Calibration Tuning Kit for Edelbrock 1400-1411 & Carter AFB — Jets Rods Springs
$35.99
 3106996022 RV AC Control Relay Board for 579/590/595/600 Series
$49.99
3106996022 RV AC Control Relay Board for 579/590/595/600 Series
$49.99
 Edelbrock 1406 Performer 600 CFM 4-Barrel Carburetor — Electric Choke, for Chevy/GMC/Ford (Gold)
$419.99
Edelbrock 1406 Performer 600 CFM 4-Barrel Carburetor — Electric Choke, for Chevy/GMC/Ford (Gold)
$419.99