
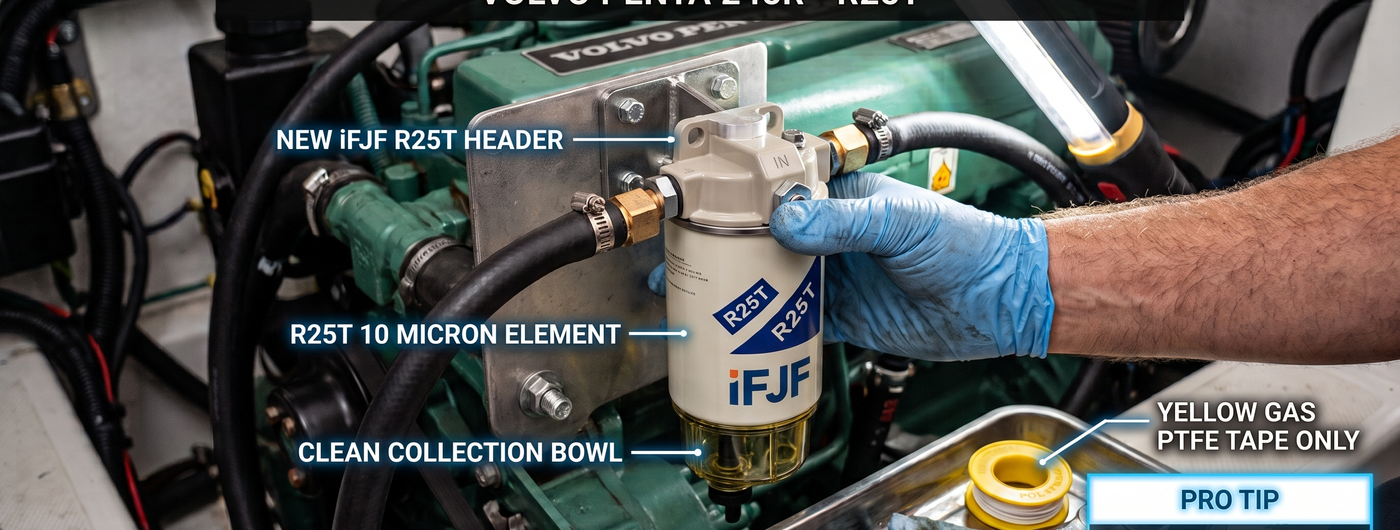
245R Diesel Fuel Water Separator Replacement: R25T WK940/38X Swap in Under an Hour
, by iFJF Direct, 7 min reading time
, by iFJF Direct, 7 min reading time

I've had a 245R-series Volvo Penta in the shop three times this month with the same complaint — hard starts, rough idle, and a fuel system that sounds like it's sucking gravel through a straw. Every single one had a water separator that hadn't been touched since the boat left the factory.
The R25T water separator assembly is a direct replacement for the WK940/38X, and at 10 microns it catches more crud than most factory units. If your diesel is acting up, this is where you start. Not the injectors. Not the lift pump. The separator.
You don't need a scan tool to know when the separator is past its prime. Look for these:
The R25T isn't just a filter swap — it's a complete assembly. New housing, new bowl, new 10-micron element, and two fittings pre-installed. The 10-micron rating matters. Most OEM separators on the 245R platform are 20-30 micron. That means the R25T catches particles half the size. Less junk reaching your injectors = longer injector life. Simple math.
It cross-references to WK940, 38X, 20386081, and 33771. If you're hunting for a replacement at the parts counter, any of those numbers will get you the right unit. The R25T comes with 2 fittings and pre-threaded ports — no chasing threads with a tap, no adapters to buy separately.
Kill the engine. Disconnect the battery. Open the fuel cap to vent tank pressure. If your setup has a primer bulb or manual lift pump, give it a few squeezes — if fuel sprays, the line's still pressurized. Wait 5 minutes.
Put your catch pan under the bowl. Crack the drain valve at the bottom slowly — fuel will come out fast if the bowl is full. Let it drain completely. What comes out tells you a lot. Clean amber diesel? Filter was doing its job. Black sludge with water droplets? You found the problem.
Mark the inlet and outlet lines with tape before pulling them. Inlet comes from the tank, outlet goes to the lift pump. Mix these up and you'll be cranking for 30 minutes wondering why nothing's happening. Loosen the hose clamps with a flathead, twist the hoses off — don't yank, you'll tear 15-year-old rubber.
Unbolt the housing bracket from the engine or bulkhead — typically 2 bolts, 17mm. Keep the bolts and bracket; the R25T uses the same mounting pattern.
Fill the new bowl about 3/4 full with clean diesel. This saves you 5 minutes of cranking. Wrap the fitting threads with yellow PTFE tape — 3 wraps, clockwise. Snug the fittings into the ports: 14mm wrench, firm but not Hercules-tight. Aluminum threads strip easier than you think.
Bolt the assembly to the bracket. Don't crank the mount bolts — 15 ft-lbs is plenty. Overtightening cracks the housing and you'll be ordering another one.
Slide the hoses onto the correct fittings, tighten the clamps. Reconnect the battery. Turn the key to ON (don't start) and let the lift pump run for 10-15 seconds. If you've got a manual primer, pump until firm. Crack the bleeder screw on top of the housing until clean fuel (no bubbles) comes out. Tighten it back down.
Start the engine. It should catch within 3-5 seconds. Let it idle for 2-3 minutes while you check every connection. Look for drips at the fittings, the bowl seal, and the drain valve. A flashlight helps — diesel can be hard to spot against a dark engine block.
Slight rpm fluctuation on first start is normal. Air bubbles working their way out. If it's surging after 60 seconds, you've got a leak letting air in. Re-check your fittings.
Mixing up inlet and outlet. Happens more than you'd think. The engine will crank but won't fire. Mark your lines.
Using white plumbing tape on fuel fittings. Diesel eats regular PTFE tape over time. Yellow gas-rated tape only.
Forgetting to bleed. Cranking a dry system for 30 seconds burns up starter motors and lift pumps. Always prime and bleed.
Reusing the old O-ring. If you're pulling the bowl off to swap just the element, put a new O-ring in. They flatten with age and leak when you re-torque.
Every 300 hours or annually, whichever comes first. If you fish in salt, run ethanol-blended fuel, or have an older tank — cut that to every 200 hours. The element is cheap. Injectors and injection pumps are not.
It's a direct replacement for the WK940/38X-style water separator used on 245R-series diesel engines and Volvo Penta applications. If your current unit cross-references to part numbers WK940, 38X, 20386081, or 33771 — it fits. Check your existing housing casting number before ordering.
10 micron nominal. Catches water and particulate down to 10 microns. Most OEM separators on this platform are 20-30 micron, so the R25T filters about twice as fine.
Not necessarily. If your hoses are hard, cracked, or older than 10 years — replace them while you're in there. Use SAE J30R9 diesel-rated fuel hose. Standard rubber fuel line degrades with biodiesel blends.
If you can change your oil, you can swap this separator. Budget 45-60 minutes. The only tricky part is bleeding the system — follow the steps above and you'll be fine.
Yes. All iFJF parts come with our satisfaction guarantee. If the unit shows up damaged or doesn't fit, reach out and we'll make it right.
Get the R25T Water Separator Assembly here: R25T Water Separator Assembly — 10 Micron, Direct Fit for 245R Diesel
Browse our full selection: Diesel Fuel Filter Collection