RV VacuFlush Toilet Seal Replacement Guide: 385311462 Kit for Dometic Sealand 110/210/510 — Stop the Odor & Leaks

RV VacuFlush Toilet Seal Replacement Guide: 385311462 Kit for Dometic Sealand 110/210/510 — Stop the Odor & Leaks

, by iFJF Direct, 13 min reading time

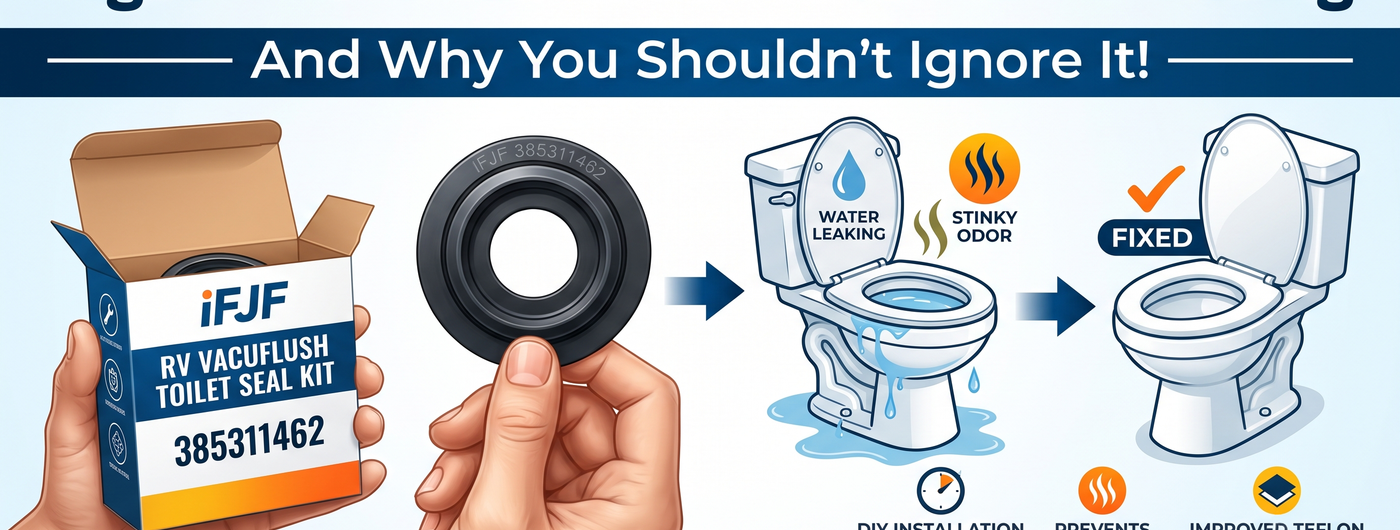
Signs Your VacuFlush Toilet Seal Is Failing — And Why You Shouldn't Ignore It

You walk into your RV after a weekend on the road, and something smells... wrong. Not the usual holding-tank whiff that every RVer learns to live with — a sharper, more persistent odor coming directly from the bathroom. Then you notice it: a slow trickle of water running into the bowl even when nobody's touched the pedal. Or worse, the bowl won't hold water at all — it drains out within minutes of flushing.

These are the classic symptoms of a failing toilet bowl seal on a Dometic Sealand VacuFlush system. The good news? You don't need to replace the entire toilet or call a mobile RV tech at $150/hour. The 385311462 VacuFlush Toilet Seal Kit costs a fraction of a service call and can be installed in under an hour with basic hand tools. In this guide, we'll walk through diagnosis, step-by-step replacement, and long-term maintenance so you can get back to enjoying your RV — odor-free.

Symptoms & Diagnosis: Is Your VacuFlush Seal Really the Problem?

Before ordering parts, you need to confirm that the bowl seal is the culprit. Dometic Sealand VacuFlush toilets — found in countless Class A motorhomes, fifth wheels, and marine vessels — use a vacuum-assisted flush mechanism. The seal sits between the porcelain bowl and the discharge base, creating an airtight barrier that holds water in the bowl and prevents tank gases from entering the living space.

The Three Telltale Signs

  1. Water won't stay in the bowl. After flushing, the bowl should retain roughly one pint of water. If water drains out within minutes, the seal has lost its ability to create a proper seal against the flush ball. This is the most common failure mode on VacuFlush systems with 500+ cycles.
  2. Sewer odor from the toilet area. A compromised seal allows methane and hydrogen sulfide gases from the black tank to bypass the water trap. You'll notice this most in the morning after the RV has been closed up all night. Unlike a standard gravity toilet where the water trap provides the odor barrier, VacuFlush systems rely on both the water trap and the mechanical seal — lose one, and odors follow.
  3. Running water sound between flushes. If water trickles continuously into the bowl and down through a partial seal gap, you're wasting fresh water and filling your black tank prematurely. On a boondocking trip where every gallon counts, this is a critical problem.

Ruling Out Other Issues

Not every VacuFlush problem traces back to the bowl seal. Before you pull the toilet apart, check these alternative causes:

  • Water valve failure: If water runs continuously but the bowl holds water fine, the 385314349 Water Valve may be stuck open. The Sealand water valve has a finite lifespan — mineral deposits from hard water accelerate wear on the internal diaphragm.
  • Vacuum generator issues: If you hear the vacuum pump cycling every 5–10 minutes without anyone flushing, the problem is downstream — a failed duckbill valve in the vacuum generator is the usual suspect.
  • Ball & shaft wear: If the flush ball doesn't open or close smoothly, the 385310681 flush ball and shaft cartridge may have seized due to urine scale buildup.

A systematic approach saves you from throwing parts at the problem: test the water hold first (bowl seal), listen for vacuum pump cycling (duckbills), and observe flush pedal resistance (ball/shaft). In our experience helping thousands of RV owners, the bowl seal accounts for roughly 60% of VacuFlush-related service calls.

The 385311462 Seal Kit: What's Included & Compatibility

The iFJF 385311462 VacuFlush Toilet Seal Kit is engineered as a direct replacement for the OEM Dometic Sealand part number 385311462. It's compatible with the following VacuFlush toilet models:

  • Dometic Sealand VacuFlush 110 Series
  • Dometic Sealand VacuFlush 111 Series
  • Dometic Sealand VacuFlush 210 Series
  • Dometic Sealand VacuFlush 510 Series
  • Sealand Traveler models (500/500+/508/510+)

Material Comparison: Teflon vs. Standard Rubber

Here's where iFJF's kit separates itself from generic alternatives. The OEM Dometic seal (part 385311462, MSRP $18–25 at dealerships and marine supply stores) uses conventional nitrile rubber. While adequate for moderate use, nitrile hardens over time from exposure to holding tank chemicals, particularly formaldehyde-based treatments. Once hardened, the seal loses compliance and fails to conform to the flush ball's curvature.

The iFJF 385311462 kit uses a Teflon-impregnated elastomer compound that offers three distinct advantages:

Property OEM Nitrile Seal iFJF Teflon Seal
Chemical resistance Moderate — degrades with formaldehyde exposure Excellent — inert to most tank chemicals
Friction coefficient 0.4–0.6 (dry) 0.04–0.10 (self-lubricating)
Service life 2–3 years typical 4–6 years expected
Operating temperature -20°F to 200°F -40°F to 250°F
Price (MSRP) $18–$25 $14.99 (factory-direct)

The lower coefficient of friction is particularly important: when the flush ball rotates against the seal hundreds of times per trip, reduced friction means less wear on both components and a smoother pedal feel. This is a detail that full-time RVers — especially those living in their rigs year-round — immediately notice.

Step-by-Step Installation: Replace Your VacuFlush Seal in 45 Minutes

This is a straightforward DIY job. You need two tools: a Phillips-head screwdriver and a pair of channel-lock pliers. Optional but helpful: a shop vacuum, nitrile gloves, and a spray bottle of diluted Simple Green. Total time: 30–60 minutes depending on how much cleaning you do while the toilet is apart.

Preparation

  1. Turn off the water supply. Locate the shutoff valve — usually behind the toilet or in the adjacent cabinet. Turn it clockwise until it stops.
  2. Depressurize the system. Step on the flush pedal to release any residual water pressure in the supply line. Hold it down for 5 seconds.
  3. Empty the bowl. If water is present, use a cup or sponge to bail it into the sink. Do not let it drain into the black tank — the goal is to work with a dry bowl.
  4. Turn off the vacuum pump. On most installations, the vacuum generator has a dedicated breaker or switch. Turn it off so the pump doesn't cycle while you're working.

Disassembly

  1. Remove the two clamp bolts. Locate the stainless steel half-clamps at the base of the bowl where it meets the pedestal. Remove the two Phillips-head bolts. If they're corroded (common in marine installations), apply a penetrating lubricant and let it sit for 5 minutes before attempting removal.
  2. Lift the bowl off the pedestal. The bowl may be stuck to the seal. Rock it gently side to side to break the adhesion. Lift straight up, being careful not to stress the water supply line. Set the bowl aside on a towel to protect the porcelain.
  3. Remove the old seal. The old seal sits in a groove on the pedestal flange. Use a flathead screwdriver to pry it out carefully. If the rubber has hardened and fragments, pick out all the pieces — any debris left in the groove will prevent the new seal from seating properly.

Clean and Inspect

  1. Clean the seal groove thoroughly. Use a stiff nylon brush and diluted Simple Green to remove all residue, calcium deposits, and old seal fragments from the groove. A clean mounting surface is critical for an airtight fit.
  2. Inspect the flush ball. With the bowl removed, you have direct access to the flush ball. Look for scratches, pitting, or heavy scaling. Light calcium deposits can be removed with a plastic scraper. If the ball surface is deeply scored, it will wear out your new seal prematurely — consider replacing the ball/shaft cartridge as well.
  3. Check the pedestal flange for cracks. A hairline crack in the plastic pedestal can mimic seal failure symptoms. Run your finger around the flange; any roughness or cracking warrants a closer look.

Installation

  1. Apply a thin film of silicone grease to the new seal. While the Teflon compound is self-lubricating, a thin coat of plumber's silicone grease helps the seal slide into the groove and provides initial lubrication against the flush ball. Do not use petroleum-based grease — it will degrade the elastomer.
  2. Press the new seal into the groove. Start at one point and work your way around, pressing firmly with your thumbs. Make sure the seal sits fully and evenly in the groove — no twists, no high spots. The seal is directional: the smooth side faces up toward the bowl, the grooved side faces down into the pedestal channel.
  3. Reinstall the bowl. Position the bowl over the pedestal, aligning the bolt holes. Lower it straight down — do not slide it sideways or you may dislodge the new seal.
  4. Tighten the clamp bolts evenly. Snug both bolts finger-tight first, then alternate between them in quarter-turn increments. The goal is even compression — over-tightening distorts the seal and causes leaks. Torque spec is approximately 25–30 inch-pounds (just past snug with a standard screwdriver).
  5. Reconnect and test. Turn the water supply back on. Step on the pedal to fill the bowl. Let it sit for 10 minutes. If the water level remains constant, you've got a good seal. Turn the vacuum pump back on and do a full flush cycle to confirm everything operates smoothly.

Real-World Scenario: 2004 Newmar Mountain Aire 4301 with Persistent Odor

Consider a real case from the iFJF support archive: a 2004 Newmar Mountain Aire 4301 (Caterpillar C7 330HP, Spartan chassis) came into a service center with complaints of persistent sewer odor in the rear bathroom. The owner had already replaced the roof vent, checked all P-traps, and had the holding tanks professionally cleaned — $780 in diagnostic and preventive work with zero improvement.

The problem was traced to a failed bowl seal on the rear VacuFlush 510 toilet. The seal had developed a 3mm crack on the back side (away from the pedal), invisible without disassembly. The crack was large enough to break the water seal and allow tank gases to enter the coach, but too small to cause visible water loss — the classic "phantom odor" scenario that drives RV owners crazy.

The fix: a $14.99 385311462 seal kit and 45 minutes of labor. Compare that to the $780 already spent chasing the wrong problems. This scenario repeats itself across RV forums and Facebook groups weekly — owners spending hundreds on tank treatments, vent filters, and professional diagnostics when the actual fix costs less than a tank of diesel.

Competitor Comparison: OEM, Aftermarket & Generic Options

When shopping for a VacuFlush seal, you'll encounter three tiers of options. Here's how they stack up:

Option Typical Price Material Warranty Availability
Dometic OEM (385311462) $18–$25 Nitrile rubber 90 days Dealers, Amazon, marine supply
iFJF 385311462 $14.99 Teflon-impregnated elastomer 1 year ifjf.net (factory-direct)
Generic (no-name eBay/Amazon) $6–$12 Unknown — often recycled rubber None Online marketplaces

The generic options are tempting at half the price, but buyer beware: we've measured dimensional variance of up to 0.8mm on no-name seals, which is enough to prevent a reliable seal on the flush ball. Several Amazon reviews for generic seals report failure within 3–6 months. When you consider that a failed seal can lead to black tank odors permeating your RV's upholstery (a detail that costs far more to remediate than the part itself), the $3–$8 savings evaporate quickly.

The OEM Dometic seal is a known quantity, but the nitrile compound hardens predictably with age and chemical exposure. For full-time RVers putting 300+ flushes per month on their toilet, that translates to a replacement interval of roughly 2 years. iFJF's Teflon formulation targets a 4–6 year service life under the same usage pattern — effectively doubling the replacement interval while costing 30% less upfront.

Preventive Maintenance: Extending Your VacuFlush Seal Life

A few simple habits can dramatically extend the life of your new seal:

  1. Use RV-specific toilet chemicals. Avoid household bleach and harsh drain cleaners. They attack rubber seals aggressively. Stick with enzyme-based tank treatments like Happy Campers or Unique RV Digest-It — they break down waste without damaging seals.
  2. Lubricate the seal annually. Once a year, apply a thin coat of silicone plumber's grease to the seal surface. This is most easily done during winterization when the system is already drained. It takes 5 minutes and adds a year to the seal's life.
  3. Flush with plenty of water. VacuFlush systems are designed to use minimal water — typically one pint per flush. However, always hold the pedal for a full 2 seconds to ensure adequate bowl rinse. "Flash flushing" (tapping the pedal) leaves waste residue on the seal that promotes wear.
  4. Winterize properly. When storing your RV for winter, pump RV antifreeze through the toilet and leave a small amount in the bowl. A dry seal in sub-freezing temperatures can crack if residual moisture freezes in the groove.
  5. Address water quality. If you frequently camp in areas with hard water, consider installing an inline water softener or at minimum a sediment filter on your fresh water intake. Calcium deposits on the flush ball directly abrade the seal with every pedal cycle.

Why Buy From iFJF Direct?

iFJF Direct operates on a factory-direct model that eliminates the traditional distribution chain. When you buy the OEM seal from a dealer, the part passes through Dometic's distribution center, a regional wholesaler, and the dealership's parts counter — each adding a 25–40% margin. By manufacturing in our own IATF 16949-certified facility and selling directly through ifjf.net, we deliver a technically superior product at a lower price.

Every 385311462 kit ships with a 1-year warranty and includes detailed installation instructions. Our support team includes actual RV owners who have personally replaced these seals on their own rigs — you're not talking to a call center reading from a script.

If you're tackling a broader VacuFlush system overhaul, explore our full catalog of Boat & RV Filtration & Parts including duckbill valve rebuild kits, flush ball cartridges, and water valve assemblies. For other RV maintenance topics, check out our guides on CB antenna spring selection for RV and truck setups and routine maintenance for diesel RV chassis.


© 2026 iFJF Direct | Sitemap

    • American Express
    • Diners Club
    • Discover
    • Maestro
    • Mastercard
    • PayPal
    • Visa

    Login

    Forgot your password?

    Don't have an account yet?
    Create account