
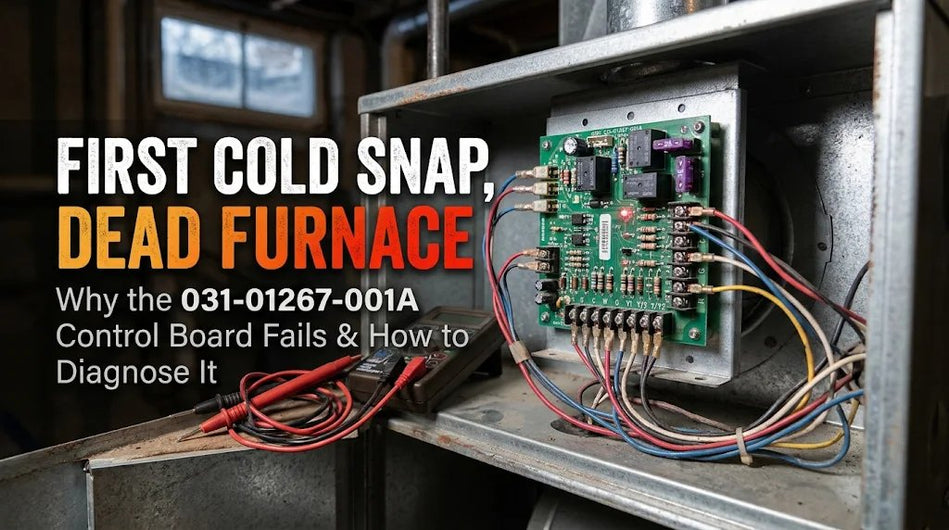
First Cold Snap, Dead Furnace: Why the 031-01267-001A Board Fails
, by iFJF Direct, 35 min reading time
, by iFJF Direct, 35 min reading time

Most gas furnaces that die in November actually broke between May and October — and the 031-01267-001A control board is the part that carries the damage. This guide covers why the first cold snap exposes it, how to read the diagnostic LED (all 13 official codes), how to tell a dead board from a dead sensor, and how hard the swap really is.
The short version — read this first if you just want to know whether to buy the board.
Most furnaces that die in November didn't actually break in November. They broke slowly between May and October, sitting there doing nothing in a damp basement. That first cold snap is just the first time in months that anything asked them to work.
And the 031-01267-001A board is where most of that damage lands. It's the low-voltage brain every safety switch reports to — which is exactly why it's the part that turns a cold snap into a no-heat call.
If you own a York, Luxaire, Coleman or Evcon single-stage furnace, this is written for you — the TG9S, TG8S, TGLS, GG9S, GG8S, GGLS, MG9S, G9T, G8T, G8C, GY8S, FG8, FG9 and FL8 series.
We'll get into why this season in particular wrecks them, how to tell a dead board from a dead sensor, and how much of the swap you can realistically do yourself.
A furnace that ran fine last March fails in November because a handful of small things pile up while it sits. Here's what actually goes on between the last heating cycle of spring and the first one of fall.
| Mechanism | What It Does to the Board |
|---|---|
| Eight months of dormancy | From late March to the first real cold front, the thing does nothing at all. Lubricants stiffen up, dust settles on the sensors, and nothing gets tested under load. Marginal parts survive right up until the day you ask them to run a full cycle. |
| Summer humidity and oxidation | All winter the burners keep the cabinet baked dry. Summer is the opposite — no heat, and warm humid air condenses right on the cooler board. ASHRAE puts accelerated copper and solder oxidation above roughly 60% relative humidity, and the signals running through this board are only 25 VAC. That's far too weak to punch through an oxide film you'd never even notice on a 120 V circuit. |
| First-start inrush | The first startup after months of sitting sends a surge through old relays and solder joints. A board with a hairline crack in a trace will run all winter and then quit on the first cold call of the new season. |
| A filter nobody changed since spring | A loaded filter chokes airflow across the heat exchanger, the high-limit switch opens, and the board kills the burners mid-cycle. The board is doing its job. Your furnace still won't heat. |
| Cold snaps remove all margin | In mild weather the furnace cycles and rests. In a cold snap it runs almost nonstop — which is exactly when a weakening relay or a weak flame signal has nowhere left to hide. |
You've probably seen the pattern by now: it fires, runs ten or fifteen seconds, shuts off, tries twice more, then gives up. That's not random.
The board is doing exactly what it's built to do. Light the burners. Fail to confirm a clean flame. Shut the gas off so your house doesn't fill up.
The number stamped on the old board is what decides fitment — not the badge on the furnace door. York built this platform for a long list of single-stage furnaces, then sold it under a pile of different numbers. That's why a 2008 Coleman and a 2012 Luxaire can take the exact same board.
| Number on the Old Board | What It Is |
|---|---|
| 031-01267-001A | Primary number for this replacement |
| 031-01267-001 · P031-01267-001 | York, earlier label on the same board |
| 031-01972-000 · 031-01266-000 · 031-01140-702 | York earlier revisions |
| 50A56-956 · 50A56-242 · 50A56-243 | White-Rodgers OEM control |
| 265901 · 265902 · 539617 | York short numbers |
| S1-33103010000 · S1-33102956000 | York service-part numbers |
| S1-03109167000 · S1-03101933000 · S1-03101972000 · S1-03101973000 | York service-part numbers |
| S1-03101267000 · S1-03101267001 · S1-03101266000 · S1-03101250000 | York service-part numbers |
| S1-03101284000 · S1-03100662000 | York service-part numbers |
| 1162-202 · 1162-83-202 · 1162-201 · L45-088 | ICM and Johnstone equivalents |
Pull the blower door, find the board, read the number off the face of it. Match anything in that table and you're done — this is your replacement. If your furnace is a Rheem, Ruud, Carrier, Bryant, Lennox or Trane, it's not. Different terminal layout, different ignition design, and no adapter harness is going to bridge that gap no matter what someone on a forum tells you.
All those numbers land on one board because York consolidated the platform — 031-01267-001A plus 21 other control numbers got folded into a single service part, S1-33103010000. The series below are the fleet that consolidated board covers, so every furnace on the list takes this replacement: TG9S, TG8S and TGLS (York, Coleman, Luxaire), GG9S, GG8S, GGLS and MG9S, the upflow and downflow G9T, G8T, G8C and GY8S units, the FG8, FG9 and FL8 series, and the RGF1L, RGF19 and PS8E packaged units.

031-01267-001A Furnace Control Board — the wire-for-wire replacement for the White-Rodgers 50A56-956 and the York S1-33103010000.
In stock · 120 VAC HSI · 6.0 A igniter relay · three blower speed taps · twinning · installation manual in the box · $89.99
Check fitment & buy →Not every no-heat call is a board. These five are the ones that actually do point at it. And that last column is the part most people skip — it's what separates a bad board from a bad sensor, and that difference is worth real money.
| Symptom | Usually Means | How to Confirm |
|---|---|---|
| Blower runs forever, no heat | Blower relay welded closed on the board | Pull the R wire off the thermostat terminal block. Blower still running with no call for heat = stuck relay on the board. |
| Fires, runs 10–15 seconds, quits | Flame not being confirmed | Most often a dirty flame sensor, not the board. Clean the sensor rod first; if the board still drops the gas valve, the flame-sense circuit is the failure. |
| Nothing happens at all, no inducer | No low-voltage power reaching the board | Check the 3 A automotive fuse on the board and the furnace door switch before condemning it. A blown fuse from a miswire looks exactly like a dead board. |
| Repeated clicks, no ignition | Igniter relay cycling without a light-off | Watch the igniter during a call for heat. No glow at all points at the igniter or its 120 V circuit; glow with no gas points at the valve. |
| Random shutdowns, odd codes | Oxidized terminals or a cracked solder joint | The classic post-humid-summer failure. It behaves during a service visit and fails that evening. Reseating the connectors is the tell — if it improves then fails again, replace the board. |
This board runs the same diagnostic system as the White-Rodgers 50A56-956, and it talks through a three-colour LED — green, amber, red. Here's the thing most people miss: the flash count means nothing until you know the colour. Slow green is a healthy standby. Slow amber is a healthy heat call. The 1–12 red codes are the actual faults. So count the flashes, clock the colour, then read the table.
Each flash lasts about 0.25 seconds, with a 2-second pause between codes — so a code reads as a quick burst, then a long gap. Look through the sight glass in the blower door, or hold the door switch in with the cover off. And don't cycle power to clear the code before you read it. The current fault vanishes the moment you cut power, and then you're blind.
| Colour + Flash | Official Fault Meaning | What the Manual Says to Check |
|---|---|---|
| Green Slow | Normal operation | No fault. Steady green indicates standby and no stored fault. Source: Normal |
| Amber Slow | Normal operation with call for heat | No fault. The control is in the heating sequence. Source: Normal |
| Amber 4 | Y present with no G call | The control is not receiving a G call with a Y signal. Check the low-voltage wiring from the thermostat. Source: Thermostat wiring |
| Amber Rapid | Low flame sense current | Carbon on the flame sensor, a poorly grounded furnace, or a mis-aligned probe. Clean the sensor, improve the ground, verify the probe sits in the flame. Reference FS and GND terminals. Source: Flame sensor |
| Red 1 | Flame sensed when no flame should be present | Verify the gas valve is shutting down properly and the flame goes out at the end of the cycle. Check orifices and gas pressure. Source: Gas valve |
| Red 2 | Pressure switch stuck closed / inducer error | The switch is closed before the inducer runs. Check switch function and verify the inducer is turning off. Terminals PSI / HLO. Source: Pressure switch |
| Red 3 | Pressure switch stuck open / inducer error | Check switch function and tubing. Verify the inducer turns on and pulls enough vacuum to close the switch. Terminals PS / HLI. Source: Pressure switch / vent |
| Red 4 | Open limit switch | Verify continuity through the limit circuit (HLI / HLO). A dirty filter, restricted duct, wrong blower speed, over-firing or a failed blower motor all open this switch. Source: Airflow / limit |
| Red 5 | Open rollout switch / open fuse detect | Verify continuity through the rollout circuit (ROSI / ROS). The rollout switch is manually reset. Check combustion air, inducer operation, heat exchanger and burners. Source: Rollout / fuse |
| Red 6 | Pressure switch cycle lockout | The pressure switch opened repeatedly during a call for heat. Verify the inducer holds vacuum continuously; check tubing and venting. Terminals PS / HLO. Source: Pressure switch / vent |
| Red 7 | External lockout (retries) | Flame was not proven after the retry limit. Usually carbon on the flame sensor, a shorted or disconnected sensor lead, a furnace that is not well grounded, or an igniter that is no longer in the gas stream. Source: Flame sensor / igniter |
| Red 8 | External lockout (recycles) | Flame was lost repeatedly during the heating cycle. Check gas supply pressure, the gas valve, and the flame sensor. Source: Gas supply / flame sensor |
| Red 9 | Grounding or reversed polarity | Verify the control and the furnace are properly grounded, then check and correct primary or secondary polarity if reversed. Source: Ground / polarity |
| Red 10 | Gas flow with no call for heat | Verify the gas valve operates and shuts down properly, and check the gas valve wiring. Source: Gas valve |
| Red 11 | Limit switch open — blower failure | The limit circuit has stayed open for more than five minutes. Usually a failed blower motor or blower wheel. Verify continuity at HLI / HLO. Source: Blower / limit |
| Red 12 | Ignitor failure | Open igniter circuit. Check the wiring and the igniter itself for a break. Source: Igniter |
| Red Solid | Internal GV error, micro, and frequency check | Control failure. The control is not field-repairable — replace the board. Source: Replace board |
| Red Rapid | Twinning error, incorrect 24 V phasing | Check that the 24 V is phased correctly between twinned furnaces. Source: Twinning wiring |
Red, steady on. That's it. That's the only one. The manual is blunt about it: an internal control failure holds the LED solid, and "the control is not field-repairable" — so the board gets replaced.
Every other code in that table points at a circuit or a component living outside the control. That includes the ones that sound like board faults. 9 is grounding or polarity, not a dead board. 12 is the igniter circuit, not the control.
Most listings get this wrong, and it costs owners real money. If your LED is flashing any code rather than sitting solid, the board is still running its diagnostic logic. That's what a working control does.
Both 4 red and 5 red read "open fuse detect" in the manual. There's one automotive-style blade fuse on the board protecting the low-voltage transformer. When it blows, the control reports it through the limit or rollout code instead of a code of its own.
So before you buy anything, pull that fuse and test it. It costs a few bucks. A miswire from a previous repair is the usual reason it's gone — and if a board keeps blowing fuses, you've got a wiring fault that no new board will fix.
9 red — grounding or reversed polarity. This is the one a DIY install coughs up when line and neutral get swapped, or the chassis isn't properly grounded.
Here's where people go wrong: they put in a new board, see 9 flashes, and immediately file for a replacement. The board isn't defective. The polarity or the ground is wrong. Fix the wiring before you ask for a return, and check that the flame probe isn't shorted to the chassis.
With no call for heat or cool, press the LAST ERROR button and let go. The LED replays up to five stored codes, most recent first, one second apart. Nothing stored? It answers with two green flashes. Hold the same button for five seconds or more and the memory wipes — three green flashes means it took.
Worth doing before a tech shows up, so the next reading isn't polluted by some ancient fault from three winters ago.
Waiting costs you twice. First, the 031-01267-001A number has been folded into York's newer S1-33103010000 service part — a consolidated kit covering 22 old numbers, and it ships with a mounting bracket. So the old label isn't the number a counter clerk reaches for anymore, and the OEM part runs $170 and up. Second, timing. When the first cold front sweeps the country, millions of furnaces get flipped from cool to heat inside the same two or three weeks. Supply houses that stock legacy HVAC controls go empty, and a part that ships in two days in July turns into a two-to-three-week backorder in November.
Which is the real argument for keeping one on the shelf instead of ordering after it dies. A furnace that quits on a Tuesday in January doesn't quit politely. It quits with the house at 50 °F, the tech booked out four days, and the part possibly on national backorder.
In most markets the board costs less than one emergency service call. And it's the one piece in the ignition chain you can swap without touching the gas train.
What a new board won't do is fix a furnace whose real problem is a cracked igniter, an oxidized flame sensor, a lazy pressure switch or a clogged filter.
Buy the board because you've confirmed the board is the failure. Not because it's the easiest part to blame.
On this board the swap is wire-for-wire, which puts it within reach of a careful homeowner and makes it a routine job for a tech. No cutting, no splicing, no adapter harness. The terminals carry the same R, C, W, G, Y1 and Y/Y2 labels as the original, and it mounts on the standoffs already inside your cabinet.
| Task | Difficulty | Notes |
|---|---|---|
| Confirm the part number | Easy | Read the board face. If you cannot read it, photograph it and ask before ordering. |
| Shut off power and gas | Easy but non-negotiable | Breaker, gas valve and the cabinet switch. Verify with a tester. |
| Move the low-voltage wires | Moderate | One at a time, to matching labels. The old harness does not need to come out. |
| Handle the board without static | Easy | Touch the chassis first. Static damage shows up later as an intermittent fault. |
| Line voltage at the igniter relay | Technician territory | 120 VAC at 6.0 A. If you are not comfortable at a breaker, stop here. |
| Gas train diagnosis | Technician only | Valve testing and combustion setup are not homeowner work. |
If the only thing between you and heat is a board with the right number on it, a careful DIY swap makes sense. If you're still guessing between the board, the igniter and the gas valve, call a tech. Guessing is how people end up buying two boards and still sitting in the cold.
Budget thirty to forty-five minutes for the board itself. Power off. That photo of your old wiring in front of you. And don't skip the static step — it's the one everyone skips, and the one that bites you later.
Kill the furnace breaker at the panel, then close the gas valve upstream of the burner section. Most furnaces also have a light-switch-style shutoff on or beside the cabinet — flip that one too. Check it with a non-contact tester before your hands go anywhere near the board.
One clear photo of the terminal block, every wire still plugged in. The new board uses the same R, C, W, G, Y1 and Y/Y2 labels, so that photo is your map back. Skip this and you're guessing — this is the one step that saves you a second service call.
Touch the bare metal of the furnace chassis before you unwrap the new board. A spark you can't even feel is enough to hurt the microprocessor — and static damage doesn't show up now, it shows up weeks later as an intermittent fault that looks exactly like a bad board out of the box.
Release the old board from its standoffs or bracket, then transfer each wire to the identically labeled terminal on the new board instead of pulling the whole harness loose. Check that no spade is bent, loose or pushed back out of its housing. Keep the plastic standoffs intact, and never let the back of the PCB rest against the sheet metal cabinet. Some of those solder points on the reverse side sit at line potential. Tighten a board down onto bare metal and it'll short or blow the fuse the second you restore power. This replacement is the board on its own, so reuse the standoffs already in your cabinet — and check none are cracked or missing before you mount it.
Breaker back on, call for heat at the thermostat. Watch the sequence: inducer starts, igniter glows, gas valve opens, burner lights, blower kicks on after the heat-on delay. A repeating flash code is actually good news — the board is alive and telling you which safety circuit opened.
Set the heat-off delay to whatever suits the house — 60, 90, 120 or 180 seconds. Longer run-on pushes the last of the warm air into the rooms instead of up the flue. Then put the blower door back on; most furnaces won't run with the door switch open, and that's not a fault.
Almost every repeat failure after a board swap comes from the install, not the part. These three cover nearly all of them.
iFJF carries five single-stage boards covering the major North American platforms. Match the number on your old board to the right one before you order — it's a two-minute check that saves a return.
| Board | Fits | Control / Ignition | Price |
|---|---|---|---|
| 031-01267-001A | York · Luxaire · Coleman · Evcon 50A56-956 / 265901 / S1-33103010000 |
25 VAC / 120 VAC HSI | $89.99 |
| 50A55-843 | White-Rodgers · Lennox 50A50-241 / 50A50-405 / 50A55-486 |
25 VAC / 120 VAC HSI | $137.99 |
| 1012-925C | Rheem · Ruud · Weather King 62-24268-01 / -02 / -03 / 62-24192-01 |
24 VAC / HSI | $179.99 |
| 920915 | Nordyne G7 / M7 replaces 624742 |
Single-stage | $79.99 |
| 1170063 | ICP 1138-200 furnaces ICP-built units |
Single-stage | $177.77 |
Not sure which one? Send us the number printed on your old board plus the furnace model number — we answer fitment questions before you order, not after. And if you're also chasing a defrost board or a converter board, the full electronics and control board range is here.
Single-stage integrated furnace control with 120 VAC hot surface ignition, a 6.0 A igniter relay, three blower speed taps and twinning support. Replaces the 031-01267-001A / 031-01972-000 / 265901 / 539617 numbers and the S1-33103010000 service part, for York, Luxaire, Coleman and Evcon furnaces.
If your board number is on the crossover list, this is a wire-for-wire swap — no cutting, no adapter harness.
Shop Now →A: Read the number printed on the board inside your blower compartment. If it says 031-01267-001A, 031-01267-001, P031-01267-001, 031-01972-000, 031-01266-000, 031-01140-702, 265901, 265902, 539617, 50A56-956, 50A56-242, 50A56-243, S1-33103010000 or any S1-0310 / S1-3310 service number, you're covered. It fits York, Luxaire, Coleman and Evcon single-stage furnaces in the TG9S, TG8S, TGLS, GG9S, GG8S, GGLS, MG9S, G9T, G8T, G8C, GY8S, FG8, FG9 and FL8 series. It does not fit Rheem, Ruud, Carrier, Bryant, Lennox or Trane controls — those are a different animal.
A: Usually, yes. A blower that never shuts off almost always means the blower relay on the board has welded shut. The motor then gets constant voltage no matter what the thermostat wants. Quick way to confirm: pull the thermostat wire off the R terminal. If the blower keeps running with no call for heat, that relay is stuck and the board needs to go.
A: It's built to the same electrical spec — 25 VAC control input at 0.45 A, a 6.0 A igniter relay at 120 VAC, a circulator relay rated 14.5 FLA / 25.0 LRA, three blower speed taps and twinning support. It just doesn't carry a York or White-Rodgers label. If having the factory name on it matters to you, buy the OEM number. If you need heat tonight, the furnace only reads the spec anyway.
A: 30 to 45 minutes for the board itself. The terminals are labeled R, C, W, G, Y1 and Y/Y2 just like the original, so it's moving wires to matching spades — no cutting, no splicing. Add a few minutes for shutting off power and gas and for the first startup check.
A: Sometimes. If the fault is a dull oxide film on the low-voltage terminals after a humid summer, cleaning and reseating the connections buys you time. But a welded blower relay, a burnt trace or a cracked solder joint doesn't clean up. And a board that fails intermittently in November usually fails for good in January.
A: For most York-built single-stage furnaces, yes — the board is the cheap failure, not the heat exchanger or the inducer. The catch is availability. The original number got consolidated into newer York service parts, so the real question isn't whether the repair is worth doing. It's whether a board is on a shelf today.
A: No — and please don't order a second board over it. Nine red flashes means the control is reporting a grounding or reversed-polarity fault. The manual lists it as "Grounding or reversed polarity" and tells you to verify the ground and correct primary or secondary polarity. It's the most common code after a DIY install where somebody swapped line and neutral, or left the chassis ground loose. Fix the wiring and the code clears. A new board won't change it.
A: One, and only one: the LED sitting solid red. The manual says an internal control failure holds the LED on continuously and that the control is not field-repairable — so it gets replaced. Every flashing code, 1 through 12, points at something outside the control: pressure switch, limit, rollout, flame sensor, igniter, gas valve, ground or polarity. If it's flashing, the board is still running its diagnostic logic. That's what a working control does.
A: Then the board wasn't the failed part. Read the LED flash code on the new board first — it points at the circuit that opened. In the order we usually see it: a dirty flame sensor, a cracked hot surface igniter, a lazy pressure switch, or a clogged filter tripping the high limit. None of those live on the board.
