RV Generator & Parts RV Generator & Parts

RV Generator & Parts

RV Generator Parts & Maintenance — Cummins Onan Filters, Kits & More iFJF Direct is your one-stop shop for RV generator maintena...

55 products


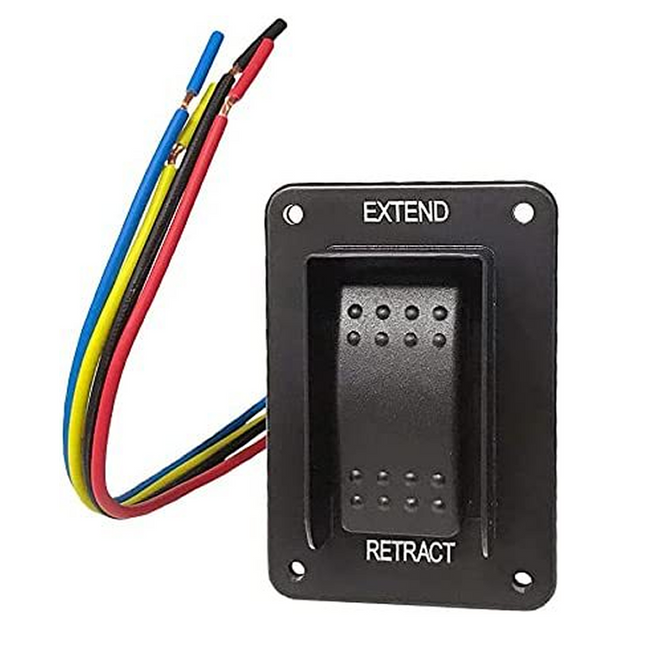
  • iFJF 387874 Power Stabilizer Switch Harness Lippert — Front View

    iFJF 387874 Power Stabilizer Switch Harness for Lippert RV — 5th Wheel

    Product Overview The 387874 Power Stabilizer Switch Harness for Lippert RV — 5th Wheel Camper is a premium-quality aftermarket replacement part engineered for 3878 Lippert diesel engines vehicles. Designed to meet or exceed OEM specifications, this Switch delivers exceptional performance, durability, and reliability for compatible models owners who demand the best for their vehicles. Key Features Precision Engineering: Manufactured to exact OEM specifications using advanced CNC machining and rigorous quality control processes for perfect fitment every time. Premium Materials: Constructed from high-grade materials selected for maximum durability, corrosion resistance, and long service life under demanding conditions. Direct Fit Installation: Designed as a direct bolt-on replacement with no modifications required — simply remove the old part and install this one using basic hand tools. Quality Certified: Backed by IATF 16949 certified manufacturing standards, ensuring consistent quality and reliability across every unit produced. Comprehensive Warranty: Covered by iFJF's standard warranty against manufacturing defects, with dedicated customer support available to answer your questions. Compatibility Specification Details Vehicle Make Lippert Vehicle Models compatible models Year Range 3878 Engine diesel engines Part Number 387874 Power Stabilizer Switch Harness for Lippert RV — 5th Wheel Camper Replaces OEM OEM specifications Why Choose iFJF Direct? At iFJF Direct, we specialize in providing diesel enthusiasts and professional mechanics with premium aftermarket parts that deliver genuine value. Every product we sell is carefully selected for quality, tested for performance, and backed by our commitment to customer satisfaction. Whether you're maintaining a daily driver, building a competition truck, or servicing a fleet, iFJF has the parts you need with the quality you can trust. Frequently Asked Questions Q: Will this fit my 3878? A: This Switch is specifically designed for 3878 Lippert compatible models with the diesel engines. Always verify your vehicle's exact year, make, model, and engine specification match the compatibility information above before ordering. Q: Is professional installation required? A: Installation difficulty varies by vehicle and skill level. For most applications, this is a direct bolt-on replacement that can be completed with basic hand tools. We always recommend consulting a certified mechanic if you are unsure about any installation procedure. Q: What's included with my purchase? A: Your purchase includes the Switch as shown. Please review the product images and description carefully. If additional hardware or gaskets are required for installation, they are included where noted. Q: What is your shipping and delivery policy? A: iFJF Direct offers fast worldwide shipping. Orders are typically processed within 1-2 business days. Shipping times vary by destination. Free shipping is available on qualifying orders. Contact our support team for specific delivery estimates to your location. Q: What warranty coverage do you provide? A: All iFJF products are warranted against manufacturing defects. Our warranty covers replacement or refund of defective products. Contact our support team with your order number to initiate a warranty claim. We pride ourselves on standing behind every product we sell. Order With Confidence When you order from iFJF Direct, you're getting more than just a Switch — you're getting our commitment to quality, reliability, and customer satisfaction. Every product is backed by our warranty and supported by our knowledgeable customer service team. Order yours today and experience the iFJF difference! Related Guides & Articles Check out these helpful resources from the iFJF blog: RV Maintenance — Complete Diesel Truck & RV Maintenance Schedule 2026 RV Generator Guide — Cummins Onan RV Generator Maintenance Guide 2026

    $57.99

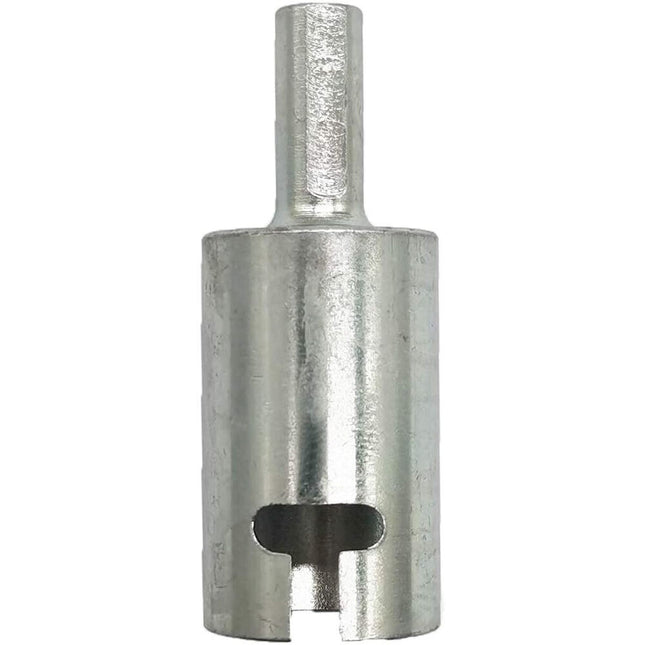
  • iFJF TST-129 RV Leveling Scissor Jack Socket Zinc Plate - Product Image 1

    iFJF iFJF TST-129 RV Leveling Scissor Jack Socket Zinc Plated Drill Adapter, fits 3/8" and 1/2" Power Drills

    Product Overview The iFJF RV Leveling Scissor Jack Drill Socket transforms campsite setup from a tedious chore into a 30-second task. Precision-machined from zinc-plated steel, this adapter socket fits both 3/8" and 1/2" drill chucks, letting your cordless drill power through stabilizer jack extensions effortlessly. Compact enough to live permanently in your RV toolkit. Key Features Dual-drive compatibility — fits 3/8" and 1/2" drill chucks Zinc-plated forged steel — built to handle repeated high-torque use Reduces campsite setup time by up to 70% Compact 4-inch length fits easily in RV tool storage Also compatible with manual ratchet wrenches Hexagonal base for secure drill chuck grip — no slipping Vehicle Compatibility Make Model Year Range Engine Universal RV Scissor Jacks All N/A Universal Trailer Stabilizer Jacks All N/A Universal Camper Leveling Systems All N/A ⚠️ Always verify fitment with your vehicle's specifications before ordering. Contact our support team for compatibility questions. Technical Specifications Brand iFJF SKU FJ-AD28-SI Drive Size 3/8" & 1/2" Material Zinc-Plated Forged Steel Length Approx. 4 inches Warranty 12-Month Limited Installation Guide Insert socket into drill chuck (3/8" or 1/2"). Place onto scissor jack drive nut. Operate drill at moderate speed for extension/retraction. Finish with manual check for safety. Frequently Asked Questions Q: Will this work with my cordless drill? Yes — compatible with any drill accepting 3/8" or 1/2" bits. Recommend 18V+ drills for optimal torque on larger stabilizer jacks. Q: Can I use this without a drill? Absolutely. The hexagonal base works with standard ratchet wrenches. A drill simply speeds up the process significantly. Why Choose iFJF? Quality Assurance: Every product is tested to meet or exceed OEM specifications for fit, function, and durability. Fast USA Shipping: Orders ship from our domestic warehouses with full tracking — typically delivered within 3-7 business days. Expert Support: Our US-based team of automotive specialists is ready to assist with fitment, installation, and technical questions. Hassle-Free Returns: 30-day return window on all iFJF products — no questions asked. Direct-to-Consumer Value: Premium quality without the dealer markup — save 30-60% vs. OEM pricing. Package Includes 1x iFJF TST-129 RV Leveling Scissor Jack Socket Zinc Plated Drill Ad Installation hardware (where applicable) Quick-start guide Related iFJF Products 🔗 iFJF RV Water Filter Multi-Layer Filtration 🔗 iFJF RV Stair Entry Step Motor for Kwikee 🔗 iFJF RV Awning Motor for Solera LCI Lippert Helpful Resources 📖 Complete Guide to Diesel Aftermarket Maintenance 📖 How to Choose the Right Replacement Auto Parts 📖 Top 10 DIY Upgrades for Your Truck or SUV

    $29.99

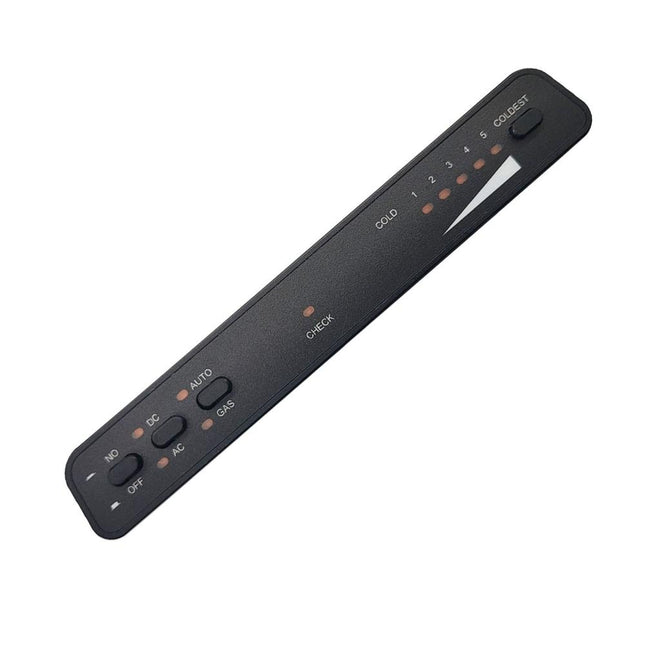
  • Norcold 630811 RV Refrigerator 300W Heating Element Replacement - Front View

    iFJF iFJF For Norcold 630811 RV Refrigerator 300 Watt Heating Element Compatible With Norcold N1095 N61X N62X Series Refrigerator

    Product Overview Restore your Norcold RV refrigerator's cooling performance with this 300W heating element, a direct replacement for Norcold part number 630811. When your Norcold fridge stops cooling on electric mode but works fine on gas, the heating element is the most likely culprit. This OEM-spec replacement gets your fridge back to reliable electric operation without the cost of a complete cooling unit. Compatible with Norcold N611, N621, N811, N821, N841, and other Norcold absorption refrigerator models that use 300W AC heating elements. Key Features 300W / 120V AC — Exact match for OEM specifications Direct Plug-and-Play Replacement — Same form factor and electrical connectors as factory unit High-Temperature Nickel-Chromium Alloy — Durable heating element wire rated for continuous duty Stainless Steel Sheath — Corrosion-resistant for long service life in RV environments Thermal Fuse Protection — Built-in safety cutoff prevents overheating Symptoms of a Failed Heating Element Fridge cools on LP gas but NOT on AC electric mode Fridge doesn't cool at all on any mode (check control board as well) Circuit breaker trips when fridge is switched to electric mode No heat felt at boiler area when running on AC Ammonia smell (indicates cooling unit leak — different problem) Compatibility Brand Models Norcold N611, N621, N811, N821, N841 (300W AC versions) Part Number 630811 Specifications Specification Value Power Rating 300 Watts Voltage 120V AC Element Material Nickel-Chromium Alloy Sheath Material Stainless Steel Replaces Part # 630811 Frequently Asked Questions Q: How do I diagnose if my heating element is bad?A: Test with a multimeter: disconnect power, remove element leads, and measure resistance. A good 300W element should read approximately 48 ohms. An open circuit (infinite resistance) means the element is burned out. Q: Can I replace this myself?A: Yes — if you're comfortable with basic electrical work and have access to the back of the refrigerator (through the exterior access panel). Disconnect all power sources (120V AC and 12V DC) before servicing. Q: Will this fit my Norcold N841?A: Yes, this 300W element fits Norcold N6xx and N8xx series refrigerators that use 300W AC electric heating elements. Verify your specific model's wattage before ordering. Q: My fridge doesn't cool on gas either — will this fix it?A: No. If your fridge fails on both gas and electric, the problem is likely a failed cooling unit (ammonia leak), blocked burner orifice, or control board issue — not the heating element. Related Products RV Winterizing Kit — Prepare your RV for storage Browse All RV Parts & Accessories Related Blog Posts RV Appliance Troubleshooting Guide

    $47.99

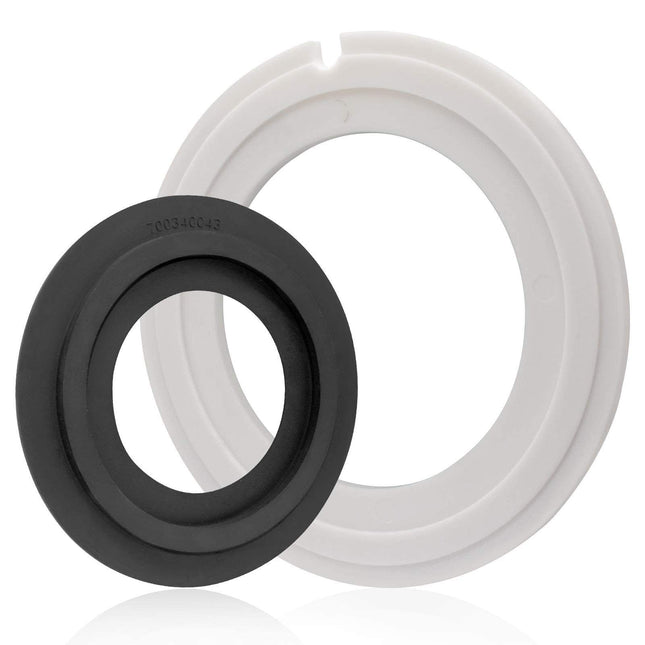
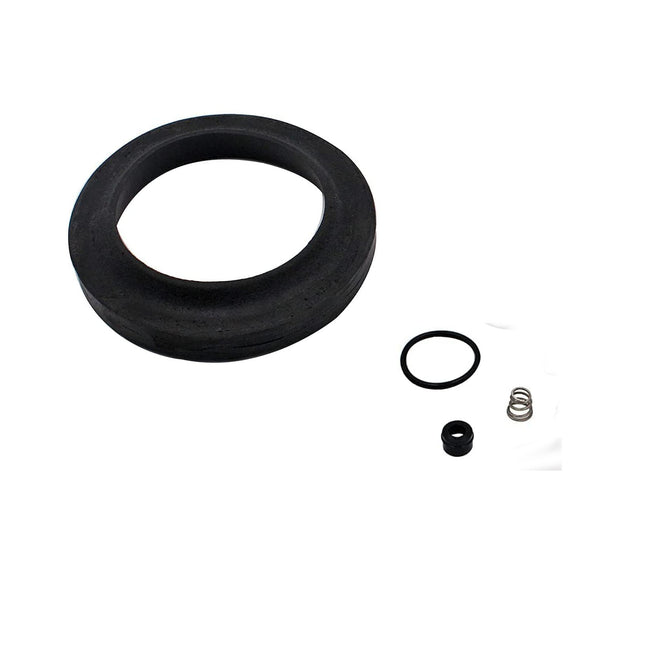
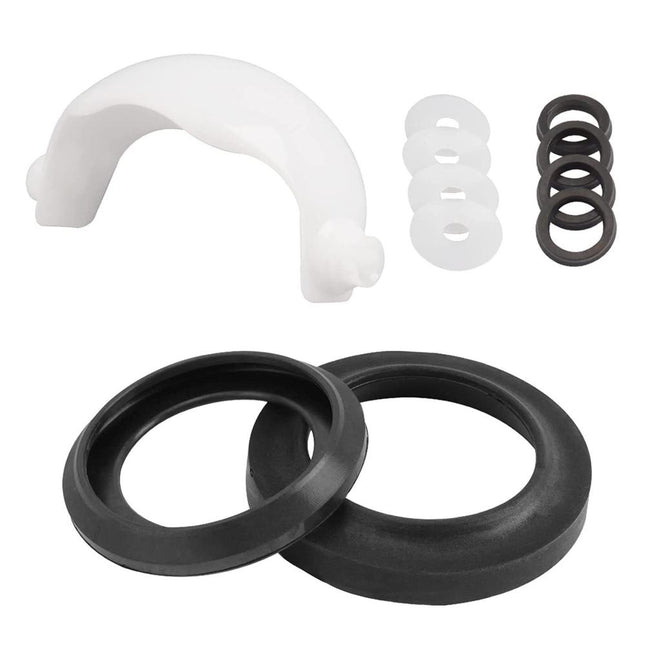
  • 385311462 VacuFlush Teflon Toilet Seal Kit for Dometic Sealand 110-510 — Complete Kit

    iFJF 385311462 VacuFlush Toilet Seal Kit for Dometic Sealand 110 111 210 510 — Teflon

    Product Overview Stop bowl water loss and sewer odors with this upgraded Teflon-faced toilet seal kit for Dometic Sealand VacuFlush toilets. Designed for models 110, 111, 210, and 510 — common in higher-end RVs, boats, and marine applications — this kit replaces both the 385311462 and 385310677 seal assemblies. The Teflon-faced polymer disk with raised alignment groove outperforms standard rubber seals, maintaining its shape through thousands of flush cycles and creating an odor-tight seal that lasts significantly longer. Key Features Upgraded Teflon-Faced Disk — Unlike standard rubber seals that develop compression set (permanent flattening), the Teflon surface resists deformation through thousands of flush cycles, maintaining a consistent seal. Raised Alignment Groove — Precision-molded groove centers the seal on the VacuFlush ball valve for even wear distribution and consistent sealing pressure around the entire circumference. Complete Seal Kit — Includes Teflon-faced seal disk, mounting ring, O-rings, and silicone lubricant packet — no additional parts needed for a complete rebuild. Direct OEM Replacement — Exact replacement for Dometic/Sealand part numbers 385311462 and 385310677. Same dimensions, same fit, upgraded material. Marine & RV Compatible — Works in both recreational vehicle and marine (boat/yacht) installations with VacuFlush toilet systems. Compatibility / Fitment Brand Series Models Replaces Part # Dometic / Sealand VacuFlush 110, 111, 210, 510 385311462, 385310677 Technical Specifications Specification Value Part Numbers 385311462, 385310677 Seal Material Teflon-Faced Polymer Disk Kit Contents Seal Disk, Mounting Ring, O-Rings, Silicone Lube Compatible Flush Type VacuFlush (Vacuum Flush) Installation Time 30-45 Minutes Why Choose This VacuFlush toilets are premium systems — and their seals demand premium materials. Standard rubber seals on these toilets often fail within 1-2 years, letting bowl water drain into the holding tank (creating sewer gas path) and allowing odors to enter the living space. The Teflon-faced design in this kit addresses both failure modes: it maintains its shape (no compression set) and creates a superior gas-tight barrier. Marine boat owners especially benefit, as salt air accelerates rubber degradation significantly. Related Products 385311653 Dometic 300/310/320 RV Toilet Seal Kit — For gravity-flush Dometic toilets with hardware Browse all RV Plumbing Parts — Complete selection of seals and repair components Shop All iFJF Parts — Our full product catalog Frequently Asked Questions Q: Will this fit my VacuFlush 510 Plus series?A: Yes. The 510 series (including 510 Plus) uses this exact seal kit. The seal interface is common across all 110, 111, 210, and 510 VacuFlush toilet models from Dometic/Sealand. Q: How is Teflon better than the standard rubber seal?A: Teflon-faced seals resist compression set — the permanent flattening that causes rubber seals to lose their shape. This means a consistent seal over many more flush cycles. Teflon also has a lower coefficient of friction, reducing wear on the flush ball surface. Q: Why is my toilet bowl water dropping within hours?A: When the VacuFlush seal fails, water slowly drains from the bowl into the holding tank. This also creates an open path for sewer gases to enter the bathroom. Replace the seal to fix both issues simultaneously. Q: How often should I replace the VacuFlush seals?A: Under normal RV use, every 2-3 years. In marine (saltwater) environments or full-time liveaboard use, every 1-2 years. Replace sooner if you notice the bowl losing water or detect sewer odors. Q: Does this kit include the silicone lubricant?A: Yes. A packet of silicone lubricant is included. Apply lightly to the Teflon seal surface during installation — this helps the seal bed in and ensures smooth flush ball operation from day one. Q: Can I install this myself or do I need a tech?A: DIY-friendly with basic mechanical skills. Budget 30-45 minutes. Key steps: shut off water, flush to empty bowl, remove toilet from flange, replace seal components, reassemble, test with 4-5 flushes. Order with Confidence Fast shipping from our US warehouse. Dedicated customer support team ready to answer your questions. Click Add to Cart to get your order started today. Related Guides & Articles Check out these helpful resources from the iFJF blog: RV Maintenance — Complete Diesel Truck & RV Maintenance Schedule 2026 RV Generator Guide — Cummins Onan RV Generator Maintenance Guide 2026 Related Guide Read: RV VacuFlush Toilet Bowl Seal Replacement: Fix That Leak and Stop the Constant Pump Cycling 📖 Related Guide: VacuFlush Toilet Seal Replacement: Step-by-Step Install Guide →

    $25.99

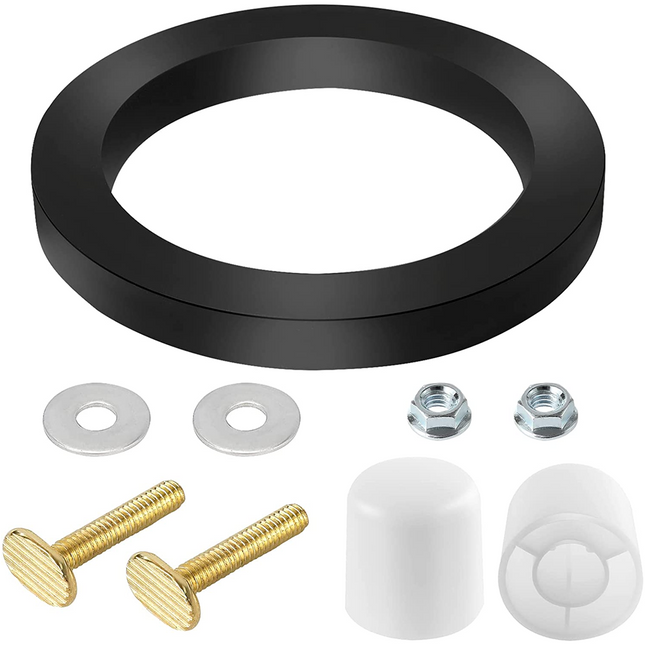
  • 385311653 RV Toilet Seal Kit for Dometic 300 310 320 — Complete Kit with Hardware

    iFJF 385311653 RV Toilet Seal Kit for Dometic 300 310 320 — Includes 385311652 Hardware

    Product Overview Fix your leaking, wobbling RV toilet in one repair with this complete seal kit for Dometic 300, 310, and 320 series gravity-flush toilets — the most popular RV toilet lineup in North America. This kit includes the 385311653 closed-cell foam floor seal to stop water and odor leaks at the base AND the 385311652 stainless steel mounting hardware kit (bolts, washers, nuts) to eliminate toilet wobble caused by corroded or stripped fasteners. One kit, one repair, problem solved. Key Features Complete Seal + Hardware Kit — Includes both the 385311653 closed-cell foam floor seal AND the 385311652 stainless steel bolt kit — everything you need for a complete toilet base repair. Closed-Cell Foam Construction — Unlike open-cell foam that acts like a sponge, closed-cell foam creates a true water barrier that won't wick moisture or absorb odors over time. Stainless Steel Hardware — The 385311652 bolts, washers, and nuts are stainless steel — they won't rust or corrode in the humid RV bathroom environment, unlike the factory carbon steel fasteners. Perfect Fit for Dometic 300/310/320 — Precision-cut to match the Dometic gravity-flush toilet base flange exactly. Same seal interface on the standard 300, low-profile 310, and elongated 320 models. DIY-Friendly Installation — 30-45 minute job with basic hand tools. No special plumbing skills required. Full instructions included. Compatibility / Fitment Brand Series Type Common Models Dometic 300 Standard Height, Gravity Flush Dometic 300 Dometic 310 Low Profile, Gravity Flush Dometic 310 Dometic 320 Elongated Bowl, Gravity Flush Dometic 320 Technical Specifications Specification Value Seal Part Number 385311653 Hardware Part Number 385311652 Seal Material Closed-Cell Foam Hardware Material Stainless Steel Flush Type Gravity Flush Installation Time 30-45 Minutes Why Choose This RV dealers charge $150-250 for this simple repair. This kit gives you everything needed to do it yourself in under an hour. The factory carbon steel bolts on Dometic toilets are notorious for rusting solid in the humid bathroom environment — our stainless steel hardware eliminates this problem permanently. The closed-cell foam seal won't degrade or absorb moisture like cheap open-cell alternatives. If your toilet is leaking at the base, rocking when you sit, or emitting sewer odors, this kit is the definitive fix. Related Products 385311462 VacuFlush Toilet Seal Kit — For Dometic Sealand VacuFlush 110/111/210/510 models Browse all RV Plumbing Parts — Seals, valves, and repair kits Shop All iFJF Parts — Complete inventory Frequently Asked Questions Q: Does this fit the Dometic 310 low-profile model?A: Yes. The 385311653 seal interface is identical across all three Dometic gravity-flush models — the standard-height 300, low-profile 310, and elongated 320. The bolt pattern and flange design are the same. Q: How do I remove rusted factory bolts?A: If the original carbon steel bolts are heavily rusted, spray them with penetrating oil (PB Blaster or WD-40) and let sit for 15 minutes. Use a 6-point socket (not 12-point) to avoid rounding. If the bolt head snaps, the toilet will lift off the broken stud — remove the remainder with vice grips from underneath. Q: How tight should I torque the new bolts?A: Hand-tighten until the toilet feels firmly seated, then turn an additional 1/4 turn with a wrench. DO NOT overtighten — excessive torque can crack the ceramic toilet base or deform the plastic flange. The foam seal does the sealing work, not bolt pressure. Q: What are the signs my toilet seal needs replacement?A: Watch for: water pooling around the toilet base after flushing, a persistent sewer odor near the toilet (even with the fan running), the toilet rocks or wobbles when you sit, visible water staining on the floor around the base, and corroded or stripped mounting bolts. Q: Can I reuse the old bolts if they look okay?A: We strongly recommend replacing the bolts with the new stainless steel hardware included in this kit. Factory bolts that look okay externally may be heavily corroded inside the flange — and carbon steel will eventually rust. Stainless hardware is a permanent upgrade. Q: Do I need to remove the toilet completely?A: Yes. The seal sits between the toilet base and the floor flange. You must lift the toilet off the floor to access and replace the old seal. Shut off the water supply, disconnect the water line, and remove the mounting bolts to lift the toilet. Order with Confidence Fast shipping from our US warehouse. Dedicated customer support team ready to answer your questions. Click Add to Cart to get your order started today. Related Guides & Articles Check out these helpful resources from the iFJF blog: RV Maintenance — Complete Diesel Truck & RV Maintenance Schedule 2026 RV Generator Guide — Cummins Onan RV Generator Maintenance Guide 2026

    $25.99

  • RV Winterizing Kit Blow Out Adapter Air Compressor for — Front View

    iFJF RV Winterizing Kit Blow Out Adapter Air Compressor Garden Hose

    Product Overview The RV Winterizing Kit Blow Out Adapter Air Compressor Garden Ho is a premium aftermarket replacement designed for a wide range of compatible vehicles and equipment. Engineered with precision-manufactured components and high-grade alloy/composite construction, this part delivers reliable, long-lasting performance that meets or exceeds OEM standards — all at a fraction of the dealership price. Key Features Precision Engineered: Manufactured to exact OEM specifications for seamless fitment and reliable performance on compatible vehicles and equipment. High-Grade Alloy/Composite Construction: Built from high-grade alloy/composite for superior durability, corrosion resistance, and long service life. Direct Replacement: No modifications required — installs with basic hand tools in most applications, saving you expensive shop labor costs. Rigorously Tested: Each unit undergoes quality control inspection to ensure consistent performance and reliability before shipment. Cost-Effective Alternative: Delivers OEM-equivalent quality at a fraction of dealership pricing, backed by iFJF customer support. Compatibility Compatible with listed applications — please verify your vehicle/equipment specifications before ordering Technical Specifications Material High-Grade Alloy/Composite Condition New Warranty 30-Day Satisfaction Guarantee Why Choose iFJF? At iFJF Direct, we specialize in premium aftermarket parts that deliver OEM quality without the dealership markup. Every product is sourced from trusted manufacturers and backed by our commitment to customer satisfaction. Whether you're a professional mechanic or a weekend DIY enthusiast, we make it easy to get the right part at the right price — with fast, reliable shipping across the United States. Frequently Asked Questions Q: Will this fit my vehicle/equipment?A: Please check the compatibility listing above. This part is designed for specific applications as listed. If you're unsure, contact us with your vehicle/equipment details and we'll confirm fitment. Q: Is this an OEM or aftermarket part?A: This is a premium aftermarket replacement part manufactured to match or exceed OEM specifications for fit, form, and function — at a significantly lower price point. Q: What's included in the package?A: You'll receive the rv winterizing kit blow out adapter air compressor garden ho as shown in the product images. Installation hardware is included where applicable. Please review all product images carefully. Q: How difficult is installation?A: Installation is straightforward for anyone with basic mechanical skills. Most customers complete the job in 30-60 minutes using common hand tools. Professional installation is always recommended if you're unsure. Q: What is your return policy?A: We offer a 30-day satisfaction guarantee. If the part doesn't fit or meet your expectations, return it in original condition for a full refund. See our Returns page for full details. Q: How fast is shipping?A: Orders typically ship within 1-2 business days from our US warehouse. Delivery takes 3-7 business days depending on your location. Expedited shipping options are available at checkout. Related Products Looking for compatible parts or accessories? Browse our full collection of rv parts for more options.

    $29.99

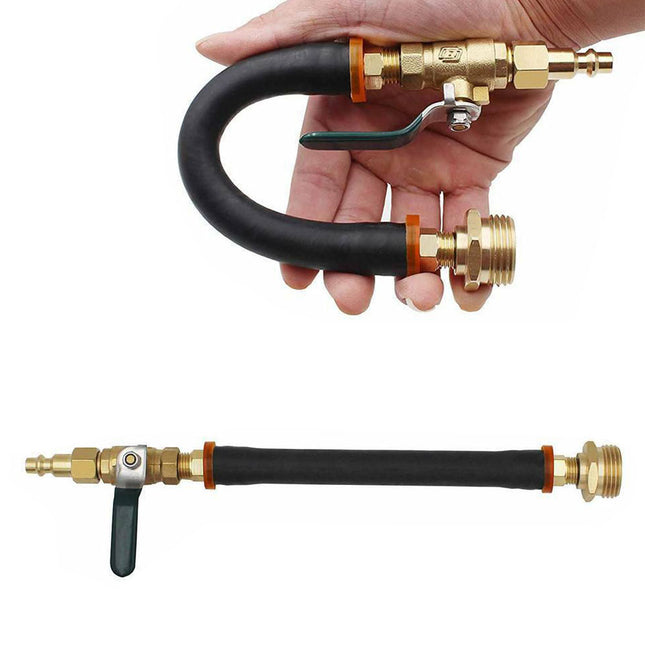
  • RV Winterizing Kit Blow Out Adapter with Air Compressor Fitting - Complete Kit

    iFJF iFJF For Recreational Vehicle Winterizing Kit Blow Out Adapter Air Compressor Garden Hose Faucet Valve

    Product Overview Winterize your RV in minutes — not hours — with the iFJF RV Winterizing Kit. This blow-out adapter connects your air compressor to your RV's city water inlet, allowing you to purge all water from the plumbing system with compressed air. Includes a premium brass shut-off valve for controlled air flow and a quick-connect air compressor fitting for fast setup. Frozen pipes can cause thousands of dollars in damage to your RV's plumbing system. This kit provides a clean, antifreeze-free winterization method preferred by many RV owners — no pink antifreeze taste in your water lines next spring. Key Features Complete Kit — Blow-out plug, brass shut-off valve, quick-connect air fitting Brass Construction — Durable, corrosion-resistant, built to last season after season Quick-Connect Fitting — Standard 1/4" industrial quick-connect for any air compressor Adjustable Air Flow — Brass ball valve provides precise air pressure control Universal Fit — Works with standard RV city water inlet connections How to Winterize Your RV with This Kit Drain all holding tanks (fresh, gray, black) completely Open all faucets, shower heads, and toilet valves Connect blow-out adapter to RV city water inlet Connect air compressor (set to 30-40 PSI MAX — do NOT exceed 50 PSI) Open brass valve gradually and blow air through system Close each faucet as water stops and only air comes out Don't forget: outdoor shower, toilet sprayer, ice maker line, and low-point drains Pour RV antifreeze into all drain P-traps (sinks, shower, toilet bowl) Compatibility Application Details RV / Camper / Motorhome Standard city water inlet Air Compressor 1/4" industrial quick-connect Water Inlet Thread Standard garden hose thread (GHT) Specifications Specification Value Material Brass body + brass ball valve Air Fitting 1/4" Industrial Quick-Connect (male) Water Connection Standard Garden Hose Thread Max Air Pressure 50 PSI (recommend 30-40 PSI) Shut-Off Brass Ball Valve (1/4 turn) Frequently Asked Questions Q: Do I still need RV antifreeze if I use this?A: You still need to pour antifreeze into drain P-traps (sinks, shower, toilet). The blow-out method clears the water lines but does NOT protect the traps. A gallon of RV antifreeze for traps is still recommended. Q: What PSI should I set my compressor to?A: 30-40 PSI is ideal. Never exceed 50 PSI — RV plumbing is designed for 40-60 PSI water pressure, and air pressure is more aggressive. Start low and increase only if needed. Q: Will this work with any air compressor?A: Yes, as long as your compressor has a standard 1/4" industrial quick-connect coupler (the most common type). Works with pancake, hot dog, and portable compressors. Q: Is the blow-out method better than using antifreeze?A: Both methods work. Many RVers prefer the blow-out method because it leaves no antifreeze residue in the water lines (no pink taste in spring). Others use antifreeze for peace of mind. Some do both for maximum protection in extreme cold climates. Related Products Norcold RV Fridge Heating Element Browse All RV Parts & Accessories Related Blog Posts Complete RV Winterization Checklist

    $37.99

  • RV Toilet Replacement Part 385310681 Flush Ball & Shaft Cartridge Kit - Image 1

    iFJF 385310681 Flush Ball & Shaft Cartridge Kit for Sealand Dometic VacuFlush Toilets

    385310681 Flush Ball & Shaft Cartridge Kit — Complete Sealand Toilet Rebuild A sticky, hard-to-flush, or leaking toilet bowl can ruin any boating trip or RV vacation. The iFJF 385310681 kit replaces the entire flush mechanism in Dometic Sealand Traveler and VacuFlush foot-pedal toilets with plastic pedals. This complete cartridge assembly includes a Teflon-coated flush ball, stainless steel shaft, dual lip seals, O-rings, and mounting clip — everything needed for a smooth, odor-free flush restoration. Key Features Complete Cartridge Assembly: Includes flush ball, stainless steel shaft, dual lip seals, O-rings, and retaining clip — no need to piece together individual parts from multiple sources. Teflon-Coated Flush Ball: Ultra-smooth Teflon surface ensures effortless flush action with minimal foot pressure — no more sticky, hard-to-press pedals. Designed for Plastic-Pedal Toilets: Specifically engineered for Dometic/Sealand foot-pedal toilets with plastic pedal arms (not metal). Verify your pedal type before ordering. Odor-Tight Dual Lip Seals: New high-performance lip seals create a positive barrier that prevents holding tank odors from entering the bathroom. Stainless Steel Shaft: Corrosion-resistant shaft won't rust or seize — ensures years of smooth operation in the humid marine/RV bathroom environment. Compatibility Brand Series Pedal Type Models Dometic / Sealand Traveler Foot Pedal (Plastic) 110, 111, 210, 211, 510, 511 Dometic / Sealand VacuFlush Foot Pedal (Plastic) 147, 148 Specifications Spec Value Part Number 385310681 Ball Material Polymer Core with Teflon Coating Shaft Material Stainless Steel Seal Type Dual Lip — Odor-Tight Design Kit Contents Flush Ball, Shaft, Lip Seals, O-Rings, Retaining Clip Symptoms You Need This Kit Foot pedal is stiff or requires excessive force to flush Flush ball sticks in the open position (allowing odors to escape) Bowl loses water between uses — slow drain into holding tank Loose, wobbly, or rattling foot pedal Flush ball doesn't return to closed position after releasing pedal Water visible around the flush ball seal when bowl is filled Installation Guide Turn off water supply to toilet. Disconnect water line. Remove toilet from floor flange (typically 2 bolts through the base). Access the cartridge assembly from the bottom of the toilet bowl. Remove the retaining clip securing the old cartridge. Slide the old cartridge out of the bore. Thoroughly clean the cartridge bore — remove all old grease, mineral deposits, and debris. Apply a thin coat of silicone grease (included) to the new lip seals. Slide the new 385310681 cartridge into the bore. Ensure proper orientation and alignment. Secure with the new retaining clip. Reinstall toilet onto floor flange. Reconnect water, turn on supply, and test flush operation with 5-6 cycles. Frequently Asked Questions Q: Does this fit metal pedal or plastic pedal toilets?A: This kit is specifically designed for plastic-pedal Dometic/Sealand toilets. Verify your pedal material before ordering — metal-pedal toilets use a different cartridge assembly. Q: How long does this cartridge typically last?A: With normal use, expect 5-7 years of service life. Avoid abrasive bowl cleaners (Comet, Ajax) which can scratch the Teflon coating and accelerate seal wear. Use liquid toilet bowl cleaners instead. Q: Is this a DIY job or do I need a professional?A: This is a moderately involved DIY project — expect 45-90 minutes for your first time. The toilet must be removed from the floor flange to access the cartridge. Having a second person to help lift the toilet makes the job much easier. Q: What's the most common installation mistake?A: Not cleaning the cartridge bore thoroughly enough. Old grease and mineral deposits can prevent the new seals from seating properly, causing immediate leaks. Take the extra 5 minutes to clean the bore completely. Q: My flush ball sticks — do I need the whole kit or just lubrication?A: If lubrication temporarily fixes the sticking, you may only need to clean and re-grease the existing assembly. If the problem returns quickly or the Teflon coating is visibly worn/scratched, replace the entire cartridge. Q: Will this stop holding tank odors in my bathroom?A: Yes, if the odor is entering through the toilet bowl. The dual lip seals in this kit create an airtight barrier between the bowl and holding tank. Combine with a properly functioning vent system for complete odor elimination. Related Products 385310076 Duckbill Valve Kit 2-Pack 385314349 RV Water Valve Kit 385311658 Flush Ball Ring Seal Kit Related Products Water Valve Kit for Sealand 300/310/320 RV Toilets — 385311641 13168 RV Toilet Water Valve Kit for Aqua Magic IV Toilets 34117 Waste Ball Valve Seal Kit for Aqua Magic Style II RV Toilet Related Guides & Articles Complete Onan Quiet Diesel RV Generator Tune-Up Best Water Separator Fuel Filter for Diesel & Marine Engines Diesel Fuel Filter Replacement: The Complete Guide 📖 Related Guide: VacuFlush Toilet Seal Replacement: Step-by-Step Install Guide →

    $34.99

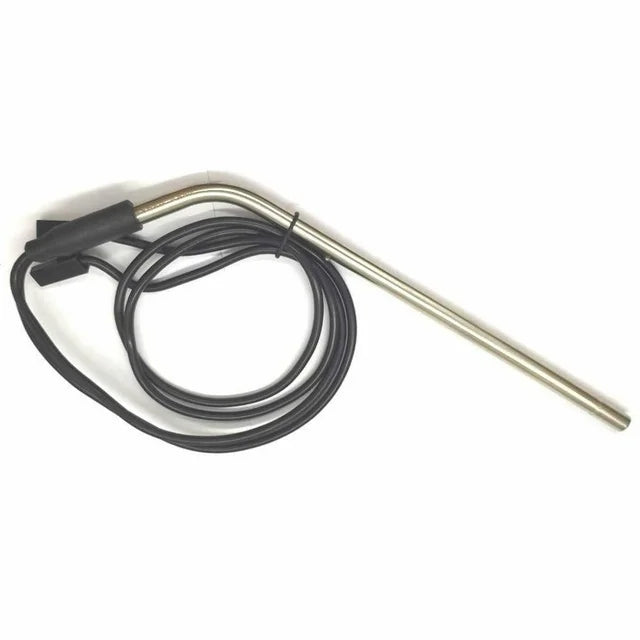
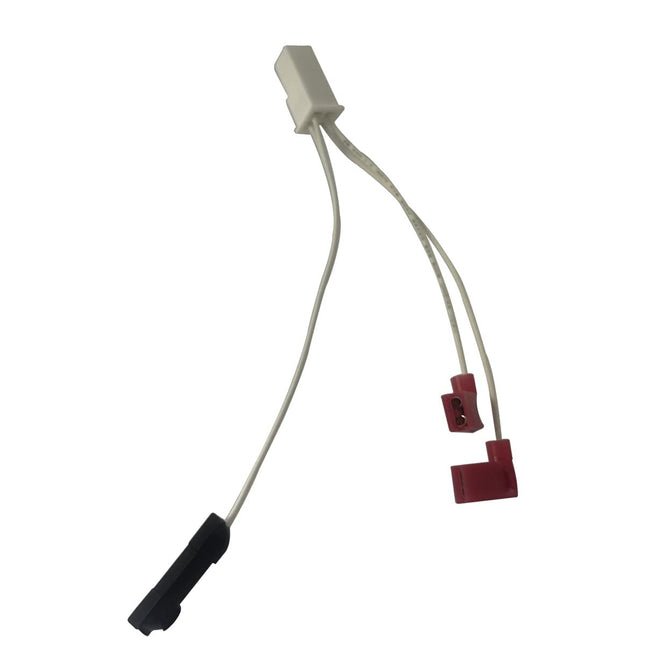
  • 618548 Thermistor Assembly for RV Refrigerator N6 N8 900 9000 with Harness

    iFJF 618548 Thermistor Assembly for RV Refrigerator N6 N8 900 9000 with Harness

    Product Overview Keep your RV refrigerator cooling properly with the iFJF 618548 Thermistor Assembly. This critical temperature sensor monitors the refrigerator's interior temperature and communicates with the control board to regulate cooling. Compatible with Norcold N6, N8, 900, and 9000 series RV refrigerators, this complete assembly includes the thermistor probe and wire harness for a straightforward plug-in replacement. A faulty thermistor is one of the most common causes of RV refrigerator problems — symptoms include inconsistent temperatures, food freezing in the fridge section, the refrigerator running too warm, or error codes on the display. Replacing the thermistor is a simple, inexpensive fix that often resolves these issues without expensive service calls. Key Features Complete Assembly: Thermistor probe + wire harness — everything needed for replacement Exact Fit: Designed specifically for Norcold N6, N8, 900, and 9000 series Accurate Sensing: Precision temperature measurement ensures proper cooling control Easy Plug-In: Pre-terminated connector plugs directly into the control board Replaces Multiple Part Numbers: 618548, 621742, and equivalents 📋 Compatibility Compatible Refrigerator Models Norcold N6 Series (N611, N621, N641) Norcold N8 Series (N811, N821, N841) Norcold 900 Series Norcold 9000 Series Replaces part numbers: 618548, 621742 📐 Specifications Specification Value Part Number 618548 Replaces 621742 Type NTC Thermistor (Negative Temperature Coefficient) Includes Sensor probe + wiring harness with connector Application RV absorption refrigerator temperature sensing ❓ Frequently Asked Questions Q: What are signs of a bad thermistor?A: Common symptoms: refrigerator temperature fluctuating widely, food freezing in the fridge section, fridge not cooling properly, or error codes E1/E2 on the display panel. Q: Does this include the wiring harness?A: Yes. This is a complete assembly including the thermistor probe and the wiring harness with plug connector. Q: How do I install the new thermistor?A: The thermistor is typically clipped to the cooling fins inside the refrigerator. Unplug the old one, slide it off the fin, slide the new one on, and plug in the connector. It takes about 5 minutes. Q: Will this work for my Norcold N811?A: Yes. The N811 is part of the N8 series and this thermistor assembly is fully compatible. Q: Does the thermistor require any calibration?A: No. The thermistor is pre-calibrated and works immediately after installation.

    $19.99

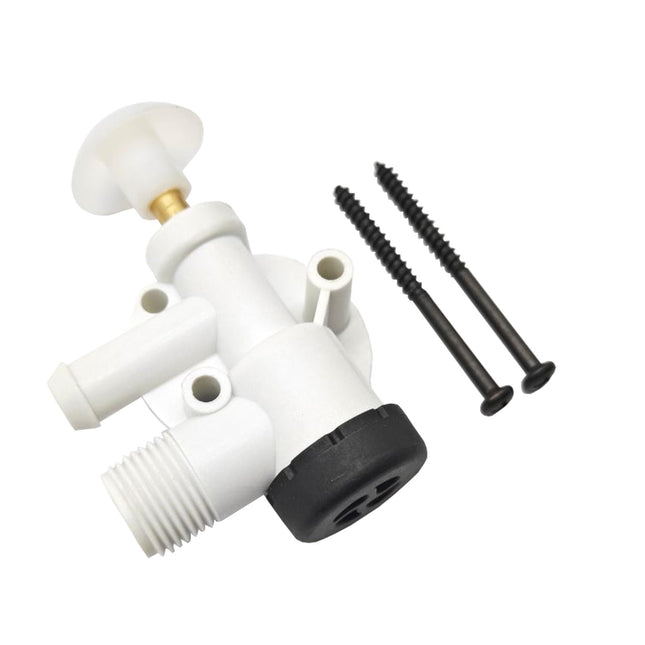
  • 42049 Water Valve Style II Kit Replacement — Front View

    iFJF 42049 Water Valve Style II Kit for RV Toilets — Direct Replacement Assembly

    42049 Water Valve Style II Kit — Complete RV Toilet Repair Assembly The 42049 Water Valve Style II Kit is a direct-fit replacement water valve assembly for RV and marine toilets. When your toilet won't stop running, has weak flushes, or leaks at the valve body, this complete kit restores proper water flow and shut-off function. A cost-effective alternative to replacing the entire toilet assembly — installs in 30-60 minutes with basic hand tools. Key Features Exact OEM-Spec Fit: Precision-engineered to match factory mounting points, water line connections, and valve operation for listed RV toilet models. Leak-Free Performance: Precision-machined valve seat and high-quality seal materials prevent the trickle and water waste common with worn factory valves. Chemical-Resistant Construction: Materials selected to withstand RV antifreeze, holding tank chemicals, hard water minerals, and freeze-thaw cycling. Complete Kit: Includes valve assembly, all gaskets and seals, mounting hardware, and installation instructions — everything needed for a one-and-done repair. DIY-Friendly: Straightforward replacement procedure with common hand tools — no RV service center appointment or specialized plumbing knowledge required. Compatibility Toilet Type Compatibility 42049 Water Valve Style II Kit Replacement for RV Toilets Direct Fit Various RV/Marine Toilet Models with Style II Valve Configuration Verify Mounting Pattern Specifications Spec Value Part Number 42049 Valve Type Water Inlet Valve — Style II Kit Contents Valve Assembly, Gaskets, Seals, Hardware Installation Time 30-60 Minutes (DIY) Symptoms of a Failing Water Valve Water continuously trickling into toilet bowl when not in use Bowl won't hold water — drains shortly after filling Weak or no water flow when pedal/lever is activated Water leaking from valve body or connections Unusual hissing, vibrating, or hammering noises during flush Inconsistent flush water volume — sometimes too much, sometimes too little Installation Guide Turn off RV water pump and disconnect from city water connection. Flush toilet several times to relieve residual water line pressure. Disconnect water supply line from valve inlet fitting. Remove old valve assembly according to your toilet model's procedure (typically mounting screws or retaining clips). Clean mounting surface thoroughly. Inspect surrounding area for water damage. Install new 42049 valve assembly. Ensure gaskets are properly seated in their grooves. Reconnect water supply line. Hand-tighten, then add 1/4 turn with wrench — do NOT overtighten. Turn water back on. Cycle flush several times to purge air from the line. Inspect all connections for leaks. Tighten slightly if needed. Preventive Maintenance Tips Use a water pressure regulator (40-60 PSI) on all city water connections. Install an inline water filter to reduce mineral buildup in the valve. Always winterize properly — antifreeze must reach the toilet valve. Inspect valve for slow leaks during spring de-winterization. Frequently Asked Questions Q: Will this fit my RV toilet?A: This is a Style II water valve kit designed for specific RV toilet models. Check the model number on the label inside the toilet base or on the back of the toilet. If your toilet uses a Style II valve configuration and the 42049 part number matches, it's a direct fit. Q: What are the symptoms of a bad water valve?A: The most common signs are water trickling into the bowl continuously (won't stop running), bowl losing water after filling, weak or no water flow during flush, visible leaks from the valve body or connections, and unusual noises during operation. Q: Do I need to winterize again after replacing the valve?A: Yes. Any time you open the RV water system, you must ensure proper winterization before freezing temperatures return. Run RV antifreeze through the system to protect the new valve and all plumbing. Q: Can I do this myself or do I need a professional?A: Most DIY RV owners can complete this replacement in 30-60 minutes with basic hand tools (screwdriver, adjustable wrench). No specialized plumbing or electrical knowledge is required. Q: Will this work with both city water and onboard pump?A: Yes. The valve is designed for standard RV water system pressure (40-60 PSI). Always use a pressure regulator on city water connections to protect your entire plumbing system. Q: What causes RV toilet water valves to fail?A: The main culprits are mineral scale buildup jamming the internal mechanism, chemical degradation of rubber seals from holding tank treatments, freeze damage in improperly winterized systems, and normal mechanical wear after years of use. Using a water filter and pressure regulator significantly extends valve life. Related Products 385314349 RV Water Valve Kit 385310076 Duckbill Valve Kit 2-Pack 385311658 Flush Ball Ring Seal Kit Related Products Water Valve Kit for Sealand 300/310/320 RV Toilets — 385311641 13168 RV Toilet Water Valve Kit for Aqua Magic IV Toilets 34117 Waste Ball Valve Seal Kit for Aqua Magic Style II RV Toilet Related Guides & Articles Complete Onan Quiet Diesel RV Generator Tune-Up Best Water Separator Fuel Filter for Diesel & Marine Engines Diesel Fuel Filter Replacement: The Complete Guide

    $29.99

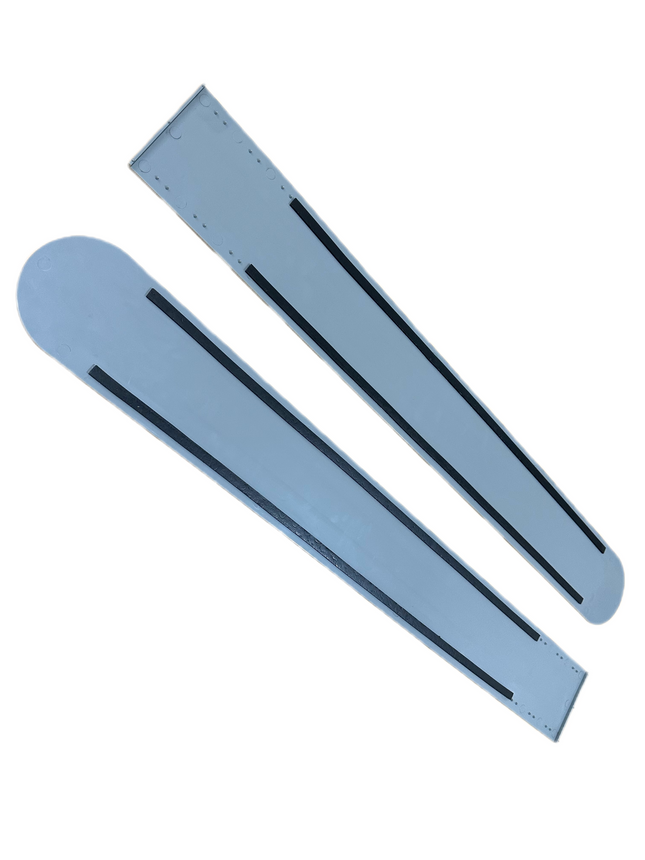
  • 134993 RV Carpet Slide Out Protector 2-Pack - Floor Protection for Travel Trailers and Motorhomes

    iFJF 134993 RV Carpet Slide Out Protector for Floor Scratch Protection

    Product Overview The 134993 RV Carpet Slide Out Protector for Floor Scratch Protection is a direct-fit replacement part engineered for the RV lifestyle. Manufactured to exact OEM specifications using durable materials that withstand constant vibration, temperature swings, and the unique demands of mobile living. Key Features ✓ Exact Fit Replacement: Manufactured to precise OEM dimensions — matches factory mounting points, plumbing connections, and seal geometry. ✓ Durable Materials: UV-stabilized plastics and corrosion-resistant metals withstand years of sun exposure and temperature cycling. ✓ Simple DIY Install: Typical installation takes under 30 minutes with basic hand tools — clear instructions included. ✓ Cost-Effective: Premium quality at a fraction of dealership replacement part pricing. ✓ USA Stock: Ships from our US warehouse for fast delivery — no extended international shipping times. Technical Specifications Material ABS / Metal Composite Color See product images Dimensions Check description for exact measurements Installation Direct Replacement / Bolt-On Compatibility See vehicle fitment list Package Includes All hardware and seals for installation Why Choose iFJF? Quality Assurance: Every product undergoes rigorous quality inspection before shipping. USA-Based Inventory: Products ship from our US warehouse — no waiting for international freight. Expert Support: Our team knows diesel, automotive, and RV parts. Real answers from real people. Fair Pricing: Premium quality without the premium markup — direct value to you. Hassle-Free Returns: 30-day return policy. If it doesn't fit or meet your expectations, we'll make it right. Installation Tips Turn off water pump and relieve pressure before starting Keep a towel handy for residual water Take photos of existing connections before disassembly Test for leaks after installation Keep old parts for reference until job is complete Frequently Asked Questions Q: Is this a direct replacement for the OEM part?A: Yes, this part is manufactured to OEM specifications for a direct, bolt-in replacement. No modifications are required. Q: How do I know if this fits my RV?A: Check the model numbers listed in the product title and compatibility section. If you are unsure, send us a message with your RV make, model, and year — we will verify fitment. Q: What tools do I need for installation?A: Most installations require only basic hand tools — screwdrivers, pliers, and a wrench set. Specific requirements are noted in the included instructions. Q: Do you offer a warranty?A: Yes, all iFJF products come with a 1-year limited warranty against manufacturing defects. See our warranty page for full details. Q: How fast is shipping?A: Orders ship from our US warehouse within 1 business day. Most customers receive their order in 3-5 business days via standard shipping. Related Products Related Blog Posts

    $69.99

  • RV Toilet Replacement Part 385311658 Flush Ball Ring Seal - Image 1

    iFJF 385311658 Flush Ball Ring Seal for Dometic 300/310/320 RV Toilet — Bowl Seal Kit

    385311658 Flush Ball Ring Seal — Complete Dometic Bowl Seal Kit Slow bowl water loss or faint sewage odor in your RV bathroom almost always points to a worn flush ball seal ring. The iFJF 385311658 is an exact-replacement seal for the critical junction between the flush ball and toilet bowl in Dometic 300, 310, and 320 series gravity-flush toilets. Made from durable, chemical-resistant polymer, this seal restores the water-tight and odor-proof barrier in under 30 minutes — no tools required, installed entirely from above the bowl. Key Features Exact OEM Fit: Precision-molded to Dometic specifications for 300, 310, and 320 series toilets — drops into the seal groove without modification or trimming. Dual-Seal Function: Creates a positive water barrier to keep bowl water from draining into the holding tank AND an odor seal to prevent sewage gases from entering the bathroom. Chemical-Resistant Polymer: Engineered to withstand formaldehyde-based and enzyme-based holding tank treatments — won't swell, soften, or degrade. Tool-Free Installation: The only Dometic toilet repair that requires zero tools — accessed and replaced entirely from above the bowl in 20-30 minutes. Budget-Friendly Maintenance: The most affordable Dometic toilet seal on the market — replace prophylactically every 2 years for peace of mind. Compatibility Brand Series Toilet Type Dometic 300, 310, 320 Gravity-Flush (All Models) Specifications Spec Value Part Number 385311658 Material Chemical-Resistant Polymer Seal Type Flush Ball Ring / Bowl Seal Installation Tool-Free — Above Bowl Access Includes Seal Ring + Installation Grease Symptoms of a Failed Bowl Seal Bowl water drains completely within 1-2 hours of flushing Holding tank odor noticeable near toilet (especially on hot days) Mineral buildup or black residue visible around flush ball opening Toilet requires multiple flushes to clear waste (insufficient bowl water) Gurgling sounds from toilet when not in use Installation Guide (Tool-Free!) Turn off water supply to toilet. Flush and hold pedal to drain bowl completely. Step on flush pedal and hold open to expose the seal ring in the bowl opening. Use fingers or a plastic pry tool to lift the old seal ring out through the bowl — it sits in a groove around the opening. Clean the seal groove thoroughly with a rag — remove all mineral deposits and old grease. Apply a thin coat of included silicone grease to the new seal ring. Press the new seal firmly into the groove. Ensure it's fully seated all the way around. Release pedal, turn water on, fill bowl, and check for water retention. Frequently Asked Questions Q: My bowl is dry every morning — is this the fix?A: Yes, this is the classic symptom of a failed flush ball seal. The seal can no longer hold water in the bowl, so it slowly drains into the holding tank overnight. Replace the seal ring to restore water retention. Q: Do I need to remove the toilet from the floor?A: No. Unlike many RV toilet repairs, the flush ball seal is installed entirely from above the bowl. Simply hold the pedal open and access the seal groove through the bowl opening. No dismounting required. Q: How often should the flush ball seal be replaced?A: Replace every 2-3 years under normal use, or at the first sign of bowl water loss. If you full-time RV or use harsh holding tank chemicals, inspect annually. The seal is inexpensive — proactive replacement prevents odor problems. Q: Will this stop the holding tank odor in my bathroom?A: Yes, if the odor is coming through the toilet bowl. A worn seal allows tank gases to bypass the flush ball. Combined with good tank vent maintenance, a new seal eliminates bathroom odors. Q: Why does my seal keep failing quickly?A: Frequent seal failures usually indicate mineral buildup from hard water or abrasive chemical treatments. Use a water softener if you have hard water, and consider enzyme-based tank treatments instead of formaldehyde-based products. Q: Is this genuine Dometic or aftermarket?A: This is a high-quality aftermarket replacement manufactured to Dometic OEM specifications. It matches the exact dimensions and material properties of the factory seal at a significantly lower cost. Related Products 385310076 Duckbill Valve Kit 2-Pack 385314349 RV Water Valve Kit 42049 Water Valve Style II Kit Related Products Water Valve Kit for Sealand 300/310/320 RV Toilets — 385311641 13168 RV Toilet Water Valve Kit for Aqua Magic IV Toilets 34117 Waste Ball Valve Seal Kit for Aqua Magic Style II RV Toilet Related Guides & Articles Complete Onan Quiet Diesel RV Generator Tune-Up Best Water Separator Fuel Filter for Diesel & Marine Engines Diesel Fuel Filter Replacement: The Complete Guide

    $19.99

  • RV Toilet Replacement Part 385314349 RV Toilet Water Valve Kit - Image 1

    iFJF 385314349 RV Toilet Water Valve Kit for Sealand Traveler & VacuFlush Pedal Flush

    385314349 RV Toilet Water Valve Assembly — Complete Replacement Kit A constantly running RV toilet wastes fresh water — the most precious resource when boondocking. The iFJF 385314349 replaces the complete water inlet valve on Dometic Sealand Traveler and VacuFlush foot-pedal toilets. This full valve body assembly includes an integrated check valve, inlet screen, and mounting flange — everything needed for a leak-free repair in under 30 minutes. Key Features Complete Assembly: Valve body, built-in anti-siphon check valve, inlet screen, and mounting flange — no need to piece together individual parts. Wide Fitment: Compatible with Sealand Traveler models 110, 111, 210, 211, 510, 511 and VacuFlush models 147, 148 with foot-pedal flush. Built-In Check Valve: Prevents back-siphoning of toilet water into the fresh water system — meets plumbing code requirements for RV applications. Quick-Connect Fittings: Tool-free push-to-connect water line connections — no wrenches needed for plumbing connections. Chemical-Resistant Construction: Seals and body materials withstand RV antifreeze, holding tank chemicals, and hard water mineral deposits. Compatibility Brand Series Models Sealand / Dometic Traveler 110, 111, 210, 211, 510, 511 Sealand / Dometic VacuFlush 147, 148 (foot-pedal models) Specifications Spec Value Part Number 385314349 Valve Type Diaphragm Water Inlet Valve Connection Type Quick-Connect Push Fittings Includes Valve Body, Check Valve, Inlet Screen, Mounting Flange, Hardware Symptoms of a Failing Water Valve Water runs continuously or trickles into toilet bowl when not in use Very weak flush — water barely enters bowl when pedal pressed No water at all when pedal is pressed Water leaking from valve body or connections Unusual hissing or vibrating sounds during flush cycle Toilet fills slowly — taking 30+ seconds for normal water level Installation Guide Shut off RV water supply (turn off pump and disconnect city water connection). Flush toilet to relieve any remaining line pressure. Disconnect water line from valve inlet — press quick-connect release tab and pull. Remove mounting screws securing old valve to toilet base. Install new 385314349 valve assembly. Align mounting holes and tighten screws. Push water line into quick-connect fitting until it clicks — no tools required. Turn water supply back on. Cycle flush pedal several times to purge air. Inspect all connections for leaks. Adjust if needed. Frequently Asked Questions Q: My toilet keeps running — will this fix it?A: Yes, if water is continuously flowing into the bowl even when the pedal isn't pressed, the internal valve diaphragm has failed. Replacing the complete valve assembly is the proper repair. Q: Does this fit the Traveler 511 toilet?A: Yes. The 385314349 fits all Sealand Traveler series models (110, 111, 210, 211, 510, 511) with push-to-connect water fittings. Q: Do I need special tools?A: No. The quick-connect fittings are tool-free. You'll only need a screwdriver for the mounting screws. Complete installation typically takes 20-30 minutes. Q: Will this work with my well water / hard water system?A: Yes. The valve is designed to handle mineral-heavy water. The built-in inlet screen catches sediment and can be cleaned periodically to maintain flow rate. Q: Is this valve anti-siphon?A: Yes. The integrated check valve prevents backflow into your fresh water system, meeting RVIA plumbing standards for toilet water supply connections. Q: What causes water valve failure in RV toilets?A: The most common causes are mineral scale buildup jamming the diaphragm, chemical degradation of internal seals from holding tank treatments, freeze damage in un-winterized systems, and simple wear from years of use. Related Products 385310076 Duckbill Valve Kit 2-Pack 385310681 Flush Ball & Shaft Cartridge Kit 385311658 Flush Ball Ring Seal Kit Related Products Water Valve Kit for Sealand 300/310/320 RV Toilets — 385311641 13168 RV Toilet Water Valve Kit for Aqua Magic IV Toilets 34117 Waste Ball Valve Seal Kit for Aqua Magic Style II RV Toilet Related Guides & Articles Complete Onan Quiet Diesel RV Generator Tune-Up Best Water Separator Fuel Filter for Diesel & Marine Engines Diesel Fuel Filter Replacement: The Complete Guide 📖 Related Guide: VacuFlush Toilet Seal Replacement: Step-by-Step Install Guide →

    $25.99

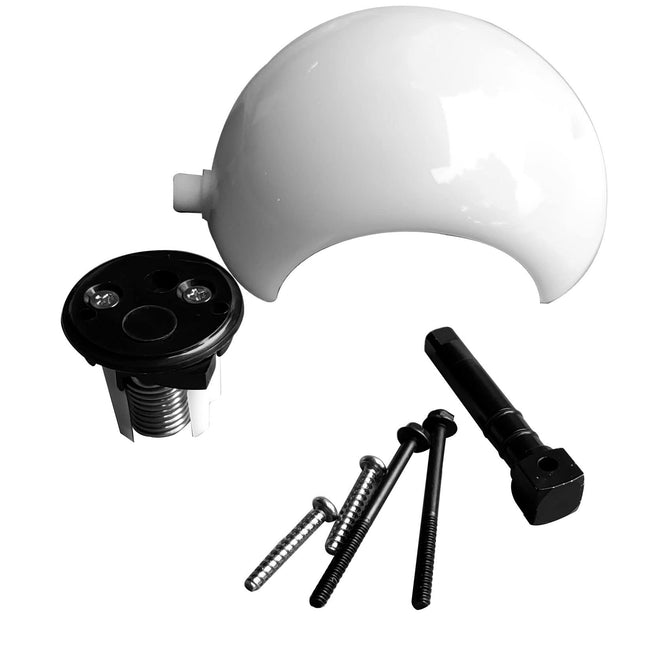
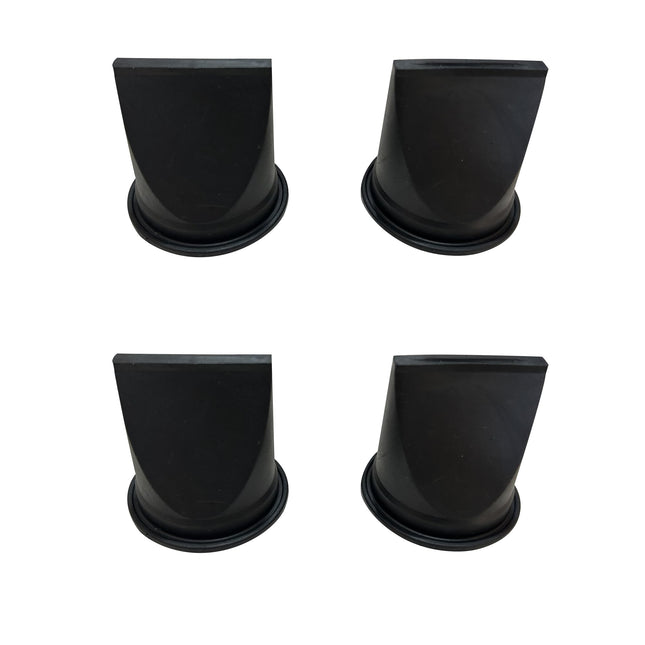
  • 385310076 Duckbill Valve Kit for Sealand S&T Vacuum Pumps — 2-Pack Complete Rebuild

    iFJF 385310076 Duckbill Valve Kit for Sealand S&T Vacuum Pumps — 2-Pack Complete Rebuild

    385310076 Duckbill Valve Kit — Complete Sealand Vacuum Generator Rebuild (2-Pack) When your Sealand VacuFlush toilet loses vacuum or cycles constantly, worn duckbill valves are almost always the cause. These one-way rubber check valves degrade from waste chemicals and mineral buildup. The iFJF 385310076 Duckbill Valve Kit includes two premium nitrile valves sized for all Sealand S-Series and T-Series vacuum generators. Rebuild your pump in under 30 minutes and restore factory vacuum performance. Key Features Complete 2-Pack Value: Both inlet and outlet valves needed for a proper pump rebuild. Replace both while you have the housing open. Premium Nitrile Rubber: Resists chemical attack from holding tank treatments — outlasts generic silicone valves by 2-3x in chemical-rich environments. Universal S&T Fit: Compatible with S12D, S24D, S32D, T12, T24, T32, and VHT/VG series vacuum generators. OEM-Dimension Match: Precise lip geometry ensures complete one-way seal — no vacuum loss between flushes. Includes Silicone Grease: Pre-applied lubrication prevents tearing during installation and ensures a perfect seal. Compatibility Pump Series Models S-Series S12D, S12DAB, S24D, S32D, S115A, S12, 52A, S32 T-Series T12, T24, T32 VHT/VG VHT12, VHT24, VG4, VG5 Specifications Spec Value Part Number 385310076 Material Premium Nitrile Rubber Valve Type One-Way Duckbill Check Valve Quantity 2 (Inlet + Outlet) Includes 2x Valves + Silicone Grease Packet Symptoms of Failed Duckbill Valves Pump runs continuously without building pressure Weak or incomplete flushes — bowl doesn't clear completely Pump cycles every few minutes without anyone flushing Foul odor from vacuum tank area Hissing sound near pump housing during operation Vacuum gauge shows pressure bleed-down Installation Guide Turn off power at breaker. Locate vacuum generator pump. Remove pump housing cover (4-6 screws depending on model). Note orientation: tapered beak faces toward holding tank on both valves. Remove old valves carefully — they may be brittle. Clean mounting surfaces with a rag. Apply included silicone grease to the lip of each new valve. Press new valves firmly into their seats. Ensure full perimeter contact. Reassemble housing, tighten screws evenly. Restore power. Test with 3-4 flushes. Verify pump shuts off and vacuum holds for 2+ minutes. Frequently Asked Questions Q: How do I know which valve is bad — inlet or outlet?A: Listen near each valve while pump runs — hissing indicates a leak at that valve. Vacuum bleeding immediately after pump stops suggests inlet valve failure. Slow to build vacuum but holds once achieved points to outlet valve wear. When in doubt, replacing both is recommended. Q: How often should duckbill valves be replaced?A: Replace every 2-3 years under normal recreational use. Liveaboards and full-time RVers should replace annually. If you use formaldehyde-based holding tank chemicals, inspect every 6 months — chemicals accelerate rubber degradation significantly. Q: Why buy the 2-pack instead of single valves?A: Both valves wear at similar rates. If one has failed, the other is likely close behind. Replacing both saves you from opening the pump housing again in a few months — and costs less than two single purchases. Q: Will these fit my older Sealand pump?A: Yes. The 385310076 duckbill valve fits all S-Series and T-Series Sealand/Dometic vacuum generators dating back to the 1990s. The design has not changed. Q: Can I do this repair myself?A: Absolutely. This is a 20-30 minute DIY job requiring only a screwdriver. No plumbing or electrical expertise needed. We include step-by-step instructions in every kit. Q: What happens if I install a valve backward?A: The pump will run continuously but never build vacuum — the valve will be forced open instead of sealing. The tapered beak MUST face toward the holding tank. If you make this mistake, simply open the housing and flip the valve around. Related Products 385310076 Duckbill Valve — Single Replacement 385310681 Flush Ball & Shaft Cartridge Kit 385314349 RV Water Valve Kit 📚 Related Guides & Articles Complete Onan Quiet Diesel RV Generator Tune-Up Marine Fuel Water Separator Guide: Why Your Outboard Needs One 📖 Related Guide: VacuFlush Toilet Seal Replacement: Step-by-Step Install Guide →

    $25.99

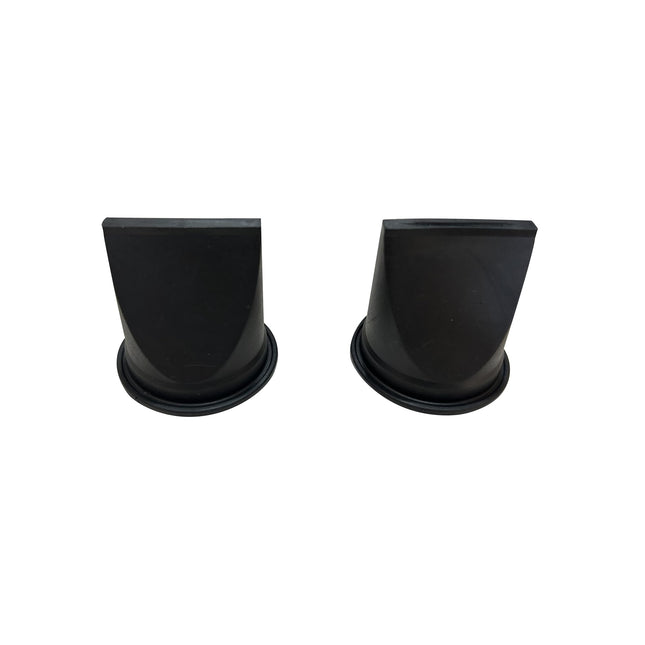
  • 385310076 Duckbill Valve for Sealand S&T Vacuum Pumps — Single Replacement

    iFJF 385310076 Duckbill Valve for Sealand S&T Vacuum Pumps — Single Replacement

    385310076 Duckbill Valve — Single Replacement for Sealand Vacuum Pumps When your Sealand VacuFlush toilet loses vacuum or cycles constantly, the culprit is almost always a worn duckbill valve. This iFJF 385310076 single replacement duckbill valve is manufactured from premium nitrile rubber and sized for all Sealand S-Series and T-Series vacuum generator pumps. Ideal for boat and RV owners who need to replace one failed valve or build a spare parts kit — without buying a full rebuild kit. Key Features Premium Nitrile Rubber: Withstands chemical exposure from holding tank treatments and mineral buildup — outlasts generic silicone valves. Single Valve Purchase: Buy exactly what you need. No waste, no unused parts. OEM-Spec Dimensions: Precise lip geometry ensures complete one-way seal. Drops into S12D, S24D, S32D, T12, T24, T32 without modification. Silicone Grease Included: Pre-lubricated for easy installation without tearing. Universal S-Series/T-Series Fit: Compatible with all Sealand vacuum generator pumps. Compatibility Series Models S-Series S12D, S24D, S32D, S115A, S12, 52A, S32 T-Series T12, T24, T32 VHT/VG VHT12, VHT24, VG4, VG5 Specifications Spec Value Part Number 385310076 Material Premium Nitrile Rubber Valve Type One-Way Duckbill Check Valve Quantity 1 (Single Pack) Includes Valve + Silicone Grease Packet When to Buy a Single Valve vs. 2-Pack Buy Single: Inlet valve failed but outlet still good. Building a spare parts kit for cruising or camping. Troubleshooting to isolate which valve is the problem. Buy 2-Pack: Both valves are original and over 2 years old. Complete pump rebuild recommended. Pump cycles every few minutes. Symptoms of Failed Duckbill Valves Pump runs continuously without building pressure Weak or incomplete flushes Pump cycles every few minutes without flushing Foul odor from vacuum tank area Hissing sound near pump during operation Installation Tips Turn off power at breaker. Open pump housing (4-6 screws). Note orientation: tapered beak must face toward holding tank. Remove old valve carefully. Clean mounting surfaces thoroughly. Apply included silicone grease to valve lip and press into place. Reassemble housing, restore power, test with 3-4 flushes. Check for vacuum hold — pump should not cycle within 2 minutes of idle. Frequently Asked Questions Q: How do I identify which valve is bad?A: Listen near each valve while pump runs. Hissing = leak at that valve. Vacuum bleeds immediately after pump stops = inlet valve failure. Pump slow to build vacuum but holds once achieved = outlet valve issue. Q: Should I buy one valve or the 2-pack?A: If both valves are original and over 2 years old, buy the 2-pack for a complete rebuild. If one failed prematurely (chemical damage, debris), a single replacement is sufficient. Q: How often should duckbill valves be replaced?A: Every 2-3 years under normal use. Liveaboards and full-time RVers should replace annually. Holding tank chemicals accelerate rubber degradation — inspect valves during annual maintenance. Q: Will non-OEM valves work as well as original?A: Our premium nitrile valves match OEM specifications and dimensions. Many marine mechanics report our nitrile compound outlasts OEM rubber in chemically-treated systems. Q: Can I install this myself?A: Absolutely. The job takes 15-20 minutes with basic hand tools (screwdriver). No specialized marine or RV knowledge required. Watch our installation video for step-by-step guidance. Q: What happens if I install it backward?A: The pump won't build vacuum because the valve will be forced open instead of sealed. The tapered beak MUST face toward the holding tank (away from the vacuum pump). If installed backward, simply flip it around. Related Products 385310076 Duckbill Valve 2-Pack — Complete Pump Rebuild 385310681 Flush Ball & Shaft Cartridge Kit 385314349 RV Water Valve Kit 📚 Related Guides & Articles Complete Onan Quiet Diesel RV Generator Tune-Up Marine Fuel Water Separator Guide: Why Your Outboard Needs One

    $19.99

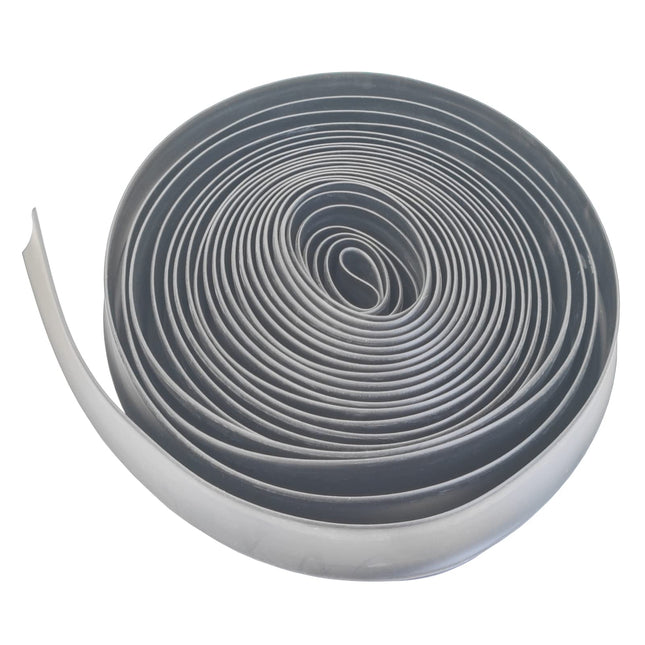
  • R854056 1-1/2" RV Slide Out Wiper Seal Replacement for 25' Rubber Clip On Weathe - Front View - iFJF

    iFJF iFJF R854056 1-1/2" RV Slide Out Wiper Seal Replacement for 25' Rubber Clip On Weather Stripping (Black)

    Product Overview The R854056 1-1/2" RV Slide Out Wiper Seal Replacement for 25' Rubber Clip On Weather Stripping (Black) is a premium-quality replacement part engineered for durability and precise fitment. Whether you're a professional mechanic or a DIY enthusiast, this component delivers OEM-grade performance at an affordable price. Manufactured with high-grade materials to withstand demanding conditions, it ensures reliable operation and long service life. Designed as a direct-fit replacement, installation is straightforward with basic hand tools — no special modifications required. Each unit undergoes rigorous quality inspection before shipping to guarantee it meets or exceeds factory specifications. Key Features Premium Construction: Built with high-grade materials for maximum durability and corrosion resistance Direct Fit: Precision-engineered to match OEM specifications — no modifications needed Easy Installation: Designed for straightforward bolt-on replacement with standard tools Rigorously Tested: Each unit passes strict quality control checks before shipment Cost-Effective: OEM-quality performance without the dealership price tag Fast Shipping: Ships from our US warehouse with reliable delivery Product Specifications Part Number(s) R854056 1-1, RV S Brand iFJF Condition New SKU FJ-RVWS01 Price $39.99 Why Choose iFJF? At iFJF, we specialize in providing high-quality aftermarket parts and accessories for automotive, powersports, RV, and outdoor equipment. Our mission is simple: deliver reliable, affordable replacement parts that professionals and DIYers can count on. ✅ Rigorous quality testing on every batch ✅ Fast, reliable shipping from US warehouses ✅ Responsive customer support team ✅ Thousands of satisfied customers nationwide Installation Tips Safety First: Disconnect the battery (if applicable) and wear appropriate safety gear before starting. Prepare Tools: Gather all necessary tools before beginning — check product listing for any special tool requirements. Remove Old Part: Carefully remove the existing component, noting the orientation and connections. Compare Parts: Place old and new parts side-by-side to verify fitment before installation. Install New Part: Mount the new component in the same orientation, ensuring all connections are secure. Test: After installation, test operation thoroughly before returning to regular use. Note: If you're unsure about any step of the installation process, we recommend consulting a professional mechanic or technician. Frequently Asked Questions Q: Is this a genuine OEM part?A: This is a high-quality aftermarket replacement part manufactured to meet or exceed OEM specifications. It is NOT a genuine OEM part. Q: Will this fit my vehicle?A: Please verify compatibility using the specifications and compatibility table above. Match your vehicle's year, make, model, and existing part number before ordering. Q: What is included in the package?A: The package includes the R854056 1-1/2" RV Slide Out Wiper Seal Replacement for 25' R as shown in the product images. Please refer to the listing photos for exactly what's included. Q: How long does shipping take?A: We ship from our US warehouse. Standard shipping typically takes 3-7 business days within the continental US. Expedited options are available at checkout. Q: What is your return policy?A: We offer a 30-day return policy for unused items in original packaging. If you receive a defective product, contact us immediately for a replacement or refund. Q: Do you offer warranty?A: Yes, all iFJF products come with a satisfaction guarantee. If you experience any issues, reach out to our support team for assistance. Order With Confidence Join thousands of satisfied customers who trust iFJF for their parts and accessories needs. With our commitment to quality, fast shipping, and excellent customer service, you can shop with confidence. Click "Add to Cart" now to get your R854056 1-1/2" RV Slide Out Wiper Seal Replacement for 25' R delivered fast!

    $69.99

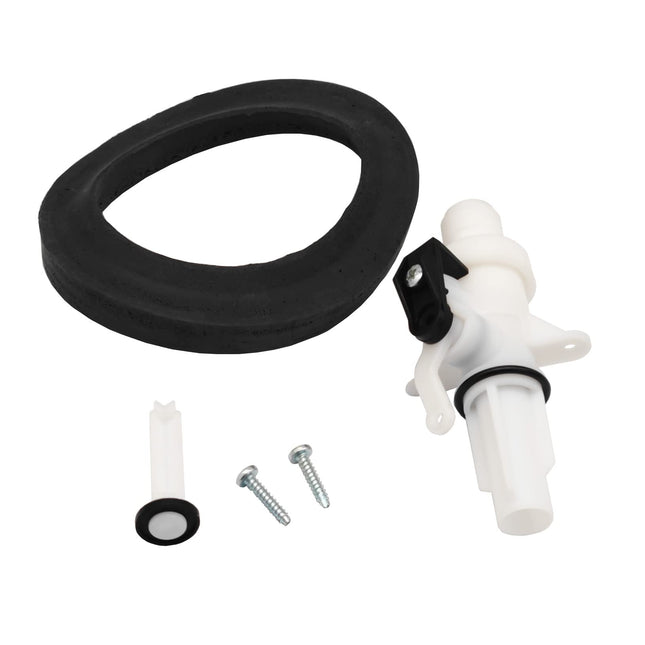
  • 13168 RV Toilet Water Valve Kit for Aqua Magic IV Toilets - Complete Kit with Valve and Seal

    iFJF 13168 RV Toilet Water Valve Kit for Aqua Magic IV Toilets

    Product Overview The 13168 RV Toilet Water Valve Kit for Aqua Magic IV Toilets is a direct-fit replacement part engineered for the RV lifestyle. Manufactured to exact OEM specifications using durable materials that withstand constant vibration, temperature swings, and the unique demands of mobile living. Key Features ✓ Exact Fit Replacement: Manufactured to precise OEM dimensions — matches factory mounting points, plumbing connections, and seal geometry. ✓ Durable Materials: UV-stabilized plastics and corrosion-resistant metals withstand years of sun exposure and temperature cycling. ✓ Simple DIY Install: Typical installation takes under 30 minutes with basic hand tools — clear instructions included. ✓ Cost-Effective: Premium quality at a fraction of dealership replacement part pricing. ✓ USA Stock: Ships from our US warehouse for fast delivery — no extended international shipping times. Technical Specifications Material ABS / Metal Composite Color See product images Dimensions Check description for exact measurements Installation Direct Replacement / Bolt-On Compatibility See vehicle fitment list Package Includes All hardware and seals for installation Why Choose iFJF? Quality Assurance: Every product undergoes rigorous quality inspection before shipping. USA-Based Inventory: Products ship from our US warehouse — no waiting for international freight. Expert Support: Our team knows diesel, automotive, and RV parts. Real answers from real people. Fair Pricing: Premium quality without the premium markup — direct value to you. Hassle-Free Returns: 30-day return policy. If it doesn't fit or meet your expectations, we'll make it right. Installation Tips Turn off water pump and relieve pressure before starting Keep a towel handy for residual water Take photos of existing connections before disassembly Test for leaks after installation Keep old parts for reference until job is complete Frequently Asked Questions Q: Is this a direct replacement for the OEM part?A: Yes, this part is manufactured to OEM specifications for a direct, bolt-in replacement. No modifications are required. Q: How do I know if this fits my RV?A: Check the model numbers listed in the product title and compatibility section. If you are unsure, send us a message with your RV make, model, and year — we will verify fitment. Q: What tools do I need for installation?A: Most installations require only basic hand tools — screwdrivers, pliers, and a wrench set. Specific requirements are noted in the included instructions. Q: Do you offer a warranty?A: Yes, all iFJF products come with a 1-year limited warranty against manufacturing defects. See our warranty page for full details. Q: How fast is shipping?A: Orders ship from our US warehouse within 1 business day. Most customers receive their order in 3-5 business days via standard shipping. Related Products Related Blog Posts

    $28.99

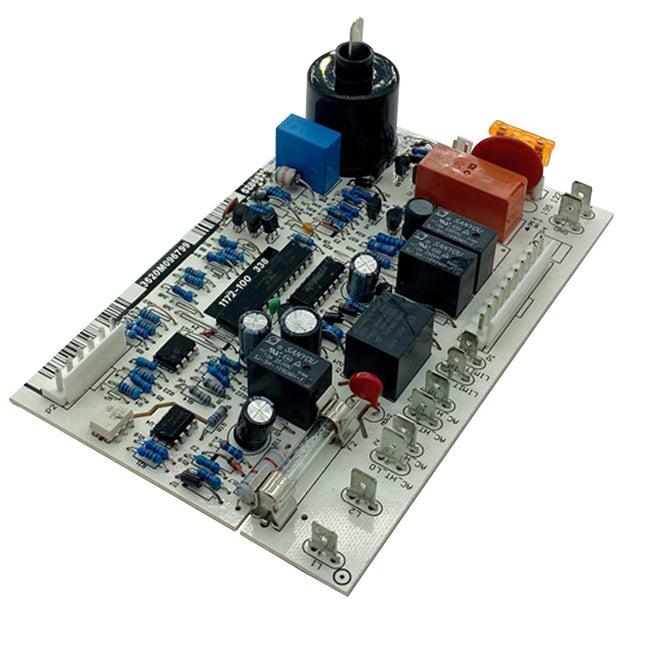
  • 628661 Refrigerator Power Circuit Board Kit for Norcold N41X N51X N6X N8X

    iFJF 628661 Refrigerator Power Circuit Board Kit for Norcold N41X N51X N6X N8X

    Product Overview Restore your Norcold RV refrigerator to full operation with the iFJF 628661 Refrigerator Power Circuit Board Kit. This essential control board manages all electrical functions in your Norcold absorption refrigerator, including AC power operation, gas ignition control, temperature regulation, and display panel communication. Compatible with a wide range of Norcold models including N41X, N51X, N6X, N8X, NXA, and N1095 series. RV refrigerators rely on complex control electronics that are exposed to vibration, temperature extremes, and power fluctuations. When the board fails, your food spoils and your trip is disrupted. This direct replacement board solves the problem quickly without the expense and wait of dealership service. Key Features Broad Compatibility: Fits N41X, N51X, N6X, N8X, NXA, and N1095 series Norcold refrigerators Full Function Control: AC heating element, gas valve, ignition, temperature sensing, and display OEM-Spec Design: Matches factory board layout, connectors, and mounting dimensions Built-in Diagnostics: Supports Norcold's self-diagnostic system for troubleshooting Protected Electronics: Conformal coating protects against humidity and condensation inside the RV 📋 Compatibility Compatible Norcold Series Norcold N41X Series Norcold N51X Series Norcold N6X Series (N611, N621, N641) Norcold N8X Series (N811, N821, N841) Norcold NXA Series Norcold N1095 Series 📐 Specifications Specification Value Part Number 628661 Type 2-Way Refrigerator Power Control Board Compatible Models N41X, N51X, N6X, N8X, NXA, N1095 Power Input 120V AC / 12V DC ❓ Frequently Asked Questions Q: Which Norcold models does this fit?A: This board fits N41X, N51X, N6X, N8X, NXA, and N1095 series Norcold RV refrigerators. Check your model number on the inside label to confirm. Q: What's the difference between 628661 and 621991001?A: These are different boards for different model families. The 628661 fits N41X/N51X/N6X/N8X/NXA/N1095, while the 621991001 fits N611/N811/N610/N810 (below serial #9056491). Choose based on your model. Q: How do I know if this is the right board?A: Check your refrigerator model number (inside door frame label) and verify against the compatibility list. If your existing board has part number 628661, this is a direct replacement. Q: Does the board come with installation instructions?A: Basic installation guidance is included. Installation involves unplugging the old board and connecting the new one to the same connectors. We recommend taking a photo of the wiring before disconnecting. Q: Is this board new or refurbished?A: This is a brand new, factory-tested board. iFJF does not sell refurbished electronics.

    $75.99

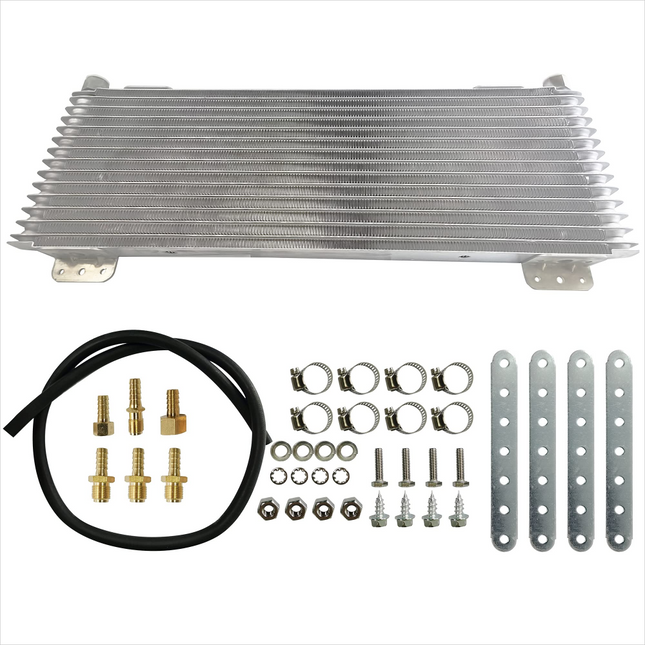
  • iFJF LPD47391 Transmission Oil Cooler 40000 GVW Heavy-Duty Brazed Aluminum

    iFJF iFJF Transmission Oil Cooler LPD47391 Low Pressure Drop Trans Cooler 40000 GVW OC-4739-1 LPD-4739-1 with Mounting Hardware (Silver)

    Product Overview The iFJF LPD47391 Transmission Oil Cooler delivers advanced cooling protection rated for up to 40,000 lbs GVW. Brazed aluminum plate design with self-regulating flow technology balances cooling efficiency with proper fluid pressure critical for towing, hauling, RV use, and commercial applications. Overheating is the #1 killer of automatic transmissions this cooler keeps fluid in the safe range even under maximum load. Key Features 40,000 GVW Rating: Heavy-duty applications including towing, RV motorhomes, commercial vans, and light trucks. Self-Regulating Flow: Built-in thermal bypass allows cold fluid to bypass during warmup, then directs full flow when at operating temp. Brazed Aluminum Construction: Superior heat transfer and durability vs tube-and-fin. Precision fin spacing maximizes surface area. Universal Application: Compatible with most cars, vans, light trucks, SUVs, RVs, and towing vehicles. Extends Transmission Life: Every 20F reduction in fluid temperature doubles fluid service life. Applications Vehicle Type Typical Use Light Trucks 1500-3500 Towing trailers, boats, campers SUVs & Vans Family travel, cargo transport RVs & Motorhomes Long-distance heavy chassis loads Performance High-HP, track use, oversized tires Specifications Part Numbers LPD47391 / OC-4739-1 GVW Rating Up to 40,000 lbs Core Brazed aluminum plate Includes Cooler, hardware, hose fittings, instructions Frequently Asked Questions Q: What size vehicle can this handle?A: Rated for up to 40,000 lbs GVW suitable from passenger cars to Class A motorhomes and commercial vehicles. Q: Should I bypass the factory cooler or run in series?A: Run in series after factory radiator cooler for maximum cooling while allowing proper warm-up in cold weather. Q: Will this work with manual transmission?A: Designed for automatic transmission fluid (ATF). Some high-performance manuals can benefit with electric pump setup. Related Products You May Need iFJF TF922 Automatic Transmission Fluid Filter 24274402 Fit 15-21 GMC Sierra Can iFJF Timbren GMRCK25D Rear Suspension Helper Spring Kit for 11-19 Silverado 2500 iFJF Mounting Clamps Truck Caps Camper Shell for Chevy Silverado Sierra 1500 250 Related Guides & Resources Transmission Cooler Installation Guide Towing Upgrades For Heavy Duty Trucks

    $177.99

  • 385316906 Vacuum Breaker Kit for Sealand Traveler Toilets — No Sprayer

    iFJF 385316906 Vacuum Breaker Kit for Sealand Traveler Toilets — No Sprayer

    385316906 Vacuum Breaker Kit for Sealand Traveler Toilets — Leaking Stopped, No Sprayer Stop your Sealand Traveler RV toilet from leaking with this OEM-grade vacuum breaker repair kit (part number 385316906). Designed specifically for Traveler series toilets WITHOUT the hand sprayer hookup, this kit replaces the worn internal seals and components that cause water leaks, backflow issues, and inconsistent flushing. Whether you're dealing with a slow drip that won't stop or water backing up into the bowl, this kit provides a complete, lasting repair at a fraction of the cost of a new toilet. Key Features OEM-Spec 385316906 Replacement: Manufactured to exact Sealand/Dometic specifications for a guaranteed fit on Traveler series toilets without the hand sprayer option Complete Sealing Kit: Includes vacuum breaker, o-rings, gaskets, check valve components, and all internal seals needed for a full rebuild Stops Water Leaks: Addresses the two most common leak sources — the vacuum breaker seal failure (leaks at the back of the toilet) and check valve deterioration (water leaking into the bowl) Prevents Backflow: Restores proper one-way water flow, preventing contaminated bowl water from siphoning back into your RV's fresh water system DIY-Friendly Installation: Clear, illustrated instructions included — most RV owners complete this repair in 30-45 minutes with basic hand tools Compatibility Brand Model Series Part Number Configuration Sealand Traveler 385316906 Without hand sprayer hookup Dometic Traveler 385316906 Without hand sprayer hookup Important: This kit is for Traveler models WITHOUT the hand sprayer. If your toilet has a hand sprayer attachment, you need kit 385230325 instead (available in our store). Common Symptoms This Kit Fixes Water leaking from the back of the toilet onto the bathroom floor Water slowly filling the bowl when the toilet is not in use Weak or inconsistent flush performance Water hammer or chattering noise during flush cycle Water backing up or gurgling in the bowl after flushing Why Fix Instead of Replace? A new Sealand Traveler toilet costs $400-700. This vacuum breaker kit addresses the most common failure point for under $25. The Traveler series is known for durable ceramic bowls and robust pedal mechanisms — the vacuum breaker is typically the first and only component that fails. Replacing it restores full function and extends your toilet's life by years. This is the same repair a mobile RV tech would perform, and you can do it yourself in under an hour. Frequently Asked Questions Q: How do I know if my Traveler toilet needs this part vs the 385230325 kit?A: Check if your toilet has a hand sprayer attachment (a small hose coming from the back of the toilet with a spray nozzle). If NO sprayer → order this 385316906 kit. If YES sprayer → order our 385230325 kit. The vacuum breaker design is different for each configuration. Q: Can I install this myself, or do I need a mobile RV tech?A: Most RV owners can install this kit themselves. You'll need basic tools: Phillips screwdriver, adjustable wrench, and possibly needle-nose pliers for small o-rings. Turn off the water pump and relieve pressure before starting. Allow 30-45 minutes for first-time installation. Q: Will this stop my toilet from running intermittently?A: If your toilet's water valve cycles on and off while not in use, the vacuum breaker seal is likely the culprit. Replacing it with this kit typically resolves intermittent cycling. If the issue persists after installation, the water valve itself may need replacement. Q: Are these genuine Sealand parts?A: This is an OEM-grade aftermarket kit manufactured to Sealand/Dometic specifications. The materials, dimensions, and tolerances match the original parts. It's functionally identical to the OEM kit at a more accessible price point. Q: How often should the vacuum breaker be replaced?A: There's no fixed replacement interval — replace it when symptoms appear (leaking, backflow, weak flush). In full-time RV use, expect 3-5 years from a vacuum breaker. In occasional/seasonal use, they can last 5-8 years. 📚 Related Guides & Articles RV Toilet Maintenance: Fixing Leaks and Odors Sealand vs Dometic: RV Toilet Parts Compatibility Guide

    $23.99

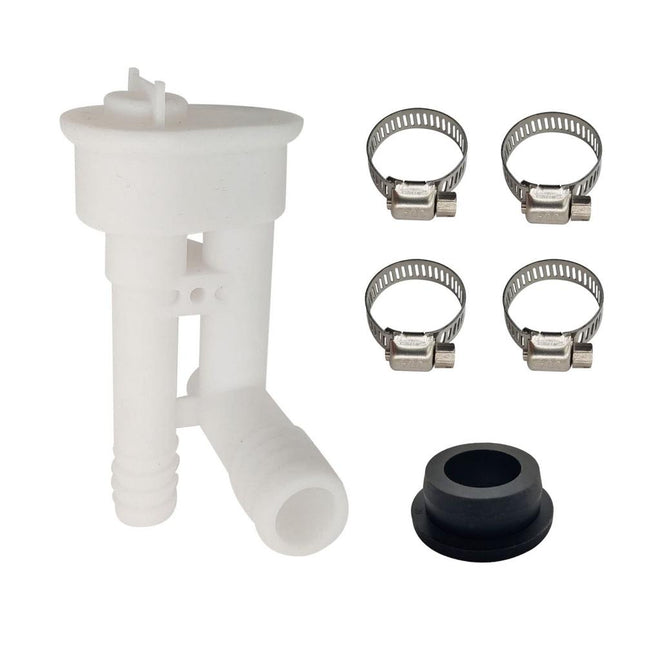
  • 34117 Waste Ball Valve Seal Kit Replacement for Aqua Magic Style II, Style Lite, Style Plus RV Toilet - Front View - iFJF Direct

    iFJF 34117 Waste Ball Valve Seal Kit for Aqua Magic Style II, Style Lite, Style Plus RV Toilets

    Overview The iFJF 34117 Waste Ball Valve Seal Kit is a direct replacement for the critical sealing component in Aqua Magic Style II, Style Lite, and Style Plus RV toilets. The waste ball valve seal creates the watertight barrier between your toilet bowl and the black water holding tank — when it fails, you get persistent odors, water leakage, and an unpleasant living environment in your RV or camper. Over time, the factory rubber seal hardens, cracks, or loses elasticity due to exposure to chemicals, temperature extremes, and mechanical wear from the flush ball mechanism. This affordable seal kit restores a tight, odor-free seal without the expense of replacing the entire toilet assembly ($200-400 for a new RV toilet). Installation takes about 30 minutes with basic hand tools. Key Features Direct OEM Replacement — Compatible with Aqua Magic Style II, Style Lite, Style Plus, and related Thetford RV toilet models Stops Odors & Leaks — Restores the water seal that prevents black tank odors from entering your RV living space Durable Rubber Construction — Manufactured from chemical-resistant rubber compound that withstands RV toilet chemicals and holding tank treatments Complete Kit — Includes ball valve seal, O-rings, and necessary gaskets for a thorough rebuild DIY-Friendly — Replace in approximately 30 minutes with basic hand tools; no special plumbing skills required Save $200+ — A $10-15 seal kit vs. $200-400 for a new RV toilet assembly Technical Specifications Specification Details Part Number 34117 Compatible Toilets Thetford Aqua Magic Style II, Style Lite, Style Plus Material Chemical-Resistant Rubber Compound Includes Waste Ball Valve Seal, O-Rings, Gaskets Installation Time Approx. 30 Minutes Compatibility Toilet Model Compatibility Aqua Magic Style II ✅ Direct Fit Aqua Magic Style Lite ✅ Direct Fit Aqua Magic Style Plus ✅ Direct Fit Other Thetford Residential-Style RV Toilets ✅ May Fit — Verify Design Installation Guide Turn Off Water — Shut off water supply to the RV toilet Empty & Clean Bowl — Flush and thoroughly clean the toilet bowl and flush ball area Remove Old Seal — Access the waste ball valve area (typically by removing the toilet from the floor flange or accessing through the bowl), extract the old hardened seal Clean Seal Groove — Remove all debris, mineral deposits, and old seal residue from the seal groove Install New Seal — Press the new iFJF 34117 seal into the groove, ensuring even seating around the entire circumference Reassemble & Test — Reinstall toilet if removed, restore water, fill bowl, and check for leaks and proper seal operation FAQ Q: How do I know if my waste ball valve seal needs replacement?A: Signs of a failing seal include: water in the toilet bowl draining slowly or not holding at all, persistent sewer odors in the RV bathroom, visible cracking or hardening of the rubber seal (visible when looking at the flush ball area), or the toilet requiring more frequent water refills to maintain the bowl seal. Q: Can I replace the seal without removing the toilet from the floor?A: On most Aqua Magic models, the seal is accessible from above after removing the flush ball mechanism — the toilet does not need to be removed from the floor flange. However, access is tight and removing the toilet (just two floor bolts) can make the job significantly easier. Q: How long should an RV toilet ball valve seal last?A: With regular use, expect 2-5 years from a quality seal. Factors that shorten seal life include: frequent use of harsh chemical holding tank treatments, extreme temperature swings (winter storage freeze-thaw cycles), and failure to maintain water in the bowl (a dry seal cracks faster). Q: Will this stop my toilet from holding water?A: If the water loss is caused by a worn ball valve seal, yes. If the toilet bowl itself is cracked or the flush ball is damaged, those are separate issues requiring different repairs. The majority of "toilet won't hold water" complaints in RV toilets are seal-related. Q: Do I need any special lubricant for the new seal?A: We recommend applying a thin coat of silicone-based plumber's grease or Thetford-approved seal lubricant to the new seal before installation. This protects the rubber, ensures smooth flush ball operation, and extends seal life. Never use petroleum-based lubricants as they degrade rubber. Q: Is this the same as Thetford part 34117?A: Yes. This aftermarket seal is manufactured to the same specifications as Thetford OEM part 34117 and provides equivalent fit and durability at a more accessible price point. Q: Can I use chemical treatments with this seal?A: Yes. The seal material is formulated to resist standard RV holding tank chemicals. For maximum seal longevity, avoid pouring undiluted chemicals directly onto the seal. Add treatments to the holding tank through the toilet bowl with water running. Q: What if the new seal still doesn't hold water?A: If the problem persists after installing a new seal, check: (1) The flush ball surface for scratches or damage that prevents sealing, (2) Proper seal seating in the groove (fully pressed in, no twists), (3) The toilet bowl itself for hairline cracks. The flush ball may also need replacement if heavily scratched. 📚 Related Guides & Articles iFJF Guides & Resources — Expert Tips, Installation Tutorials & Buying Guides

    $39.99

  • FRV100 Flow Regulator Valve for Zodiac MX8 MX6 Elite Pool Cleaners - front view - FRV100

    iFJF FRV100 Flow Regulator Valve for Zodiac MX8 MX6 Elite Pool Cleaners

    Keep your pool cleaner running at peak efficiency with the FRV100 Flow Regulator Valve for Zodiac MX8 MX6 Elite Pool Cleaners. Designed as a direct replacement for factory parts, this premium component restores proper function to your automatic pool cleaner, ensuring thorough debris collection and consistent pool wall coverage. Key Features & Benefits Direct OEM Replacement: Engineered to match original equipment specifications for guaranteed fit and function Durable Materials: Constructed with corrosion-resistant materials built to withstand continuous exposure to pool chemicals Easy Installation: Tool-free or basic hand tool installation — most replacements complete in under 15 minutes Restores Cleaner Performance: Eliminates sluggish movement, poor wall climbing, and incomplete pool coverage Universal Compatibility: Compatible with multiple cleaner models within the same series for wide application coverage Compatibility & Specifications Specification Details Part Number FJ-JP-X-FRV01 Replaces FRV100 Price $19.99 Brand iFJF Direct Condition New Why Choose iFJF Direct? Quality Assurance: Every product undergoes rigorous inspection before shipping to ensure you receive a flawless component Expert Support: Our US-based support team has deep knowledge of diesel engines, powersports, and pool equipment — we're here to help with fitment questions Fast Free Shipping: Orders ship from our US warehouse within 1 business day with free standard shipping on all domestic orders 30-Day Returns: Not satisfied? Return within 30 days for a full refund. We stand behind every product we sell Ready to get your equipment back in top shape? Order the FRV100 Flow Regulator Valve for Zodiac MX8 MX6 Elite Pool Cleaners today and enjoy fast shipping, expert support, and the quality assurance that thousands of mechanics and DIY enthusiasts trust. Related Products Pool Cleaner Parts — Complete selection of replacement parts for leading pool cleaner brands Pool Filter Parts — Replacement O-rings, knobs, and accessories for Hayward, Pentair, and Zodiac systems 📖 Related Guide: Pool Cleaner Maintenance Guide — Extend the Life of Your Automatic Cleaner Frequently Asked Questions Q: Is this compatible with my pool cleaner model? A: This part is designed to fit the specific pool cleaner models listed in the product title. Please verify your cleaner model number before ordering. If you're unsure about compatibility, send us your cleaner model number and we'll confirm fitment within 24 hours. Q: How difficult is the installation? A: Most users complete the installation in 15-30 minutes with basic tools. No specialized equipment is required. We recommend reviewing your pool cleaner's manual for disassembly instructions. If you encounter any difficulties, our support team can provide additional guidance. Q: What warranty does this product come with? A: All iFJF Direct products are backed by a 30-day satisfaction guarantee. If you're not completely satisfied, return the product for a full refund. We also offer a 90-day warranty against manufacturing defects. Our US-based customer support team is available to assist with any issues. Q: How fast will I receive my order? A: Orders ship from our US warehouse within 1 business day. Standard shipping typically delivers within 3-7 business days to the continental US. Expedited shipping options are available at checkout. You'll receive a tracking number as soon as your order ships. Q: What if this part doesn't fit my vehicle/equipment? A: If the part doesn't fit, we'll make it right. Contact our support team within 30 days for a prepaid return label and full refund. We recommend verifying your vehicle/equipment model, year, and part numbers before ordering to ensure compatibility. Our team is happy to help with fitment questions before you buy.

    $29.99

  • RV Refrigerator Button Panel 3850964036 Circuit Board — Front View with Connector

    iFJF iFJF Refrigerator Button Panel 3850964036 Circuit Board Kit for 3850964010 Refrigerator 2-Way Button Panel fit RM1350 RM3762 RM3962

    Refrigerator Button Panel Circuit Board 3850964036 — RV Refrigerator Control Board The iFJF Refrigerator Button Panel Circuit Board (3850964036) is a direct replacement control board for Dometic and Norcold 2-way RV refrigerators. This circuit board replaces the common failure-prone part #3850964010 and restores full button functionality to your RV refrigerator's control panel. If your fridge buttons have become unresponsive, intermittent, or stopped working entirely, this replacement board provides a cost-effective fix that gets your RV refrigerator back to reliable operation — without the expense of replacing the entire cooling unit. Compatibility Brand Model Series Type Dometic RM1350, RM3762, RM3962 2-Way (LP Gas / Electric) Norcold Compatible 2-Way Models 2-Way (LP Gas / Electric) Key Features Direct Replacement: Replaces OEM part number 3850964010 — same dimensions, same connector, same functionality Restores Full Control: Brings back all button functions — power on/off, temperature adjustment, mode selection (LP Gas / Electric / Auto) Enhanced Reliability: Upgraded circuit traces and components for improved durability over the original design Plug-and-Play Installation: No soldering or wiring modifications required — disconnect old board, connect new one Includes Faceplate Overlay: Comes with a new button membrane overlay to replace worn, faded, or cracked originals Mechanical Enhancement: Improves the overall operation of the refrigerator's control system Technical Specifications Specification Detail SKU FJ-JP-X-DLB04-CK Replaces OEM Part 3850964010, 3850964036 Compatible Models RM1350, RM3762, RM3962 Refrigerator Type 2-Way Absorption (LP Gas / 120V Electric) Installation Plug-and-Play, No Soldering Required Symptoms of a Failing Control Board Buttons require multiple presses to respond Display shows error codes or flickers intermittently Refrigerator won't switch between gas and electric modes Temperature adjustment buttons are unresponsive Control panel is completely dead (no lights, no response) Refrigerator randomly shuts off or changes modes Installation Guide Disconnect Power: Unplug the RV from shore power AND disconnect the 12V battery. Turn off LP gas at the tank. Access Control Panel: Remove the refrigerator's front control panel cover (typically held by clips or screws at the top edge) Disconnect Old Board: Carefully unplug the wiring harness connector from the old circuit board Remove Old Board: Unscrew or unclip the old board from its mounting location Install New Board: Mount the new 3850964036 board in the same position and reconnect the wiring harness Apply Faceplate Overlay: Clean the button area, align the new overlay, and press firmly into place Test: Reconnect power and test all button functions before reinstalling the cover panel Frequently Asked Questions Q: Is this board compatible with my Dometic RM1350 refrigerator?A: Yes. The 3850964036 board is a direct replacement for Dometic RM1350, RM3762, and RM3962 2-way refrigerators that use the 3850964010 control board. Q: Do I need any special tools to install this?A: Only basic hand tools are needed — typically a Phillips screwdriver to access the control panel. No soldering or electrical expertise is required. Q: Will this fix my refrigerator if the cooling unit is bad?A: This board only addresses control panel and button issues. If your refrigerator's cooling unit (absorption system) has failed, the control board will not resolve cooling problems. Check for ammonia smell or yellow residue — signs of cooling unit failure. Q: How do I know if I need the 3850964010 or 3850964036 board?A: Both part numbers are compatible. The 3850964036 is the updated version. If your original board is labeled 3850964010, this replacement board is a direct, improved substitute. Q: Does this come with installation instructions?A: Yes. Basic installation guidance is included. The process is straightforward for anyone comfortable with basic RV DIY repairs — typically 20-30 minutes.

    $79.99

  • iFJF 830644 Deluxe Handle for A&E Awning Lift

    iFJF iFJF 830644 Deluxe Handle for A&E Awning Lift

    Overview The iFJF 830644 Deluxe Awning Handle is a premium replacement lift handle for Dometic and A&E 8500/9000 series manual RV patio awnings. Molded from durable polyethylene with an ergonomic morphological grip design, this handle makes raising and lowering your RV awning effortless while providing a comfortable, secure hold even in wet conditions. Key Features Ergonomic Morphological Grip: The handle shape follows the natural curve of your hand, distributing pressure evenly across your palm to reduce fatigue during awning setup and takedown. Durable Polyethylene Construction: High-density polyethylene resists cracking, fading, and UV deterioration while remaining lightweight and comfortable to handle. Smooth Polished Finish: The polished surface prevents splinters and rough spots even after years of outdoor exposure, making it comfortable for bare-hand use in any weather. Universal Awning Fit: Designed to fit Dometic and A&E 8500/9000 series manual awnings, covering the vast majority of RV patio awnings on the road today. Direct OEM Replacement: Replaces the original Dometic/A&E deluxe handle (830644) with identical fitment and improved material durability. Lightweight Design: At just a few ounces, this handle adds no meaningful weight to your awning assembly while providing years of reliable, comfortable service. Compatibility Make Model Year/Type Dometic/A&E 8500 Series Manual Patio Awning Dometic/A&E 9000 Series Manual Patio Awning Specifications Specification Value Part Number 830644 Material High-Density Polyethylene Type Deluxe Awning Lift Handle Compatibility A&E 8500 & 9000 SKU TOOL85-CK Why Choose iFJF? At iFJF Direct, we specialize in high-quality replacement parts backed by rigorous quality control. Each component is manufactured to meet or exceed OEM specifications, ensuring reliable performance and long service life. We stand behind every product with responsive customer support and a satisfaction guarantee. Frequently Asked Questions Q: Will this handle fit my Dometic awning?A: Yes. This deluxe handle is designed for Dometic and A&E 8500 and 9000 series manual patio awnings — the most common RV awnings on the market. If your awning arm has a hook/pin at the bottom, this handle will work. Q: My old handle cracked — will this last longer?A: Our high-density polyethylene formulation includes UV stabilizers that significantly extend outdoor lifespan. The smooth polished finish resists stress cracking better than textured alternatives. Q: Is this difficult to install?A: Not at all. Simply slide the handle onto the awning arm rod and it's ready to use — no tools, fasteners, or adhesives needed. Installation takes seconds. Q: Does this include the rafter rivet?A: This SKU is for the handle only. If you need both the handle and the rafter rivet, see our combo kit (SKU FJ-TOOL85-HL02-1) which includes both items. Package Includes 1 x iFJF 830644 Deluxe Handle for A&E Awning Lift | Installation hardware as shown | Product support documentation

    $29.99

RV Generator Parts & Maintenance — Cummins Onan Filters, Kits & More

iFJF Direct is your one-stop shop for RV generator maintenance parts. From Cummins Onan filter kits to RV plumbing and appliances, we stock the parts that keep RV owners on the road and off the campground repair shop. Trusted by full-timers, weekenders, and fleet operators — our #1 selling category with US-based inventory and same-day shipping.

Cummins Onan Generator Parts — Our Specialty

The heart of any RV electrical system is the generator, and Cummins Onan powers more RVs than any other brand. We stock maintenance parts for every major Onan series, cross-referenced to OEM part numbers:

  • QG 4000 / 5500 / 7000 — The most common RV generators. We carry oil filters (122-0836), air filters (140-2897), fuel filters (149-2513), fuel pumps (149-2341-01), spark plugs, and complete annual maintenance kits.
  • Marquis Gold / Platinum — Older but widely used in Class A motorhomes. Filter kits, voltage regulators, carburetor rebuild kits, and ignition components.
  • MicroQuiet 4000 — Compact generators for smaller RVs and toy haulers. Full filter sets, exhaust gaskets, and replacement fuel lines.
  • KY / KYD Series — Entry-level generators. Oil change kits, air filter elements, and spark arrestor replacements.

Onan Generator Maintenance Schedule

Service Item Interval iFJF Part
Oil & Filter Change Every 150 hours 122-0836 Oil Filter
Air Filter Replacement Every 300 hours 140-2897 Air Filter
Fuel Filter Every 500 hours 149-2513 Fuel Filter
Spark Plugs Every 500 hours 167-1637 Spark Plug
Fuel Pump Inspection Annually 149-2341-01 Fuel Pump

Pro tip: Stock up on our complete maintenance kits to save 15-20% vs buying individual filters. One kit covers a full season of generator service.

RV Parts by Category

Appliances & Climate

Norcold and Dometic refrigerator control boards (N611/N811/N821), soft start kits for rooftop A/C units, water heater elements and thermostats (Atwood, Suburban), furnace ignitors and sail switches.

Plumbing & Water Systems

Dometic and Thetford toilets and replacement parts, Shurflo water pumps (2088/4008 series), PEX fittings and crimp tools, sewer hose kits with clear adapters, black tank treatments and rinse wands.

Electrical & Power

Automatic transfer switches (30A/50A), Progressive Industries surge protectors, battery disconnect switches, solar charge controllers (MPPT/PWM), LED interior and exterior lighting upgrades.

RV Generator Parts FAQ

How do I identify which Onan generator model I have?

Look for the data plate on your generator — typically located on the side of the unit or inside the access door. It will show the model number (e.g., 4KYFA26100K), spec letter, and serial number. The most common RV generators are the QG 4000 (4.0kW gasoline), QG 5500 (5.5kW gasoline), and QG 7000 (7.0kW gasoline). Diesel pushers commonly use the QD 7500/8000/10000 series. Match your model to our product listings for guaranteed fitment.

Can I use automotive oil filters on my Onan generator?

Technically yes — many Onan generators use the same thread pitch and gasket diameter as common automotive filters. However, we strongly recommend using OEM-spec filters like the 122-0836. Generator-specific filters have different bypass valve pressures and anti-drainback specifications optimized for small engine operating conditions (higher RPM range, frequent start/stop cycles). The cost difference is minimal compared to potential engine damage. Every iFJF filter is cross-referenced to the exact Onan specification.

What signs indicate my Onan fuel pump is failing?

The classic symptom is your generator starting, running for 10-30 seconds, then shutting down — this usually means the fuel pump cannot maintain fuel pressure. Other signs include: generator cranks but won't start, surging RPMs under load, extended cranking before firing, and no audible ticking from the pump when the generator is priming. The Onan fuel pump (149-2341-01) is a common replacement item, typically lasting 600-1,000 hours depending on fuel quality.

Do your Onan maintenance kits work for generator models outside RVs?

Yes — our Cummins Onan filter kits are compatible with Onan generators used in commercial trucks (APU), food trucks, emergency vehicles, mobile medical units, and construction equipment. The same QG and QD series generators power many non-RV applications. Filter specifications are identical regardless of the generator's installation environment. Just verify your model number against the fitment guide in each product listing.

Common Problems & Diagnosis: Troubleshooting Your Onan Generator

Onan generators are reliable workhorses, but no machine is immune to wear and age. Here are the most common failure patterns and how to diagnose them before they strand you at a dry-camping site:

Generator Cranks But Won't Start: The most frequent cause on gasoline models is stale fuel — fuel in the generator's carburetor bowl evaporates over time, leaving behind varnish deposits that clog the main and idle jets. If your generator has sat unused for more than 3-4 weeks, drain the carburetor bowl (most Onan carbs have a drain screw) and refill with fresh fuel. Add fuel stabilizer to your RV's fuel tank if the generator will sit for extended periods — especially important for ethanol-blended fuels that absorb moisture. Other causes include: a fouled spark plug (remove and check for wet, black, or eroded electrodes), a clogged fuel filter (149-2513 — try starting with starting fluid sprayed into the air intake to isolate fuel vs. ignition problems), or a failed ignition coil (test with an inline spark tester).

Generator Starts Then Dies Under Load: The generator fires up, runs smoothly at no-load, but stumbles or shuts down when the air conditioner compressor kicks on. This pattern points to one of three issues: (1) A clogged air filter (140-2897) — a restricted air filter causes an over-rich mixture that bogs under load. Remove the filter and test-run briefly; if the generator handles load without the filter, replace it. (2) A failing fuel pump (149-2341-01) — the pump can deliver enough fuel at low demand but cannot maintain pressure when the governor opens the throttle under load. (3) A slipping generator belt (if equipped) — inspect the belt connecting the engine to the generator head for glazing, cracking, or improper tension.

Generator Produces Power But Voltage Is Low or Flickering: The engine runs normally but lights dim and appliances cycle erratically. This is a voltage regulation problem: (1) The voltage regulator has failed — Onan regulators are sensitive to heat and vibration, especially on generators with high hours. (2) The brushes (on brushed generator heads) are worn past their service limit — remove and measure brush length against the specification in your service manual. (3) The slip rings on the rotor have accumulated carbon deposits from worn brushes — cleaning the slip rings with a commutator stone restores clean electrical contact. Any voltage irregularity should be addressed immediately — low voltage can damage your RV's air conditioner compressor (the most expensive appliance to repair) and refrigerator control boards.

Generator Surges or Hunts at Steady Load: RPM fluctuates up and down rhythmically even when the load is constant. This is almost always a governor or carburetor issue: (1) The governor linkage is binding or the governor spring has weakened — clean and lubricate all linkage pivot points with a dry-film lubricant. (2) The carburetor's idle circuit is partially clogged while the main circuit is clear — this causes surging when the governor transitions between the idle and main fuel circuits. (3) A vacuum leak at the intake manifold gasket or carburetor base gasket introduces unmetered air, leaning the mixture erratically. Spray carburetor cleaner around the intake joints while the generator is running — an RPM change indicates a vacuum leak at that location.

Buying Guide: Building Your RV Generator Spares Kit

Smart RV owners don't wait for a breakdown — they prepare for it. Here is how to build a generator spares kit that keeps you independent of repair shops:

Essential Spares (Carry These Always): (1) One complete oil change kit — oil filter (122-0836), 2 quarts of 15W-40 diesel oil (for QD series) or SAE 30 small-engine oil (for QG series), and a drain pan. (2) One air filter (140-2897) — air filters on generators operating in dusty campgrounds and unpaved roads clog faster than expected. (3) Two spark plugs (167-1637) — a fouled spark plug is the #1 field-repairable cause of generator no-start. (4) One fuel filter (149-2513) — small enough to carry and critical to generator operation. (5) A spare fuel pump (149-2341-01) — the fuel pump is the most common component-level failure on Onan generators and is easily replaced with basic hand tools.

Recommended Tools: Spark plug socket (13/16" or 5/8" depending on model), ratchet with 6-inch extension, 10mm and 12mm combination wrenches, inline spark tester, multimeter (for diagnosing voltage regulation and starting circuit issues), and a can of starting fluid (for fuel system diagnosis). A dedicated generator tool roll stored in the generator compartment ensures you have what you need when you need it.

Fuel Management: The single most important practice for generator reliability is fuel rotation. Run the generator under load (at least 50% rated capacity) for 30 minutes every month. This exercise burns the fuel in the carburetor bowl, circulates fresh fuel through the pump and lines, boils moisture out of the oil, and keeps the generator head's slip rings clean. Set a recurring calendar reminder — monthly exercise prevents 80% of the generator problems RV owners experience. For seasonal storage (3+ months), add fuel stabilizer, run the generator for 15 minutes to distribute stabilized fuel through the system, then drain the carburetor bowl.

Installation Tips: DIY Onan Generator Service

Onan generator maintenance is well within the capability of most RV owners with basic mechanical aptitude. These model-specific tips will make your service go smoothly:

Oil Change: Warm up the generator for 5-10 minutes before draining — warm oil flows faster and carries more contaminants. The drain plug is typically located on the bottom of the oil pan, accessible from underneath the generator. On some models, Onan provides a drain hose that extends to the edge of the generator tray for easier access. The oil capacity is small (typically 1.5-2 quarts) — add oil slowly and check the dipstick frequently to avoid overfilling. Overfilled oil causes crankshaft whip that aerates the oil, reducing oil pressure and potentially damaging bearings.

Air Filter Replacement: The air filter housing is typically secured by a single wing nut or spring clip. Before removing the old filter, vacuum or wipe away loose debris around the housing to prevent it from falling into the intake. If the filter foam pre-cleaner is present, wash it in warm soapy water, dry completely, then lightly oil it with foam filter oil (not engine oil — engine oil degrades the foam). A dry foam pre-cleaner does not trap fine dust effectively.

Spark Plug Replacement: Always use a spark plug socket with a rubber insert — a standard deep socket can crack the ceramic insulator. Gap the new plug to specification (typically 0.025-0.030 inches for Onan generators) before installation — factory pre-gapped plugs are sometimes knocked out of spec during shipping. Apply a small amount of anti-seize to the threads (keeping it off the electrode and insulator), thread in by hand to avoid cross-threading, then torque to specification (typically 15-20 ft-lbs). Over-tightening crushes the crush washer excessively and can strip the aluminum cylinder head threads — a $200+ repair for a $5 spark plug.

Related Collections

© 2026 iFJF Direct | Sitemap

    • American Express
    • Diners Club
    • Discover
    • Maestro
    • Mastercard
    • PayPal
    • Visa

    Login

    Forgot your password?

    Don't have an account yet?
    Create account