



iFJF iFJF Wind Noise Reduction Seal Kit Version 2 For Tesla Model 3 Noise Dampening Seal
Product Overview Enjoy a quieter, more refined driving experience with the iFJF Wind Noise Reduction Seal Kit Version 2 for Tesla Model 3. This upgraded seal kit targets the windshield and roof gaps where wind noise enters the cabin — a common complaint among Model 3 owners at highway speeds. Self-adhesive installation takes under 30 minutes with no tools required, and the results are immediately noticeable. Key Features Version 2 Design: Improved rubber compound and profile for better sealing and longer durability compared to earlier versions. Targeted Noise Reduction: Seals the windshield-to-roof gap, A-pillar channels, and roof glass perimeter — the primary sources of wind noise in the Model 3. Simple Peel-and-Stick Install: Pre-cut lengths with 3M automotive-grade adhesive backing — just clean the surface, peel, and press. No tools needed. OEM-Look Finish: Low-profile black EPDM rubber blends seamlessly with the Tesla's glass roof and trim — virtually invisible after installation. All-Weather Durability: UV-resistant and temperature-rated from -40°F to 250°F — won't crack, shrink, or peel in extreme conditions. Compatibility Vehicle Years Trim Levels Tesla Model 3 2017-2023 Standard, Long Range, Performance Specifications Spec Detail Material EPDM Rubber (Automotive Grade) Adhesive 3M VHB Acrylic Foam Tape Temperature Range -40°F to 250°F (-40°C to 121°C) Profile Low-Profile D-Shape (Version 2) Installation Self-Adhesive, No Tools Required Installation Tips Clean Thoroughly: Wipe all application surfaces with the included alcohol prep pads — any dirt or wax will prevent proper adhesion. Work in 70°F+ Temperatures: The adhesive bonds best above 70°F. If installing in cold weather, warm the surface with a hair dryer first. Apply Firm Pressure: Press firmly along the entire length of the seal after application — use a roller if available. Avoid Car Washes: Wait 24 hours before washing the vehicle or exposing to rain to allow the adhesive to fully cure. Frequently Asked Questions Q: How much noise reduction can I expect?A: Most Model 3 owners report a 3-5 dB reduction in wind noise at highway speeds (65-75 mph) — a noticeable improvement that makes phone calls and music much clearer. Q: Will this affect my glass roof's appearance?A: The seal is low-profile and black, designed to blend with the existing trim and glass. It's barely visible and does not obstruct the panoramic roof view. Q: Can I remove it later without damage?A: Yes — the seal can be removed by peeling it off carefully. Any remaining adhesive residue can be cleaned with isopropyl alcohol without damaging the paint or glass. Q: Does this fit the 2024+ Model 3 Highland?A: This Version 2 kit is designed for 2017-2023 Model 3. The 2024 Highland refresh has different panel gaps and may not fit properly. Q: Is this the same as the OEM Tesla seal?A: This is an aftermarket upgrade designed to supplement the factory seals. It addresses gaps that the OEM seals don't fully cover, providing additional wind noise reduction.
$25.99

iFJF iFJF Window Latch Hinge Pivot for First Gen Tacoma Tundra Rear Quarter Window 1995-2004 Tundra 2000-2006 Xtracab 2pcs (Black)
Product Overview Fix those rattling, broken rear quarter windows on your first-gen Tacoma or Tundra with the iFJF Window Latch Hinge Pivot Kit. These precision-molded replacement pivots restore smooth opening and secure closing of the Xtracab rear quarter windows — a notoriously brittle factory part that snaps after years of UV exposure and use. This 2-pack includes both left and right side pivots in black. Key Features Direct Replacement: Designed to match the factory pivot dimensions and mounting points — no modifications required. 2-Pack Complete Set: Includes both left and right side pivot hinges — everything you need for both rear quarter windows. Durable Construction: Made from high-strength nylon polymer that resists UV degradation — much tougher than the brittle factory plastic. Eliminates Rattle: Locks the window securely in place — no more highway wind rattle from a loose quarter window. Easy DIY Install: Single screw removal and replacement — most owners complete both sides in under 15 minutes. Compatibility Vehicle Year Cab Type Toyota Tacoma 1995-2004 Xtracab (1st Gen) Toyota Tundra 2000-2006 Xtracab (1st Gen) Specifications Spec Detail Material High-Strength Nylon Polymer Color Black Quantity 2 Pivots (Left + Right) Mounting Single Screw (Factory Match) Installation Steps Open the rear quarter window to access the pivot screw Remove the old broken pivot (one Phillips screw) Align the new pivot and secure with the screw — do not overtighten Test window operation for smooth open/close Repeat on the opposite side Frequently Asked Questions Q: How do I know if my window latch pivot is broken?A: If your rear quarter window rattles at highway speeds, won't stay closed, or the latch feels loose — the pivot is likely cracked or broken. This is a well-known issue on first-gen Tacomas and Tundras. Q: Does this fit the Double Cab models?A: This pivot is specifically for Xtracab models with the rear quarter vent windows. Double Cab models typically have full-size rear doors and do not use this pivot. Q: Will this work for the passenger side too?A: Yes — this 2-pack includes both left (driver side) and right (passenger side) pivots. They are side-specific, so make sure to use the correct one. Q: Is this better than the OEM Toyota part?A: Our nylon polymer formulation is more UV-resistant than the factory plastic, which becomes brittle over time. Many owners find this aftermarket version lasts longer. Q: Do I need any special tools?A: Just a Phillips head screwdriver. The whole job takes about 10-15 minutes for both sides.
$19.99

iFJF iFJF Window Latch Hinge Pivot for First Gen Tacoma Tundra Rear Quarter Window 1995-2004 Tundra 2000-2006 Xtracab 2pcs(silver)
Product Overview Fix those rattling, broken rear quarter windows on your first-gen Tacoma or Tundra with the iFJF Window Latch Hinge Pivot Kit. These precision-molded replacement pivots restore smooth opening and secure closing of the Xtracab rear quarter windows — a notoriously brittle factory part that snaps after years of UV exposure and use. This 2-pack includes both left and right side pivots in silver. Key Features Direct Replacement: Designed to match the factory pivot dimensions and mounting points — no modifications required. 2-Pack Complete Set: Includes both left and right side pivot hinges — everything you need for both rear quarter windows. Durable Construction: Made from high-strength nylon polymer that resists UV degradation — much tougher than the brittle factory plastic. Eliminates Rattle: Locks the window securely in place — no more highway wind rattle from a loose quarter window. Easy DIY Install: Single screw removal and replacement — most owners complete both sides in under 15 minutes. Compatibility Vehicle Year Cab Type Toyota Tacoma 1995-2004 Xtracab (1st Gen) Toyota Tundra 2000-2006 Xtracab (1st Gen) Specifications Spec Detail Material High-Strength Nylon Polymer Color Silver Quantity 2 Pivots (Left + Right) Mounting Single Screw (Factory Match) Frequently Asked Questions Q: How do I know if my window latch pivot is broken?A: If your rear quarter window rattles at highway speeds, won't stay closed, or the latch feels loose — the pivot is likely cracked or broken. This is a well-known issue on first-gen Tacomas and Tundras. Q: Does this fit the Double Cab models?A: This pivot is specifically for Xtracab models with the rear quarter vent windows. Double Cab models typically have full-size rear doors and do not use this pivot. Q: Will this work for the passenger side too?A: Yes — this 2-pack includes both left (driver side) and right (passenger side) pivots. They are side-specific, so make sure to use the correct one. Q: Is this better than the OEM Toyota part?A: Our nylon polymer formulation is more UV-resistant than the factory plastic, which becomes brittle over time. Many owners find this aftermarket version lasts longer. Q: Do I need any special tools?A: Just a Phillips head screwdriver. The whole job takes about 10-15 minutes for both sides.
$19.99
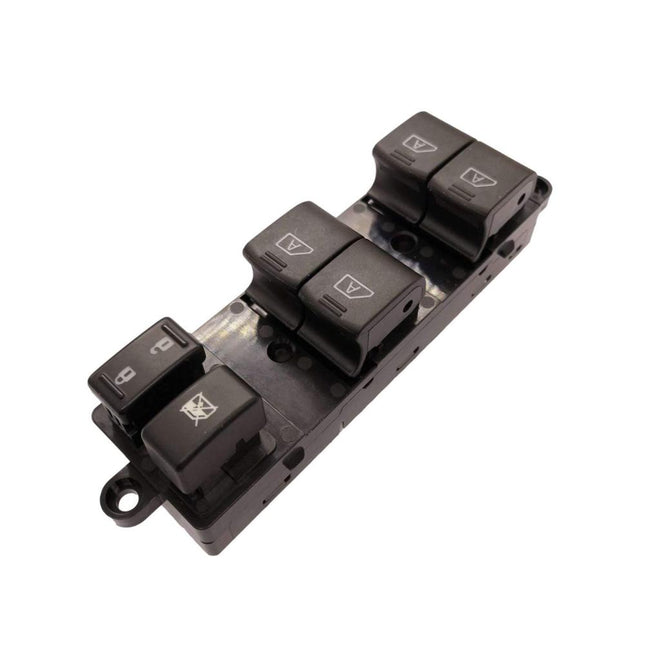
iFJF iFJF Window Master Power Regulator Switch 25401-EH100 Replacement for 2006 2007 Nissan Infiniti M35 M45
Product Overview Restore full control of your power windows with the iFJF Window Master Power Regulator Switch. This direct-fit replacement is designed for 2006-2007 Nissan and Infiniti M35/M45 models, replacing OEM part number 25401-EH100. If your driver-side window controls are unresponsive, intermittent, or stuck — this switch brings everything back to life with plug-and-play simplicity. Key Features OEM-Grade Quality: Built to match or exceed factory specifications for fit, finish, and electrical performance. Full Function Restoration: Controls all four windows, power door locks, window lock-out, and mirror adjustment from the driver's position. Plug-and-Play Install: No wiring, splicing, or programming required — unplug the old switch, plug in the new one, snap into place. Ergonomic Design: Backlit buttons with crisp tactile feedback — identical look and feel to the factory switch. Durable Construction: High-quality contacts rated for 100,000+ cycles — built to last the life of the vehicle. Compatibility Vehicle Year Part Number Nissan M35 2006-2007 25401-EH100 Nissan M45 2006-2007 25401-EH100 Infiniti M35 2006-2007 25401-EH100 Infiniti M45 2006-2007 25401-EH100 Specifications Spec Detail Part Number 25401-EH100 Functions 4 Windows, Door Locks, Window Lockout, Mirror Adjust Illumination LED Backlit Buttons Connector Factory Multi-Pin Harness Frequently Asked Questions Q: How do I know if my window switch is faulty?A: Common symptoms include: windows won't move from the master switch but work from individual door switches, intermittent operation, or no response from any switch position. If fuses and window motors test good, the master switch is the likely culprit. Q: Is this a genuine Nissan part?A: This is a high-quality aftermarket replacement manufactured to OEM specifications. It matches the fit, finish, and function of the factory switch at a fraction of the dealer price. Q: Does installation require programming?A: No — the switch is truly plug-and-play. After installation, you may need to perform the auto-up/down relearn procedure: roll each window fully down, hold for 3 seconds, then fully up, hold for 3 seconds. Q: Will this fit other Nissan models?A: This specific switch (25401-EH100) is designed for the 2006-2007 M35/M45 platform. It may not fit other Nissan/Infiniti models — verify your part number before ordering. Q: What tools do I need for installation?A: A plastic trim removal tool and a Phillips screwdriver. The door panel switch bezel pops out — the whole job takes about 15 minutes.
$75.99

iFJF iFJF Wood And Fine Carpentry Cabinet Scraper 6" x 2.5" Rectangle W3344 For Woodworking Hand Tool
Product Overview Achieve a glass-smooth finish on your woodworking projects with the iFJF 6" x 2.5" Rectangle Cabinet Scraper. This professional-grade tool is essential for fine furniture making, cabinetry, and woodworking — delivering a surface finish that no sandpaper can match. The carbon steel blade is ready to use with a properly formed burr edge that cuts instead of tears wood fibers. Key Features Professional-Grade Carbon Steel: High-carbon steel blade holds a sharp burr edge for consistent, chatter-free scraping. Rectangle Design: 6" x 2.5" size with comfortable beveled edges — ideal for flat surfaces, tabletops, and large panels. Superior Finish: Produces a surface smoother than 220-grit sandpaper — eliminates swirl marks and scratches. Versatile Use: Perfect for removing old finish, leveling joints, smoothing veneer, and final surface preparation. Reusable & Long-Lasting: Can be re-sharpened and re-burnished dozens of times — a lifetime tool with proper care. Specifications Spec Detail Model/Part W3344 Dimensions 6" x 2.5" (152mm x 63mm) Thickness 0.032" (0.8mm) Material High-Carbon Steel Edge Style Beveled, Ready for Burnishing How to Use a Cabinet Scraper Joint the Edge: File the scraper edge flat and square. Hone: Use a fine sharpening stone to polish the edge to a mirror finish. Draw the Burr: Run a burnisher along the edge at a slight angle to create a microscopic cutting hook. Scrape: Hold the scraper at 70-80° to the surface, flex slightly with thumbs, and push or pull. Re-burnish: When the scraper stops cutting cleanly, re-draw the burr — no need to fully re-sharpen each time. Frequently Asked Questions Q: What's the difference between a cabinet scraper and sandpaper?A: A cabinet scraper cuts wood fibers cleanly, leaving a polished surface. Sandpaper abrades by tearing fibers, which can leave scratches, swirl marks, and clogged pores. A properly sharpened scraper produces a smoother finish than 220+ grit sandpaper. Q: Do I need a burnisher to use this?A: Yes — you'll need a burnisher (hardened steel rod) to draw a burr on the edge. The scraper comes with a factory-ground edge that needs burnishing before first use. Q: How long does the edge last?A: The burr typically lasts 5-15 minutes of continuous use before needing to be re-burnished. The steel itself can be re-sharpened dozens of times — a lifetime tool. Q: Can I use this on hardwood?A: Absolutely — cabinet scrapers excel on hardwoods like oak, maple, cherry, and walnut. They're also excellent for figured woods (curly maple, birdseye) where sandpaper causes tear-out. Q: Is this suitable for beginners?A: Sharpening and burnishing takes practice, but it's a rewarding skill to learn. There are many excellent YouTube tutorials on cabinet scraper setup. Once mastered, you'll wonder how you ever worked without one.
$39.99

iFJF iFJF Wood Cabinet Carbon Steel Goose Neck Scraper 180mm 4.5" W3340 For Woodworking
Product Overview Master curved and contoured surfaces with the iFJF 4.5" Goose Neck Cabinet Scraper. While flat scrapers handle tabletops and panels, this goose neck profile excels on chair legs, table aprons, moldings, archways, and any curved wood surface. The carbon steel blade produces that signature glass-smooth scraper finish — even on the most challenging profiles. Key Features Goose Neck Design: Curved profile with multiple radius options on a single tool — convex and concave scraping edges for maximum versatility. Carbon Steel Blade: High-carbon steel holds a sharp burr and can be re-sharpened and burnished repeatedly. Reaches Where Flats Can't: Gets into coves, beads, curved chair legs, moldings, and turned profiles that are impossible to scrape with a straight edge. Superior Surface Finish: Produces a polished surface free of sanding scratches — ready for stain or clear coat immediately. Compact & Maneuverable: 4.5" length fits comfortably in one hand for precise control on detailed work. Specifications Spec Detail Model/Part W3340 Length 4.5" (114mm) Thickness 0.032" (0.8mm) Material High-Carbon Steel Profile Goose Neck (Multiple Radius Curves) Best Applications Chair Making: Smooth curved legs, spindles, and armrests Molding & Trim: Remove finish or smooth contoured profiles Table Aprons: Clean up curved apron edges and bead details Turned Work: Smooth lathe-turned bowls, vases, and spindles Violin/Guitar Making: Perfect for instrument arching and scroll work Frequently Asked Questions Q: What makes a goose neck scraper different from a rectangle scraper?A: The goose neck's curved profile allows you to scrape concave curves (like chair legs and moldings) and convex curves (like table edges). A rectangle scraper only works on flat or gently curved surfaces. Q: How do I sharpen a curved scraper?A: The process is similar to a flat scraper but requires a rounded burnisher for the concave sections. File the edge square, hone with a slip stone for the curves, then burnish each section. Practice makes perfect! Q: Can I use this with a scraper holder?A: Due to the curved profile, this scraper is designed for hand-held use. A holder would prevent you from accessing all the radius options built into the goose neck shape. Q: Is this suitable for removing paint and varnish?A: Yes — cabinet scrapers are excellent for stripping old finish without chemicals. The curved profile reaches moldings and details that flat scrapers miss. Q: Will this rust if not maintained?A: Carbon steel can rust if left in humid conditions. Wipe with a light coat of machine oil or paste wax after use and store in a dry place.
$33.99
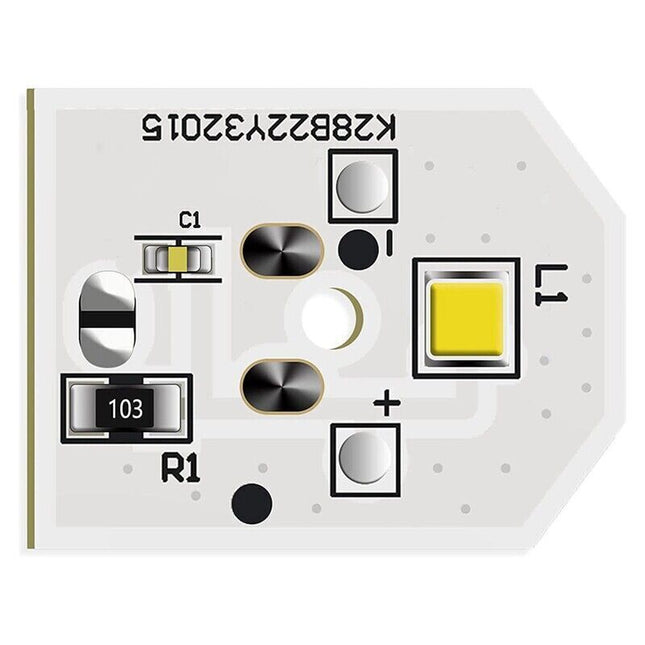
iFJF iFJF WR55X11132 Refrigerator Bulb Light For WR55X25754 WR55X26486 WR55X30602 4590213
Product Overview Brighten up your refrigerator interior with the iFJF WR55X11132 Refrigerator LED Bulb Light. This energy-efficient LED replacement fits most GE refrigerator models and replaces multiple OEM part numbers including WR55X25754, WR55X26486, WR55X30602, and 4590213. If your fridge interior is dim, flickering, or completely dark, this simple bulb swap restores full illumination in seconds. Key Features Multi-Model Compatibility: Replaces GE OEM part numbers WR55X11132, WR55X25754, WR55X26486, WR55X30602, and 4590213. LED Technology: Brighter, cooler-running, and more energy-efficient than original incandescent bulbs — lasts up to 15,000 hours. Instant On: No warm-up time — full brightness immediately when the door opens. Easy Swap: Twist-in design replaces old bulb in seconds — no tools, no wiring, no technician needed. Consistent Color: Natural white light (4000K) illuminates food clearly — find what you need without hunting. Compatibility Brand Replaces Part Numbers GE WR55X11132, WR55X25754, WR55X26486 GE WR55X30602, 4590213 Specifications Spec Detail Part Numbers WR55X11132, WR55X25754, WR55X26486, WR55X30602, 4590213 Type LED (Light Emitting Diode) Base Twist-Lock (Proprietary GE) Color Temperature 4000K Natural White Lifespan ~15,000 Hours Frequently Asked Questions Q: Will this fit my GE refrigerator model?A: This bulb fits most GE refrigerators that use the WR55X series light bulbs. It replaces WR55X11132, WR55X25754, WR55X26486, WR55X30602, and 4590213. Check your owner's manual or the part number on your existing bulb to confirm. Q: Is this brighter than the original bulb?A: Yes — this LED replacement produces brighter light while using less energy and generating less heat than the original incandescent bulb. The 4000K natural white color makes food items easier to identify. Q: How do I install this bulb?A: Simply twist the old bulb counterclockwise to remove, then insert the new bulb and twist clockwise until it locks. No tools required — it takes about 10 seconds. Q: Will an LED bulb work in a refrigerator?A: Absolutely — LEDs actually perform better than incandescent bulbs in cold environments. They're more durable, use less energy, and don't add heat to the refrigerator compartment. Q: Does this bulb work in the freezer compartment too?A: This bulb is designed for the fresh food compartment. Freezer compartments typically use a different bulb type. Verify your freezer bulb part number before ordering.
$29.99
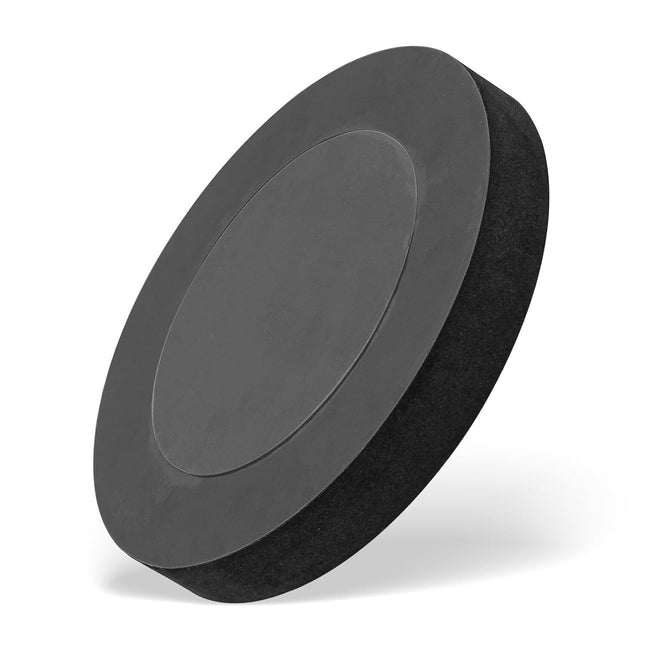
iFJF iFJF Z1210-57 Wall Hung Toilet Gasket Neoprene Gasket Kit 4" for Wall Hung Toilets
Product Overview Eliminate leaks and odors from your wall-mounted toilet with the iFJF Z1210-57 Neoprene Gasket Kit. This complete 4" gasket set replaces worn-out seals between the toilet bowl and wall carrier — the most common source of leaks in wall hung toilets. Unlike wax rings that compress and fail over time, this neoprene gasket provides a resilient, long-lasting seal that handles building movement and temperature changes. Key Features Complete Kit: Includes neoprene gasket, mounting bolts, washers, and nuts — everything needed for a complete seal replacement. Neoprene Material: Superior to traditional wax rings — won't compress, crack, or deform under pressure. Resilient seal that lasts for years. 4" Standard Size: Compatible with most wall hung toilet bowls and carriers using a 4" waste outlet. Leak-Free Guarantee: Creates a watertight, odor-proof seal between the toilet bowl and wall carrier. DIY-Friendly: Straightforward replacement — just remove the bowl, swap the old gasket, and reinstall. Compatibility Application Size Type Wall Hung Toilets 4" (100mm) Neoprene Gasket Specifications Spec Detail Part Number Z1210-57 Size 4" (100mm) Diameter Material Neoprene Rubber Kit Includes Gasket, Bolts, Washers, Nuts Application Wall Hung / Wall Mounted Toilets Installation Guide Turn off water supply and flush to empty the toilet Remove the toilet bowl from the wall carrier (2-4 mounting bolts) Remove the old gasket and clean both mating surfaces thoroughly Position the new Z1210-57 neoprene gasket on the carrier outlet Reinstall the toilet bowl, tightening mounting bolts evenly Turn water back on, flush several times, and check for leaks Frequently Asked Questions Q: Why neoprene instead of a wax ring?A: Neoprene gaskets are far more durable than wax rings. Wax compresses under weight, melts in high heat, and cracks with building movement. Neoprene maintains its seal integrity for years regardless of these conditions. Q: Will this fit my wall hung toilet?A: This 4" gasket fits most standard wall hung toilets. Measure your waste outlet diameter and the carrier connection to confirm 4" compatibility before ordering. Q: How do I know if I need to replace the gasket?A: Signs include: water pooling around the toilet base, sewer odors near the toilet, or visible water stains on the wall below the toilet. If you notice any of these, your gasket likely needs replacement. Q: Is this a difficult DIY job?A: Moderate difficulty — you'll need to remove and reinstall the toilet bowl, which is heavy (40-60 lbs). Having a helper makes the job much easier. Most DIYers complete it in 30-60 minutes. Q: Does this kit include the carrier gasket too?A: This kit is for the connection between the toilet bowl and the wall carrier. If you also need to replace the carrier-to-waste-pipe gasket (behind the wall), that's a separate part.
$27.99
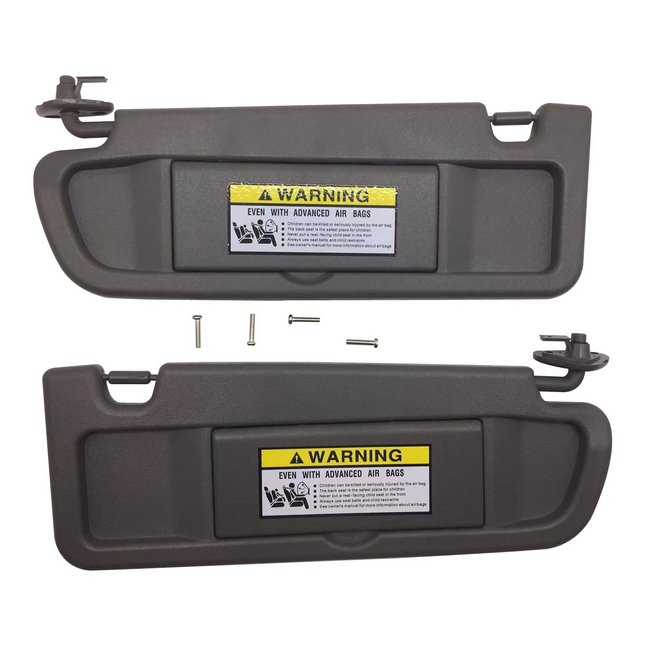
iFJF iFJF1 Pair Left and Right Side Sun Visor Assembly for Civic 2006-2011 Replaces 83280-SNA-A01ZA 83230-SNA-A01ZA (Gray)
Product Overview Replace those sagging, torn, or broken sun visors in your 8th-generation Honda Civic with the iFJF Sun Visor Assembly Pair. This complete set includes both driver (left) and passenger (right) side visors in factory-matched gray — a direct replacement for OEM part numbers 83280-SNA-A01ZA and 83230-SNA-A01ZA. No modifications, no adapters — just unbolt the old and bolt in the new. Key Features Complete Pair: Includes both left (driver) and right (passenger) sun visors — everything you need in one purchase. Factory-Matched Gray: Color-matched to the original Honda Civic interior — looks and feels like OEM. Direct Replacement: Replaces part numbers 83280-SNA-A01ZA (left) and 83230-SNA-A01ZA (right) — same mounting points, same fit. Fully Functional: Includes flip-up mirror cover, vanity mirror, and smooth pivot mechanism — all functions restored. Quick Installation: Each visor uses 2-3 Phillips screws — swap both sides in under 20 minutes. Compatibility Vehicle Year Part Numbers Honda Civic (All Trims) 2006-2011 83280-SNA-A01ZA, 83230-SNA-A01ZA Specifications Spec Detail Color Gray Quantity 2 (Driver + Passenger) Material Fabric-Wrapped Foam Core with Plastic Frame Features Vanity Mirror, Flip Cover, Pivot Adjustment Mounting 2-3 Phillips Screws per Side Frequently Asked Questions Q: How do I know if I need to replace my sun visors?A: Common signs include: visor won't stay up (sagging), fabric peeling or torn, broken mirror cover, or the pivot mechanism feels loose. A drooping visor is not just annoying — it can obstruct your view while driving. Q: Will these fit a 2012+ Civic?A: These are designed for the 8th generation Civic (2006-2011). The 9th generation (2012-2015) uses different mounting points and part numbers. Verify your vehicle's year before ordering. Q: Do these include the mounting screws?A: The visors come with the mounting bracket attached. You can reuse your existing screws — just remove them from the old visors and use them to install the new ones. Q: Is the color an exact match to the factory gray interior?A: These visors are color-matched to the Honda gray interior and will blend seamlessly. Slight variation in shade is possible depending on sun fading of your existing interior trim. Q: Are these electrically connected (for lighted mirrors)?A: These visors do not include lighted vanity mirrors — they match the standard non-illuminated visors found in most 2006-2011 Civic trims.
$79.99
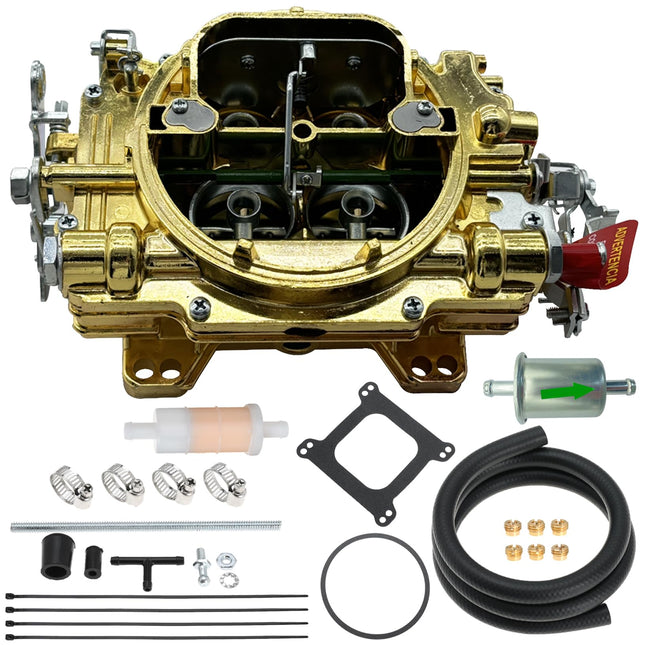
iFJF iFJF1407 4 Barrel Carburetor Replacement for 750 CFM Manual Choke Square Bore Air Valve Secondary (Golden)
Product Overview Unleash your V8's full potential with the iFJF 1407 4-Barrel Carburetor. This 750 CFM performance carburetor features a manual choke, square bore design, and mechanical secondaries — the go-to setup for street performance and weekend strip runs. The striking golden finish isn't just for looks — it's a corrosion-resistant coating that protects against ethanol-blended fuels. Whether you're building a crate motor, restoring a classic muscle car, or upgrading from a tired 2-barrel, the 1407 delivers crisp throttle response and reliable fuel delivery. Key Features 750 CFM Flow: Ideal for 350-454 cubic inch V8 engines — supports up to 500+ horsepower with the right cam and intake. Manual Choke: Simple, reliable cold-start enrichment — pull the cable, fire it up, push it in when warm. No vacuum diaphragm to fail. Square Bore Design: Compatible with most aftermarket intake manifolds (Edelbrock Performer, Weiand, Holley pattern). Mechanical Secondaries: Instant throttle response — secondaries open with your right foot, not engine vacuum. Perfect for aggressive driving. Golden Dichromate Finish: Corrosion-resistant coating protects against modern ethanol-blended fuels and looks great under the hood. Air Valve Secondary: Adjustable secondary air valve tunes the transition from primary to WOT — eliminates the bog common with vacuum secondary carbs. Recommended Applications Engine Size Cam Type Usage 350-383 CID Mild to Hot Street Street / Weekend Strip 400-454 CID Stock to Mild Street Cruiser / Towing 383-454 CID Hot Street / Race Strip / Performance Street Specifications Spec Detail Model 1407 CFM Rating 750 Barrels 4 Choke Manual Bore Type Square Bore Secondaries Mechanical with Adjustable Air Valve Finish Golden Dichromate Fuel Inlet Single (3/8" NPT) Tuning Tips Set Float Levels: Adjust to the middle of the sight glass window with the engine running — too high causes rich idle, too low causes lean stumble. Idle Mixture: Start at 1.5 turns out. Adjust for highest vacuum reading, then back each screw out 1/8 turn for a slightly rich idle — smoother transition off-idle. Secondary Air Valve: Adjust the spring tension to open secondaries without bogging. Too loose = bog; too tight = secondaries never open. Start with 3/4 turn of preload. Fuel Pressure: Keep fuel pressure between 5-7 psi. Above 7 psi can overwhelm the needle and seat, causing flooding. Frequently Asked Questions Q: Will this carburetor fit my intake manifold?A: The 1407 has a square bore bolt pattern compatible with most aftermarket 4-barrel intake manifolds (Edelbrock, Weiand, Holley-square-bore). It will NOT fit a spread-bore manifold (Quadrajet pattern) without an adapter plate. Q: Is 750 CFM too much for my 350?A: A 750 CFM carb works well on a 350 with a performance cam, headers, and intake. For a bone-stock 350 with stock heads and cam, a 600-650 CFM carb would be better matched. The 1407's air valve secondaries help prevent over-carburetion by only flowing what the engine demands. Q: How is the manual choke set up?A: You'll need a manual choke cable kit (sold separately) routed to the cabin. Mount the cable under the dash, connect it to the carb's choke lever, and adjust for full open/close travel. Many hot-rodders prefer manual chokes for their simplicity and reliability. Q: Does this carb support a kickdown linkage?A: Yes — the throttle lever includes provisions for GM TH350/TH400, Ford C4/C6, and Chrysler 727 kickdown linkages. An aftermarket bracket may be needed for some applications. Q: Is this ready to run out of the box?A: The 1407 comes pre-calibrated for a typical performance V8. You'll need to set the idle speed, idle mixture, and float levels. The secondary air valve may need adjustment based on your specific engine combination.
$299.99

iFJF Ignition Coil for Homelite Super XL XL12 SXL Chainsaw — 94605 A94605S Replacement
Product Overview The iFJF Ignition Coil is a direct replacement for Homelite Super XL, XL12, and SXL chainsaw models. Engineered to deliver a strong, consistent spark for reliable starting and smooth operation. Replaces OEM part numbers 94605 and A94605S. Compatible with both Big Red and Big Blue Homelite variants. Key Features Strong, Consistent Spark: High-output coil design ensures reliable ignition across the full RPM range. Direct OEM Replacement: Fits Homelite Super XL, XL12, SXL, Big Red, and Big Blue models without modification. Durable Construction: High-temperature epoxy encapsulation protects against vibration, moisture, and heat. Pre-Gapped: Factory-set air gap for quick, hassle-free installation. Restores Hard-Starting Engines: A weak or failing coil is the #1 cause of no-spark conditions on older chainsaws. Compatibility Brand Model/Part Years/Notes Homelite Super XL All variants Homelite XL12 All variants Homelite SXL All variants Homelite Big Red All variants Homelite Big Blue All variants Technical Specifications Specification Value Part Number 94605 / A94605S (Replacement) Type Flywheel Magneto Ignition Coil Application Homelite 2-Stroke Chainsaw Mounting 2-Bolt Flange Construction Epoxy Encapsulated Spark Output High Energy Why Choose iFJF? Breathe New Life Into Old Saws: Homelite Super XL and XL12 saws are legendary — keep yours running with a fresh coil. Simple Diagnosis: No spark? Try a new coil first. It's the most common ignition failure point on these vintage saws. Same-Day Shipping: Get your saw back in the wood quickly. 30-Day Returns: If this coil doesn't fix your no-spark issue, return it for a full refund. Installation Remove the chainsaw's recoil starter cover and flywheel shroud. Disconnect the kill switch wire from the old coil. Remove the two mounting bolts and extract the old coil. Mount the new iFJF coil — air gap is pre-set; verify with a business card if needed. Reconnect the kill switch wire, reinstall covers, and test for spark. Frequently Asked Questions Q: How do I test if my coil is bad?A: Remove the spark plug, reconnect it to the plug wire, ground the plug body against the cylinder, and pull the starter. No visible blue spark = bad coil (test with a known-good plug first).Q: Will this fit my Super XL Auto?A: Yes. The Super XL, XL12, SXL, Super XL Auto, and all Big Red/Blue variants use the same ignition coil design.Q: Do I need to set the air gap?A: The coil comes pre-gapped. We recommend verifying with a standard business card (approx. 0.010-0.014 inch) between the coil and flywheel magnets.Q: Is this OEM or aftermarket?A: This is a high-quality aftermarket replacement manufactured to OEM specifications. It replaces 94605 and A94605S. Related Products Carburetor for BS 550EX 625EX 675EX Engine Related Blog Posts How to Tune an Autolite 1101 Carburetor
$49.99
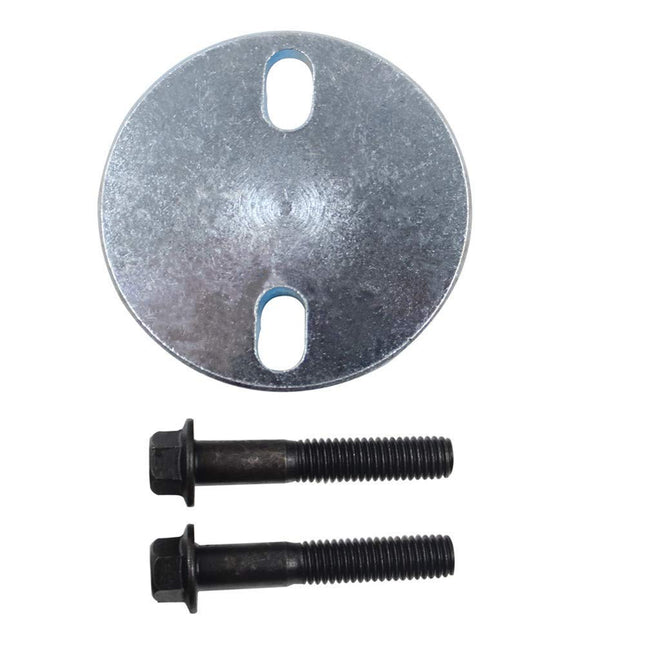
iFJF Injection Pump Gear Puller for 1989-2012 5.9L & 6.7L Cummins — VE P7100 VP44 CP3
Product Overview The iFJF Injection Pump Gear Puller is a professional-grade tool designed specifically for removing the injection pump drive gear on 1989-2012 Cummins 5.9L and 6.7L diesel engines. Compatible with VE rotary pumps, P7100 inline pumps, VP44 electronic pumps, and CP3 common-rail pumps. Precision-machined for a secure fit that prevents gear damage during removal. Key Features Multi-Pump Compatibility: Works on VE, P7100, VP44, and CP3 injection pumps — one tool covers over 20 years of Cummins engines. Precision-Machined Jaws: CNC-machined from heat-treated alloy steel for a perfect grip on the pump gear without slipping or marring. Heavy-Duty Forcing Screw: High-tensile center screw with thrust bearing for smooth, controlled gear extraction. Prevents Gear Damage: Proper gear removal is critical — a damaged gear can cost $200+ to replace. Our puller grips securely and evenly. Professional Grade: Built for shop use. Heat-treated finish resists corrosion and wear. Compatibility Brand Model/Part Years/Notes Dodge Ram 2500/3500 5.9L 1989-2007 (VE, P7100, VP44) Dodge Ram 2500/3500 6.7L 2007.5-2012 (CP3) Cummins 5.9L 12V 1989-1998 (VE, P7100) Cummins 5.9L 24V 1998.5-2007 (VP44, CP3) Cummins 6.7L 24V 2007.5-2012 (CP3) Technical Specifications Specification Value Application Injection Pump Drive Gear Removal Compatible Pumps VE, P7100, VP44, CP3 Compatible Engines 5.9L 12V/24V, 6.7L 24V Cummins Year Range 1989-2012 Material Heat-Treated Alloy Steel Finish Black Oxide / Corrosion Resistant Why Choose iFJF? Shop-Ready Quality: Built to withstand daily professional use. Saves Time and Money: One puller for four different pump types — no need to buy separate tools. Prevents Costly Mistakes: Using the wrong puller can damage the gear or pump shaft. Our tool is engineered for exact fit. 1-Year Warranty: Covers manufacturing defects. Usage Tips Remove the injection pump access cover and any interfering components. Position the puller jaws securely around the pump drive gear. Tighten the forcing screw gradually — do not hammer or use an impact gun. Apply steady pressure until the gear releases from the tapered shaft. Always replace the gear retaining nut and washer upon reassembly. Frequently Asked Questions Q: Will this work on my 2006 5.9L Cummins?A: Yes — the 2006 model year uses a CP3 pump on the common-rail 5.9L. This puller works with all 2003-2007 5.9L common-rail engines.Q: Do I need to remove the radiator?A: On most Ram trucks, removing the fan shroud and radiator provides the best access. Some technicians can do it with the radiator in place by working carefully.Q: Can I use an impact gun with this puller?A: No. Use hand tools only. Impact guns can damage the forcing screw threads and bearings. Apply steady, even pressure by hand.Q: Is this a one-time-use tool?A: Absolutely not. This is a professional-grade tool designed for repeated shop use. With proper care, it will last for years.Q: How is this different from a generic gear puller?A: Generic 2 or 3-jaw pullers don't have the correct jaw profile for injection pump gears. They can slip and damage the gear teeth. Our puller is purpose-designed for Cummins pump gears. Related Products HPOP Quick Disconnect Tool for Ford 6.0L 7.3L Powerstroke LB7 Injector Sleeve Cup for Duramax 6.6L Related Blog Posts Best Water Separator Fuel Filter Guide How To Perform A Cooling System Flush On Your Diesel Engine L5P Duramax: Downpipe Install + EGR Block-Off
$25.99
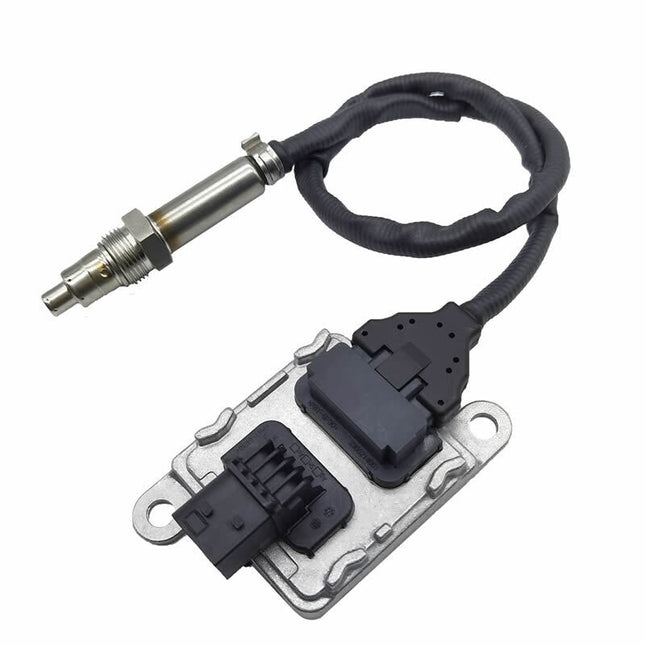
iFJF Inlet NOx Sensor for Detroit DD13 DD15 DD16 Freightliner — A0101532228 5WK97338A
Product Overview The iFJF Inlet NOx Sensor is a direct OEM replacement for Detroit DD13, DD15, and DD16 diesel engines used in Freightliner, Western Star, and other heavy-duty trucks. This upstream (inlet) nitrogen oxide sensor provides critical emissions data to the engine ECU for SCR system optimization. Pre-calibrated and ready to install. Key Features OEM-Grade Sensing Element: Precision ceramic sensing element delivers accurate NOx readings across the full operating temperature range. Pre-Calibrated: No dealer programming required — plug in and the ECU auto-recognizes the sensor. Direct Fit: Identical connector, thread pitch, and probe length as OEM sensors A0101532228 and 5WK97338A. Durable Construction: Stainless steel probe body with high-temperature cable rated for extreme exhaust environment conditions. Restores SCR Efficiency: A failing NOx sensor causes poor DEF dosing, reduced fuel economy, and potential derate conditions. Compatibility Brand Model/Part Years/Notes Detroit DD13 All model years Detroit DD15 All model years Detroit DD16 All model years Freightliner Cascadia With DD13/DD15/DD16 Western Star 4900, 5700XE With DD13/DD15/DD16 Technical Specifications Specification Value Part Number A0101532228 / 5WK97338A (Replacement) Sensor Type Upstream / Inlet NOx Sensor Function Measures NOx concentration pre-SCR catalyst Connector Type OEM Match, Plug-and-Play Probe Material Stainless Steel with Ceramic Element Calibration Factory Pre-Calibrated Includes Sensor + Anti-Seize Compound Why Choose iFJF? Save 50-70% vs Dealer: OEM NOx sensors from the dealer can cost $400-800. Our direct replacement delivers identical performance at a fraction of the price. Avoid Derate: A bad NOx sensor triggers Check Engine lights and can put your truck into limp mode. Get back on the road fast. Same-Day Shipping: In stock in US warehouses — no waiting for backordered dealer parts. 1-Year Warranty: Full replacement warranty against manufacturing defects. Installation Locate the inlet NOx sensor on the exhaust system before the SCR catalyst. Disconnect the electrical connector by pressing the release tab. Using a 22mm oxygen sensor socket, unscrew the old sensor. Apply the included anti-seize compound to the new sensor threads (avoid the probe tip). Thread the new sensor in by hand, then torque to 35-40 ft-lbs. Reconnect the electrical connector until it clicks. Start engine and verify no MIL. Frequently Asked Questions Q: What's the difference between inlet and outlet NOx sensors?A: The inlet (upstream) sensor measures NOx entering the SCR catalyst. The outlet (downstream) sensor measures NOx after treatment. They are NOT interchangeable — this listing is for the INLET sensor only.Q: Do I need to reprogram after replacing the sensor?A: No. Our sensors are pre-calibrated and the Detroit ECU will auto-detect the new sensor. If a fault persists, you may need to clear the code with a diagnostic scanner.Q: What are symptoms of a bad NOx sensor?A: Check Engine Light with NOx-related codes, poor fuel economy, frequent DPF regens, DEF dosing issues, or the truck entering derate (limp mode).Q: Is this sensor the same as the OEM Continental/VDO unit?A: Our sensor is manufactured to the same specifications and performance standards as the OEM Continental 5WK97338A sensor. Same ceramic element technology.Q: Will this fit my 2018 Cascadia with DD15?A: Yes. All Freightliner Cascadia models with DD13, DD15, or DD16 engines use this inlet NOx sensor. Related Products Inlet NOx Sensor for Ram 2500-5500 6.7L Cummins Related Blog Posts L5P Duramax: Downpipe Install + EGR Block-Off Cummins ISX Crankcase Breather Filter Guide
$197.99
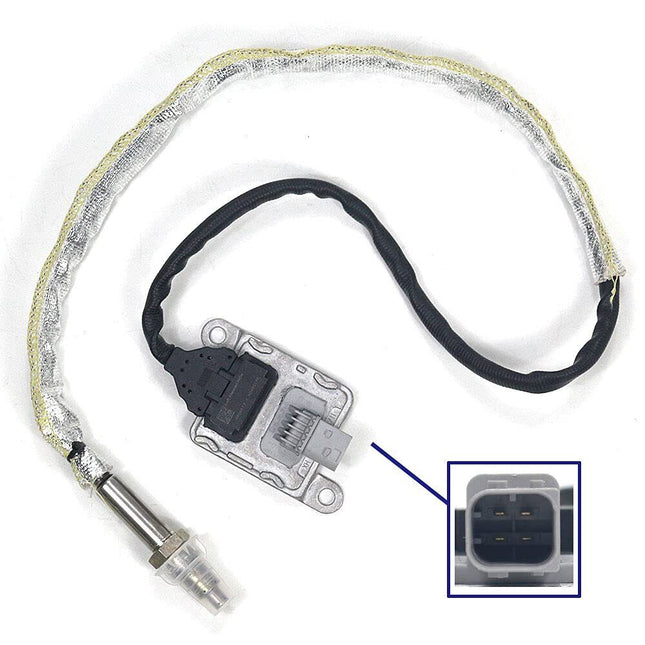
iFJF Inlet Upstream NOx Sensor for Ram 2500 3500 4500 5500 6.7L Cummins 2013-2017
Product Overview The iFJF Inlet Upstream NOx Sensor is a direct OEM replacement for 2013-2017 Ram 2500, 3500, 4500, and 5500 trucks equipped with the 6.7L Cummins turbo diesel engine. This sensor measures nitrogen oxide levels entering the SCR catalyst — critical data for proper DEF injection and emissions compliance. Key Features Pre-Calibrated, No Programming: Install and drive — the Cummins ECU automatically recognizes and calibrates the new sensor. OEM-Grade Sensing Technology: Advanced ceramic planar sensing element for accurate, fast-responding NOx measurement. Stainless Steel Construction: Corrosion-resistant probe body and high-temp cable withstand extreme diesel exhaust conditions. Exact Fit: Matches OEM connector, thread size, and probe depth — no adapters or modifications needed. Prevents Derate: A failed NOx sensor can trigger limp mode and costly downtime. Replace it before it strands you. Compatibility Brand Model/Part Years/Notes Ram 2500 6.7L Cummins 2013-2017 Ram 3500 6.7L Cummins 2013-2017 Ram 4500 6.7L Cummins 2013-2017 Ram 5500 6.7L Cummins 2013-2017 Technical Specifications Specification Value Sensor Type Upstream / Inlet NOx Sensor Engine 6.7L Cummins Turbo Diesel Year Range 2013-2017 Vehicle Ram 2500, 3500, 4500, 5500 Calibration Factory Pre-Calibrated Installation Plug-and-Play, No Programming Includes Sensor + Anti-Seize Compound Why Choose iFJF? Massive Savings vs Dealer: Dealer NOx sensors cost $350-600+. Our direct replacement offers the same performance at a fraction of the price. Keep Your Truck Running: Avoid derate and limp mode — a working NOx sensor is essential for SCR system function. Same-Day US Shipping: In stock and ready to ship — no backorders, no waiting. 1-Year Warranty: Replacement guarantee against defects. Installation Steps Locate the inlet NOx sensor — typically in the exhaust downpipe before the SCR catalyst. Disconnect the electrical connector. Use a 22mm O2 sensor socket to remove the old sensor. Apply anti-seize to the new sensor threads (keep compound off the probe tip). Thread in by hand, then torque to 35-40 ft-lbs. Reconnect the connector until it clicks. Clear any stored codes with a scan tool. Frequently Asked Questions Q: Is this the upstream or downstream sensor?A: This is the UPSTREAM (inlet) sensor — located before the SCR catalyst. It is NOT the downstream/outlet sensor. Verify your fault code identifies which sensor needs replacement.Q: Will this clear my check engine light immediately?A: The sensor itself won't clear stored codes. After installation, use an OBDII scanner to clear the codes. If the sensor was the root cause, the light will stay off.Q: Do I need a dealer to install this?A: No. Installation takes 15-30 minutes with basic tools. No programming or calibration required — the ECU handles it automatically.Q: What if the code comes back?A: Check for exhaust leaks near the sensor, damaged wiring, or a failing SCR catalyst. A NOx sensor code doesn't always mean a bad sensor. Related Products Inlet NOx Sensor for Detroit DD13 DD15 Freightliner Related Blog Posts How To Perform A Cooling System Flush On Your Diesel Engine Best Water Separator Fuel Filter Guide
$197.99
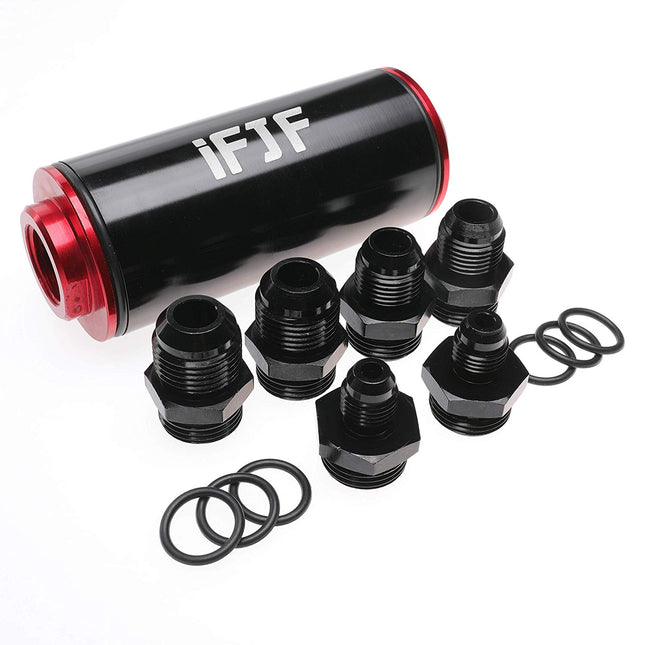
iFJF Inline Fuel Filter for Universal Mount Between Fuel Tank and Pump 50mm
Product Overview The iFJF 50mm Inline Fuel Filter is a universal pre-pump solution engineered for high-flow fuel systems. Featuring a 100-micron stainless steel filter element housed in a durable 50mm body with AN6, AN8, and AN10 compatibility, this filter protects your fuel pump and injectors from debris and contaminants. Ideal for EFI conversions, racing applications, diesel fuel systems, and custom builds where reliable pre-pump filtration is critical. Key Features 100-Micron Stainless Steel Mesh: Captures harmful debris before it reaches your fuel pump while maintaining maximum flow rate — perfect for high-horsepower and high-flow applications. Universal AN Fitment: Compatible with AN6, AN8, and AN10 fuel lines without adapters — fits most aftermarket fuel systems. 50mm Compact Body: High-capacity filtration in a space-efficient design that fits tight engine bays and custom fuel cell installations. Pre-Pump Protection: Installed between tank and pump to extend pump life by preventing debris ingestion from the fuel tank. Multi-Fuel Compatible: Works with gasoline, diesel, E85, methanol, and race fuels — stainless steel element resists corrosion. Cleanable & Reusable: Stainless steel mesh can be removed, cleaned, and reinstalled for extended service life. Compatibility Specification Details AN Fitting Size AN6, AN8, AN10 Micron Rating 100 Micron (Pre-Pump) Body Diameter 50mm Fuel Types Gasoline, Diesel, E85, Methanol, Race Fuel Installation Position Between Fuel Tank and Fuel Pump Element Type Stainless Steel Mesh (Cleanable / Reusable) Flow Direction In-Line (Tank → Filter → Pump) Installation Tips Mount the filter BEFORE the fuel pump (between tank and pump) for pre-pump protection. Use PTFE paste thread sealant on AN fittings — avoid Teflon tape which can shred and clog injectors. Ensure adequate clearance for filter element removal during routine maintenance. Periodically inspect and clean the stainless steel element every 5,000 miles or annually for optimal flow. Frequently Asked Questions Q: Is 100 micron enough filtration?A: Yes — 100 micron is ideal for pre-pump filtration. It catches debris that could damage your pump while maintaining unrestricted flow. For post-pump (pre-injector) filtration, use a 10-40 micron filter downstream. Q: Will this filter work with E85 or methanol?A: Yes. The stainless steel element and anodized housing are fully compatible with ethanol, methanol, and all common race fuels. Q: Can I use this as my only fuel filter?A: We recommend using this as a pre-pump filter paired with a finer post-pump filter (10-40 micron) for complete fuel system protection. Q: How do I clean the filter element?A: Remove the filter housing, extract the stainless steel mesh element, and clean with brake cleaner or compressed air. Reinstall and check for leaks before driving. Q: What AN fittings do I need?A: This filter accepts AN6, AN8, or AN10 male flare fittings. Choose the size matching your fuel line diameter. Q: Does this filter come with fittings?A: Fittings are sold separately. The filter body has female AN ports — you'll need male AN flare fittings to match your fuel line size. Related Products 58mm Inline Fuel Filter — Larger Capacity Version R18189-30 Spin-On Fuel Filter 30 Micron
$69.99
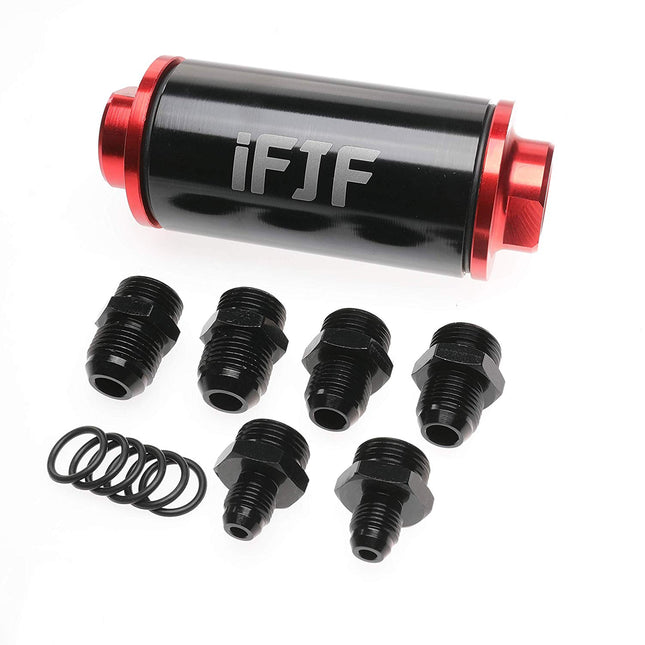
iFJF Inline Fuel Filter for Universal Mount Between Fuel Tank and Pump 58mm
Product Overview The iFJF 58mm Inline Fuel Filter is a universal pre-pump solution engineered for high-flow fuel systems. Featuring a 100-micron stainless steel filter element housed in a durable 58mm body with AN6, AN8, and AN10 compatibility, this filter protects your fuel pump and injectors from debris and contaminants. Ideal for EFI conversions, racing applications, diesel fuel systems, and custom builds where reliable pre-pump filtration is critical. Key Features 100-Micron Stainless Steel Mesh: Captures harmful debris before it reaches your fuel pump while maintaining maximum flow rate — perfect for high-horsepower and high-flow applications. Universal AN Fitment: Compatible with AN6, AN8, and AN10 fuel lines without adapters — fits most aftermarket fuel systems. 58mm High-Capacity Body: High-capacity filtration in a increased capacity design — 16% more filtration area than standard 50mm filters and custom fuel cell installations. Pre-Pump Protection: Installed between tank and pump to extend pump life by preventing debris ingestion from the fuel tank. Multi-Fuel Compatible: Works with gasoline, diesel, E85, methanol, and race fuels — stainless steel element resists corrosion. Cleanable & Reusable: Stainless steel mesh can be removed, cleaned, and reinstalled for extended service life. Compatibility Specification Details AN Fitting Size AN6, AN8, AN10 Micron Rating 100 Micron (Pre-Pump) Body Diameter 58mm Fuel Types Gasoline, Diesel, E85, Methanol, Race Fuel Installation Position Between Fuel Tank and Fuel Pump Element Type Stainless Steel Mesh (Cleanable / Reusable) Flow Direction In-Line (Tank → Filter → Pump) Installation Tips Mount the filter BEFORE the fuel pump (between tank and pump) for pre-pump protection. Use PTFE paste thread sealant on AN fittings — avoid Teflon tape which can shred and clog injectors. Ensure adequate clearance for filter element removal during routine maintenance. Periodically inspect and clean the stainless steel element every 5,000 miles or annually for optimal flow. Frequently Asked Questions Q: Is 100 micron enough filtration?A: Yes — 100 micron is ideal for pre-pump filtration. It catches debris that could damage your pump while maintaining unrestricted flow. For post-pump (pre-injector) filtration, use a 10-40 micron filter downstream. Q: Will this filter work with E85 or methanol?A: Yes. The stainless steel element and anodized housing are fully compatible with ethanol, methanol, and all common race fuels. Q: Can I use this as my only fuel filter?A: We recommend using this as a pre-pump filter paired with a finer post-pump filter (10-40 micron) for complete fuel system protection. Q: How do I clean the filter element?A: Remove the filter housing, extract the stainless steel mesh element, and clean with brake cleaner or compressed air. Reinstall and check for leaks before driving. Q: What AN fittings do I need?A: This filter accepts AN6, AN8, or AN10 male flare fittings. Choose the size matching your fuel line diameter. Q: Does this filter come with fittings?A: Fittings are sold separately. The filter body has female AN ports — you'll need male AN flare fittings to match your fuel line size. Related Products 58mm Inline Fuel Filter — Compact 50mm Version R18189-30 Spin-On Fuel Filter 30 Micron
$79.99
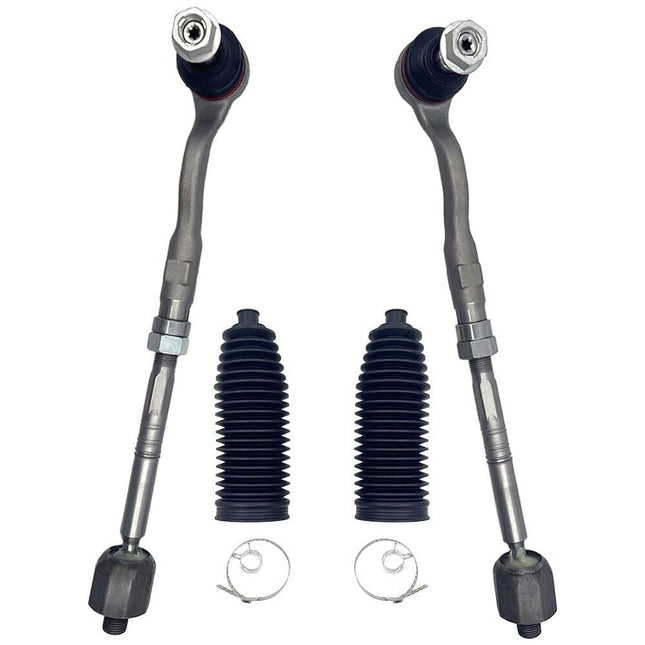
iFJF Inner & Outer Tie Rods for 2011-2017 BMW X3 / 2015-2018 X4 — 4-Piece Set
Product Overview The iFJF Inner & Outer Tie Rod Set for 2011-2017 (X3), 2015-2018 (X4) delivers a complete steering linkage refresh for your BMW. This 4-piece set includes both inner tie rods and both outer tie rod ends — everything needed to restore precise, responsive steering and eliminate the play and vibration caused by worn tie rods. Each tie rod is manufactured to strict OE specifications using forged alloy steel and features precision-rolled threads for smooth adjustment during alignment. The outer tie rod ends include pre-greased, sealed ball joints with dust boots for long service life. Sold as a complete 4-piece set (left inner + right inner + left outer + right outer). Key Features Complete 4-Piece Set: Includes both inner tie rods and both outer tie rod ends — no need to order multiple part numbers. Forged Alloy Steel Construction: Heat-treated forged steel bodies with corrosion-resistant coating. Engineered to handle the precise steering demands of BMW's suspension geometry. Precision-Rolled Threads: Smooth, accurate threads ensure trouble-free installation and make alignment adjustments precise and repeatable. Sealed Ball Joint Design: Maintenance-free sealed ball joints with integrated dust boots keep out road grit, water, and salt for extended service life. OE-Spec Geometry: Reverse-engineered from OEM dimensions to guarantee exact fitment — toe adjustment range matches factory specifications perfectly. Compatibility Chart Year Make Model Platform Position 2011-2017 BMW X3 F25 Front Inner & Outer (Complete Set) 2015-2018 BMW X4 F26 Front Inner & Outer (Complete Set) Specifications Specification Detail Material Forged Alloy Steel with Anti-Corrosion Coating Thread Type Precision-Rolled Metric Threads Ball Joint Type Sealed, Pre-Greased, Maintenance-Free Quantity 4 Pieces (2 Inner + 2 Outer Tie Rods) Installation Direct Bolt-On Replacement Warranty 1-Year Limited Warranty Why Choose iFJF? Complete Steering Refresh: Inner and outer tie rods in one box — replace everything at once and restore like-new steering feel. BMW-Spec Engineering: Our tie rods are designed specifically for BMW's demanding suspension geometry. No "universal" compromises. No Core Charge, No Hassle: Unlike dealership parts, our tie rods are new — no core returns, no rebuilt components. Fraction of Dealer Cost: Get OE-quality steering components without the dealership markup. Frequently Asked Questions Q: Will this fit my 2011-2017 BMW X3?A: Yes. This 4-piece tie rod set fits 2011-2017 BMW X3 (F25) and 2015-2018 BMW X4 (F26) models. Both inner and outer tie rods are included for both sides. Q: Do I need an alignment after replacing tie rods?A: Yes — tie rod replacement directly affects toe alignment. A professional alignment is REQUIRED after installation. Driving without alignment will cause rapid and severe tire wear. Q: What symptoms indicate worn tie rods?A: Common signs include: loose or wandering steering, uneven tire wear (feathering or scalloping), clunking noises when turning, vibration in the steering wheel, and the steering wheel not returning to center smoothly after turns. Q: Can I install these myself?A: Tie rod replacement on BMWs requires moderate mechanical skill. You'll need basic hand tools, a tie rod separator tool, and a torque wrench. The inner tie rods may require a special inner tie rod tool for removal. Professional installation is recommended if you're unfamiliar with BMW steering systems. Q: How do I know if I need inner, outer, or both?A: If one tie rod end is worn, it's best practice to replace all four (both inner and outer on both sides) at the same time. Steering components typically wear at similar rates, and replacing only one side can lead to alignment issues and uneven wear on the new part. Q: Are these compatible with the X3 M Sport or X4 M40i?A: Yes, these tie rods fit all X3 F25 and X4 F26 variants, including M Sport, xLine, and M40i trims. The steering rack and tie rod design is consistent across the platform. Q: What's the difference between inner and outer tie rods?A: Inner tie rods connect the steering rack to the outer tie rod and are located inside the steering boot. Outer tie rod ends connect to the steering knuckle and include the ball joint that allows suspension articulation. Both are included in this set for complete steering system renewal.
$74.88
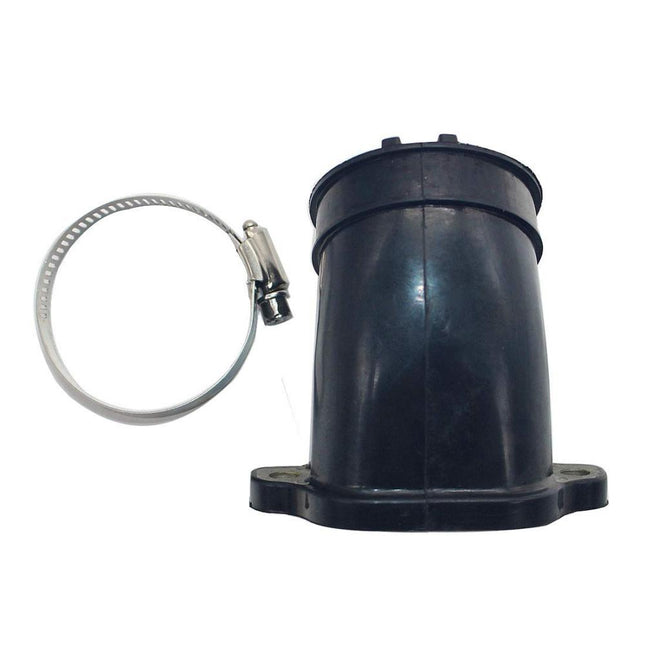
iFJF Intake Manifold Boot for 2004-2009 Polaris Ranger Sportsman 700 — 1253527 Throttle Body Adapter
Intake Manifold Boot for 2004-2009 Polaris Ranger & Sportsman 700 Restore your Polaris 700's performance with this OEM-spec intake manifold boot from iFJF Direct. Designed as a direct replacement for Polaris part number 1253527, this throttle body adapter boot seals the connection between your throttle body and intake manifold, preventing vacuum leaks that cause rough running, stalling, and power loss. Key Features Direct OEM Replacement: Replaces Polaris part number 1253527 with exact dimensions and mounting points. Crosses to R09WH68, R07RF68, R08WH68, A07MH68, A08TN68, and more. OEM-Spec Rubber Compound: Manufactured from heat-resistant, flexible rubber that withstands engine bay temperatures, vibration, and repeated throttle body movement without cracking. Prevents Vacuum Leaks: Cracked or hardened intake boots are a common cause of lean running conditions, rough idle, and hard starting on Polaris 700 engines. This fresh boot restores proper air-fuel mixture. Perfect Fit: Precision-molded to match the throttle body and intake manifold flanges on 2004-2009 Ranger 700 and Sportsman 700 models. Restores Engine Performance: Eliminate unmetered air entering the intake and restore crisp throttle response and reliable idle. Compatibility Make Model Years Engine Polaris Ranger 700 4x4 2004-2009 700cc EFI/Carb Polaris Sportsman 700 4x4 2004-2009 700cc EFI/Carb Specifications Specification Value Part Number 1253527 Material Heat-resistant rubber Application Throttle body to intake manifold Cross References R09WH68, R07RF68, R08WH68, A07MH68, A08TN68, R08RF68, R06RF68, A04CH68, R06RD68, A05MH68, A06MH68 Why Choose iFJF Direct? Our intake boots are molded from premium rubber compounds that resist the heat cycling and flexing that cause OEM boots to crack over time. Every boot is inspected for proper fit and material integrity. Satisfaction guaranteed. Frequently Asked Questions Q: What models does this intake boot fit?A: This intake manifold boot fits 2004-2009 Polaris Ranger 700 4x4 and Sportsman 700 4x4 models. It replaces OEM part number 1253527 and crosses to part numbers R09WH68, R07RF68, R08WH68, and others.Q: What are the symptoms of a bad intake boot?A: Cracked or torn intake boots cause vacuum leaks that lead to rough idle, stalling, hard starting, loss of power, and lean-running conditions. If your Polaris 700 is running poorly, inspect the intake boot for cracks.Q: Is this made of rubber or silicone?A: This is an OEM-spec rubber intake boot designed to match the flexibility and durability of the original Polaris part. It withstands engine heat, vibration, and flexing during throttle operation.Q: Do I need to replace gaskets too?A: We recommend replacing the intake gaskets when installing a new boot. Old gaskets can compress and fail to seal properly with the new boot, potentially causing vacuum leaks.Q: How difficult is installation?A: Installation is moderate — the throttle body, air box, and intake components must be removed to access the boot. Basic hand tools and 1-2 hours of time. A service manual is recommended. Order today and get your Polaris 700 running right again. Free shipping on orders $50+.
$45.00
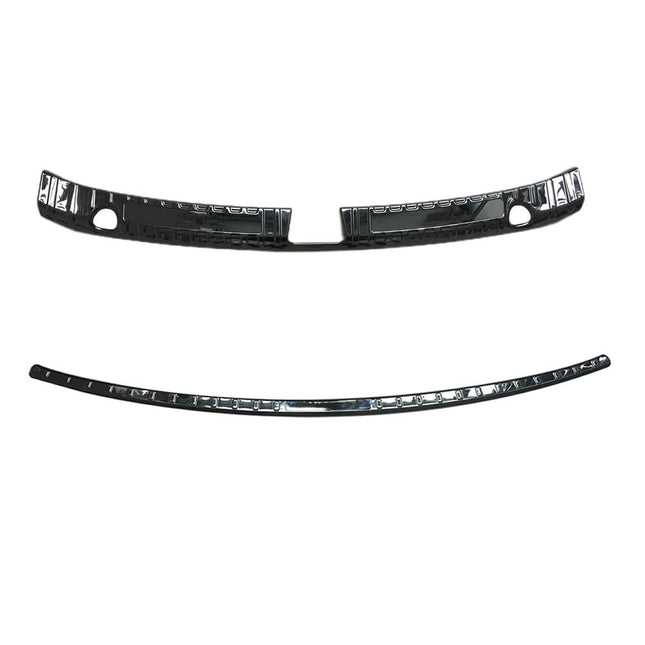
iFJF Interior & Exterior Rear Trunk Sill Plate for Tesla Model Y 2019-2024 — Stainless Steel
Product Overview Protect your Tesla Model Y's rear trunk sill from scratches, scuffs, and cargo damage with the iFJF Stainless Steel Trunk Sill Plate set. This 2-piece kit covers both the interior and exterior sill areas — the most vulnerable contact points when loading groceries, luggage, sports gear, or pets. Precision-cut for a perfect OEM+ fit. Key Features 2-Piece Complete Protection: Includes both interior and exterior sill plates — covers the full loading area threshold. 304 Stainless Steel: Premium brushed stainless steel with black trim finish — resists scratches, rust, and UV fading. Precision Laser-Cut: CNC laser-cut to follow the exact contours of the Model Y trunk sill. No gaps, no overhang. Peel-and-Stick Install: Pre-applied 3M automotive-grade adhesive backing. Clean the surface, peel, align, and press — done in 5 minutes. OEM+ Aesthetic: Black finish with stainless steel accent seamlessly matches Model Y's premium interior design language. Compatibility Brand Model/Part Years/Notes Tesla Model Y 2019-2024 All Trims Tesla Model Y Long Range / Performance / Standard Tesla Model Y 5-Seat Configuration Technical Specifications Specification Value Material 304 Brushed Stainless Steel Finish Black with Stainless Accent Pieces 2 (Interior + Exterior) Adhesive 3M Automotive-Grade VHB Installation Peel-and-Stick, No Drilling Fitment Precision Laser-Cut for Model Y Why Choose iFJF? Prevent Permanent Damage: Once the trunk sill paint is scratched through to bare metal, rust can start. Protect it before it's too late. Maintain Resale Value: A clean, protected trunk area impresses buyers and preserves your Model Y's value. 5-Minute Install: No tools, no drilling, no permanent modification. Just clean, peel, and stick. Designed for Model Y: Not a universal trim piece — laser-cut specifically for Model Y trunk contours. Installation Thoroughly clean the trunk sill area with isopropyl alcohol. Surface must be completely free of dirt, wax, and oils. Test-fit both plates before removing the adhesive backing. Note alignment markers. Peel a corner of the backing and align the plate carefully — the adhesive bonds instantly. Press firmly along the entire surface, applying even pressure for 60 seconds. Avoid washing the car or exposing to water for 24 hours to allow full adhesive cure. Frequently Asked Questions Q: Will this fit a 2023 Model Y?A: Yes. This sill plate set fits all Model Y model years from 2019 through 2024, including 2023 models. The trunk sill dimensions have not changed.Q: Does this work with the 7-seat configuration?A: This kit is designed for the 5-seat Model Y. The 7-seat third row changes the trunk sill profile slightly and may not provide a perfect fit.Q: Will the adhesive damage my paint when removed?A: 3M VHB automotive adhesive is designed for permanent exterior use. If you ever need to remove it, use a heat gun or hair dryer to soften the adhesive, then dental floss to slice through. Any residue cleans up with adhesive remover.Q: Is this real stainless steel or plastic?A: Real 304-grade brushed stainless steel — not plastic or chrome-plated ABS. It's durable, rust-proof, and has a premium weighty feel.Q: Does the black finish scratch easily?A: The brushed finish naturally hides minor scratches. For severe abuse, the underlying stainless steel won't rust even if the black coating is compromised. Related Products Aluminum Trunk Grocery Bag Hook for Model 3 Center Console Mats for Model 3 7PC Related Blog Posts Golf Cart Wheel Covers Installation Guide
$69.99

iFJF Interior Door Handle Driver Side for Chevy HHR 2006-2011 — Chrome 19299614
Product Overview The iFJF Interior Door Handle is a direct OEM replacement for the driver side of 2006-2011 Chevrolet HHR. Designed to fix the infamous HHR broken door handle problem with a reinforced internal mechanism that addresses the weak plastic pivot point of the factory handle. Bright chrome finish matches OEM styling. Key Features Driver Side Specific: Exact fit for the driver side door — replaces OEM part number 19299614. Reinforced Pivot: Metal internal mechanism replaces the factory plastic pivot that causes premature failure. Bright Chrome Finish: Electroplated chrome matches or exceeds OEM appearance. Direct Bolt-In: Same mounting points and cable attachment — no modifications. DIY Friendly: Door panel removal required, but the handle swap is straightforward with basic tools. Compatibility Brand Model/Part Years/Notes Chevrolet HHR (Driver Side) 2006-2011 All Trims Chevrolet HHR LS/LT/LTZ 2006-2011 Chevrolet HHR SS 2008-2010 Chevrolet HHR Panel 2007-2011 Technical Specifications Specification Value Part Number 19299614 (Driver Side) Position Driver / Left Side Material Chrome-Plated with Metal Internal Pivot Finish Bright Chrome Fitment Direct OEM Replacement Installation Door Panel Removal Required Why Choose iFJF? Fix It Once, Fix It Right: The OEM handle will break again because it uses the same weak plastic design. Our reinforced mechanism is built to last. Factory-Match Chrome: Won't look out of place against your passenger side handle or other chrome interior trim. Affordable Repair: A fraction of what a dealer would charge for parts and labor. 1-Year Warranty: Covers manufacturing defects. Installation Remove the driver side door panel: pry off trim pieces, remove screws, and lift panel up and off. Carefully peel back the vapor barrier to access the handle assembly. Disconnect the door latch cable from the broken handle. Remove mounting screws and extract the old handle. Install the new iFJF handle, reconnect cable, and test before reassembling the door panel. Frequently Asked Questions Q: Do I need the passenger side too?A: If only your driver side handle is broken, this single handle is all you need. However, if one side has failed, the passenger side is likely not far behind. Consider our pair set for both sides.Q: Why do these handles break?A: The OEM design uses a thin plastic internal pivot. Over years of use and temperature cycling, the plastic becomes brittle and snaps — usually right at the pivot point.Q: Is installation difficult?A: Moderate DIY difficulty. Removing the door panel requires some care with trim clips. The handle swap itself is simple once you have access. Budget 30-45 minutes.Q: Will this match my existing passenger handle?A: Yes. The chrome finish is matched to OEM specifications. If your passenger handle is also chrome, they will be indistinguishable. Related Products Interior Door Handle Set Driver+Passenger HHR Related Blog Posts How to Install Tie Rods on your GM Truck
$29.99

iFJF Interior Door Handle Set for Chevy HHR 2006-2011 — Driver & Passenger Chrome 19299614 19299613
Product Overview The iFJF Interior Door Handle Set is a complete driver and passenger side replacement for the 2006-2011 Chevrolet HHR. These chrome-finished interior door handles replace brittle factory plastic handles that commonly break at the pivot point. Constructed with reinforced metal internals for lasting durability. Key Features Complete Pair Set: Includes both driver side (19299614) and passenger side (19299613) handles — replace both at once for a matching look. Reinforced Construction: Metal internal pivot mechanism replaces the weak plastic pivot that causes factory handle failures. Chrome Finish: Bright chrome exterior matches OEM styling and adds a premium touch to the HHR interior. Direct Fit: Same mounting points, same cable attachment — no modifications needed. Restores Proper Function: Eliminates the floppy, broken handle feel and restores smooth door operation. Compatibility Brand Model/Part Years/Notes Chevrolet HHR 2006-2011 All Trims Chevrolet HHR LS/LT/LTZ 2006-2011 Chevrolet HHR SS 2008-2010 Chevrolet HHR Panel 2007-2011 Technical Specifications Specification Value Part Numbers 19299614 (Driver) / 19299613 (Passenger) Material Chrome-Finished Metal Internal Mechanism Finish Bright Chrome Fitment Direct OEM Replacement Installation Door Panel Removal Required Package 2-Piece Set (Left + Right) Why Choose iFJF? Fix a Known Weak Point: The Chevy HHR interior door handle is notorious for breaking. Our reinforced design addresses the root cause. Replace Both Sides: If one handle has broken, the other isn't far behind. Save money with the pair set. Premium Chrome Look: Matches or exceeds the OEM chrome finish for a factory-fresh appearance. 1-Year Warranty: Covers manufacturing defects. Installation Overview Remove the door panel: pry off trim pieces, remove screws (behind armrest and door pull), and lift the panel up and off. Peel back the vapor barrier carefully to access the handle assembly. Disconnect the door latch cable from the old handle. Remove the mounting screws and extract the broken handle. Install the new iFJF handle, reconnect the latch cable, and test operation before reassembling the door panel. Frequently Asked Questions Q: Why do HHR door handles break so often?A: The OEM handles use a thin plastic pivot point that becomes brittle over time, especially in cold climates. Repeated stress eventually causes the plastic to snap. Our handles use a reinforced metal mechanism to prevent this failure.Q: Do I need to replace both sides?A: It's highly recommended. If one side has broken, the other has experienced the same wear and tear. Buying the pair saves money vs. purchasing individually later.Q: Is this chrome or painted silver?A: This is genuine bright chrome electroplating — not silver paint. It matches the OEM chrome door handle finish on HHR LT and LTZ trims.Q: How difficult is the installation?A: Intermediate DIY level. Door panel removal takes about 10 minutes per side. The handle swap itself is straightforward once the panel is off. Budget 30-45 minutes per door for first-timers. Related Products Interior Door Handle Driver Side HHR 19299614 Related Blog Posts How to Install Tie Rods on your GM Truck
$49.99

iFJF Intex Pool Hose Adapter A — Threaded Collar for 1500-4000 GPH Pumps | iFJF
Product Overview The Intex Pool Hose Adapter A — Threaded Collar for 1500-4000 GPH Pumps | iFJF from iFJF Direct is engineered to meet or exceed OEM specifications for vehicles. This pool hose adapter delivers reliable performance at factory-direct pricing. Key Features Premium Quality: Manufactured to strict quality control standards with durable materials for long service life Direct Fit: Designed as a direct replacement — no modifications required for installation on compatible vehicles Factory Direct Value: Eliminate the middleman markup — get OEM-quality parts at aftermarket prices Fast US Shipping: Ships from our US warehouse within 1 business day of order Compatibility This product is designed to fit vehicles. Please verify compatibility with your specific vehicle using our fitment guide or contact our support team before ordering. Why Choose iFJF Direct? Quality Assurance: Every product undergoes multi-point inspection before shipping US-Based Support: Our customer service team is available to answer your fitment and installation questions Hassle-Free Returns: 30-day return policy on unused parts in original packaging Expert Community: Join thousands of DIY mechanics and professional technicians who trust iFJF Frequently Asked Questions Q: Will this fit my Intex 2500 GPH filter pump?A: Yes. This adapter fits all Intex filter pumps rated 1500, 2000, 2500, and 4000 GPH that use threaded hose connections. It's also compatible with Intex saltwater chlorine generators and sand filter pump conversions. Q: How do I connect a 1.25" hose to the 1.5" pump port?A: This adapter is designed for exactly that conversion. Attach the smaller threaded end to your 1.25" hose using the included stainless steel clamp, then thread the larger end onto the pump's 1.5" plunger valve or filter connection. The O-rings ensure a watertight seal. Q: What's included in the package?A: Each package includes: 2× threaded hose adapters (Type A collars), 2× stainless steel hose clamps, and 4× rubber O-rings — everything needed for a complete pump-to-hose connection on both intake and return sides. Q: Is this compatible with the Intex sand filter pump?A: Yes. If you're upgrading from a standard cartridge filter to an Intex sand filter pump, these adapters handle the hose size transition. The threaded collar design matches both standard and sand filter pump ports. Q: Will the plastic adapters crack under pressure?A: The adapters are made from high-grade, glass-reinforced ABS plastic designed to withstand typical above-ground pool pump pressures (up to 50 PSI operating pressure). They will not crack or deform under normal use. 🔗 Related Products
$47.99
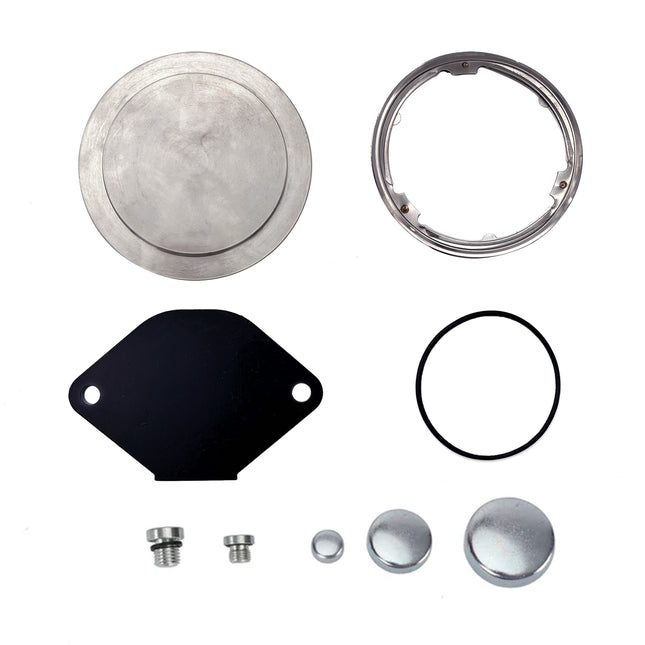
iFJF ISX CM870 Stage 2 EGR Delete Plug Kit for 2002-2007 Cummins ISX — Plates & Plugs
Upgrade your 2002-2007 Cummins ISX CM870 with the iFJF Stage 2 EGR Delete Plug Kit — a complete solution designed to eliminate the problematic EGR system and restore engine performance. This kit includes precision-machined block-off plates and plugs, all manufactured from high-grade billet aluminum with CNC machining for perfect fitment. By removing the EGR system, you reduce carbon buildup in the intake, lower exhaust gas temperatures, and improve overall engine efficiency. For off-road and competition use only. Key Features & Benefits Complete Stage 2 Kit: Includes all block-off plates, plugs, and hardware needed for a full EGR system delete on ISX CM870 engines. CNC-Machined Billet Aluminum: Precision-machined from 6061-T6 billet aluminum for exceptional durability, corrosion resistance, and precise OEM-level fitment. Eliminates Carbon Buildup: Removes the EGR recirculation path, preventing carbon and soot accumulation in the intake manifold and on valves. Lower EGTs: Eliminating exhaust gas recirculation significantly reduces exhaust gas temperatures, protecting your turbo and engine internals. Improved Throttle Response: Cleaner intake air means better combustion efficiency and noticeably improved throttle response. Vehicle Compatibility Year Make Model Engine Notes 2002-2007 Cummins ISX CM870 15.0L ISX Stage 2 Kit 2002-2007 Peterbilt 379/386/387 ISX CM870 Verify engine code 2002-2007 Kenworth W900/T600/T800 ISX CM870 Verify engine code 2002-2007 Freightliner Century/Columbia ISX CM870 Verify engine code Technical Specifications Material 6061-T6 Billet Aluminum Manufacturing CNC Precision Machined Kit Type Stage 2 (Plates & Plugs) Engine Compatibility Cummins ISX CM870 (2002-2007) Installation Time 4-6 hours (professional recommended) Installation Guide Installation requires basic mechanical skills and standard hand tools. Remove the EGR cooler, EGR valve, and associated piping. Install block-off plates at the exhaust manifold and intake manifold ports using supplied gaskets and hardware. Torque all fasteners to factory specifications. A performance tuner/ECU reflash is strongly recommended to maximize benefits and prevent check engine lights. ⚠️ Important Legal Notice This product is intended for OFF-ROAD AND COMPETITION USE ONLY. It is NOT legal for use on public roads in the United States or Canada. Installation may violate federal, state, and local emissions regulations. NOT CARB compliant. Frequently Asked Questions Q: Will this fit my 2005 Kenworth W900 with ISX?A: Yes. If your Kenworth W900 has the Cummins ISX CM870 engine (2002-2007), this Stage 2 kit is a direct fit. Always verify your engine code is CM870 (not CM871 or later) before ordering. Q: Do I need a tuner after installing this EGR delete kit?A: While the mechanical delete works without tuning, we strongly recommend an ECU reflash or performance tuner to disable EGR-related DTCs, optimize fuel mapping, and prevent check engine lights. Q: What is the difference between Stage 1 and Stage 2?A: Stage 2 includes additional block-off plates and plugs for a more complete EGR system removal compared to Stage 1. This kit removes more EGR components for maximum flow improvement. Q: Will this improve my fuel economy?A: Most operators report 0.5-1.5 MPG improvement after EGR delete combined with proper tuning. Results vary based on driving conditions, load weight, and tune quality. Related Products Stage 2 ISX CM2250/CM2350 EGR Delete Kit ISX CM871 EGR Plug Kit Stage 2 6.0L Powerstroke EGR Delete Kit
$81.19

iFJF Jack Pad Adapter Anodized Black for B-MW 135 335 535 E82 E88 E46
Product Overview The Jack Pad Adapter Anodized Black for B-MW 135 335 535 E82 E88 E46 E90 E91 E92 E93 E38 E39 E60 E61 E63 E64 E65 E66 E70 F01 F02 F30 F10,Mini (3 pcs) is a high-quality replacement part built to exacting standards. Whether you're performing routine maintenance or a complete overhaul, this component provides the fit, finish, and reliability you expect from iFJF Direct. Key Features Precision-Engineered Fit: Manufactured to tight tolerances for a direct, hassle-free installation — no modifications required. Premium Materials: Constructed from high-grade materials that resist wear, corrosion, and fatigue for extended service life. OEM-Spec Performance: Designed to match or exceed original equipment specifications for consistent, dependable operation. Complete Package: Includes all necessary components for a professional-grade installation (verify contents in product images). Quality-Assured: Each unit undergoes rigorous inspection before shipping to ensure you receive a flawless product. Compatibility This replacement part is engineered for broad compatibility. Please check your equipment's part number against the listing to ensure proper fitment. Contact our support team if you need assistance with compatibility verification. Specifications Specification Detail Product Type Replacement Part Brand iFJF Condition New Fitment Direct Replacement Why Choose iFJF Direct? Fast, Reliable Shipping: Orders processed within 1 business day from our US warehouses. Expert Support: Our team knows diesel, automotive, and powersports parts inside and out. Quality Guarantee: Every iFJF part is backed by our satisfaction promise. Trusted by Pros & DIYers: Thousands of technicians and home mechanics rely on iFJF parts daily. Installation Tips Always consult your vehicle or equipment service manual before beginning installation. Clean all mounting surfaces thoroughly before installing the new replacement part. Compare the new part side-by-side with the old one to verify correct fitment. Use the proper tools and torque specifications as recommended by the manufacturer. If you encounter any issues, contact iFJF support for assistance. Frequently Asked Questions Q: Will this part fit my vehicle?A: This replacement part is designed for Various (Various). Please verify your specific year, make, model, and engine configuration matches. Contact our support team with your VIN or serial number if unsure. Q: Is this OEM or aftermarket?A: This is a high-quality aftermarket replacement replacement part manufactured to meet or exceed OEM specifications at a fraction of dealer cost. Q: What's included in the package?A: The package includes the replacement part as shown in the product images. Please review all images for exact contents. Q: How long does shipping take?A: Most orders ship within 1 business day from our US warehouse. Standard delivery takes 3-7 business days. Expedited options available at checkout. Q: What is the return policy?A: 30-day return window for unused items in original packaging. Contact us immediately if you receive a defective or incorrect item.
$51.99


OEM-Grade Duramax Replacement Parts & Maintenance Filters
iFJF Direct offers precision-engineered aftermarket replacement filters and components tailored for GM Chevy/GMC Duramax diesel engines. Designed to match or exceed OEM specifications, our products provide optimal filtration efficiency and engine longevity for Silverado and Sierra 2500HD/3500HD trucks. Every component is manufactured to strict quality standards with a 45-day return policy and fast shipping from Boulder, Colorado.
Duramax Engine Generation Compatibility Guide
- LB7 (2001–2004): Fuel water separators, oil filtration kits, and air bleeder screws for the original 6.6L Duramax.
- LLY / LBZ / LMM (2004.5–2010): Precision oil filters, CCV elements, fuel filter housings, and EGR maintenance components.
- LML (2011–2016): Advanced fuel filter kits designed for high-pressure common rail (HPCR) systems — spin-on and cartridge options.
- L5P (2017–2026): Next-gen oil filter housing caps, dual fuel filter service kits, TP1015/134001 replacements with CNC billet aluminum upgrades.
- LM2 / LZ0 (2020+ 3.0L inline-6): Specialized maintenance kits for light-duty Duramax diesel applications.
Duramax OEM Cross-Reference & Replacement Guide
Use this table to quickly find the iFJF replacement part that matches your original equipment. All parts listed are direct fit, no modifications required.
| OE / OEM Part No. | Engine Generation | Part Type | Replaces / Cross-Reference |
|---|---|---|---|
| TP1015 / 134001 | L5P (2017-2026) | Fuel Filter Kit + Housing Cap | ACDelco TP1015, GM 13539108, OE 134001 |
| TP3018 | LB7-LLY-LBZ-LMM-LML (2001-2016) | Fuel/Water Separator Filter | ACDelco TP3018, GM 12664429, Racor PFF50216 |
| FJ-TOOL09 | All 6.6L Duramax (2001-2026) | Billet Air Bleeder Screw | GM 12642623 Bleeder Screw Upgrade |
| 12642623 | L5P (2017-2026) | Fuel Filter Housing Assembly | GM 12642623, ACDelco TP1015 Housing |
| 122-0836 | Onan QG RV Generators | Oil Filter | Onan 122-0836, Cummins Onan HGJAA/HGJAB |
Duramax Maintenance FAQ
How often should I change the fuel filter on a 6.6L Duramax?
GM recommends replacing the Duramax fuel filter every 15,000 to 22,500 miles, or every 12 months. If operating under heavy towing conditions or using biodiesel blends, changing it every 10,000 miles is recommended to protect the high-pressure fuel pump (CP4/HPCR). The L5P models (2017+) use a dual-filter system — both filters should be changed simultaneously for optimal protection.
Are iFJF Duramax filters compatible with OEM housings?
Yes. All iFJF Duramax oil, fuel, and CCV filters are built to exact OEM dimensions. They feature high-grade synthetic filtration media (5-micron rating on fuel filters) to ensure 98%+ water separation efficiency and zero modifications required during installation. Compatible with ACDelco, Racor, and GM factory filter housings.
What causes the "Water in Fuel" warning on my Duramax?
The "Water in Fuel" warning light indicates water accumulation in the fuel filter housing separator. This is common on LML and L5P engines. Drain the water separator immediately using the bleed screw, and consider replacing the filter if the warning persists. Upgrading to an iFJF CNC billet aluminum bleeder screw (replacing the fragile OE plastic screw) prevents stripping and ensures reliable drainage.
Do I need to prime the fuel system after changing a Duramax fuel filter?
For L5P (2017+) models with the electric lift pump, the system self-primes after filter replacement — simply cycle the key to "ON" (without starting) for 30 seconds, repeat 2-3 times. For LB7-LML models, use the manual primer pump on the filter housing until firm resistance is felt. Running the engine without proper priming can cause air in the HPCR system and potential injector damage.
What is the difference between TP1015 and TP3018 Duramax fuel filters?
TP1015 is the spin-on fuel filter used on 2017+ L5P Duramax engines (driver-side frame rail mount). TP3018 is the fuel/water separator filter for 2001-2016 LB7 through LML engines. They are not interchangeable — verify your model year before ordering. iFJF offers both types, including complete kits with upgraded CNC aluminum housing caps.
How do I know if my Duramax fuel filter housing cap needs replacement?
Common signs include: fuel seepage around the cap, difficulty achieving a proper seal after filter changes, cracked or stripped threads on the OE plastic cap, and recurring "Water in Fuel" warnings despite draining. iFJF upgraded CNC 6061-T6 billet aluminum caps (available in multiple colors for the L5P 134001 housing) permanently solve these issues with a precision-machined fit and O-ring sealing surface that outlasts the factory plastic components.